Spring Boot 登录页面教程显示了如何使用默认登录页面。 Spring Security 默认情况下会保护所有 HTTP 端点。 用户必须以默认的 HTTP 形式登录。
为了启用 Spring Boot 安全性,我们将spring-boot-starter-security添加到依赖项中。
Spring Boot 登录页面示例
以下示例显示了如何在 Spring Boot 应用中设置简单的登录页面。
pom.xmlsrc├───main│ ├───java│ │ └───com│ │ └───zetcode│ │ │ Application.java│ │ └───controller│ │ MyController.java│ └───resources│ application.properties└───test└───java
这是 Spring Boot 应用的项目结构。
pom.xml
<?xml version="1.0" encoding="UTF-8"?><project xmlns="http://maven.apache.org/POM/4.0.0"xmlns:xsi="http://www.w3.org/2001/XMLSchema-instance"xsi:schemaLocation="http://maven.apache.org/POM/4.0.0http://maven.apache.org/xsd/maven-4.0.0.xsd"><modelVersion>4.0.0</modelVersion><groupId>com.zetcode</groupId><artifactId>springbootloginpage</artifactId><version>1.0-SNAPSHOT</version><packaging>jar</packaging><properties><project.build.sourceEncoding>UTF-8</project.build.sourceEncoding><maven.compiler.source>11</maven.compiler.source><maven.compiler.target>11</maven.compiler.target></properties><parent><groupId>org.springframework.boot</groupId><artifactId>spring-boot-starter-parent</artifactId><version>2.1.5.RELEASE</version></parent><dependencies><dependency><groupId>org.springframework.boot</groupId><artifactId>spring-boot-starter-web</artifactId></dependency><dependency><groupId>org.springframework.boot</groupId><artifactId>spring-boot-starter-security</artifactId></dependency></dependencies><build><plugins><plugin><groupId>org.springframework.boot</groupId><artifactId>spring-boot-maven-plugin</artifactId></plugin></plugins></build></project>
这是 Maven 构建文件。 我们有网络和安全性的入门者。
resources/application.properties
spring.main.banner-mode=offlogging.pattern.console=%d{dd-MM-yyyy HH:mm:ss} %magenta([%thread]) %highlight(%-5level) %logger.%M - %msg%n
在application.properties文件中,我们关闭 Spring Boot 横幅并配置控制台日志记录模式。
com/zetcode/controller/MyController.java
package com.zetcode.controller;import org.springframework.web.bind.annotation.GetMapping;import org.springframework.web.bind.annotation.RestController;@RestControllerpublic class MyController {@GetMapping("/")public String home() {return "This is home page";}}
我们有一个简单的主页。
我们运行该应用并导航到localhost:8080。 我们被重定向到http://localhost:8080/login页面。
...17-06-2019 17:48:45 [main] INFO org.springframework.boot.autoconfigure.security.servlet.UserDetailsServiceAutoConfiguration.getOrDeducePassword -Using generated security password: df7ce50b-abae-43a1-abe1-0e17fd81a454...
在控制台中,我们可以看到为默认用户user生成的密码。 这些凭据将提供给认证表单。
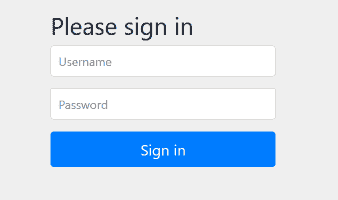
图:登录表单
Spring 使用 Bootstrap 定义 UI。
spring.security.user.name = adminspring.security.user.password = s$cret
通过这两个选项,我们可以拥有一个新的用户名和密码。 使用这些设置将自动生成的用户关闭。
在本教程中,我们使用了默认的登录表单。 您可能也对相关教程感兴趣: Spring Boot @Lazy教程, Java 教程或列出 Spring Boot 教程。

若有收获,就点个赞吧
0 人点赞
