在 Qt4 C++ 编程教程的这一部分中,我们将做一些绘图。
当我们在 Qt4 中进行绘图时,QPainter类非常有用。 对paintEvent()方法的反应是使用QPainter类完成的。
直线
在第一个示例中,我们将在窗口的客户区域上绘制一些线。
lines.h
#pragma once#include <QWidget>class Lines : public QWidget {public:Lines(QWidget *parent = 0);protected:void paintEvent(QPaintEvent *event);void drawLines(QPainter *qp);};
这是头文件。
lines.cpp
#include <QPainter>#include "lines.h"Lines::Lines(QWidget *parent) : QWidget(parent){ }void Lines::paintEvent(QPaintEvent *e) {Q_UNUSED(e);QPainter qp(this);drawLines(&qp);}void Lines::drawLines(QPainter *qp) {QPen pen(Qt::black, 2, Qt::SolidLine);qp->setPen(pen);qp->drawLine(20, 40, 250, 40);pen.setStyle(Qt::DashLine);qp->setPen(pen);qp->drawLine(20, 80, 250, 80);pen.setStyle(Qt::DashDotLine);qp->setPen(pen);qp->drawLine(20, 120, 250, 120);pen.setStyle(Qt::DotLine);qp->setPen(pen);qp->drawLine(20, 160, 250, 160);pen.setStyle(Qt::DashDotDotLine);qp->setPen(pen);qp->drawLine(20, 200, 250, 200);QVector<qreal> dashes;qreal space = 4;dashes << 1 << space << 5 << space;pen.setStyle(Qt::CustomDashLine);pen.setDashPattern(dashes);qp->setPen(pen);qp->drawLine(20, 240, 250, 240);}
我们在窗口上画了六行; 每条线都有不同的笔样式。
void Lines::paintEvent(QPaintEvent *e) {Q_UNUSED(e);QPainter qp(this);drawLines(&qp);}
更新小部件时将调用paintEvent()。 在这里我们创建QPainter对象并进行绘制。 由于我们不使用QPaintEvent对象,因此可以通过Q_UNUSED宏来抑制编译器警告。 实际图形委托给drawLines()方法。
QPen pen(Qt::black, 2, Qt::SolidLine);qp->setPen(pen);
我们创建一个QPen对象。 笔是实心的,2px 粗,是黑色的。 笔用于绘制线条和形状轮廓。 使用setPen()方法将笔设置为画家对象。
qp->drawLine(20, 40, 250, 40);
drawLine()方法画一条线。 四个参数是窗口上两个点的坐标。
pen.setStyle(Qt::DashLine);
QPen行的setStyle()方法设置笔样式-Qt::DashLine。
main.cpp
#include <QApplication>#include "lines.h"int main(int argc, char *argv[]) {QApplication app(argc, argv);Lines window;window.resize(280, 270);window.setWindowTitle("Lines");window.show();return app.exec();}
这是主文件。
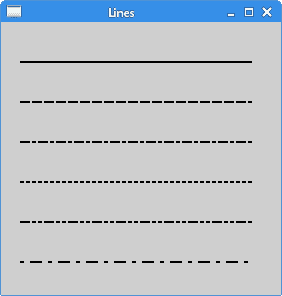
图:直线
色彩
颜色是代表红色,绿色和蓝色(RGB)强度值的组合的对象。 有效的 RGB 值在 0 到 255 之间。在下面的示例中,我们绘制了九个矩形,其中填充了九种不同的颜色。
colours.h
#pragma once#include <QWidget>class Colours : public QWidget {Q_OBJECTpublic:Colours(QWidget *parent = 0);protected:void paintEvent(QPaintEvent *);void drawColouredRectangles(QPainter &);};
这是头文件。
colours.cpp
#include <QPainter>#include "colours.h"Colours::Colours(QWidget *parent) : QWidget(parent){ }void Colours::paintEvent(QPaintEvent *e) {Q_UNUSED(e);QPainter qp(this);drawColouredRectangles(qp);}void Colours::drawColouredRectangles(QPainter &qp) {qp.setPen(QColor("#d4d4d4"));qp.setBrush(QBrush("#c56c00"));qp.drawRect(10, 15, 90, 60);qp.setBrush(QBrush("#1ac500"));qp.drawRect(130, 15, 90, 60);qp.setBrush(QBrush("#539e47"));qp.drawRect(250, 15, 90, 60);qp.setBrush(QBrush("#004fc5"));qp.drawRect(10, 105, 90, 60);qp.setBrush(QBrush("#c50024"));qp.drawRect(130, 105, 90, 60);qp.setBrush(QBrush("#9e4757"));qp.drawRect(250, 105, 90, 60);qp.setBrush(QBrush("#5f3b00"));qp.drawRect(10, 195, 90, 60);qp.setBrush(QBrush("#4c4c4c"));qp.drawRect(130, 195, 90, 60);qp.setBrush(QBrush("#785f36"));qp.drawRect(250, 195, 90, 60);}
我们绘制九个不同颜色填充的矩形。 矩形的轮廓是灰色的。
qp.setBrush(QBrush("#c56c00"));qp.drawRect(10, 15, 90, 60);
QBrush类定义QPainter绘制的形状的填充图案。 drawRect()方法绘制一个矩形。 它绘制一个矩形,其左上角位于 x,y 点,并具有给定的宽度和高度。 我们使用十六进制表示法来指定颜色值。
main.cpp
#include <QApplication>#include "colours.h"int main(int argc, char *argv[]) {QApplication app(argc, argv);Colours window;window.resize(360, 280);window.setWindowTitle("Colours");window.show();return app.exec();}
这是主文件。
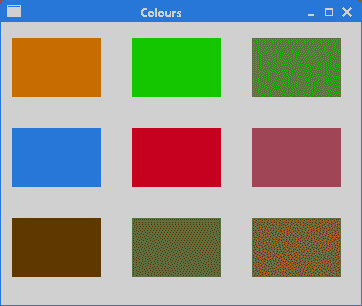
图:颜色
图案
以下编程代码示例与上一个示例相似。 这次我们用各种预定义的图案填充矩形。
patterns.h
#pragma once#include <QWidget>class Patterns : public QWidget {public:Patterns(QWidget *parent = 0);protected:void paintEvent(QPaintEvent *);void drawRectangles(QPainter &);};
头文件。
patterns.cpp
#include <QApplication>#include <QPainter>#include "patterns.h"Patterns::Patterns(QWidget *parent) : QWidget(parent){ }void Patterns::paintEvent(QPaintEvent *e) {Q_UNUSED(e);QPainter qp(this);drawRectangles(qp);}void Patterns::drawRectangles(QPainter &qp) {qp.setPen(Qt::NoPen);qp.setBrush(Qt::HorPattern);qp.drawRect(10, 15, 90, 60);qp.setBrush(Qt::VerPattern);qp.drawRect(130, 15, 90, 60);qp.setBrush(Qt::CrossPattern);qp.drawRect(250, 15, 90, 60);qp.setBrush(Qt::Dense7Pattern);qp.drawRect(10, 105, 90, 60);qp.setBrush(Qt::Dense6Pattern);qp.drawRect(130, 105, 90, 60);qp.setBrush(Qt::Dense5Pattern);qp.drawRect(250, 105, 90, 60);qp.setBrush(Qt::BDiagPattern);qp.drawRect(10, 195, 90, 60);qp.setBrush(Qt::FDiagPattern);qp.drawRect(130, 195, 90, 60);qp.setBrush(Qt::DiagCrossPattern);qp.drawRect(250, 195, 90, 60);}
我们用各种画笔图案绘制了九个矩形。
qp.setBrush(Qt::HorPattern);qp.drawRect(10, 15, 90, 60);
我们绘制具有特定图案的矩形。 Qt::HorPattern是用于创建水平线条图案的常数。
main.cpp
#include <QApplication>#include "patterns.h"int main(int argc, char *argv[]) {QApplication app(argc, argv);Patterns window;window.resize(350, 280);window.setWindowTitle("Patterns");window.show();return app.exec();}
这是主文件。
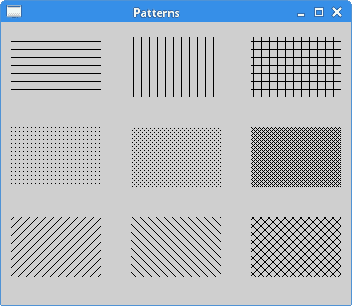
图:图案
甜甜圈
在下面的示例中,我们将创建一个甜甜圈形状。
donut.h
#pragma once#include <QWidget>class Donut : public QWidget {Q_OBJECTpublic:Donut(QWidget *parent = 0);protected:void paintEvent(QPaintEvent *);void drawDonut(QPainter &);};
这是头文件。
donut.cpp
#include <QApplication>#include <QPainter>#include "donut.h"Donut::Donut(QWidget *parent) : QWidget(parent){ }void Donut::paintEvent(QPaintEvent *e) {Q_UNUSED(e);QPainter qp(this);drawDonut(qp);}void Donut::drawDonut(QPainter &qp) {qp.setPen(QPen(QBrush("#535353"), 0.5));qp.setRenderHint(QPainter::Antialiasing);int h = height();int w = width();qp.translate(QPoint(w/2, h/2));for (qreal rot=0; rot < 360.0; rot+=5.0 ) {qp.drawEllipse(-125, -40, 250, 80);qp.rotate(5.0);}}
“甜甜圈”是类似于此类食物的高级几何形状。 我们通过绘制 72 个旋转椭圆来创建它。
qp.setRenderHint(QPainter::Antialiasing);
我们将以抗锯齿模式绘制。 渲染将具有更高的质量。
int h = height();int w = width();qp.translate(QPoint(w/2, h/2));
这些行将坐标系的起点移到窗口的中间。 默认情况下,它位于 0、0 点。 换句话说,在窗口的左上角。 通过移动坐标系,绘图会容易得多。
for (qreal rot=0; rot < 360.0; rot+=5.0 ) {qp.drawEllipse(-125, -40, 250, 80);qp.rotate(5.0);}
在此循环中,我们绘制了 72 个旋转的椭圆。
main.cpp
#include <QApplication>#include "donut.h"int main(int argc, char *argv[]) {QApplication app(argc, argv);Donut window;window.resize(350, 280);window.setWindowTitle("Donut");window.show();return app.exec();}
这是主文件。
形状
Qt4 绘图 API 可以绘制各种形状。 以下编程代码示例显示了其中一些。
shapes.h
#pragma once#include <QWidget>class Shapes : public QWidget {Q_OBJECTpublic:Shapes(QWidget *parent = 0);protected:void paintEvent(QPaintEvent *e);};
这是头文件。
shapes.cpp
#include <QApplication>#include <QPainter>#include <QPainterPath>#include "shapes.h"Shapes::Shapes(QWidget *parent): QWidget(parent){ }void Shapes::paintEvent(QPaintEvent *e) {Q_UNUSED(e);QPainter painter(this);painter.setRenderHint(QPainter::Antialiasing);painter.setPen(QPen(QBrush("#888"), 1));painter.setBrush(QBrush(QColor("#888")));QPainterPath path1;path1.moveTo(5, 5);path1.cubicTo(40, 5, 50, 50, 99, 99);path1.cubicTo(5, 99, 50, 50, 5, 5);painter.drawPath(path1);painter.drawPie(130, 20, 90, 60, 30*16, 120*16);painter.drawChord(240, 30, 90, 60, 0, 16*180);painter.drawRoundRect(20, 120, 80, 50);QPolygon polygon({QPoint(130, 140), QPoint(180, 170), QPoint(180, 140),QPoint(220, 110), QPoint(140, 100)});painter.drawPolygon(polygon);painter.drawRect(250, 110, 60, 60);QPointF baseline(20, 250);QFont font("Georgia", 55);QPainterPath path2;path2.addText(baseline, font, "Q");painter.drawPath(path2);painter.drawEllipse(140, 200, 60, 60);painter.drawEllipse(240, 200, 90, 60);}
我们绘制了九种不同的形状。
QPainterPath path1;path1.moveTo(5, 5);path1.cubicTo(40, 5, 50, 50, 99, 99);path1.cubicTo(5, 99, 50, 50, 5, 5);painter.drawPath(path1);
QPainterPath是用于创建复杂形状的对象。 我们用它来绘制贝塞尔曲线。
painter.drawPie(130, 20, 90, 60, 30*16, 120*16);painter.drawChord(240, 30, 90, 60, 0, 16*180);painter.drawRoundRect(20, 120, 80, 50);
这些代码行绘制了一个饼图,一个和弦和一个圆角矩形。
QPolygon polygon({QPoint(130, 140), QPoint(180, 170), QPoint(180, 140),QPoint(220, 110), QPoint(140, 100)});painter.drawPolygon(polygon);
在这里,我们使用drawPolygon()方法绘制一个多边形。 多边形由五个点组成。
QPointF baseline(20, 250);QFont font("Georgia", 55);QPainterPath path2;path2.addText(baseline, font, "Q");painter.drawPath(path2);
Qt4 允许基于字体字符创建路径。
painter.drawEllipse(140, 200, 60, 60);painter.drawEllipse(240, 200, 90, 60);
drawEllipse()也会绘制一个椭圆和一个圆。 圆是椭圆的特例。 参数是矩形起点的 x 和 y 坐标以及椭圆边界矩形的宽度和高度。
main.cpp
#include <QApplication>#include "shapes.h"int main(int argc, char *argv[]) {QApplication app(argc, argv);Shapes window;window.resize(350, 280);window.setWindowTitle("Shapes");window.show();return app.exec();}
这是示例的主文件。
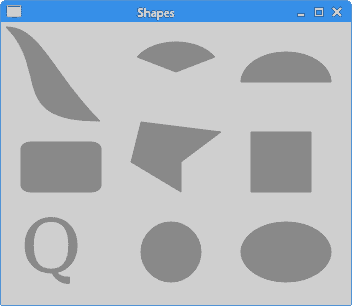
图:形状
渐变
在计算机图形学中,渐变是从浅到深或从一种颜色到另一种颜色的阴影的平滑混合。 在 2D 绘图程序和绘图程序中,渐变用于创建彩色背景和特殊效果以及模拟灯光和阴影。
以下代码示例显示了如何创建线性渐变。
gradients.h
#pragma once#include <QWidget>class Gradient : public QWidget {public:Gradient(QWidget *parent = 0);protected:void paintEvent(QPaintEvent *e);};
这是头文件。
gradients.cpp
#include <QApplication>#include <QPainter>#include "gradients.h"Gradient::Gradient(QWidget *parent): QWidget(parent){ }void Gradient::paintEvent(QPaintEvent *e) {Q_UNUSED(e);QPainter painter(this);QLinearGradient grad1(0, 20, 0, 110);grad1.setColorAt(0.1, Qt::black);grad1.setColorAt(0.5, Qt::yellow);grad1.setColorAt(0.9, Qt::black);painter.fillRect(20, 20, 300, 90, grad1);QLinearGradient grad2(0, 55, 250, 0);grad2.setColorAt(0.2, Qt::black);grad2.setColorAt(0.5, Qt::red);grad2.setColorAt(0.8, Qt::black);painter.fillRect(20, 140, 300, 100, grad2);}
在代码示例中,我们绘制了两个矩形,并用线性渐变填充它们。
QLinearGradient grad1(0, 20, 0, 110);
QLinearGradient构造线性梯度,并在两个点之间作为参数提供插值区域。
grad1.setColorAt(0.1, Qt::black);grad1.setColorAt(0.5, Qt::yellow);grad1.setColorAt(0.9, Qt::black);
使用停止点定义渐变中的颜色。 setColorAt()在给定位置以给定颜色创建一个停止点。
painter.fillRect(20, 20, 300, 90, grad1);
我们用渐变填充矩形。
main.cpp
#include <QApplication>#include "gradients.h"int main(int argc, char *argv[]) {QApplication app(argc, argv);Gradient window;window.resize(350, 260);window.setWindowTitle("Gradients");window.show();return app.exec();}
这是主文件。

图:渐变
径向渐变
径向渐变是两个圆之间颜色或阴影的混合。
radial_gradient.h
#pragma once#include <QWidget>class RadialGradient : public QWidget {public:RadialGradient(QWidget *parent = 0);protected:void paintEvent(QPaintEvent *e);};
这是头文件。
radial_gradient.cpp
#include <QApplication>#include <QPainter>#include "radial_gradient.h"RadialGradient::RadialGradient(QWidget *parent): QWidget(parent){ }void RadialGradient::paintEvent(QPaintEvent *e) {Q_UNUSED(e);QPainter painter(this);int h = height();int w = width();QRadialGradient grad1(w/2, h/2, 80);grad1.setColorAt(0, QColor("#032E91"));grad1.setColorAt(0.3, Qt::white);grad1.setColorAt(1, QColor("#032E91"));painter.fillRect(0, 0, w, h, grad1);}
该示例创建了一个径向渐变; 渐变从窗口的中心扩散。
QRadialGradient grad1(w/2, h/2, 80);
QRadialGradient创建一个径向渐变; 它在焦点和围绕它的圆上的端点之间插入颜色。 参数是圆心和半径的坐标。 焦点位于圆的中心。
grad1.setColorAt(0, QColor("#032E91"));grad1.setColorAt(0.3, Qt::white);grad1.setColorAt(1, QColor("#032E91"));
setColorAt()方法定义彩色挡块。
painter.fillRect(0, 0, w, h, grad1);
窗口的整个区域都充满了径向渐变。
main.cpp
#include <QApplication>#include "radial_gradient.h"int main(int argc, char *argv[]) {QApplication app(argc, argv);RadialGradient window;window.resize(300, 250);window.setWindowTitle("Radial gradient");window.show();return app.exec();}
这是主文件。
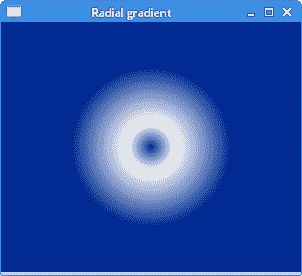
图:径向渐变
泡泡
在本 C++ Qt4 教程章节的最后一个示例中,我们创建一个泡泡效果。 该示例显示一个不断增长的居中文本,该文本从某个点逐渐淡出。 这是一种非常常见的效果,您通常可以在网络上的 Flash 动画中看到这种效果。
puff.h
#pragma once#include <QWidget>class Puff : public QWidget {Q_OBJECTpublic:Puff(QWidget *parent = 0);protected:void paintEvent(QPaintEvent *event);void timerEvent(QTimerEvent *event);private:int x;qreal opacity;int timerId;};
在头文件中,我们定义了两个事件处理器:绘图事件处理器和计时器处理器。
puff.cpp
#include <QPainter>#include <QTimer>#include <QTextStream>#include "puff.h"Puff::Puff(QWidget *parent): QWidget(parent) {x = 1;opacity = 1.0;timerId = startTimer(15);}void Puff::paintEvent(QPaintEvent *e) {Q_UNUSED(e);QPainter painter(this);QTextStream out(stdout);QString text = "ZetCode";painter.setPen(QPen(QBrush("#575555"), 1));QFont font("Courier", x, QFont::DemiBold);QFontMetrics fm(font);int textWidth = fm.width(text);painter.setFont(font);if (x > 10) {opacity -= 0.01;painter.setOpacity(opacity);}if (opacity <= 0) {killTimer(timerId);out << "timer stopped" << endl;}int h = height();int w = width();painter.translate(QPoint(w/2, h/2));painter.drawText(-textWidth/2, 0, text);}void Puff::timerEvent(QTimerEvent *e) {Q_UNUSED(e);x += 1;repaint();}
这是puff.cpp文件。
Puff::Puff(QWidget *parent): QWidget(parent) {x = 1;opacity = 1.0;timerId = startTimer(15);}
在构造器中,我们启动计时器。 每 15ms 会生成一个计时器事件。
void Puff::timerEvent(QTimerEvent *e) {Q_UNUSED(e);x += 1;repaint();}
在timerEvent()内,我们增加字体大小并重新绘制小部件。
if (x > 10) {opacity -= 0.01;painter.setOpacity(opacity);}
如果字体大小大于 10 磅,我们将逐渐降低不透明度; 文字开始消失。
if (opacity <= 0) {killTimer(timerId);out << "timer stopped" << endl;}
如果文字完全消失,我们将杀死计时器。
main.cpp
#include <QApplication>#include "puff.h"int main(int argc, char *argv[]) {QApplication app(argc, argv);Puff window;window.resize(350, 280);window.setWindowTitle("Puff");window.show();return app.exec();}
这是主文件。
本章是关于 Qt4 中的绘图的。

若有收获,就点个赞吧
0 人点赞
