在 Mono Winforms 教程的这一部分中,我们将进行绘图。 当我们想要更改或增强现有控件时,将使用绘图。 或者,如果我们要从头开始创建自定义控件。 要进行绘图,我们使用 Winforms 库提供的绘图 API。 绘图是在一种方法中完成的,我们将其插入Paint事件。
System.Drawing名称空间提供对GDI+基本图形功能的访问。 System.Drawing.Drawing2D,System.Drawing.Imaging和System.Drawing.Text命名空间中提供了更高级的功能。 Graphics类提供了在表单上绘图的方法。
直线
我们的第一个示例将在Form控件上绘制线条。
lines.cs
using System;using System.Drawing;using System.Drawing.Drawing2D;using System.Windows.Forms;class MForm : Form {public MForm() {Text = "Lines";Size = new Size(280, 270);ResizeRedraw = true;Paint += new PaintEventHandler(OnPaint);CenterToScreen();}void OnPaint(object sender, PaintEventArgs e){Graphics g = e.Graphics;Pen pen = new Pen(Color.Black, 1);pen.DashStyle = DashStyle.Dot;g.DrawLine(pen, 20, 40, 250, 40);pen.DashStyle = DashStyle.DashDot;g.DrawLine(pen, 20, 80, 250, 80);pen.DashStyle = DashStyle.Dash;g.DrawLine(pen, 20, 120, 250, 120);pen.DashStyle = DashStyle.DashDotDot;g.DrawLine(pen, 20, 160, 250, 160);pen.DashPattern = new float[] {6f, 8f, 1f, 1f, 1f, 1f, 1f, 1f };g.DrawLine(pen, 20, 200, 250, 200);g.Dispose();}}class MApplication {public static void Main() {Application.Run(new MForm());}}
我们在表格上画了五行。 每行具有不同的DashStyle。
ResizeRedraw = true;
调整表单大小时,它会自动重绘。 这不是默认行为。
Paint += new PaintEventHandler(OnPaint);
绘图事件将传递给OnPaint()方法。
void OnPaint(object sender, PaintEventArgs e){...}
这是OnPaint()方法的签名。
Graphics g = e.Graphics;
为了在表单上绘图,我们必须获取Graphics对象。 在窗体上绘图实际上是在调用Graphics对象的各种方法。
Pen pen = new Pen(Color.Black, 1);pen.DashStyle = DashStyle.Dot;g.DrawLine(pen, 20, 40, 250, 40);
我们创建一个Pen对象。 该对象用于绘制形状的轮廓。 比我们设置点划线DashStyle。 最后,我们用DrawLine()方法画线。 第一个参数是钢笔对象。 接下来的四个值是线的起点和终点的 x 和 y 值。
pen.DashPattern = new float[] {6f, 8f, 1f, 1f, 1f, 1f, 1f, 1f };
有几个内置的DashStyle值。 我们可以使用DashPattern属性来创建自己的样式。 乍一看可能很难。 但是模式只是填充和空值的数组。
g.Dispose();
我们知道 C# 语言使用垃圾回收。 那么,为什么我们要明确释放资源? 这是为了提高效率。 我们正在帮助垃圾收集器。

图:直线
色彩
Winforms 库中的颜色表示 ARGB(alpha,红色,绿色,蓝色)颜色。 它是 Alpha,红色,绿色和蓝色(RGB)强度值的组合。 还有一些可以在绘图中使用的预定义颜色名称。
colors.cs
using System;using System.Drawing;using System.Drawing.Drawing2D;using System.Windows.Forms;class MForm : Form {public MForm() {Text = "Colors";Size = new Size(360, 300);Paint += new PaintEventHandler(OnPaint);CenterToScreen();}void OnPaint(object sender, PaintEventArgs e){Graphics g = e.Graphics;g.FillRectangle(Brushes.Sienna, 10, 15, 90, 60);g.FillRectangle(Brushes.Green, 130, 15, 90, 60);g.FillRectangle(Brushes.Maroon, 250, 15, 90, 60);g.FillRectangle(Brushes.Chocolate, 10, 105, 90, 60);g.FillRectangle(Brushes.Gray, 130, 105, 90, 60);g.FillRectangle(Brushes.Coral, 250, 105, 90, 60);g.FillRectangle(Brushes.Brown, 10, 195, 90, 60);g.FillRectangle(Brushes.Teal, 130, 195, 90, 60);g.FillRectangle(Brushes.Goldenrod, 250, 195, 90, 60);g.Dispose();}}class MApplication {public static void Main() {Application.Run(new MForm());}}
我们用 9 种不同的颜色绘制 9 个矩形。
g.FillRectangle(Brushes.Sienna, 10, 15, 90, 60);
FillRectagle()方法用画笔填充指定的矩形。 画笔可以是颜色或图案。 有一些预定义的颜色可用。 我们可以从Brushes枚举中获取它们。 最后四个值是左上角点的 x,y 值以及矩形的宽度和高度。

图:颜色
HatchBrush
HatchBrush对象用于填充形状的内部。 我们可以使用几种内置模式。
hatches.cs
using System;using System.Drawing;using System.Drawing.Drawing2D;using System.Windows.Forms;class MForm : Form {public MForm() {Text = "Hatches";Size = new Size(360, 300);Paint += new PaintEventHandler(OnPaint);CenterToScreen();}void OnPaint(object sender, PaintEventArgs e){Graphics g = e.Graphics;HatchBrush hb = new HatchBrush(HatchStyle.Cross, Color.Black, this.BackColor);g.FillRectangle(hb, 10, 15, 90, 60);hb = new HatchBrush(HatchStyle.Percent05, Color.Black, this.BackColor);g.FillRectangle(hb, 130, 15, 90, 60);hb = new HatchBrush(HatchStyle.SolidDiamond, Color.Black, this.BackColor);g.FillRectangle(hb, 250, 15, 90, 60);hb = new HatchBrush(HatchStyle.DiagonalBrick, Color.Black, this.BackColor);g.FillRectangle(hb, 10, 105, 90, 60);hb = new HatchBrush(HatchStyle.Divot, Color.Black, this.BackColor);g.FillRectangle(hb, 130, 105, 90, 60);hb = new HatchBrush(HatchStyle.Wave, Color.Black, this.BackColor);g.FillRectangle(hb, 250, 105, 90, 60);hb = new HatchBrush(HatchStyle.ZigZag, Color.Black, this.BackColor);g.FillRectangle(hb, 10, 195, 90, 60);hb = new HatchBrush(HatchStyle.Sphere, Color.Black, this.BackColor);g.FillRectangle(hb, 130, 195, 90, 60);hb = new HatchBrush(HatchStyle.Shingle, Color.Black, this.BackColor);g.FillRectangle(hb, 250, 195, 90, 60);hb.Dispose();g.Dispose();}}class MApplication {public static void Main() {Application.Run(new MForm());}}
这次,我们用九种不同的图案(称为剖面线)填充了九个矩形。
HatchBrush hb = new HatchBrush(HatchStyle.Cross, Color.Black, this.BackColor);
在这里,我们创建一个HatchBrush对象。 参数是图案填充样式以及前景色和背景色。 背景颜色设置为表单的颜色,因此看起来就像我们在表单上绘制的一样。
g.FillRectangle(hb, 10, 15, 90, 60);
我们使用指定的阴影刷填充矩形。

图:通口
渐变
在计算机图形学中,渐变是从浅到深或从一种颜色到另一种颜色的阴影的平滑混合。 在 2D 绘图程序和绘图程序中,渐变用于创建彩色背景和特殊效果以及模拟灯光和阴影。 (answers.com)
gradients.cs
using System;using System.Drawing;using System.Drawing.Drawing2D;using System.Windows.Forms;class MForm : Form {public MForm() {Text = "Gradients";Size = new Size(350, 350);Paint += new PaintEventHandler(OnPaint);CenterToScreen();}void OnPaint(object sender, PaintEventArgs e){Graphics g = e.Graphics;Point pt1 = new Point(5, 5);Point pt2 = new Point(25, 25);Brush lg = new LinearGradientBrush(pt1, pt2, Color.Red, Color.Black);g.FillRectangle(lg, 20, 20, 300, 40);pt1 = new Point(5, 25);pt2 = new Point(20, 2);lg = new LinearGradientBrush(pt1, pt2, Color.Yellow, Color.Black);g.FillRectangle(lg, 20, 80, 300, 40);pt1 = new Point(5, 25);pt2 = new Point(2, 2);lg = new LinearGradientBrush(pt1, pt2, Color.Green, Color.Black);g.FillRectangle(lg, 20, 140, 300, 40);pt1 = new Point(25, 25);pt2 = new Point(15, 25);lg = new LinearGradientBrush(pt1, pt2, Color.Blue, Color.Black);g.FillRectangle(lg, 20, 200, 300, 40);pt1 = new Point(0, 10);pt2 = new Point(0, 20);lg = new LinearGradientBrush(pt1, pt2, Color.Orange, Color.Black);g.FillRectangle(lg, 20, 260, 300, 40);lg.Dispose();g.Dispose();}}class MApplication {public static void Main() {Application.Run(new MForm());}}
我们绘制五个矩形,这些矩形填充有不同的线性渐变。
Point pt1 = new Point(5, 5);Point pt2 = new Point(25, 25);
这两个是线性渐变画笔的控制点。
Brush lg = new LinearGradientBrush(pt1, pt2, Color.Red, Color.Black);
我们创建LinearGradientBrush对象。 我们使用两个控制点和两种混合颜色。
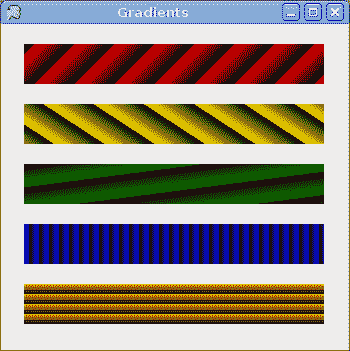
图:渐变
画线
要在 Winforms Form上绘制字符串,我们使用DrawString()方法。
lyrics.cs
using System;using System.Drawing;using System.Drawing.Drawing2D;using System.Windows.Forms;class MForm : Form {public MForm() {Text = "You know I'm No Good";Size = new Size(380, 450);Paint += new PaintEventHandler(OnPaint);CenterToScreen();}void OnPaint(object sender, PaintEventArgs e){Graphics g = e.Graphics;Font ft = new Font("Purisa", 10);SolidBrush br = new SolidBrush(Color.Black);PointF pt = new PointF(20.0f, 20.0f);g.DrawString("Meet you downstairs in the bar and heard", ft, br, pt);pt = new PointF(20.0f, 50.0f);g.DrawString("Your rolled up sleeves and your skull t-shirt", ft, br, pt);pt = new PointF(20.0f, 80.0f);g.DrawString("You say why did you do it with him today?", ft, br, pt);pt = new PointF(20.0f, 110.0f);g.DrawString("And sniffed me out like I was tanqueray", ft, br, pt);pt = new PointF(20.0f, 160.0f);g.DrawString("Cause you’re my fella, my guy", ft, br, pt);pt = new PointF(20.0f, 190.0f);g.DrawString("Hand me your stella and fly", ft, br, pt);pt = new PointF(20.0f, 220.0f);g.DrawString("By the time I’m out the door", ft, br, pt);pt = new PointF(20.0f, 250.0f);g.DrawString("You tear me down like roger moore", ft, br, pt);pt = new PointF(20.0f, 300.0f);g.DrawString("I cheated myself", ft, br, pt);pt = new PointF(20.0f, 330.0f);g.DrawString("Like I knew I would", ft, br, pt);pt = new PointF(20.0f, 360.0f);g.DrawString("I told ya, I was trouble", ft, br, pt);pt = new PointF(20.0f, 390.0f);g.DrawString("You know that I’m no good", ft, br, pt);g.Dispose();}}class MApplication {public static void Main() {Application.Run(new MForm());}}
在我们的示例中,我们在 Winforms 窗体上绘制歌曲的歌词。
Font ft = new Font("Purisa", 10);
我们使用 10 磅高的 Purisa 字体。
PointF pt = new PointF(20.0f, 20.0f);
要在表单上绘制字符串,我们必须使用浮点值。
g.DrawString("Meet you downstairs in the bar and heard", ft, br, pt);
DrawString()方法采用以下参数:要绘制的文本,字体,笔刷和PointF对象。
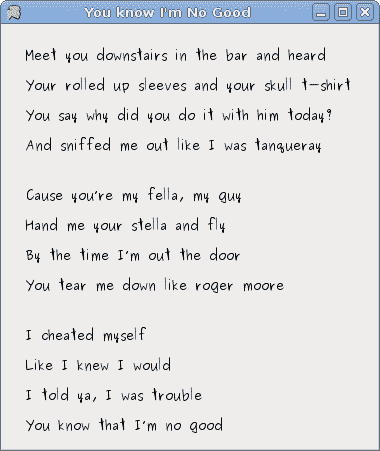
图:歌词
绘制图像
在最后一个示例中,我们将在Form控件上绘制图像。
redrock.cs
using System;using System.Drawing;using System.Windows.Forms;class MForm : Form {private Bitmap castle;public MForm() {Text = "Red Rock";loadImage();ClientSize = new Size(castle.Width, castle.Height);Paint += new PaintEventHandler(OnPaint);CenterToScreen();}void loadImage() {try {castle = new Bitmap("redrock.png");} catch (Exception e) {Console.WriteLine(e.Message);Environment.Exit(1);}}void OnPaint(object sender, PaintEventArgs e){Graphics g = e.Graphics;Rectangle r = new Rectangle(1, 1, castle.Width, castle.Height);g.DrawImage(castle, r);}}class MApplication {public static void Main() {Application.Run(new MForm());}}
此代码示例在窗体上绘制城堡的图像。
try {castle = new Bitmap("redrock.png");} catch (Exception e) {Console.WriteLine(e.Message);Environment.Exit(1);}
我们加载城堡的图像。
Rectangle r = new Rectangle(1, 1, castle.Width, castle.Height);
我们确定将要绘制的矩形。
g.DrawImage(castle, r);
这条线实际上绘制图像。
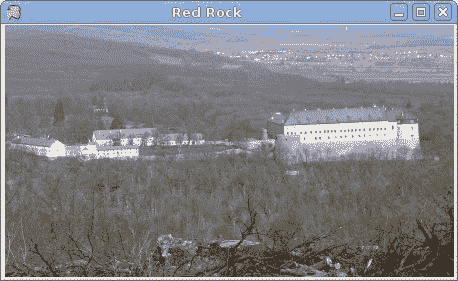
图:图像
在本章中,我们在 Mono Winforms 库中做了一些绘图。

若有收获,就点个赞吧
0 人点赞
