这是 Qt Quick 入门教程。 本教程讲授了 Qt Quick 中编程的基础知识。 本教程使用 Qt 5.5.1 编写。
Qt Quick
Qt Quick 是一种现代的用户界面技术,将声明性用户界面设计和命令性编程逻辑分开。 它是 Qt 框架内的一个应用框架。 它提供了一种构建自定义的,高度动态的,具有流畅过渡和效果的用户界面的方式,这种方式在移动设备中尤为常见。
Qt Quick 是与 Qt Widgets 分离的模块,该模块针对传统的桌面应用。 Qt Quick 基于 QML 声明性语言。
QML
QML 是一种用户界面规范和编程语言。 它允许创建流畅的动画和视觉吸引力的应用。 QML 提供了一种高度可读的,声明性的,类似于 JSON 的语法,并支持将命令性 JavaScript 表达式与动态属性绑定结合在一起。
QML 由元素层次构成。
简单的例子
我们从一个简单的例子开始。
simple.qml
import QtQuick 2.5import QtQuick.Controls 1.4ApplicationWindow {width: 300height: 200title: "Simple"Text {text: "Qt Quick"anchors.horizontalCenter: parent.horizontalCenteranchors.verticalCenter: parent.verticalCenterfont.pointSize: 24; font.bold: true}}
该代码创建一个带有居中文本的小窗口。
import QtQuick 2.5import QtQuick.Controls 1.4
导入了必要的模块。 Qt Quick 模块的最新版本与 Qt 版本不同。 这些是 Qt 5.5.1 的最新模块。
ApplicationWindow {...}
ApplicationWindow是用于主应用窗口的 Qt Quick 控件。 用户界面元素由其类型名称指定,后跟两个大括号。
width: 300height: 200title: "Simple"
这是ApplicationWindow元素的三个内置属性。 它们指定窗口的宽度,高度和标题。
Text {text: "Qt Quick"anchors.horizontalCenter: parent.horizontalCenteranchors.verticalCenter: parent.verticalCenterfont.pointSize: 24}
Text控件显示文本; 文本是使用text属性指定的。 在其父元素ApplicationWindow元素中声明它。 我们通过parent属性引用父对象。 anchors用于在应用窗口中将Text控件居中。 最后,font属性用于设置文本的大小。 parent和font是组属性的示例。
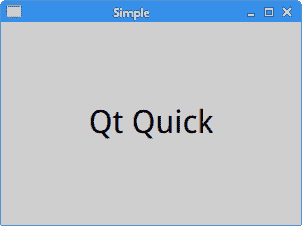
图:简单 example
用qmlscene工具加载simple.qml文档后,我们得到了这张图片。
退出按钮
在第二个示例中,我们展示Button控件。
quit_button.qml
import QtQuick 2.5import QtQuick.Controls 1.4ApplicationWindow {width: 300height: 200title: "Quit button"Button {x: 20y: 20text: "Quit"onClicked: Qt.quit()}}
窗口上放置了一个按钮。 单击该按钮可终止该应用。
Button {x: 20y: 20text: "Quit"onClicked: Qt.quit()}
Button控件嵌套在ApplicationWindow元素内。 它放置在x = 20,y = 20坐标处; 坐标相对于窗口的左上角。 text属性指定按钮的标签。 onClicked()是按钮单击信号的处理器。 Qt.quick()函数终止应用。
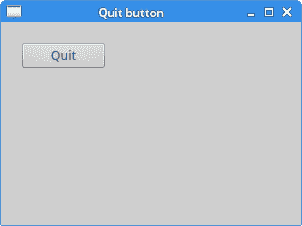
图:退出按钮
CheckBox
CheckBox是 Qt Quick 控件,具有两种状态:开和关。 复选框通常用于表示可以启用或禁用的应用中的功能。
mycheckbox.qml
import QtQuick 2.5import QtQuick.Controls 1.4ApplicationWindow {id: rootwinwidth: 300height: 200title: "CheckBox"function onChecked(checked) {if (checked) {rootwin.title = "CheckBox"} else {rootwin.title = " "}}CheckBox {x: 15y: 15text: "Show title"checked: trueonClicked: rootwin.onChecked(checked)}}
在我们的示例中,我们在窗口上放置了一个检查按钮。 复选按钮显示或隐藏窗口的标题。
id: rootwin
id是一个特殊值,用于引用 QML 文档中的元素。 id 在文档中必须唯一,并且不能将其重置为其他值,也无法查询。
function onChecked(checked) {if (checked) {rootwin.title = "CheckBox"} else {rootwin.title = " "}}
onChecked是一个 JavaScript 函数,用于设置或删除窗口的标题。 为此,我们使用先前创建的rootwin ID。
CheckBox {x: 15y: 15text: "Show title"checked: trueonClicked: rootwin.onChecked(checked)}
由于标题在应用的开头是可见的,因此我们使用checked属性将CheckBox设置为选中状态。 onClicked处理器调用onChecked函数。 由于它是在根窗口的空间中定义的,因此我们再次使用rootwin id 来引用它。
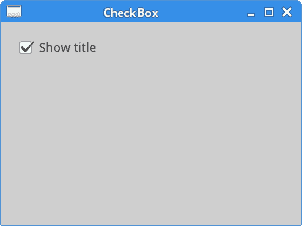
图:CheckBox
滑杆
Slider是具有简单句柄的控件。 可以前后拉动此手柄,从而为特定任务选择一个值。
slider.qml
import QtQuick 2.5import QtQuick.Controls 1.4ApplicationWindow {id: rootwinwidth: 300height: 200title: "Slider"Row {Slider {id: sliderminimumValue: 0maximumValue: 100}Label {text: Math.floor(slider.value)}}}
窗口上放置了Slider和Label控件。 拉动滑块,我们将更新标签。
Row {...}
Row是 QML 类型,其子项沿一行放置。
Slider {id: sliderminimumValue: 0maximumValue: 100}
创建一个Slider控件。 我们指定其最小值和最大值。
Label {text: Math.floor(slider.value)}
标签的text属性绑定到滑块的value属性。 这称为属性绑定。
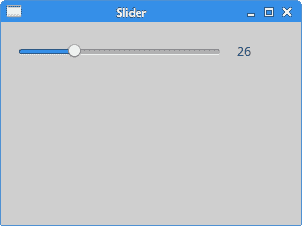
图:滑块
NumberAnimation
Qt Quick 中提供了几种动画类型。 其中之一是NumberAnimation。 NumberAnimation是数值变化的特殊属性动画。
numberanim.qml
import QtQuick 2.5import QtQuick.Controls 1.4ApplicationWindow {width: 400height: 300title: "Number animation"Rectangle {x: 20y: 20width: 100; height: 100color: "forestgreen"NumberAnimation on x { to: 250; duration: 1000 }}}
在示例中,我们使用NumberAnimation为矩形设置动画; 矩形沿 x 轴移动一秒钟。
NumberAnimation on x { to: 250; duration: 1000 }
动画将应用于Rectangle的x属性。 to:属性保存动画的结束值。 duration:属性保存动画的持续时间(以毫秒为单位)。
自定义绘图
可以在Canvas元素上执行自定义绘图。
shapes.qml
import QtQuick 2.5import QtQuick.Controls 1.4ApplicationWindow {width: 400height: 200title: "Shapes"Canvas {anchors.fill: parentonPaint: {var ctx = getContext("2d");ctx.fillStyle = "lightslategray"ctx.beginPath();ctx.fillRect(10, 10, 80, 50);ctx.beginPath();ctx.fillRect(120, 10, 70, 70);ctx.beginPath();ctx.ellipse(230, 10, 90, 70);ctx.fill();ctx.beginPath();ctx.ellipse(10, 110, 70, 70);ctx.fill();ctx.beginPath();ctx.roundedRect(120, 110, 70, 70, 10, 10);ctx.fill();ctx.beginPath();ctx.moveTo(230, 110);ctx.arc(230, 110, 70, 0, Math.PI * 0.5, false);ctx.fill();}}}
在示例中,我们在画布上绘制了六个不同的形状:矩形,正方形,椭圆形,圆形,圆角矩形和弧形。
Canvas {anchors.fill: parent...}
Canvas填充整个父级。
var ctx = getContext("2d");
我们使用getContext()函数获得绘图上下文。
ctx.fillStyle = "lightslategray"
形状的内部充满了光亮的色彩。
ctx.beginPath();ctx.fillRect(10, 10, 80, 50);
beginPath()函数开始一个新路径。 fillRect()使用fillStyle绘制指定的矩形区域。
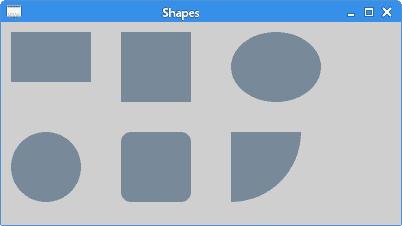
图:形状
在 C++ 中部署 Qt Quick 应用
在本节中,我们显示如何在 C++ 中部署 Qt Quick 应用。
simple.pro
QT += qml quickTARGET = SimpleTEMPLATE = appSOURCES += main.cpp
这是项目文件。 它在应用中包括 qml 和 quick 模块。
basic.qml
import QtQuick 2.5import QtQuick.Controls 1.4ApplicationWindow {width: 300height: 200title: "Simple"Text {text: "Qt Quick"anchors.horizontalCenter: parent.horizontalCenteranchors.verticalCenter: parent.verticalCenterfont.pointSize: 24}}
这是要在 C++ 应用中显示的 QML 文档。 它包含居中文本。
main.cpp
#include <QGuiApplication>#include <QQmlApplicationEngine>#include <QQuickWindow>int main(int argc, char *argv[]) {QGuiApplication app(argc, argv);QQmlApplicationEngine engine;engine.load(QUrl("simple.qml"));QObject *topLevel = engine.rootObjects().value(0);QQuickWindow *window = qobject_cast<QQuickWindow *>(topLevel);window->show();return app.exec();}
QQmlApplicationEngine用于加载 QML 文档。
在 PyQt5 中部署 Qt Quick 应用
在本节中,我们显示如何在 PyQt5 中部署 Qt Quick 应用。
$ sudo apt-get install python3-pyqt5$ sudo apt-get install python3-pyqt5.qtquick$ sudo apt-get install qtdeclarative5-qtquick2-plugin
在基于 Debian 的 Linux 上,我们可以安装上述包以使事情顺利进行。
basic.qml
import QtQuick 2.2Rectangle {x: 20y: 20width: 100height: 100color: "lightsteelblue"}
这是要在 PyQt5 应用中显示的 QML 文档; 它包含一个矩形对象。
launcher.py
#!/usr/bin/python3# -*- coding: utf-8 -*-import sysfrom PyQt5.QtWidgets import QApplication, QMainWindowfrom PyQt5.QtCore import QUrlfrom PyQt5.QtQuick import QQuickViewif __name__ == "__main__":app = QApplication(sys.argv)view = QQuickView()view.setSource(QUrl('basic.qml'))view.show()sys.exit(app.exec_())
QQuickView类提供了一个用于显示 Qt Quick 用户界面的窗口。

