在 Ruby Qt 教程的这一部分中,我们将介绍 Qt 工具包并使用 Ruby 编程语言创建第一个程序。
本教程的目的是帮助您开始使用 Ruby 语言的 Qt 工具包。 可以在此处下载本教程中使用的图像。 我们使用了 Gnome 项目的 Tango 图标包中的一些图标。
关于
Qt 是用于创建图形用户界面的领先工具包之一。 Ruby 是一种流行的脚本语言。
创建工具提示
第一个示例将显示一个工具提示。 工具提示是一个小的矩形窗口,它提供有关对象的简短信息。 它通常是一个 GUI 组件。 它是应用帮助系统的一部分。
#!/usr/bin/ruby# ZetCode Ruby Qt tutorial## This code shows a tooltip on# a window.## author: Jan Bodnar# website: www.zetcode.com# last modified: September 2012require 'Qt'class QtApp < Qt::Widgetdef initializesupersetWindowTitle "Tooltip"setToolTip "This is Qt::Widget"resize 250, 150move 300, 300showendendapp = Qt::Application.new ARGVQtApp.newapp.exec
该示例创建一个窗口。 如果将鼠标指针悬停在窗口区域上方,则会弹出一个工具提示。
require 'Qt'
require关键字导入我们将在应用中使用的必要类型。
class QtApp < Qt::Widget
该示例继承自Qt::Widget。 Widget类是所有用户界面对象的基类。 小部件是用户界面的原子。 它从窗口系统接收鼠标,键盘和其他事件。
setWindowTitle "Tooltip"
此方法调用为窗口创建标题。
setToolTip "This is Qt::Widget"
setToolTip方法为Widget对象创建工具提示。
resize 250, 150
在这里,我们设置窗口的宽度和高度。
move 300, 300
move方法在屏幕上移动窗口。
show
一切准备就绪后,我们在屏幕上显示窗口。
app = Qt::Application.new ARGVQtApp.newapp.exec
这三行设置了应用。
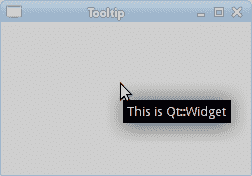
图:工具提示
使窗口居中
在第二个示例中,我们将窗口置于屏幕中央。
#!/usr/bin/ruby# ZetCode Ruby Qt tutorial## This program centers a window# on the screen.## author: Jan Bodnar# website: www.zetcode.com# last modified: September 2012require 'Qt'WIDTH = 250HEIGHT = 150class QtApp < Qt::Widgetdef initializesupersetWindowTitle "Center"resize WIDTH, HEIGHTcentershowenddef centerqdw = Qt::DesktopWidget.newscreenWidth = qdw.widthscreenHeight = qdw.heightx = (screenWidth - WIDTH) / 2y = (screenHeight - HEIGHT) / 2move x, yendendapp = Qt::Application.new ARGVQtApp.newapp.exec
Qt 工具包没有一种将窗口居中的方法。
WIDTH = 250HEIGHT = 150
这两个常数定义了应用窗口的宽度和高度。
qdw = Qt::DesktopWidget.new
Qt::DesktopWidget类提供有关屏幕的信息。
screenWidth = qdw.widthscreenHeight = qdw.height
在这里,我们确定屏幕的宽度和高度。
x = (screenWidth - WIDTH) / 2y = (screenHeight - HEIGHT) / 2
在这里,我们计算居中窗口的x和y坐标。 为了使窗口在屏幕上居中,我们需要知道屏幕的大小和窗口的大小。
move x, y
我们将窗口移至计算出的 x 和 y 坐标。
退出按钮
在本节的最后一个示例中,我们将创建一个退出按钮。 当我们按下此按钮时,应用终止。
#!/usr/bin/ruby# ZetCode Ruby Qt tutorial## This program creates a quit# button. When we press the button,# the application terminates.## author: Jan Bodnar# website: www.zetcode.com# last modified: September 2012require 'Qt'class QtApp < Qt::Widgetdef initializesupersetWindowTitle "Quit button"init_uiresize 250, 150move 300, 300showenddef init_uiquit = Qt::PushButton.new 'Quit', selfquit.resize 80, 30quit.move 50, 50connect quit, SIGNAL('clicked()'), $qApp, SLOT('quit()')endendapp = Qt::Application.new ARGVQtApp.newapp.exec
Qt::PushButton类在 Ruby Qt 中显示一个按钮。 它是一个矩形小部件,通常显示一个文本标签。
init_ui
我们将用户界面的创建委托给init_ui方法。
quit = Qt::PushButton.new 'Quit', self
我们创建按钮小部件。 构造器的第一个参数是按钮显示的标签。 第二个参数是按钮的父窗口小部件。
quit.resize 80, 30quit.move 50, 50
我们调整和放置按钮小部件的大小。
connect quit, SIGNAL('clicked()'), $qApp, SLOT('quit()')
单击退出按钮时,将发出clicked信号。 connect方法将信号连接到对象的特定槽。 在我们的情况下,它是应用对象的quit方法。 $qApp是指向应用实例的全局指针。
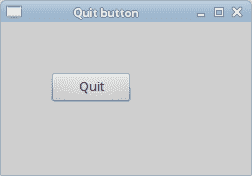
图:退出按钮
本节介绍了使用 Ruby 语言的 Qt 工具包。

若有收获,就点个赞吧
0 人点赞
