在 GTK# 编程教程的这一部分中,我们将进行编程的第一步。 我们将创建简单的程序。
简单的例子
第一个代码示例是一个简单的示例,它显示了居中的窗口。
center.cs
using Gtk;class SharpApp : Window {public SharpApp() : base("Center"){SetDefaultSize(250, 200);SetPosition(WindowPosition.Center);DeleteEvent += delegate { Application.Quit(); };Show();}public static void Main(){Application.Init();new SharpApp();Application.Run();}}
该代码示例在屏幕中央显示一个小窗口。
$ gmcs -pkg:gtk-sharp-2.0 center.cs
这是我们编译代码示例的方式。
using Gtk;
现在,我们可以直接使用Gtk名称空间中的对象。 我们可以写Window而不是Gtk.Window。
class SharpApp : Window {
我们的应用基于SharpApp类。 该类继承自Window类。
public SharpApp() : base("Center"){...}
这是构造器。 它构建了我们的应用。 它还通过base()关键字调用其父构造器。
SetDefaultSize(250, 200);
这行为我们的窗口设置默认大小。
SetPosition(WindowPosition.Center);
这条线使窗口在屏幕上居中。
DeleteEvent += delegate { Application.Quit(); };
我们将一个代理插入DeleteEvent。 当我们单击标题栏中的关闭按钮时,将触发此事件。 或按 Alt + F4 。 我们的代表永久退出了申请。
Show();
现在我们显示窗口。 在调用Show()方法之前,该窗口不可见。
public static void Main(){Application.Init();new SharpApp();Application.Run();}
Main()方法是应用的入口点。 它启动并运行程序。
图标
在下一个示例中,我们显示应用图标。 大多数窗口管理器在标题栏的左上角以及任务栏上都显示图标。
icon.cs
using Gtk;using System;class SharpApp : Window {public SharpApp() : base("Icon"){SetDefaultSize(250, 160);SetPosition(WindowPosition.Center);SetIconFromFile("web.png");DeleteEvent += new DeleteEventHandler(OnDelete);Show();}public static void Main(){Application.Init();new SharpApp();Application.Run();}void OnDelete(object obj, DeleteEventArgs args){Application.Quit();}}
该代码示例显示了应用图标。
SetIconFromFile("web.png");
SetIconFromFile()方法为窗口设置图标。 从当前工作目录中的磁盘加载映像。
DeleteEvent += new DeleteEventHandler(OnDelete);
这是另一种方式,我们如何将事件处理器插入事件。 只是有点冗长。
void OnDelete(object obj, DeleteEventArgs args){Application.Quit();}
这是删除事件的事件处理器。
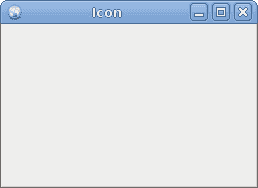
图:图标
按钮
在下一个示例中,我们将使用 GTK# 库进一步增强我们的编程技能。
buttons.cs
using Gtk;class SharpApp : Window{public SharpApp() : base("Buttons"){SetDefaultSize(250, 200);SetPosition(WindowPosition.Center);DeleteEvent += delegate { Application.Quit(); };Fixed fix = new Fixed();Button btn1 = new Button("Button");btn1.Sensitive = false;Button btn2 = new Button("Button");Button btn3 = new Button(Stock.Close);Button btn4 = new Button("Button");btn4.SetSizeRequest(80, 40);fix.Put(btn1, 20, 30);fix.Put(btn2, 100, 30);fix.Put(btn3, 20, 80);fix.Put(btn4, 100, 80);Add(fix);ShowAll();}public static void Main(){Application.Init();new SharpApp();Application.Run();}}
我们在窗口上显示四个不同的按钮。 我们将看到容器窗口小部件和子窗口小部件之间的区别,并将更改子窗口小部件的某些属性。
Fixed fix = new Fixed();
Fixed小部件是不可见的容器小部件。 其目的是包含其他子窗口小部件。
Button btn1 = new Button("Button");
Button是子窗口小部件。 子窗口小部件放置在容器内。
btn1.Sensitive = false;
我们使此按钮不敏感。 这意味着我们无法单击它。 图形化的小部件为灰色。
Button btn3 = new Button(Stock.Close);
第三个按钮在其区域内显示图像。 GTK# 库具有我们可以使用的内置图像库。
btn4.SetSizeRequest(80, 40);
在这里,我们更改按钮的大小。
fix.Put(btn1, 20, 30);fix.Put(btn2, 100, 30);...
在这里,我们将按钮小部件放置在固定容器小部件内。
Add(fix);
我们将Fixed容器设置为Window小部件的主要容器。
ShowAll();
我们可以调用ShowAll()方法,也可以在每个小部件上调用Show()方法。 包括容器。
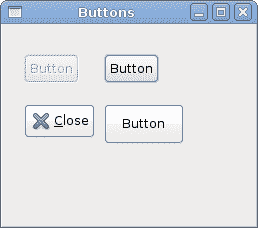
图:按钮
在本章中,我们在 GTK# 编程库中创建了第一个程序。

若有收获,就点个赞吧
0 人点赞
