在 Qt4 C++ 编程教程的这一部分中,我们创建了第一个程序。
我们显示一个应用图标,一个工具提示和各种鼠标光标。 我们在屏幕上居中放置一个窗口,并介绍信号和槽机制。
简单的例子
我们从一个非常简单的例子开始。
simple.cpp
#include <QApplication>#include <QWidget>int main(int argc, char *argv[]) {QApplication app(argc, argv);QWidget window;window.resize(250, 150);window.setWindowTitle("Simple example");window.show();return app.exec();}
该示例在屏幕上显示一个基本窗口。
#include <QApplication>#include <QWidget>
我们包括必要的头文件。
QApplication app(argc, argv);
这是应用对象。 每个 Qt4 应用都必须创建此对象。 (控制台应用除外。)
QWidget window;
这是我们的主要小部件。
window.resize(250, 150);window.setWindowTitle("Simple example");window.show();
在这里,我们调整窗口小部件的大小并为我们的主窗口设置标题。 在这种情况下,QWidget是我们的主窗口。 最后,我们在屏幕上显示小部件。
return app.exec();
exec()方法启动应用的主循环。
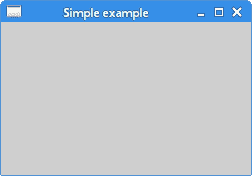
图:简单 example
使窗口居中
如果我们不自己定位窗口,则窗口管理器将为我们定位。 在下一个示例中,我们将窗口居中。
center.cpp
#include <QApplication>#include <QDesktopWidget>#include <QWidget>int main(int argc, char *argv[]) {int WIDTH = 250;int HEIGHT = 150;int screenWidth;int screenHeight;int x, y;QApplication app(argc, argv);QWidget window;QDesktopWidget *desktop = QApplication::desktop();screenWidth = desktop->width();screenHeight = desktop->height();x = (screenWidth - WIDTH) / 2;y = (screenHeight - HEIGHT) / 2;window.resize(WIDTH, HEIGHT);window.move( x, y );window.setWindowTitle("Center");window.show();return app.exec();}
监视器大小和分辨率类型很多。 为了使窗口居中,我们必须确定桌面的宽度和高度。 为此,我们使用QDesktopWidget类。
QDesktopWidget *desktop = QApplication::desktop();screenWidth = desktop->width();screenHeight = desktop->height();
在这里,我们确定屏幕的宽度和高度。
x = (screenWidth - WIDTH) / 2;y = (screenHeight - HEIGHT) / 2;
在这里,我们计算中心窗口的左上点。
window.resize(WIDTH, HEIGHT);window.move( x, y );
我们调整窗口小部件的大小并将其移动到计算的位置。 请注意,我们必须首先调整窗口小部件的大小。 之后我们将其移动。
工具提示
工具提示是有关应用中项目的特定提示。 以下示例将演示如何在 Qt4 编程库中创建工具提示。
tooltip.cpp
#include <QApplication>#include <QWidget>int main(int argc, char *argv[]) {QApplication app(argc, argv);QWidget window;window.resize(250, 150);window.move(300, 300);window.setWindowTitle("ToolTip");window.setToolTip("QWidget");window.show();return app.exec();}
该示例显示了主QWidget的工具提示。
window.setWindowTitle("ToolTip");
我们使用setToolTip()方法为QWidget小部件设置了工具提示。
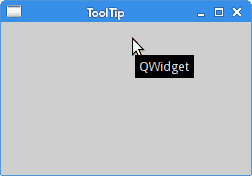
图:工具提示
应用图标
在下一个示例中,我们显示应用图标。 大多数窗口管理器在标题栏的左上角以及任务栏上都显示图标。
icon.cpp
#include <QApplication>#include <QWidget>#include <QIcon>int main(int argc, char *argv[]) {QApplication app(argc, argv);QWidget window;window.resize(250, 150);window.setWindowTitle("Icon");window.setWindowIcon(QIcon("web.png"));window.show();return app.exec();}
窗口左上角显示一个图标。
window.setWindowIcon(QIcon("web.png"));
为了显示图标,我们使用setWindowIcon()方法和QIcon类。 该图标是位于当前工作目录中的一个小 PNG 文件。
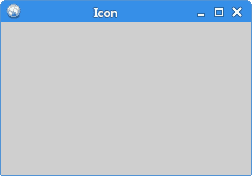
图:图标
游标
光标是一个小图标,指示鼠标指针的位置。 在下一个示例中,将显示我们可以在程序中使用的各种游标。
cursors.cpp
#include <QApplication>#include <QWidget>#include <QFrame>#include <QGridLayout>class Cursors : public QWidget{public:Cursors(QWidget *parent = 0);};Cursors::Cursors(QWidget *parent): QWidget(parent) {QFrame *frame1 = new QFrame(this);frame1->setFrameStyle(QFrame::Box);frame1->setCursor(Qt::SizeAllCursor);QFrame *frame2 = new QFrame(this);frame2->setFrameStyle(QFrame::Box);frame2->setCursor(Qt::WaitCursor);QFrame *frame3 = new QFrame(this);frame3->setFrameStyle(QFrame::Box);frame3->setCursor(Qt::PointingHandCursor);QGridLayout *grid = new QGridLayout(this);grid->addWidget(frame1, 0, 0);grid->addWidget(frame2, 0, 1);grid->addWidget(frame3, 0, 2);setLayout(grid);}int main(int argc, char *argv[]) {QApplication app(argc, argv);Cursors window;window.resize(350, 150);window.setWindowTitle("Cursors");window.show();return app.exec();}
在此示例中,我们使用三个框架。 每个帧都有一个不同的光标集。
QFrame *frame1 = new QFrame(this);
QFrame小部件已创建。
frame1->setFrameStyle(QFrame::Box);
我们使用setFrameStyle()方法设置框架样式。 这样我们可以看到框架的边界。
frame1->setCursor(Qt::SizeAllCursor);
使用setCursor()方法将光标设置到该帧。
QGridLayout *grid = new QGridLayout(this);grid->addWidget(frame1, 0, 0);grid->addWidget(frame2, 0, 1);grid->addWidget(frame3, 0, 2);setLayout(grid);
这会将所有帧分组为一行。 我们将在布局管理一章中详细讨论这一点。
QButton
在下一个代码示例中,我们在窗口上显示一个按钮。 通过单击按钮,我们关闭应用。
pushbutton.cpp
#include <QApplication>#include <QWidget>#include <QPushButton>class MyButton : public QWidget {public:MyButton(QWidget *parent = 0);};MyButton::MyButton(QWidget *parent): QWidget(parent) {QPushButton *quitBtn = new QPushButton("Quit", this);quitBtn->setGeometry(50, 40, 75, 30);connect(quitBtn, SIGNAL(clicked()), qApp, SLOT(quit()));}int main(int argc, char *argv[]) {QApplication app(argc, argv);MyButton window;window.resize(250, 150);window.setWindowTitle("QPushButton");window.show();return app.exec();}
在此代码示例中,我们首次使用信号和槽的概念。
QPushButton *quitBtn = new QPushButton("Quit", this);quitBtn->setGeometry(50, 40, 75, 30);
我们创建一个新的QPushButton。 我们手动调整其大小,然后使用setGeometry()方法将其放置在窗口中。
connect(quitBtn, SIGNAL(clicked()), qApp, SLOT(quit()));
当我们点击按钮时,会产生一个clicked()信号。 slot是对信号做出反应的方法。 在我们的情况下,它是主应用对象的quit()槽。 qApp是指向应用对象的全局指针。 它在QApplication头文件中定义。
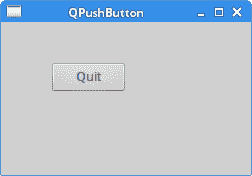
图:QPushButton
PlusMinus
我们将在本节完成,展示小部件如何进行通信。 该代码分为三个文件。
plusminus.h
#pragma once#include <QWidget>#include <QApplication>#include <QPushButton>#include <QLabel>class PlusMinus : public QWidget {Q_OBJECTpublic:PlusMinus(QWidget *parent = 0);private slots:void OnPlus();void OnMinus();private:QLabel *lbl;};
这是示例的头文件。 在此文件中,我们定义了两个槽和一个标签小部件。
class PlusMinus : public QWidget {Q_OBJECT...
Q_OBJECT宏必须包含在声明自己的信号和槽的类中。
plusminus.cpp
#include "plusminus.h"#include <QGridLayout>PlusMinus::PlusMinus(QWidget *parent): QWidget(parent) {QPushButton *plsBtn = new QPushButton("+", this);QPushButton *minBtn = new QPushButton("-", this);lbl = new QLabel("0", this);QGridLayout *grid = new QGridLayout(this);grid->addWidget(plsBtn, 0, 0);grid->addWidget(minBtn, 0, 1);grid->addWidget(lbl, 1, 1);setLayout(grid);connect(plsBtn, SIGNAL(clicked()), this, SLOT(OnPlus()));connect(minBtn, SIGNAL(clicked()), this, SLOT(OnMinus()));}void PlusMinus::OnPlus() {int val = lbl->text().toInt();val++;lbl->setText(QString::number(val));}void PlusMinus::OnMinus() {int val = lbl->text().toInt();val--;lbl->setText(QString::number(val));}
我们有两个按钮和一个标签小部件。 我们使用按钮增加或减少标签上显示的数字。
connect(plsBtn, SIGNAL(clicked()), this, SLOT(OnPlus()));connect(minBtn, SIGNAL(clicked()), this, SLOT(OnMinus()));
在这里,我们将clicked()信号连接到槽。
void PlusMinus::OnPlus() {int val = lbl->text().toInt();val++;lbl->setText(QString::number(val));}
在OnPlus()方法中,我们确定标签的当前值。 标签窗口小部件显示一个字符串值,因此我们必须将其转换为整数。 我们增加数量并为标签设置新的文本。 我们将数字转换为字符串值。
main.cpp
#include "plusminus.h"int main(int argc, char *argv[]) {QApplication app(argc, argv);PlusMinus window;window.resize(300, 190);window.setWindowTitle("Plus minus");window.show();return app.exec();}
这是代码示例的主文件。
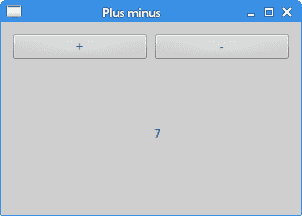
图:正负
在本章中,我们在 Qt4 中创建了第一个程序。

若有收获,就点个赞吧
0 人点赞
