在 Windows API 教程的这一部分中,我们将创建一些简单的 UI 示例。
简单的程序
这是一个非常简单的程序。 它将弹出一个小对话框。
simple.c
#include <windows.h>int WINAPI wWinMain(HINSTANCE hInstance, HINSTANCE hPrevInstance,PWSTR pCmdLine, int CmdShow) {MessageBoxW(NULL, L"First Program", L"First", MB_OK);return 0;}
屏幕上会显示一个小对话框。 它具有标题,消息和“确定”按钮。
#include <windows.h>
我们包括基本的函数声明,常量,数据类型和结构。
int WINAPI wWinMain(HINSTANCE hInstance, HINSTANCE hPrevInstance,PWSTR pCmdLine, int CmdShow)
wWinMain()函数是我们应用的入口。
MessageBoxW(NULL, L"First Program", L"First", MB_OK);
MessageBoxW()函数显示一个简单的消息框。 第一个参数是所有者窗口。 在我们的情况下,该对话框没有所有者。 接下来的两个参数提供消息文本和标题。 最后一个参数定义消息对话框的类型。 MB_OK值使对话框具有一个“确定”按钮。
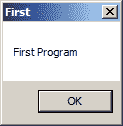
图:简单 message box
使窗口居中
在下一个代码示例中,我们将窗口置于屏幕中央。 SetWindowPos()函数更改子项,弹出窗口或顶级窗口的大小,位置和 Z 顺序。
BOOL WINAPI SetWindowPos(HWND hWnd, HWND hWndInsertAfter, int x, int y,int cx, int cy, UINT uFlags);
第一个参数是窗口的句柄。 第二个参数是窗口的句柄,该窗口的句柄以 Z 顺序或特殊标志位于定位的窗口之前。 例如,HWND_BOTTOM标志将窗口置于 Z 顺序的底部,HWND_TOP标志置于 Z 顺序的顶部。 x和y参数是客户端坐标中窗口左侧和顶部的新位置。 cx和cy是窗口的新宽度和高度大小,以像素为单位。 最后一个参数是大小和位置标志的组合。 例如SWP_NOMOVE保留当前位置(忽略x和y参数)或SWP_NOSIZE保留当前大小(忽略cx和cy参数)。
centering.c
#include <windows.h>LRESULT CALLBACK WndProc(HWND, UINT, WPARAM, LPARAM);void CenterWindow(HWND);int WINAPI wWinMain(HINSTANCE hInstance, HINSTANCE hPrevInstance,PWSTR pCmdLine, int nCmdShow) {MSG msg;WNDCLASSW wc = {0};wc.lpszClassName = L"Center";wc.hInstance = hInstance;wc.hbrBackground = GetSysColorBrush(COLOR_3DFACE);wc.lpfnWndProc = WndProc;wc.hCursor = LoadCursor(0, IDC_ARROW);RegisterClassW(&wc);CreateWindowW(wc.lpszClassName, L"Center",WS_OVERLAPPEDWINDOW | WS_VISIBLE,100, 100, 250, 150, 0, 0, hInstance, 0);while (GetMessage(&msg, NULL, 0, 0)) {TranslateMessage(&msg);DispatchMessage(&msg);}return (int) msg.wParam;}LRESULT CALLBACK WndProc(HWND hwnd, UINT msg,WPARAM wParam, LPARAM lParam) {switch(msg) {case WM_CREATE:CenterWindow(hwnd);break;case WM_DESTROY:PostQuitMessage(0);break;}return DefWindowProcW(hwnd, msg, wParam, lParam);}void CenterWindow(HWND hwnd) {RECT rc = {0};GetWindowRect(hwnd, &rc);int win_w = rc.right - rc.left;int win_h = rc.bottom - rc.top;int screen_w = GetSystemMetrics(SM_CXSCREEN);int screen_h = GetSystemMetrics(SM_CYSCREEN);SetWindowPos(hwnd, HWND_TOP, (screen_w - win_w)/2,(screen_h - win_h)/2, 0, 0, SWP_NOSIZE);}
为了使窗口在屏幕上居中,我们需要确定窗口和屏幕的大小。
case WM_CREATE:CenterWindow(hwnd);break;
我们在WM_CREATE消息期间调用用户定义的CenterWindow()函数。
GetWindowRect(hwnd, &rc) ;
使用GetWindowRect()函数,我们检索指定窗口的边界矩形的大小。
int win_w = rc.right - rc.left;int win_h = rc.bottom - rc.top;
计算窗口的宽度和高度。
int screen_w = GetSystemMetrics(SM_CXSCREEN)int screen_h = GetSystemMetrics(SM_CYSCREEN);
通过GetSystemMetrics()函数,我们可以确定屏幕的宽度和高度。
SetWindowPos(hwnd, HWND_TOP, (screen_w - win_w)/2,(screen_h - win_h)/2, 0, 0, SWP_NOSIZE);
我们使用SetWindowPos()函数将应用窗口放置在屏幕中央。
热键
在以下示例中,我们显示了如何注册热键。 热键是用于执行特定操作的组合键。 热键已通过RegisterHotKey()函数注册。
BOOL WINAPI RegisterHotKey(HWND hWnd, int id, UINT fsModifiers, UINT vk);
第一个参数是窗口的句柄,该窗口将接收由热键生成的WM_HOTKEY消息。 第二个参数是热键的 ID。 第三个参数由修饰符组成; 必须将这些键与vk参数指定的键组合在一起才能生成WM_HOTKEY消息。 改性剂的实例包括MOD_ALT或MOD_CONTROL。 最后一个参数是热键的虚拟键代码。
hotkey.c
#include <windows.h>LRESULT CALLBACK WndProc(HWND, UINT, WPARAM, LPARAM);void CenterWindow(HWND);#define ID_HOTKEY 1int WINAPI wWinMain(HINSTANCE hInstance, HINSTANCE hPrevInstance,PWSTR lpCmdLine, int nCmdShow) {HWND hwnd;MSG msg;WNDCLASSW wc = {0};wc.lpszClassName = L"Application";wc.hInstance = hInstance;wc.hbrBackground = GetSysColorBrush(COLOR_3DFACE);wc.lpfnWndProc = WndProc;wc.hCursor = LoadCursor(0, IDC_ARROW);RegisterClassW(&wc);hwnd = CreateWindowW(wc.lpszClassName, L"Hot key",WS_OVERLAPPEDWINDOW | WS_VISIBLE,100, 100, 270, 170, 0, 0, 0, 0);while (GetMessage(&msg, NULL, 0, 0)) {TranslateMessage(&msg);DispatchMessage(&msg);}return (int) msg.wParam;}LRESULT CALLBACK WndProc(HWND hwnd, UINT msg,WPARAM wParam, LPARAM lParam) {switch(msg) {case WM_CREATE:RegisterHotKey(hwnd, ID_HOTKEY, MOD_CONTROL, 0x43);break;case WM_HOTKEY:if ((wParam) == ID_HOTKEY) {CenterWindow(hwnd);}break;case WM_DESTROY:UnregisterHotKey(hwnd, ID_HOTKEY);PostQuitMessage(0);break;}return DefWindowProcW(hwnd, msg, wParam, lParam);}void CenterWindow(HWND hwnd) {RECT rc = {0};GetWindowRect(hwnd, &rc);int win_w = rc.right - rc.left;int win_h = rc.bottom - rc.top;int screen_w = GetSystemMetrics(SM_CXSCREEN);int screen_h = GetSystemMetrics(SM_CYSCREEN);SetWindowPos(hwnd, HWND_TOP, (screen_w - win_w)/2,(screen_h - win_h)/2, 0, 0, SWP_NOSIZE);}
在示例中,我们注册了 Ctrl + C 热键。 它将窗口居中在屏幕上。
case WM_CREATE:RegisterHotKey(hwnd, ID_HOTKEY, MOD_CONTROL, 0x43);break;
在创建窗口的过程中,我们使用RegisterHotKey()函数注册了 Ctrl + C 热键。
case WM_HOTKEY:if ((wParam) == ID_HOTKEY) {CenterWindow(hwnd);}break;
调用热键时会生成WM_HOTKEY消息。 我们通过检查wParam参数来识别我们的热键,然后调用CenterWindow()函数。
case WM_DESTROY:UnregisterHotKey(hwnd, ID_HOTKEY);PostQuitMessage(0);break;
当窗口被破坏时,我们使用UnregisterHotKey()函数取消注册热键。 MSDN 尚不清楚是否必须调用此函数。
更多窗口
从特定的窗口类创建一个窗口。 窗口类定义了几个窗口共有的一组行为。 一些类已经在系统中预定义。 自定义窗口类必须注册。 之后,我们可以创建此新窗口类的窗口。 使用CreateWindowW()函数创建一个窗口。 它的第一个参数是窗口类名称。
每个窗口都有一个窗口过程。 当用户与窗口交互时,此函数由 OS 调用。 在下面的示例中,我们创建三个窗口:一个父窗口和两个子窗口。
morewindows.c
#include <windows.h>LRESULT CALLBACK WndProc(HWND, UINT, WPARAM, LPARAM);LRESULT CALLBACK PanelProc(HWND, UINT, WPARAM, LPARAM);void RegisterRedPanelClass(void);void RegisterBluePanelClass(void);int WINAPI wWinMain(HINSTANCE hInstance, HINSTANCE hPrevInstance,PWSTR lpCmdLine, int nCmdShow) {MSG msg;WNDCLASSW wc = {0};wc.lpszClassName = L"Windows";wc.hInstance = hInstance;wc.hbrBackground = GetSysColorBrush(COLOR_3DFACE);wc.lpfnWndProc = WndProc;wc.hCursor = LoadCursor(0, IDC_ARROW);RegisterClassW(&wc);CreateWindowW(wc.lpszClassName, L"Windows",WS_OVERLAPPEDWINDOW | WS_VISIBLE,100, 100, 250, 180, 0, 0, hInstance, 0);while (GetMessage(&msg, NULL, 0, 0)) {TranslateMessage(&msg);DispatchMessage(&msg);}return (int) msg.wParam;}LRESULT CALLBACK WndProc(HWND hwnd, UINT msg,WPARAM wParam, LPARAM lParam) {switch(msg) {case WM_CREATE:RegisterRedPanelClass();CreateWindowW(L"RedPanelClass", NULL,WS_CHILD | WS_VISIBLE,20, 20, 80, 80,hwnd, (HMENU) 1, NULL, NULL);RegisterBluePanelClass();CreateWindowW(L"BluePanelClass", NULL,WS_CHILD | WS_VISIBLE,120, 20, 80, 80,hwnd, (HMENU) 2, NULL, NULL);break;case WM_DESTROY:PostQuitMessage(0);return 0;}return DefWindowProcW(hwnd, msg, wParam, lParam);}LRESULT CALLBACK PanelProc(HWND hwnd, UINT msg,WPARAM wParam, LPARAM lParam) {switch(msg) {case WM_LBUTTONUP:MessageBeep(MB_OK);break;}return DefWindowProcW(hwnd, msg, wParam, lParam);}void RegisterRedPanelClass(void) {HBRUSH hbrush = CreateSolidBrush(RGB(255, 0, 0));WNDCLASSW rwc = {0};rwc.lpszClassName = L"RedPanelClass";rwc.hbrBackground = hbrush;rwc.lpfnWndProc = PanelProc;rwc.hCursor = LoadCursor(0, IDC_ARROW);RegisterClassW(&rwc);}void RegisterBluePanelClass(void) {HBRUSH hbrush = CreateSolidBrush(RGB(0, 0, 255));WNDCLASSW rwc = {0};rwc.lpszClassName = L"BluePanelClass";rwc.hbrBackground = hbrush;rwc.lpfnWndProc = PanelProc;rwc.hCursor = LoadCursor(0, IDC_ARROW);RegisterClassW(&rwc);}
我们有一个带有两个子窗口的应用窗口。 两个子窗口具有蓝色和红色背景。
HBRUSH hbrush = CreateSolidBrush(RGB(255, 0, 0));...rwc.hbrBackground = hbrush;
要创建彩色窗口背景,我们通过调用CreateSolidBrush()函数来创建自定义的实心画笔。 要指定颜色,我们使用RGB宏。 众所周知,可以通过组合红色,绿色和蓝色来创建任何颜色。 然后,将窗口类结构的hbrBackground参数设置为此新创建的画笔。
RegisterRedPanelClass();CreateWindowW(L"RedPanelClass", NULL,WS_CHILD | WS_VISIBLE,20, 20, 80, 80,hwnd, (HMENU) 1, NULL, NULL);
首先,我们注册一个新的窗口类。 完成此步骤后,我们将创建此类的窗口。
我们的两个子窗口都共享PanelProc窗口过程。 当我们与 Windows OS 进行交互时,将调用此过程。
case WM_LBUTTONUP:MessageBeep(MB_OK);break;
单击子窗口时,我们将与它们交互。 通过在子窗口上单击鼠标左键,Windows 操作系统将调用子窗口过程并发送WM_LBUTTONUP消息。 在我们的示例中,我们调用MessageBeep()函数。 如果我们在两个子窗口的背景上单击鼠标左键,则会听到 Windows 默认的蜂鸣声。
void RegisterBluePanelClass(void) {HBRUSH hbrush = CreateSolidBrush(RGB(0, 0, 255));WNDCLASSW rwc = {0};rwc.lpszClassName = L"BluePanelClass";rwc.hbrBackground = hbrush;rwc.lpfnWndProc = PanelProc;rwc.hCursor = LoadCursor(0, IDC_ARROW);RegisterClassW(&rwc);}
该函数注册一个新的窗口类。 此窗口类类型的窗口具有红色背景。 编辑,按钮和静态控件是从预定义的窗口类创建的,这些窗口类已可用于所有进程。 因此,在这些情况下,我们不需要为其注册窗口类。
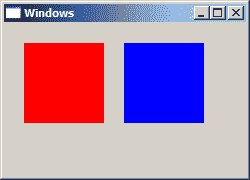
图:更多窗口
退出键
通常,通过按 Escape 键可以终止应用。 还显示一个消息框以确认终止。
escapekey.c
#include <windows.h>LRESULT CALLBACK WndProc(HWND, UINT, WPARAM, LPARAM);int WINAPI wWinMain(HINSTANCE hInstance, HINSTANCE hPrevInstance,PWSTR pCmdLine, int CmdShow) {MSG msg;WNDCLASSW wc = {0};wc.lpszClassName = L"Escape";wc.hInstance = hInstance;wc.hbrBackground = GetSysColorBrush(COLOR_3DFACE);wc.lpfnWndProc = WndProc;wc.hCursor = LoadCursor(0, IDC_ARROW);RegisterClassW(&wc);CreateWindowW(wc.lpszClassName, L"Escape",WS_OVERLAPPEDWINDOW | WS_VISIBLE,100, 100, 250, 180, 0, 0, hInstance, 0);while (GetMessage(&msg, NULL, 0, 0)) {TranslateMessage(&msg);DispatchMessage(&msg);}return (int) msg.wParam;}LRESULT CALLBACK WndProc(HWND hwnd, UINT msg,WPARAM wParam, LPARAM lParam) {switch(msg) {case WM_KEYDOWN:if (wParam == VK_ESCAPE) {int ret = MessageBoxW(hwnd, L"Are you sure to quit?",L"Message", MB_OKCANCEL);if (ret == IDOK) {SendMessage(hwnd, WM_CLOSE, 0, 0);}}break;case WM_DESTROY:PostQuitMessage(0);break;}return DefWindowProcW(hwnd, msg, wParam, lParam);}
询问用户是否确实要关闭应用是一种常见的做法。 如果我们有时钟或计算器,那就没关系了。 但是,如果我们有文本编辑器或绘图应用,那确实很重要。 我们可能不小心按了 Escape 键并失去了所有修改。
case WM_KEYDOWN:if (wParam == VK_ESCAPE) {int ret = MessageBoxW(hwnd, L"Are you sure to quit?",L"Message", MB_OKCANCEL);if (ret == IDOK) {SendMessage(hwnd, WM_CLOSE, 0, 0);}}break;
如果我们按一个键,则窗口过程会收到WM_KEYDOWN消息。 wParam参数具有键码。 我们可以通过发送WM_CLOSE消息来关闭窗口。 该消息通过SendMessage()函数发送。
移动窗口
当我们在屏幕上移动窗口时,窗口过程会收到WM_MOVE消息。 在我们的示例中,我们在屏幕上显示当前窗口的位置-我们显示窗口左上角的坐标。
moving.c
#include <windows.h>#include <wchar.h>LRESULT CALLBACK WndProc(HWND, UINT, WPARAM, LPARAM);void CreateLabels(HWND);HWND hwndSta1;HWND hwndSta2;int WINAPI wWinMain(HINSTANCE hInstance, HINSTANCE hPrevInstance,PWSTR pCmdLine, int CmdShow) {HWND hwnd;MSG msg;WNDCLASSW wc = {0};wc.lpszClassName = L"Moving";wc.hInstance = hInstance ;wc.hbrBackground = GetSysColorBrush(COLOR_3DFACE);wc.lpfnWndProc = WndProc;wc.hCursor = LoadCursor(0, IDC_ARROW);RegisterClassW(&wc);hwnd = CreateWindowW(wc.lpszClassName, L"Moving",WS_OVERLAPPEDWINDOW | WS_VISIBLE,150, 150, 250, 180, 0, 0, hInstance, 0);while(GetMessage(&msg, NULL, 0, 0)) {TranslateMessage(&msg);DispatchMessage(&msg);}return (int) msg.wParam;}LRESULT CALLBACK WndProc(HWND hwnd, UINT msg,WPARAM wParam, LPARAM lParam) {wchar_t buf[10];RECT rect;switch(msg) {case WM_CREATE:CreateLabels(hwnd);break;case WM_MOVE:GetWindowRect(hwnd, &rect);StringCbPrintfW(buf, BUF_LEN, L"%ld", rect.left);SetWindowTextW(hwndSta1, buf);StringCbPrintfW(buf, BUF_LEN, L"%ld", rect.top);SetWindowTextW(hwndSta2, buf);break;case WM_DESTROY:PostQuitMessage(0);break;}return DefWindowProcW(hwnd, msg, wParam, lParam);}void CreateLabels(HWND hwnd) {CreateWindowW(L"static", L"x: ",WS_CHILD | WS_VISIBLE,10, 10, 25, 25,hwnd, (HMENU) 1, NULL, NULL);hwndSta1 = CreateWindowW(L"static", L"150",WS_CHILD | WS_VISIBLE,40, 10, 55, 25,hwnd, (HMENU) 2, NULL, NULL);CreateWindowW(L"static", L"y: ",WS_CHILD | WS_VISIBLE,10, 30, 25, 25,hwnd, (HMENU) 3, NULL, NULL);hwndSta2 = CreateWindowW(L"static", L"150",WS_CHILD | WS_VISIBLE,40, 30, 55, 25,hwnd, (HMENU) 4, NULL, NULL);}
静态文本控件的创建委托给CreateLabels()函数。
void CreateLabels(HWND hwnd) {CreateWindowW(L"static", L"x: ",WS_CHILD | WS_VISIBLE,10, 10, 25, 25,hwnd, (HMENU) 1, NULL, NULL);hwndSta1 = CreateWindowW(L"static", L"150",WS_CHILD | WS_VISIBLE,40, 10, 55, 25,hwnd, (HMENU) 2, NULL, NULL);CreateWindowW(L"static", L"y: ",WS_CHILD | WS_VISIBLE,10, 30, 25, 25,hwnd, (HMENU) 3, NULL, NULL);hwndSta2 = CreateWindowW(L"static", L"150",WS_CHILD | WS_VISIBLE,40, 30, 55, 25,hwnd, (HMENU) 4, NULL, NULL);}
有四个静态文本控件。 在应用的生命周期中,其中两个会更改。 因此,我们只需要两个句柄。
case WM_MOVE:GetWindowRect(hwnd, &rect);StringCbPrintfW(buf, BUF_LEN, L"%ld", rect.left);SetWindowTextW(hwndSta1, buf);StringCbPrintfW(buf, BUF_LEN, L"%ld", rect.top);SetWindowTextW(hwndSta2, buf);break;
要获取窗口坐标,我们调用GetWindowRect()函数。 由于坐标是数字,因此必须将其转换为字符串。 为此,我们使用StringCbPrintfW()函数。
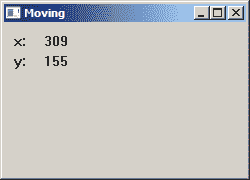
图:移动窗口
闪烁窗口
有时,当发生重要事件时,标题栏或任务栏按钮开始闪烁。 闪烁是标题栏从非活动状态更改为活动状态,反之亦然。 当我们收到新消息时,这是 Miranda IM 中的常见功能。
flashing.c
#include <windows.h>LRESULT CALLBACK WndProc(HWND, UINT, WPARAM, LPARAM);int WINAPI wWinMain(HINSTANCE hInstance, HINSTANCE hPrevInstance,PWSTR lpCmdLine, int nCmdShow) {MSG msg;WNDCLASSW wc = {0};wc.lpszClassName = L"Flash";wc.hInstance = hInstance;wc.hbrBackground = GetSysColorBrush(COLOR_3DFACE);wc.lpfnWndProc = WndProc;wc.hCursor = LoadCursor(0,IDC_ARROW);RegisterClassW(&wc);CreateWindowW(wc.lpszClassName, L"Flash",WS_OVERLAPPEDWINDOW | WS_VISIBLE,100, 100, 250, 180, 0, 0, hInstance, 0);while(GetMessage(&msg, NULL, 0, 0)) {TranslateMessage(&msg);DispatchMessage(&msg);}return (int) msg.wParam;}LRESULT CALLBACK WndProc(HWND hwnd, UINT msg,WPARAM wParam, LPARAM lParam) {FLASHWINFO fwi;switch(msg) {case WM_CREATE:CreateWindowW(L"Button", L"Flash",WS_CHILD | WS_VISIBLE,10, 10, 80, 25,hwnd, (HMENU) 1, NULL, NULL);break;case WM_COMMAND:fwi.cbSize = sizeof(fwi);fwi.dwFlags = FLASHW_ALL;fwi.dwTimeout = 0;fwi.hwnd = hwnd;fwi.uCount = 4;FlashWindowEx(&fwi);break;case WM_DESTROY:PostQuitMessage(0);break;}return DefWindowProcW(hwnd, msg, wParam, lParam);}
为了刷新窗口,我们必须执行两个步骤:创建并填充FLASHWINFO结构并调用FlashWindowEx()函数。
fwi.dwFlags = FLASHW_ALL;
我们已经设置了FLASHW_ALL标志。 这将同时闪烁标题栏和任务栏按钮。 要仅闪烁标题栏,我们可以使用FLASHW_CAPTION标签。 要闪烁任务栏按钮,我们可以使用FLASHW_TRAY标志。
fwi.dwTimeout = 0;
dwTimeout成员是刷新窗口的速率,以毫秒为单位。 如果dwTimeout为零,则该功能使用默认的光标闪烁速率。
fwi.hwnd = hwnd;fwi.uCount = 4;
在这里,我们设置要闪烁的窗口以及要闪烁多少次。 在本例中,我们将主窗口闪烁四次。
FlashWindowEx(&fwi);
FlashWindowEx()开始闪烁。
在 Windows API 教程的这一部分中,我们创建了一些简单的 UI 示例。

若有收获,就点个赞吧
0 人点赞
