在 Java SWT 编程教程的这一部分中,我们介绍 Java SWT 库并创建我们的第一个程序。
本教程的目的是帮助您开始使用 Java SWT 工具包。 可以在此处下载本教程中使用的图像。 我使用了 Gnome 项目的探戈图标包中的一些图标。
关于
标准窗口小部件工具箱(SWT)是用于 Java 编程语言的图形窗口小部件工具箱。 它最初是由 IBM 开发的。 它是 Swing 和 JavaFX 的替代方法。 SWT 使用 Winapi 和 GTK+ 等本机 GUI API 通过 Java 本机接口(JNI)创建其小部件。
构建 SWT 应用
在 NetBeans 下,我们从官方网站下载了 SWT 包,并将swt.jar添加到项目库中。

图:将swt.jar添加到 NetBeans 项目
对于 Eclipse,我们右键单击项目,然后选择“构建路径”,“配置构建路径”。 我们单击“添加外部 JAR …”按钮,然后选择平台特定的 JAR 文件。
使窗口居中
在第一个示例中,我们创建一个简单的窗口。 窗口在屏幕上居中。
CenterWindowEx.java
package com.zetcode;import org.eclipse.swt.graphics.Point;import org.eclipse.swt.graphics.Rectangle;import org.eclipse.swt.widgets.Display;import org.eclipse.swt.widgets.Shell;/*** ZetCode Java SWT tutorial** In this program, we show a window in* the center of the screen** Author: Jan Bodnar* Website: zetcode.com* Last modified: May 2015*/public class CenterWindowEx {public CenterWindowEx(Display display) {Shell shell = new Shell(display);shell.setText("Center");shell.setSize(250, 200);centerWindow(shell);shell.open();while (!shell.isDisposed()) {if (!display.readAndDispatch()) {display.sleep();}}}private void centerWindow(Shell shell) {Rectangle bds = shell.getDisplay().getBounds();Point p = shell.getSize();int nLeft = (bds.width - p.x) / 2;int nTop = (bds.height - p.y) / 2;shell.setBounds(nLeft, nTop, p.x, p.y);}@SuppressWarnings("unused")public static void main(String[] args) {Display display = new Display();CenterWindowEx ex = new CenterWindowEx(display);display.dispose();}}
本示例在屏幕中央显示一个250x200像素的窗口。 在每个 SWT 应用中,都有两个重要的类:Display和Shell。 Display是 SWT 与基础 OS 之间的连接。 它实现了事件循环并提供了有关操作系统的信息。 Shell代表一个窗口。 有顶级的外壳; 这些将Display作为父项。 其他外壳称为辅助外壳。
Shell shell = new Shell(display);
创建一个顶层窗口。
shell.setText("Center");
我们使用setText()方法为窗口设置标题。
shell.setSize(250, 200);
在这里,我们为外壳设置大小。
shell.open();
窗口显示在屏幕上。
while (!shell.isDisposed()) {if (!display.readAndDispatch()) {display.sleep();}}
这些行启动事件主循环。
Rectangle bds = shell.getDisplay().getBounds();
我们得到屏幕的分辨率。 如果使用多个显示器,则可能需要调用getMonitor()方法而不是getDisplay()。
int nLeft = (bds.width - p.x) / 2;int nTop = (bds.height - p.y) / 2;
我们计算窗口的左坐标和顶坐标。
shell.setBounds(nLeft, nTop, p.x, p.y);
我们使用setBounds()方法设置壳的边界。
Display display = new Display();
创建了Display。
CenterWindowEx ex = new CenterWindowEx(display);
我们实例化示例程序。
display.dispose();
应用终止后,我们释放操作系统资源。
创建工具提示
第二个示例显示了一个工具提示。 工具提示是一个小的矩形窗口,它提供有关对象的简短信息。 它通常是一个 GUI 组件。 它是应用帮助系统的一部分。
TooltipEx.java
package com.zetcode;import org.eclipse.swt.SWT;import org.eclipse.swt.widgets.Display;import org.eclipse.swt.widgets.Shell;/*** ZetCode Java SWT tutorial** In this program, we show a tooltip.** Author: Jan Bodnar* Website: zetcode.com* Last modified: May 2015*/public class TooltipEx {public TooltipEx(Display display) {initUI(display);}private void initUI(Display display) {Shell shell = new Shell(display, SWT.SHELL_TRIM | SWT.CENTER);shell.setText("Tooltip");shell.setToolTipText("This is a window");shell.setSize(250, 200);shell.open();while (!shell.isDisposed()) {if (!display.readAndDispatch()) {display.sleep();}}}@SuppressWarnings("unused")public static void main(String[] args) {Display display = new Display();TooltipEx ex = new TooltipEx(display);display.dispose();}}
该示例创建一个窗口。 如果将鼠标指针悬停在窗口区域上方,则会弹出一个工具提示。
Shell shell = new Shell(display, SWT.SHELL_TRIM | SWT.CENTER);
style参数指定外壳的行为。 传递SWT.CENTER选项可使外壳位于窗口的中心。 SWT.SHELL_TRIM在窗口上装饰。 它启用标题和标题栏按钮,并使窗口可调整大小。 这是外壳的默认样式。
shell.setToolTipText("This is a window");
此行为窗口创建工具提示。
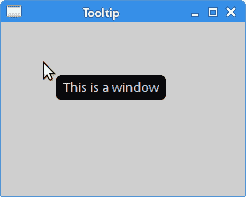
图:工具提示
退出按钮
在本节的最后一个示例中,我们将创建一个退出按钮。 当我们按下此按钮时,应用终止。
QuitButtonEx.java
package com.zetcode;import org.eclipse.swt.SWT;import org.eclipse.swt.events.SelectionAdapter;import org.eclipse.swt.events.SelectionEvent;import org.eclipse.swt.layout.RowData;import org.eclipse.swt.layout.RowLayout;import org.eclipse.swt.widgets.Button;import org.eclipse.swt.widgets.Display;import org.eclipse.swt.widgets.Shell;/*** ZetCode Java SWT tutorial** This example shows a button on a window.* Clicking on the button, we terminate* the application.** Author: Jan Bodnar* Website: zetcode.com* Last modified: May 2015*/public class QuitButtonEx {public QuitButtonEx(Display display) {initUI(display);}private void initUI(Display display) {Shell shell = new Shell(display, SWT.SHELL_TRIM | SWT.CENTER);RowLayout layout = new RowLayout();layout.marginLeft = 50;layout.marginTop = 50;shell.setLayout(layout);Button quitBtn = new Button(shell, SWT.PUSH);quitBtn.setText("Quit");quitBtn.setLayoutData(new RowData(80, 30));quitBtn.addSelectionListener(new SelectionAdapter() {@Overridepublic void widgetSelected(SelectionEvent e) {shell.getDisplay().dispose();System.exit(0);}});shell.setText("Quit button");shell.setSize(250, 200);shell.open();while (!shell.isDisposed()) {if (!display.readAndDispatch()) {display.sleep();}}}@SuppressWarnings("unused")public static void main(String[] args) {Display display = new Display();QuitButtonEx ex = new QuitButtonEx(display);display.dispose();}}
该示例中有一个Button小部件; 单击该按钮可终止该应用。
RowLayout layout = new RowLayout();layout.marginLeft = 50;layout.marginTop = 50;shell.setLayout(layout);
RowLayout用于将按钮定位在窗口上。 该布局类将小部件放入简单的行或列中。
Button quitBtn = new Button(shell, SWT.PUSH);
Button小部件已创建。 它的父级是外壳。 SWT.PUSH指定按钮的类型。
quitBtn.setText("Quit");
我们使用setText()方法为按钮设置标签。
quitBtn.setLayoutData(new RowData(80, 30));
setLayoutData()方法指定退出按钮的布局数据。 在这种情况下,这些是按钮的大小。
quitBtn.addSelectionListener(new SelectionAdapter() {@Overridepublic void widgetSelected(SelectionEvent e) {shell.getDisplay().dispose();System.exit(0);}});
我们为按钮添加一个选择监听器。 当我们单击按钮时,将调用widgetSelected()方法。 在此方法内部,我们释放 OS 资源并退出应用。
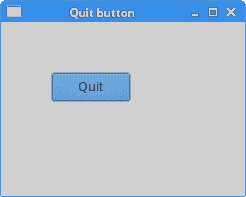
图:退出按钮
助记符
助记符是用于激活支持助记符的窗口小部件的快捷键。 例如,它们可以与标签,按钮或菜单项一起使用。
助记符是通过在小部件的标签上添加&字符来创建的。 它使下一个字符成为助记符。 字符与无鼠标修饰符(通常为 Alt )结合在一起。 选择的字符带有下划线,但是可以以平台特定的方式强调。 在某些平台上,仅在按下无鼠标修饰符后才对字符加下划线。
MnemonicEx.java
package com.zetcode;import org.eclipse.swt.SWT;import org.eclipse.swt.layout.RowData;import org.eclipse.swt.layout.RowLayout;import org.eclipse.swt.widgets.Button;import org.eclipse.swt.widgets.Display;import org.eclipse.swt.widgets.Shell;/*** ZetCode SWT tutorial** This program creates a mnemonic for* a button widget.** Author: Jan Bodnar* Website: zetcode.com* Last modified: June 2015*/public class MnemonicEx {public MnemonicEx(Display display) {initUI(display);}private void initUI(Display display) {Shell shell = new Shell(display, SWT.SHELL_TRIM | SWT.CENTER);RowLayout layout = new RowLayout();layout.marginLeft = 30;layout.marginTop = 30;layout.marginBottom = 150;layout.marginRight = 150;shell.setLayout(layout);Button btn = new Button(shell, SWT.PUSH);btn.setText("&Button");btn.setLayoutData(new RowData(80, 30));btn.addListener(SWT.Selection, event -> System.out.println("Button clicked"));shell.setText("Mnemonic");shell.pack();shell.open();while (!shell.isDisposed()) {if (!display.readAndDispatch())display.sleep();}}@SuppressWarnings("unused")public static void main(String[] args) {Display display = new Display();MnemonicEx ex = new MnemonicEx(display);display.dispose();}}
我们为按钮小部件设置了助记符。 可以使用 Alt + B 键盘快捷键激活。
Button btn = new Button(shell, SWT.PUSH);btn.setText("&Button");
通过在按钮的标签上添加&字符来创建助记符。 Alt + B 快捷键现在激活该按钮。
btn.addListener(SWT.Selection, event -> System.out.println("Button clicked"));
激活后,该按钮会将消息打印到控制台。 lambda 表达式用于向按钮添加监听器。
目前,有三种激活按钮的方式:单击鼠标左键, Alt + B 快捷方式以及空格键 按钮具有焦点)。
本章是 Java SWT 库的简介。

若有收获,就点个赞吧
0 人点赞
