在 QtJambi 编程教程的这一部分中,我们将介绍 QtJambi 小部件。
小部件是 GUI 应用的基本构建块。 多年来,几个小部件已成为所有 OS 平台上所有工具包中的标准。 例如,按钮,复选框或滚动条。 QtJambi 有一组丰富的小部件,可以满足大多数编程需求。 可以将更多专门的窗口小部件创建为自定义窗口小部件。
QCheckBox
QCheckBox是具有两种状态的窗口小部件:开和关。 接通状态通过复选标记显示。 它用来表示一些布尔属性。 QCheckBox小部件提供一个带有文本标签的复选框。
package com.zetcode;import com.trolltech.qt.core.Qt.FocusPolicy;import com.trolltech.qt.gui.QApplication;import com.trolltech.qt.gui.QCheckBox;import com.trolltech.qt.gui.QWidget;/*** ZetCode QtJambi tutorial** This program uses QCheckBox* widget to show/hide the title* of the window** @author jan bodnar* website zetcode.com* last modified March 2009*/public class JambiApp extends QWidget {public JambiApp() {setWindowTitle("QCheckBox");initUI();resize(250, 150);move(300, 300);show();}public void initUI() {QCheckBox cb = new QCheckBox("Show Title", this);cb.setFocusPolicy(FocusPolicy.NoFocus);cb.setChecked(true);cb.toggled.connect(this, "onChanged(boolean)");cb.move(50, 50);}public void onChanged(boolean state) {if (state) {setWindowTitle("QCheckBox");} else {setWindowTitle("");}}public static void main(String[] args) {QApplication.initialize(args);new JambiApp();QApplication.exec();}}
在我们的示例中,我们在窗口上放置了一个复选框。 复选框显示/隐藏窗口的标题。
setWindowTitle("QCheckBox");
在构建窗口期间,我们为窗口设置标题。
QCheckBox cb = new QCheckBox("Show Title", this);
QCheckBox小部件已创建。 构造器的第一个参数是其文本标签。 第二个参数是父窗口小部件。
cb.setFocusPolicy(FocusPolicy.NoFocus);
我不喜欢聚焦复选框的视觉表示。 此行禁用焦点。
cb.setChecked(true);
标题在应用的开始处可见。 因此,也必须选中该复选框。
cb.toggled.connect(this, "onChanged(boolean)");
复选框的状态更改时,会发出toggled()信号。 发出信号时,我们触发onChanged()方法。
if (state) {setWindowTitle("QCheckBox");} else {setWindowTitle("");}
根据复选框的状态,我们显示或隐藏窗口的标题。
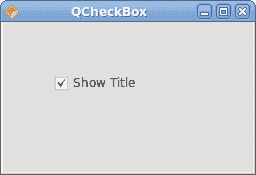
图:QCheckBox
QLabel
QLabel小部件用于显示文本或图像。 没有用户交互。
package com.zetcode;import com.trolltech.qt.gui.QApplication;import com.trolltech.qt.gui.QFont;import com.trolltech.qt.gui.QLabel;import com.trolltech.qt.gui.QVBoxLayout;import com.trolltech.qt.gui.QWidget;/*** ZetCode QtJambi tutorial** This program uses QLabel to* show lyrics of a song** @author jan bodnar* website zetcode.com* last modified March 2009*/public class JambiApp extends QWidget {public JambiApp() {setWindowTitle("You know I'm no Good");initUI();move(300, 300);show();}private void initUI() {String text ="Meet you downstairs in the bar and heard\n" +"your rolled up sleeves and your skull t-shirt\n" +"You say why did you do it with him today?\n" +"and sniff me out like I was Tanqueray\n\n" +"cause you're my fella, my guy\n" +"hand me your stella and fly\n" +"by the time I'm out the door\n" +"you tear men down like Roger Moore\n\n" +"I cheated myself\n" +"like I knew I would\n" +"I told ya, I was trouble\n" +"you know that I'm no good";QLabel label = new QLabel(text, this);label.setFont(new QFont("Purisa", 9));QVBoxLayout vbox = new QVBoxLayout();vbox.addWidget(label);setLayout(vbox);}public static void main(String[] args) {QApplication.initialize(args);new JambiApp();QApplication.exec();}}
我们的示例在窗口中显示了歌曲的歌词。
String text ="Meet you downstairs in the bar and heard\n" +...
我们定义了多行文字。
QLabel label = new QLabel(text, this);label.setFont(new QFont("Purisa", 9));
我们创建标签小部件并更改其字体。
QVBoxLayout vbox = new QVBoxLayout();vbox.addWidget(label);setLayout(vbox);
代替手动编码标签的位置和大小,我们将标签放入盒子布局中。

图:QLabel
QLineEdit
QLineEdit是一个小部件,允许输入和编辑单行纯文本。 QLineEdit小部件具有撤消/重做,剪切/粘贴和拖放功能。
package com.zetcode;import com.trolltech.qt.gui.QApplication;import com.trolltech.qt.gui.QLabel;import com.trolltech.qt.gui.QLineEdit;import com.trolltech.qt.gui.QWidget;/*** ZetCode QtJambi tutorial** This program shows text* which is entered in a QLineEdit* widget in a QLabel widget** @author jan bodnar* website zetcode.com* last modified March 2009*/public class JambiApp extends QWidget {QLabel label;public JambiApp() {setWindowTitle("QLineEdit");initUI();resize(250, 200);move(300, 300);show();}private void initUI() {label = new QLabel(this);QLineEdit edit = new QLineEdit(this);edit.textChanged.connect(this, "onChanged(String)");edit.move(60, 100);label.move(60, 40);}private void onChanged(String text) {label.setText(text);label.adjustSize();}public static void main(String[] args) {QApplication.initialize(args);new JambiApp();QApplication.exec();}}
在我们的示例中,我们显示了两个小部件。 行编辑和标签小部件。 输入到行编辑中的文本显示在标签窗口小部件中。
QLineEdit edit = new QLineEdit(this);
QLineEdit小部件已创建。
edit.textChanged.connect(this, "onChanged(String)");
当我们在行编辑中键入或删除某些文本时,将触发onChanged()方法。
private void onChanged(String text) {label.setText(text);label.adjustSize();}
在onChanged()方法中,我们将行编辑的内容设置为标签窗口小部件。 adjustSize()方法确保所有文本都是可见的。
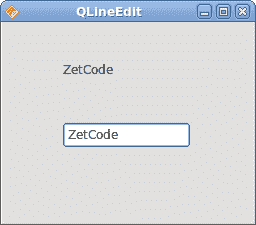
图:QLineEdit小部件
ToggleButton
切换按钮是设置了可检查标志的按钮。 切换按钮是具有两种状态的按钮。 已按下但未按下。 通过单击可以在这两种状态之间切换。 在某些情况下此功能非常合适。
package com.zetcode;import com.trolltech.qt.gui.QApplication;import com.trolltech.qt.gui.QColor;import com.trolltech.qt.gui.QPushButton;import com.trolltech.qt.gui.QWidget;import java.util.Formatter;/*** ZetCode QtJambi tutorial** This program uses toggle buttons to* change the background color of* a widget** @author jan bodnar* website zetcode.com* last modified March 2009*/public class JambiApp extends QWidget {private QWidget square;private QColor color;private QPushButton redb;private QPushButton greenb;private QPushButton blueb;public JambiApp() {setWindowTitle("Toggle Buttons");initUI();resize(350, 240);move(300, 300);show();}private void initUI() {color = new QColor();redb = new QPushButton("Red", this);redb.setCheckable(true);greenb = new QPushButton("Green", this);greenb.setCheckable(true);blueb = new QPushButton("Blue", this);blueb.setCheckable(true);redb.toggled.connect(this, "onToggled()");greenb.toggled.connect(this, "onToggled()");blueb.toggled.connect(this, "onToggled()");square = new QWidget(this);square.setStyleSheet("QWidget { background-color: black }");redb.move(30, 30);greenb.move(30, 80);blueb.move(30, 130);square.setGeometry(150, 25, 150, 150);}public void onToggled() {int red = color.red();int green = color.green();int blue = color.blue();if (redb.isChecked()) {red = 255;} else {red = 0;}if (greenb.isChecked()) {green = 255;} else {green = 0;}if (blueb.isChecked()) {blue = 255;} else {blue = 0;}color = new QColor(red, green, blue);Formatter fmt = new Formatter();fmt.format("QWidget { background-color: %s }", color.name());square.setStyleSheet(fmt.toString());}public static void main(String[] args) {QApplication.initialize(args);new JambiApp();QApplication.exec();}}
在代码示例中,我们使用三个切换按钮来更改矩形小部件的颜色。
private QWidget square;private QColor color;private QPushButton redb;private QPushButton greenb;private QPushButton blueb;
我们定义了五个对象。 正方形小部件是QWidget,它显示颜色。 color变量用于保存颜色值。 这三个按钮是切换按钮,用于混合颜色值。
redb = new QPushButton("Red", this);redb.setCheckable(true);
我们创建一个QPushButton小部件。 setCheckable()方法将按钮更改为切换按钮。
redb.toggled.connect(this, "onToggled()");greenb.toggled.connect(this, "onToggled()");blueb.toggled.connect(this, "onToggled()");
所有三个按钮都插入到一个方法调用中,即onToggled()方法。
square = new QWidget(this);square.setStyleSheet("QWidget { background-color: black }");
我们创建方形小部件。 一开始是黑色的。 在 QtJambi 中,我们使用样式表来自定义小部件的外观。
在onToggled()方法内部,我们确定颜色值并将正方形小部件更新为新颜色。
int red = color.red();int green = color.green();int blue = color.blue();
在这里,我们确定方形小部件的当前颜色。
if (redb.isChecked()) {red = 255;} else {red = 0;}
根据红色切换按钮的状态,更改颜色的红色部分。
color = new QColor(red, green, blue);
我们创建一个新的颜色值。
Formatter fmt = new Formatter();fmt.format("QWidget { background-color: %s }", color.name());
这两行创建样式表的文本。 我们使用 Java Formatter对象。
square.setStyleSheet(fmt.toString());
正方形的颜色已更新。
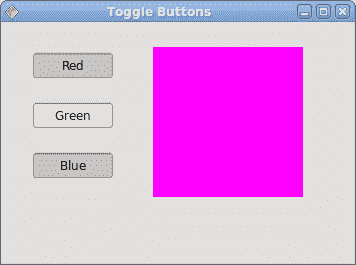
图:开关按钮
QComboBox
QComboBox是一个小部件,允许用户从选项列表中进行选择。 这是一个显示当前项目的选择小部件,可以弹出可选择项目的列表。 组合框可能是可编辑的。 它以占用最少屏幕空间的方式向用户显示选项列表。
package com.zetcode;import com.trolltech.qt.gui.QApplication;import com.trolltech.qt.gui.QComboBox;import com.trolltech.qt.gui.QLabel;import com.trolltech.qt.gui.QWidget;/*** ZetCode QtJambi tutorial** This program uses the QComboBox widget.* The option selected from the combo box is* displayed in the label widget.** @author jan bodnar* website zetcode.com* last modified March 2009*/public class JambiApp extends QWidget {QLabel label;public JambiApp() {setWindowTitle("QComboBox");initUI();resize(250, 200);move(300, 300);show();}private void initUI() {label = new QLabel("Ubuntu", this);QComboBox combo = new QComboBox(this);combo.addItem("Ubuntu");combo.addItem("Fedora");combo.addItem("Mandriva");combo.addItem("Red Hat");combo.addItem("Mint");combo.currentStringChanged.connect(this, "OnActivated(String)");combo.move(50, 30);label.move(50, 100);}private void OnActivated(String text) {label.setText(text);label.adjustSize();}public static void main(String[] args) {QApplication.initialize(args);new JambiApp();QApplication.exec();}}
在我们的代码示例中,我们有两个小部件。 组合框和标签小部件。 从组合框中选择的选项显示在标签中。
label = new QLabel("Ubuntu", this);
这是一个标签,它将显示组合框中当前选择的选项。
QComboBox combo = new QComboBox(this);
我们创建QComboBox小部件的实例。
combo.addItem("Ubuntu");combo.addItem("Fedora");combo.addItem("Mandriva");combo.addItem("Red Hat");combo.addItem("Mint");
组合框将填充值。
combo.currentStringChanged.connect(this, "OnActivated(String)");
当我们从组合框中选择一个选项时,将触发OnActivated()方法。
private void OnActivated(String text) {label.setText(text);label.adjustSize();}
在OnActivated()方法中,我们将标签小部件更新为从组合框中选择的当前字符串。
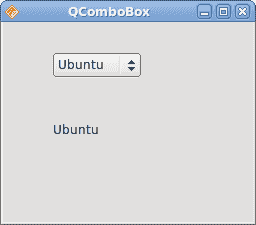
图:QComboBox小部件
在 QtJambi 教程的这一部分中,我们介绍了几个 QtJambi 小部件。

若有收获,就点个赞吧
0 人点赞
