在 Tkinter 教程的这一部分中,我们将介绍一些基本的 Tkinter 小部件。 我们使用以下小部件:Checkbutton,Label,Scale和Listbox。
小部件是 GUI 应用的基本构建块。 多年以来,几个小部件已成为所有 OS 平台上所有工具包中的标准。 例如按钮,复选框或滚动条。 其中一些名称可能不同。 例如,在 Tkinter 中,复选框称为复选框。 Tkinter 具有一小组可满足基本编程需求的小部件。 可以将更多专门的窗口小部件创建为自定义窗口小部件。
Tkinter Checkbutton
Checkbutton是具有两种状态的窗口小部件:打开和关闭。 接通状态通过复选标记显示。 (某些主题可能具有不同的视觉效果。)它用来表示某些布尔属性。 Checkbutton小部件提供一个带有文本标签的复选框。
check_button.py
#!/usr/bin/env python3"""ZetCode Tkinter tutorialThis program toggles the title of thewindow with the Checkbutton widget.Author: Jan BodnarLast modified: April 2019Website: www.zetcode.com"""from tkinter import Tk, Frame, Checkbuttonfrom tkinter import BooleanVar, BOTHclass Example(Frame):def __init__(self):super().__init__()self.initUI()def initUI(self):self.master.title("Checkbutton")self.pack(fill=BOTH, expand=True)self.var = BooleanVar()cb = Checkbutton(self, text="Show title",variable=self.var, command=self.onClick)cb.select()cb.place(x=50, y=50)def onClick(self):if self.var.get() == True:self.master.title("Checkbutton")else:self.master.title("")def main():root = Tk()root.geometry("250x150+300+300")app = Example()root.mainloop()if __name__ == '__main__':main()
在我们的示例中,我们在窗口上放置了一个检查按钮。 复选按钮显示或隐藏窗口的标题。
self.var = BooleanVar()
我们创建一个BooleanVar对象。 它是 Tkinter 中小部件的布尔值的值持有者。
cb = Checkbutton(self, text="Show title",variable=self.var, command=self.onClick)
创建Checkbutton的实例。 值持有者通过variable参数连接到窗口小部件。 当我们单击检查按钮时,将调用onClick()方法。 这是通过command参数完成的。
cb.select()
最初,标题显示在标题栏中。 因此,一开始,我们使用select()方法对其进行了检查。
if self.var.get() == True:self.master.title("Checkbutton")else:self.master.title("")
在onClick()方法内部,我们根据self.var变量中的值显示或隐藏标题。
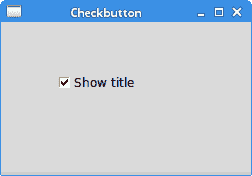
图:Checkbutton
Tkinter 标签
Label小部件用于显示文本或图像。 没有用户交互。
label.py
#!/usr/bin/env python3"""ZetCode Tkinter tutorialIn this script, we use the Labelwidget to show an image.Author: Jan BodnarLast modified: April 2019Website: www.zetcode.com"""from PIL import Image, ImageTkfrom tkinter import Tkfrom tkinter.ttk import Frame, Labelimport sysclass Example(Frame):def __init__(self):super().__init__()self.loadImage()self.initUI()def loadImage(self):try:self.img = Image.open("tatras.jpg")except IOError:print("Unable to load image")sys.exit(1)def initUI(self):self.master.title("Label")tatras = ImageTk.PhotoImage(self.img)label = Label(self, image=tatras)# reference must be storedlabel.image = tatraslabel.pack()self.pack()def setGeometry(self):w, h = self.img.sizeself.master.geometry(("%dx%d+300+300") % (w, h))def main():root = Tk()ex = Example()ex.setGeometry()root.mainloop()if __name__ == '__main__':main()
我们的示例在窗口上显示图像。
from PIL import Image, ImageTk
默认情况下,Label小部件只能显示一组有限的图像类型。 要显示 JPG 图像,我们必须使用 PIL,Python Imaging Library 模块。 通过 Pillow 教程了解有关 PIL 的更多信息。
self.img = Image.open("tatras.jpg")
我们从当前工作目录中的图像文件创建一个Image。
tatras = ImageTk.PhotoImage(self.img)
我们根据图像创建照片图像。
label = Label(self, image=tatras)
将照片图像提供给标签窗口小部件的image参数。
label.image = tatras
为了不被垃圾收集,必须存储图像引用。
w, h = self.img.sizeself.master.geometry(("%dx%d+300+300") % (w, h))
我们使窗口的大小完全适合图像的大小。
Tkinter 刻度
Scale是一个小部件,可让用户通过在有限间隔内滑动旋钮以图形方式选择一个值。 我们的示例将在标签小部件中显示一个选定的数字。
scale.py
#!/usr/bin/env python3"""ZetCode Tkinter tutorialIn this script, we show how touse the Scale widget.Author: Jan BodnarLast modified: April 2019Website: www.zetcode.com"""from tkinter import Tk, BOTH, IntVar, LEFTfrom tkinter.ttk import Frame, Label, Scale, Styleclass Example(Frame):def __init__(self):super().__init__()self.initUI()def initUI(self):self.master.title("Scale")self.style = Style()self.style.theme_use("default")self.pack(fill=BOTH, expand=1)scale = Scale(self, from_=0, to=100,command=self.onScale)scale.pack(side=LEFT, padx=15)self.var = IntVar()self.label = Label(self, text=0, textvariable=self.var)self.label.pack(side=LEFT)def onScale(self, val):v = int(float(val))self.var.set(v)def main():root = Tk()ex = Example()root.geometry("250x100+300+300")root.mainloop()if __name__ == '__main__':main()
上面的脚本中有两个小部件:标尺和标签。 标签控件中显示了比例控件的值。
scale = Scale(self, from_=0, to=100,command=self.onScale)
Scale小部件已创建。 我们提供上下限。 from是常规的 Python 关键字,这就是为什么第一个参数后会有下划线的原因。 当我们移动秤的旋钮时,将调用onScale()方法。
self.var = IntVar()self.label = Label(self, text=0, textvariable=self.var)
创建一个整数值持有者和标签小部件。 持有者的值显示在标签小部件中。
def onScale(self, val):v = int(float(val))self.var.set(v)
onScale()方法从缩放窗口小部件接收当前选择的值作为参数。 该值首先转换为浮点数,然后转换为整数。 最后,将值设置为标签窗口小部件的值持有者。
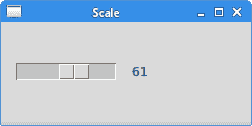
图:Scale
Tkinter 列表框
Listbox是显示对象列表的窗口小部件。 它允许用户选择一项或多项。
listbox.py
#!/usr/bin/env python3"""ZetCode Tkinter tutorialIn this script, we show how touse the Listbox widget.Author: Jan BodnarLast modified: April 2019Website: www.zetcode.com"""from tkinter import Tk, BOTH, Listbox, StringVar, ENDfrom tkinter.ttk import Frame, Labelclass Example(Frame):def __init__(self):super().__init__()self.initUI()def initUI(self):self.master.title("Listbox")self.pack(fill=BOTH, expand=1)acts = ['Scarlett Johansson', 'Rachel Weiss','Natalie Portman', 'Jessica Alba']lb = Listbox(self)for i in acts:lb.insert(END, i)lb.bind("<<ListboxSelect>>", self.onSelect)lb.pack(pady=15)self.var = StringVar()self.label = Label(self, text=0, textvariable=self.var)self.label.pack()def onSelect(self, val):sender = val.widgetidx = sender.curselection()value = sender.get(idx)self.var.set(value)def main():root = Tk()ex = Example()root.geometry("300x250+300+300")root.mainloop()if __name__ == '__main__':main()
在我们的示例中,我们显示了Listbox中的女演员列表。 当前选择的女演员显示在标签小部件中。
acts = ['Scarlett Johansson', 'Rachel Weiss','Natalie Portman', 'Jessica Alba']
这是要在列表框中显示的女演员列表。
lb = Listbox(self)for i in acts:lb.insert(END, i)
我们创建Listbox的实例,并插入上述列表中的所有项目。
lb.bind("<<ListboxSelect>>", self.onSelect)
当我们在列表框中选择一个项目时,将生成<<ListboxSelect>>事件。 我们将onSelect()方法绑定到此事件。
self.var = StringVar()self.label = Label(self, text=0, textvariable=self.var)
将创建标签及其值持有者。 在此标签中,我们将显示当前选择的项目。
sender = val.widget
我们得到了事件的发送者。 这是我们的列表框小部件。
idx = sender.curselection()
我们使用curselection()方法找出所选项目的索引。
value = sender.get(idx)
使用get()方法检索实际值,该方法获取项目的索引。
self.var.set(value)
最后,标签被更新。
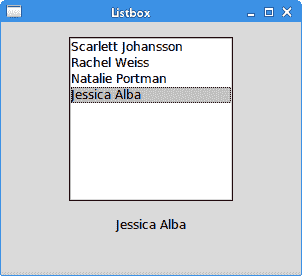
图:Listbox小部件
在 Tkinter 教程的这一部分中,我们介绍了几个 Tkinter 小部件。

若有收获,就点个赞吧
0 人点赞
