在 Java SWT 教程的这一部分中,我们进行了一些绘制。
在实现Drawable接口的对象上执行绘制。 这包括Control,Image,Display设备或Printer设备。
org.eclipse.swt.graphics.GC是一个图形上下文,其中封装了可以执行的绘制操作。 使用GC有两种常见方法; 通过使用Drawable实例作为构造器参数创建一个,或使用作为paintEvent回调的一部分提供的GC创建一个。
色彩
在第一个示例中,我们处理颜色。 颜色是代表红色,绿色和蓝色(RGB)强度值的组合的对象。 在 Java SWT 中,有效的 RGB 值在 0 到 255 之间。
ColoursEx.java
package com.zetcode;import org.eclipse.swt.SWT;import org.eclipse.swt.graphics.Color;import org.eclipse.swt.graphics.GC;import org.eclipse.swt.widgets.Display;import org.eclipse.swt.widgets.Event;import org.eclipse.swt.widgets.Shell;/*** ZetCode Java SWT tutorial** This program draws three rectangles.* The interiors are filled with* different colors.** Author: Jan Bodnar* Website: zetcode.com* Last modified: June 2015*/public class ColoursEx {private Shell shell;public ColoursEx(Display display) {initUI(display);}private void initUI(Display display) {shell = new Shell(display, SWT.SHELL_TRIM | SWT.CENTER);shell.addListener(SWT.Paint, event -> drawRectangles(event));shell.setText("Colours");shell.setSize(360, 120);shell.open();while (!shell.isDisposed()) {if (!display.readAndDispatch()) {display.sleep();}}}private void drawRectangles(Event e) {GC gc = e.gc;Color c1 = new Color(e.display, 50, 50, 200);gc.setBackground(c1);gc.fillRectangle(10, 15, 90, 60);Color c2 = new Color(e.display, 105, 90, 60);gc.setBackground(c2);gc.fillRectangle(130, 15, 90, 60);Color c3 = new Color(e.display, 33, 200, 100);gc.setBackground(c3);gc.fillRectangle(250, 15, 90, 60);c1.dispose();c2.dispose();c3.dispose();}@SuppressWarnings("unused")public static void main(String[] args) {Display display = new Display();ColoursEx ex = new ColoursEx(display);display.dispose();}}
在我们的示例中,我们绘制了三个矩形,并用三种不同的颜色填充它们。
shell.addListener(SWT.Paint, event -> drawRectangles(event));
我们为绘图事件添加了绘图监听器。
private void drawRectangles(Event e) {GC gc = e.gc;...}
生成绘图事件时将调用drawRectangles()方法。 我们获得了图形上下文的句柄,该上下文是我们在其上执行绘制操作的对象。
Color c1 = new Color(e.display, 50, 50, 200);
我们创建一个颜色对象。
gc.setBackground(c1);
setBackground()方法为绘图文本和形状的内部设置颜色。
gc.fillRectangle(10, 15, 90, 60);
fillRectangle()用背景色填充指定的矩形。
c1.dispose();c2.dispose();c3.dispose();
在绘图结束时,释放颜色资源。
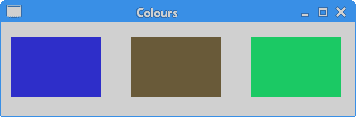
图:颜色
直线
drawLine()方法在可绘制对象上绘制一条线。 setLineStyle()方法指定线条的样式。 以下是内置的 SWT 线型:
SWT.LINE_DOTSWT.LINE_DASHSWT.LINE_DASHDOTSWT.LINE_DASHDOTDOTSWT.LINE_SOLID
也可以使用SWT.LINE_CUSTOM选项创建自定义线条样式。
LineStylesEx.java
package com.zetcode;import org.eclipse.swt.SWT;import org.eclipse.swt.graphics.GC;import org.eclipse.swt.widgets.Display;import org.eclipse.swt.widgets.Event;import org.eclipse.swt.widgets.Shell;/*** ZetCode Java SWT tutorial** This program draws text on the window.** Author: Jan Bodnar* Website: zetcode.com* Last modified: June 2015*/public class LineStylesEx {public LineStylesEx(Display display) {initUI(display);}private void initUI(Display display) {Shell shell = new Shell(display);shell.addListener(SWT.Paint, event -> drawLyrics(event));shell.setText("Line styles");shell.setSize(300, 330);shell.open();while (!shell.isDisposed()) {if (!display.readAndDispatch()) {display.sleep();}}}private void drawLyrics(Event e) {GC gc = e.gc;gc.setLineWidth(2);gc.setLineStyle(SWT.LINE_DASHDOT);gc.drawLine(20, 40, 250, 40);gc.setLineStyle(SWT.LINE_DASH);gc.drawLine(20, 80, 250, 80);gc.setLineStyle(SWT.LINE_DASHDOTDOT);gc.drawLine(20, 120, 250, 120);gc.setLineStyle(SWT.LINE_SOLID);gc.drawLine(20, 160, 250, 160);gc.setLineStyle(SWT.LINE_DOT);gc.drawLine(20, 200, 250, 200);gc.setLineStyle(SWT.LINE_CUSTOM);gc.setLineDash(new int[] {1, 4, 5, 4});gc.drawLine(20, 240, 250, 240);}@SuppressWarnings("unused")public static void main(String[] args) {Display display = new Display();LineStylesEx ex = new LineStylesEx(display);display.dispose();}}
该示例绘制了五条标准样式线和一种自定义样式。
gc.setLineWidth(2);
setLineWidth()设置绘制线时使用的宽度。
gc.setLineStyle(SWT.LINE_DASHDOT);
setLineStyle()将线条样式设置为SWT.LINE_DASHDOT。 该线由点划线组成。
gc.drawLine(20, 40, 250, 40);
drawLine()画一条线。 参数是起点和终点的 x 和 y 坐标。
gc.setLineStyle(SWT.LINE_CUSTOM);gc.setLineDash(new int[] {1, 4, 5, 4});gc.drawLine(20, 240, 250, 240);
这些线创建自定义线型样式。 整数数组指定行间距和笔划线的宽度。 在我们的示例中,图案为 1 像素笔划线,4 像素间隔,5 像素笔划线和 4 像素间隔。 对整个行重复此模式。
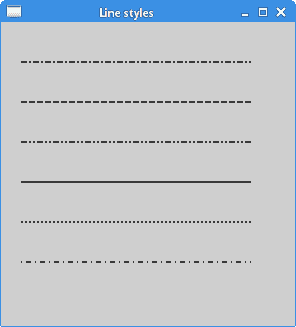
图:线型
基本形状
下一个示例将一些基本形状绘制到窗口上。
BasicShapesEx.java
package com.zetcode;import org.eclipse.swt.SWT;import org.eclipse.swt.graphics.Color;import org.eclipse.swt.graphics.GC;import org.eclipse.swt.widgets.Display;import org.eclipse.swt.widgets.Event;import org.eclipse.swt.widgets.Shell;/*** ZetCode Java SWT tutorial** In this program, we draw some* basic shapes.** Author: Jan Bodnar* Website: zetcode.com* Last modified: June 2015*/public class BasicShapesEx {private Shell shell;public BasicShapesEx(Display display) {initUI(display);}private void initUI(Display display) {shell = new Shell(display, SWT.SHELL_TRIM | SWT.CENTER);shell.addListener(SWT.Paint, event -> drawShapes(event));shell.setText("Basic shapes");shell.setSize(430, 300);shell.open();while (!shell.isDisposed()) {if (!display.readAndDispatch()) {display.sleep();}}}private void drawShapes(Event e) {GC gc = e.gc;gc.setAntialias(SWT.ON);Color col = new Color(e.display, 150, 150, 150);gc.setBackground(col);gc.fillRectangle(20, 20, 120, 80);gc.fillRectangle(180, 20, 80, 80);gc.fillOval(290, 20, 120, 70);gc.fillOval(20, 150, 80, 80);gc.fillRoundRectangle(150, 150, 100, 80, 25, 25);gc.fillArc(280, 150, 100, 100, 0, 115);col.dispose();}@SuppressWarnings("unused")public static void main(String[] args) {Display display = new Display();BasicShapesEx ex = new BasicShapesEx(display);display.dispose();}}
在此示例中,我们将创建一个矩形,一个正方形,一个椭圆形,一个圆形,一个圆角矩形和一个圆弧。
gc.fillRectangle(20, 20, 120, 80);gc.fillRectangle(180, 20, 80, 80);gc.fillOval(290, 20, 120, 70);
这些线绘制一个矩形,一个正方形和一个椭圆形。
gc.fillOval(20, 150, 80, 80);
在这里fillOval()方法画一个圆。
gc.fillRoundRectangle(150, 150, 100, 80, 25, 25);gc.fillArc(280, 150, 100, 100, 0, 115);
这两条线绘制了一个圆角的矩形和一个圆弧。
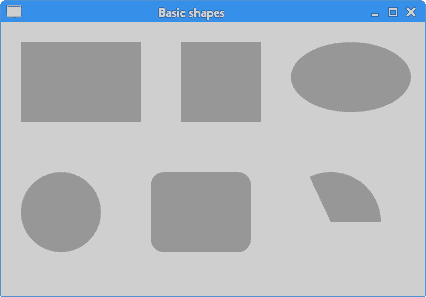
图:基本形状
多边形
多边形是具有直边的二维平面形状。
PolygonEx.java
package com.zetcode;import org.eclipse.swt.SWT;import org.eclipse.swt.graphics.Color;import org.eclipse.swt.graphics.GC;import org.eclipse.swt.widgets.Display;import org.eclipse.swt.widgets.Event;import org.eclipse.swt.widgets.Shell;/*** ZetCode Java SWT tutorial** This program draws a star.** Author: Jan Bodnar* Website: zetcode.com* Last modified: June 2015*/public class PolygonEx {private final int points[] = { 0, 85, 75, 75, 100, 10,125, 75, 200, 85, 150, 125, 160, 190, 100, 150,40, 190, 50, 125, 0, 85 };public PolygonEx(Display display) {initUI(display);}private void initUI(Display display) {Shell shell = new Shell(display);shell.addListener(SWT.Paint, event -> drawPolygon(event));shell.setText("Polygon");shell.setSize(280, 280);shell.open();while (!shell.isDisposed()) {if (!display.readAndDispatch()) {display.sleep();}}}private void drawPolygon(Event e) {GC gc = e.gc;Color grayCol = new Color(e.display, 120, 120, 120);gc.setBackground(grayCol);gc.fillPolygon(points);grayCol.dispose();}@SuppressWarnings("unused")public static void main(String[] args) {Display display = new Display();PolygonEx ex = new PolygonEx(display);display.dispose();}}
该示例绘制了一个起始对象。
private final int points[] = { 0, 85, 75, 75, 100, 10,125, 75, 200, 85, 150, 125, 160, 190, 100, 150,40, 190, 50, 125, 0, 85 };
这些是多边形的坐标。 该数组由成对的 x 和 y 坐标组成。
Color grayCol = new Color(e.display, 120, 120, 120);
多边形以某种灰色绘制。
gc.fillPolygon(points);
fillPolygon()填充封闭多边形的内部,该多边形由指定的整数坐标数组定义。
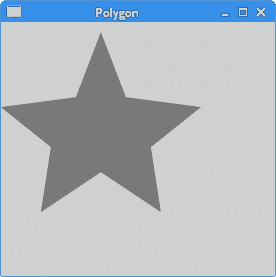
图:多边形
透明矩形
透明性是指能够透视材料的质量。 了解透明度的最简单方法是想象一块玻璃或水。 从技术上讲,光线可以穿过玻璃,这样我们就可以看到玻璃后面的物体。
在计算机图形学中,我们可以使用 alpha 合成来实现透明效果。 Alpha 合成是将图像与背景组合以创建部分透明外观的过程。 合成过程使用 Alpha 通道。 (wikipedia.org,answers.com)
TransparentRectanglesEx.java
package com.zetcode;import org.eclipse.swt.SWT;import org.eclipse.swt.graphics.Color;import org.eclipse.swt.graphics.GC;import org.eclipse.swt.widgets.Display;import org.eclipse.swt.widgets.Event;import org.eclipse.swt.widgets.Shell;/*** ZetCode Java SWT tutorial** This program draws ten rectangles with different* levels of transparency.** Author: Jan Bodnar* Website: zetcode.com* Last modified: June 2015*/public class TrasparentRectanglesEx {public TrasparentRectanglesEx(Display display) {initUI(display);}private void initUI(Display display) {Shell shell = new Shell(display, SWT.SHELL_TRIM | SWT.CENTER);shell.addListener(SWT.Paint, event -> drawRectangles(event));shell.setText("Transparent rectangles");shell.setSize(590, 120);shell.open();while (!shell.isDisposed()) {if (!display.readAndDispatch()) {display.sleep();}}}private void drawRectangles(Event e) {GC gc = e.gc;Color blueCol = new Color(e.display, 0, 0, 255);gc.setBackground(blueCol);for (int i = 1; i < 11; i++) {gc.setAlpha(i * 25);gc.fillRectangle(50 * i, 20, 40, 40);}blueCol.dispose();}@SuppressWarnings("unused")public static void main(String[] args) {Display display = new Display();TrasparentRectanglesEx ex = new TrasparentRectanglesEx(display);display.dispose();}}
在该示例中,我们绘制了十个透明度不同的矩形。
gc.setAlpha(i * 25);
setAlpha()方法设置 alpha 透明度值。

图:透明矩形
甜甜圈
在下面的示例中,我们通过旋转一堆椭圆来创建复杂的形状。
DonutEx.java
package com.zetcode;import org.eclipse.swt.SWT;import org.eclipse.swt.graphics.GC;import org.eclipse.swt.graphics.Transform;import org.eclipse.swt.widgets.Display;import org.eclipse.swt.widgets.Event;import org.eclipse.swt.widgets.Shell;/*** ZetCode Java SWT tutorial** This program creates a donut shape.** Author: Jan Bodnar* Website: zetcode.com* Last modified: June 2015*/public class DonutEx {public DonutEx(Display display) {initUI(display);}private void initUI(Display display) {Shell shell = new Shell(display, SWT.SHELL_TRIM | SWT.CENTER);shell.addListener(SWT.Paint, event -> drawDonut(event));shell.setText("Donut");shell.setSize(430, 300);shell.open();while (!shell.isDisposed()) {if (!display.readAndDispatch()) {display.sleep();}}}private void drawDonut(Event e) {GC gc = e.gc;int w = e.width;int h = e.height;gc.setAntialias(SWT.ON);Transform tr = new Transform(e.display);tr.translate(w / 2, h / 2);gc.setTransform(tr);for (int rot = 0; rot < 36; rot++) {tr.rotate(5f);gc.setTransform(tr);gc.drawOval(-125, -40, 250, 80);}tr.dispose();}@SuppressWarnings("unused")public static void main(String[] args) {Display display = new Display();DonutEx ex = new DonutEx(display);display.dispose();}}
在此示例中,我们创建一个甜甜圈。 形状类似于曲奇,因此称为甜甜圈。
gc.setAntialias(SWT.ON);
我们使用setAntialias()方法打开抗锯齿功能,这可以使绘图更平滑。
Transform tr = new Transform(e.display);tr.translate(w / 2, h / 2);gc.setTransform(tr);
我们将轴的中心移到窗口的中心。
for (int rot = 0; rot < 36; rot++) {tr.rotate(5f);gc.setTransform(tr);gc.drawOval(-125, -40, 250, 80);}
在for循环中,我们进行旋转操作并绘制椭圆。
绘制文字
在下一个示例中,我们在窗口上绘制一些文本。
SoulmateEx.java
package com.zetcode;import org.eclipse.swt.SWT;import org.eclipse.swt.graphics.Color;import org.eclipse.swt.graphics.Font;import org.eclipse.swt.graphics.GC;import org.eclipse.swt.widgets.Display;import org.eclipse.swt.widgets.Event;import org.eclipse.swt.widgets.Shell;/*** ZetCode Java SWT tutorial** This program draws text* on the window.** Author: Jan Bodnar* Website: zetcode.com* Last modified: June 2015*/public class LyricsEx {public LyricsEx(Display display) {initUI(display);}private void initUI(Display display) {Shell shell = new Shell(display);shell.addListener(SWT.Paint, event -> drawLyrics(event));shell.setText("Soulmate");shell.setSize(380, 300);shell.open();while (!shell.isDisposed()) {if (!display.readAndDispatch()) {display.sleep();}}}private void drawLyrics(Event e) {GC gc = e.gc;gc.setAntialias(SWT.ON);Font font = new Font(e.display, "Purisa", 10, SWT.NORMAL);Color col = new Color(e.display, 25, 25, 25);gc.setForeground(col);gc.setFont(font);gc.drawText("Most relationships seem so transitory", 20, 30);gc.drawText("They're good but not the permanent one", 20, 60);gc.drawText("Who doesn't long for someone to hold", 20, 120);gc.drawText("Who knows how to love without being told", 20, 150);gc.drawText("Somebody tell me why I'm on my own", 20, 180);gc.drawText("If there's a soulmate for everyone", 20, 210);col.dispose();font.dispose();}@SuppressWarnings("unused")public static void main(String[] args) {Display display = new Display();LyricsEx ex = new LyricsEx(display);display.dispose();}}
我们显示 Natasha Bedingfields Soulmate 歌曲的部分歌词。
Font font = new Font(e.display, "Purisa", 10, SWT.NORMAL);
在这里,我们指定使用的字体。
gc.drawText("Most relationships seem so transitory", 20, 30);
drawText()方法将文本绘制到窗口上。
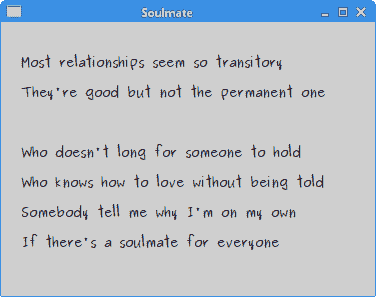
图:灵魂伴侣
在 Java SWT 教程的这一章中,我们做了一些绘图。

若有收获,就点个赞吧
0 人点赞
