Fog
There are three ways to create fog in OctaneRender®: The Octane Volume object, Environment Medium and Open VDB volumes with the Octane VDB loader. This section will discuss using the Volume Object and the Environment Medium methods.
Fog is less complex to create than fire, which needs an actual simulation of the fire effect to behave realistically. Nevertheless, making a realistic fog does require an understanding of Light and Volume medium setups. If you want to follow the tutorials we discuss in this section, you can download the scenes from the link below.
Download “Fog_01” scene from here
Download “Fog_02” scene from here
CREATING LOCAL FOG USING VOLUME FOG OBJECT
Open the “Fog_01” scene. This scene is the classic indoor scene from the content browser of Cinema 4D.
1- Go to the Objects menu from the Live Viewer and create an “Octane Fog Volume”. Then change the coordinates and parameters of the volume object as you see in the picture below.

2- From the Live Viewer, go to the Objects menu and create an “Octane Daylight” from the Lights sub-menu and change the coordinates and parameters as shown in the image below. This light will interact with the volume object in the scene.

3- Create the Volume medium settings for the Fog. To do this, select “Volume Fog” from the Object Manager and go to the Medium Tab. Change the settings as shown in the image below.
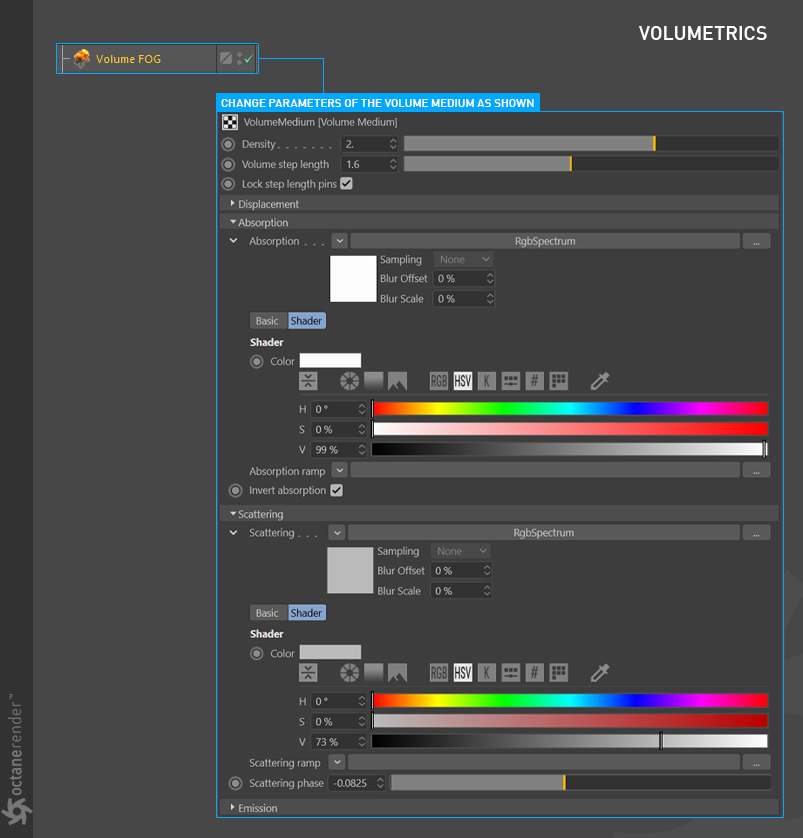
4- Now run Live Viewer. The image in the Live Viewer should match the result in the image below. The volume fog object placed in the scene has created the desired moody effect. A completely different atmosphere can be created by playing with the position of the light and the Density and Step Length settings of the Volume object.

To add some variation to Fog add a Cinema 4D noise texture to the texture slot of the volume object. In the picture below, Naki noise is used. Animating this noise would create a moving foggy smoke effect.

CREATING GLOBAL FOG USING ENVIRONMENT MEDIUM
In this tutorial we will show how to make an environment fog. The difference from Local Fog is that it covers the whole scene. Now install the “Hot4D” plugin for Cinema 4D before opening the “fog_02” scene. This plugin creates a realistic ocean (not material, only mesh). You can download it from here.
You may need to add Hot4D after your file has loaded, as the scene file is referring to an older version of the plugin. If so, make sure that you add Hot4D as a child of the Ocean object, and remove the older version. Set the Wave Height to 12m and increase the Ocean Resolution to 1024x1024.
1- Open the “Fog02” scene. First create an Object > Lights > Octane Daylight_ from the Live viewer menu and change both the settings and the coordinates as you see in the image below.

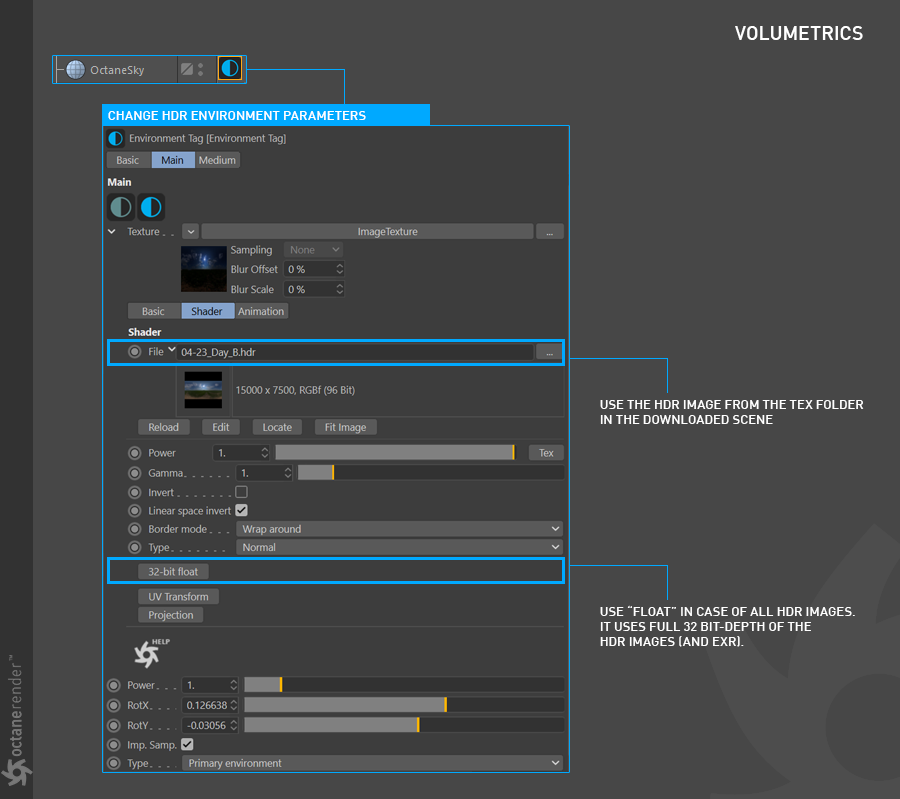
2- Now create the Object/HDR Environment from the Live viewer menu and change the settings as you see in the picture below. HDR images contribute to general illumination and local shadows, adding an extra layer of ambiance.
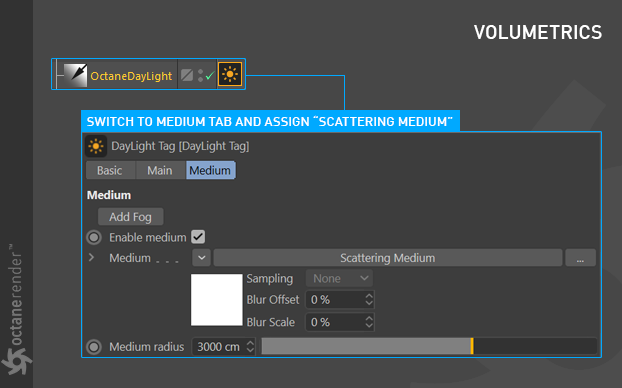
3- Now select Octane Daylight Tag from the Object manager. Go to the Medium tab and assign “Scattering Medium” to the medium slot. Make the medium radius 3000 cm.
4- Click scattering medium and assign an “RGB Spectrum” to the Absorption and Scattering channels and change the settings as you see in the image below.
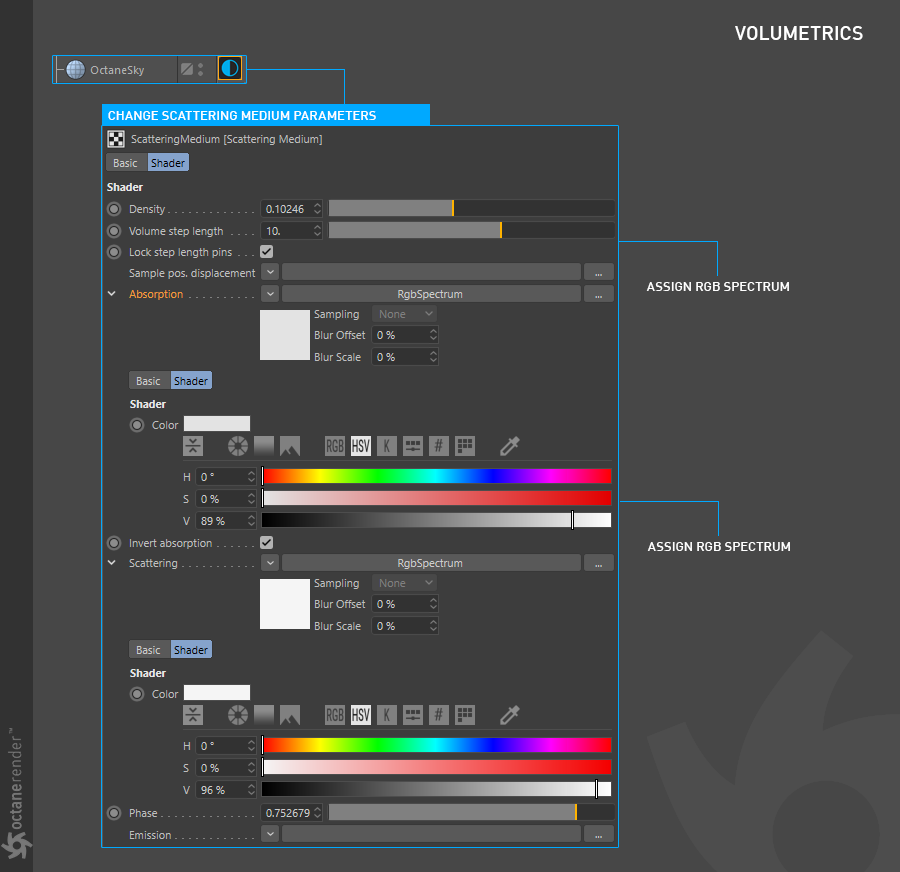
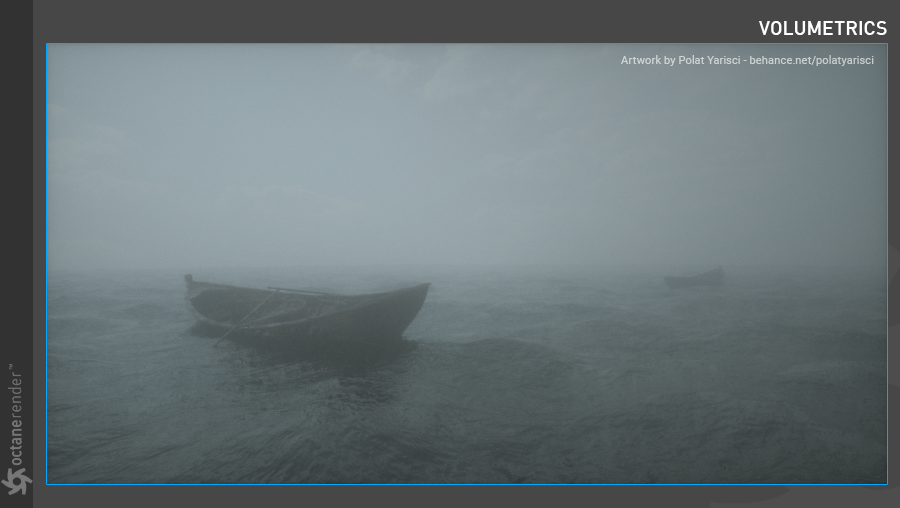
5- Now run Live Viewer. If you have done everything right, you will get the result you see in the picture below. As you can see, we created a global fog using Daylight’s medium channel. Because of the high absorption and scatter in the fog phenomenon, we made our adjustments accordingly. For example, in the absorption channel, the higher the value of the color, the more quickly rays are absorbed. As in reality, the rays will quickly absorb in any dense fog. Also, the scatter phase plays a very important role in the scene. The rays scattering towards the source of light ensures that we will see the front rowboat a little clearly. Play with the settings to see how the values work and create the atmosphere you want.
