Interface & Settings
The Octane Object tag is one of the most important components in OctaneRender®. This tag is required for motion blur, hair and particle rendering visibility and so on. The Octane Object tag is also used to assign Layer and Bake IDs, manage light visibility for the object, and control subdivison, removing the need to use the Cinema 4D Subdivision generator (in most cases).
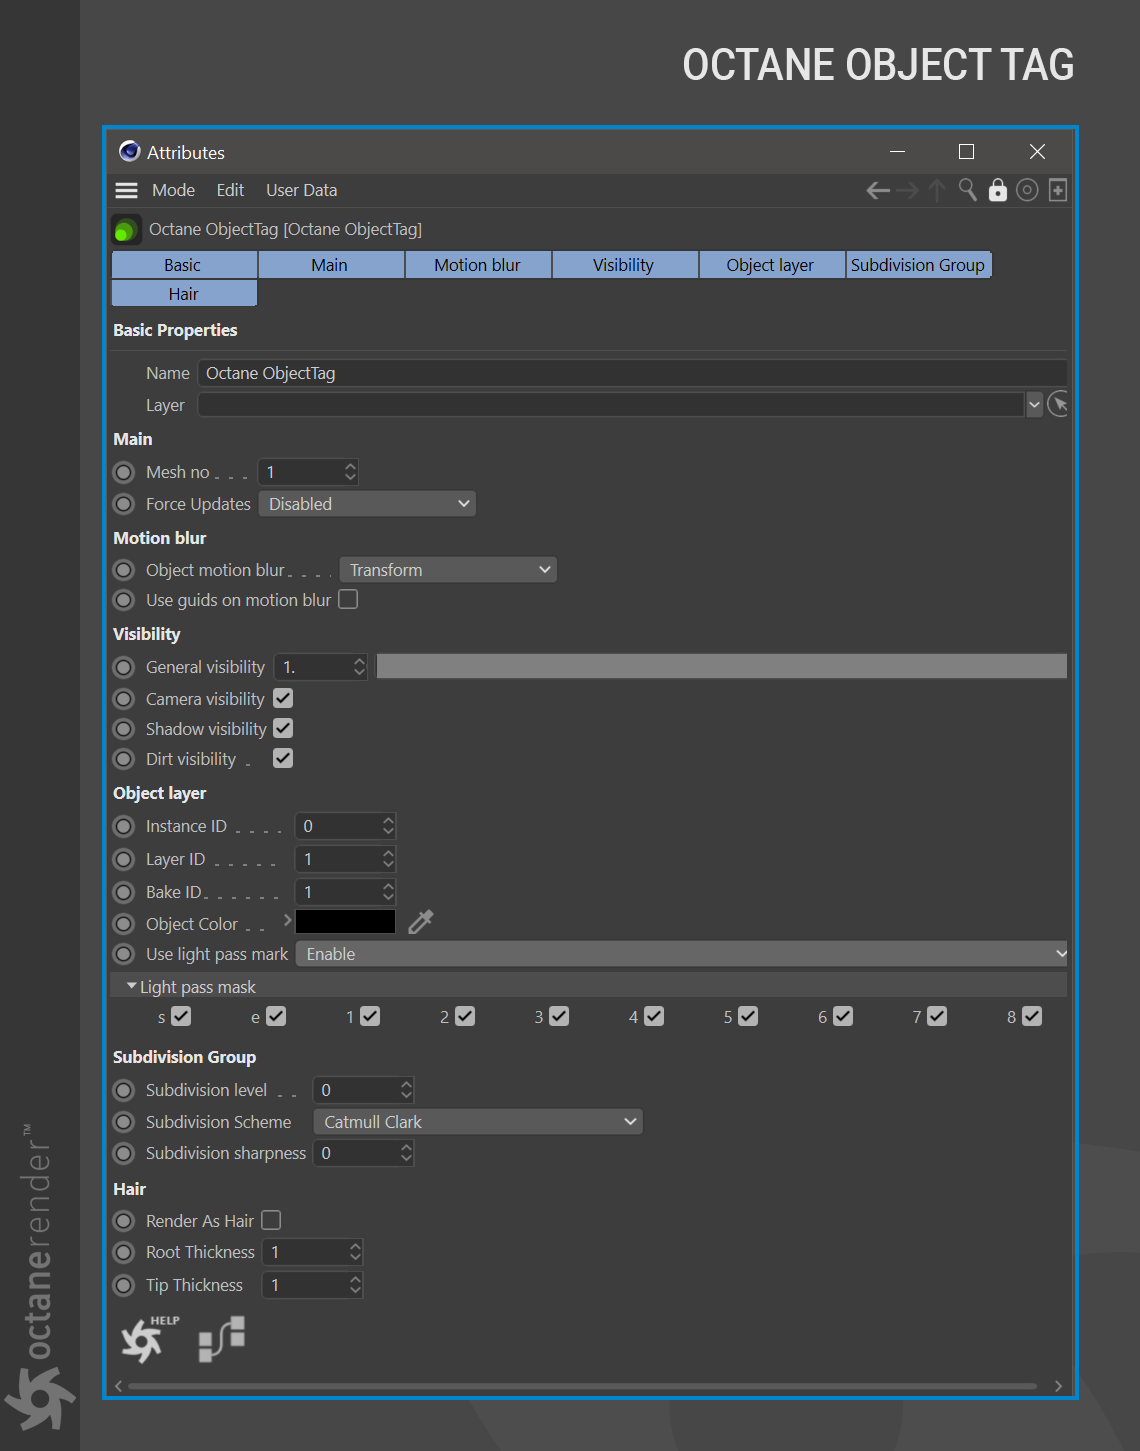
MAIN TAB
The options in this section are designed to manage geometry updates while moving or editing objects, and for making rendering faster for scenes with static geometry and some moving objects.
MESH NO:
Object group number for exporting to Octane Render. A value of zero (0) is used for static objects. Values greater than zero are used for movable objects. If Live Viewer > Options > Update Check >** **All Geometry Movable is enabled along with _Render Settings > Octane Renderer > Main tab > Main group > Geometry Control >** Auto Detect **_from the render settings, this option is not needed.
FORCE UPDATES:
This setting can be used to force updates of the mesh for every frame while rendering. Enable this option if materials and other aspects of the object are not animating as expected. Make sure that Manual Assignment is set in Render Settings > Octane Renderer > Main tab > Geometry Control setting, explained here.
MOTION BLUR TAB
This tab contains options for Object Motion Blur, explained in detail here.
VISIBILITY TAB
This tab contains the visibility options of the assigned object.
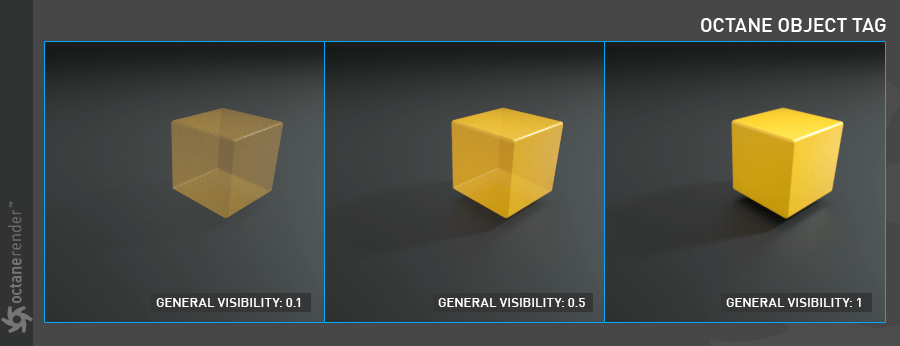
GENERAL VISIBILITY:
General visibility determines the overall visibility of the assigned object. Set this option to 0.0 if the object is not intended to be seen or rendered. Default is 1.0 (visible).
CAMERA VISIBILITY:
This toggle determines if the assigned object is visible to the camera. Default is visible.

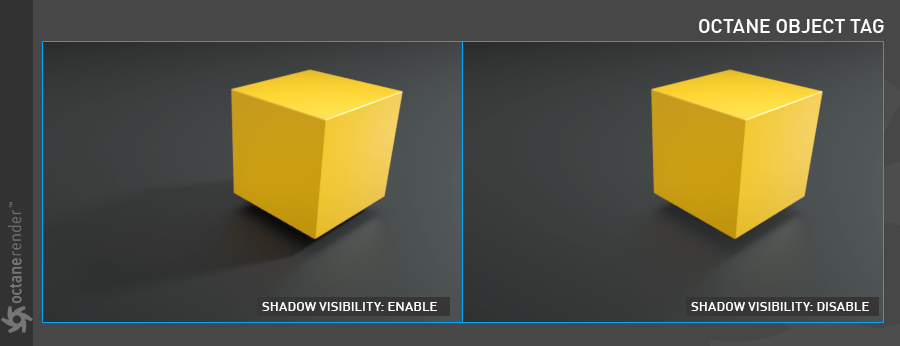
SHADOW VISIBILITY:
This option determines the visibility of the shadow cast from the assigned object. For this option to work properly, “Alpha Shadows” must be active in the kernel settings.
OBJECT LAYER TAB
This tab contains options to manage several attributes of the assigned object. These ID descriptions are required for the Info, Bake and Render Passes. These options are discussed at the links below.
Go to this link for Instance ID.
Go to this link for Layer ID.
Go to this link for the Bake ID.
Go to this link for the Light Pass Mask.
SUBDIVISION GROUP TAB
This option will subdivide the assigned object and works similarly to the Subdivision Surface Generator in Cinema 4D, with one exception: It does not leverage the SubD weight tag. Unlike the Cinema SubD generator, the Octane Object tag will subdivide the assigned object on the GPU itself, which is much faster than doing so on the CPU. Sending a simpler mesh to the GPU and subdividing onboard is also much faster than sending a fully subdivided mesh to the GPU VRAM. Use this option instead of the Cinema 4D SubD Generator except when noted.
HAIR TAB
The Hair tab enables the use of the Cinema 4D Hair module for the assigned object in Octane. Go to the following links for details.
For general hair usage, go to this link
For hair gradient usage, go to this link

若有收获,就点个赞吧
0 人点赞
