Creating Materials in Octane
There are several ways to create materials in OctaneRender®:
- Via the Live Viewer
- Via the Cinema 4D Material Manager
- Via the Octane Node Editor
USING LIVE VIEWER
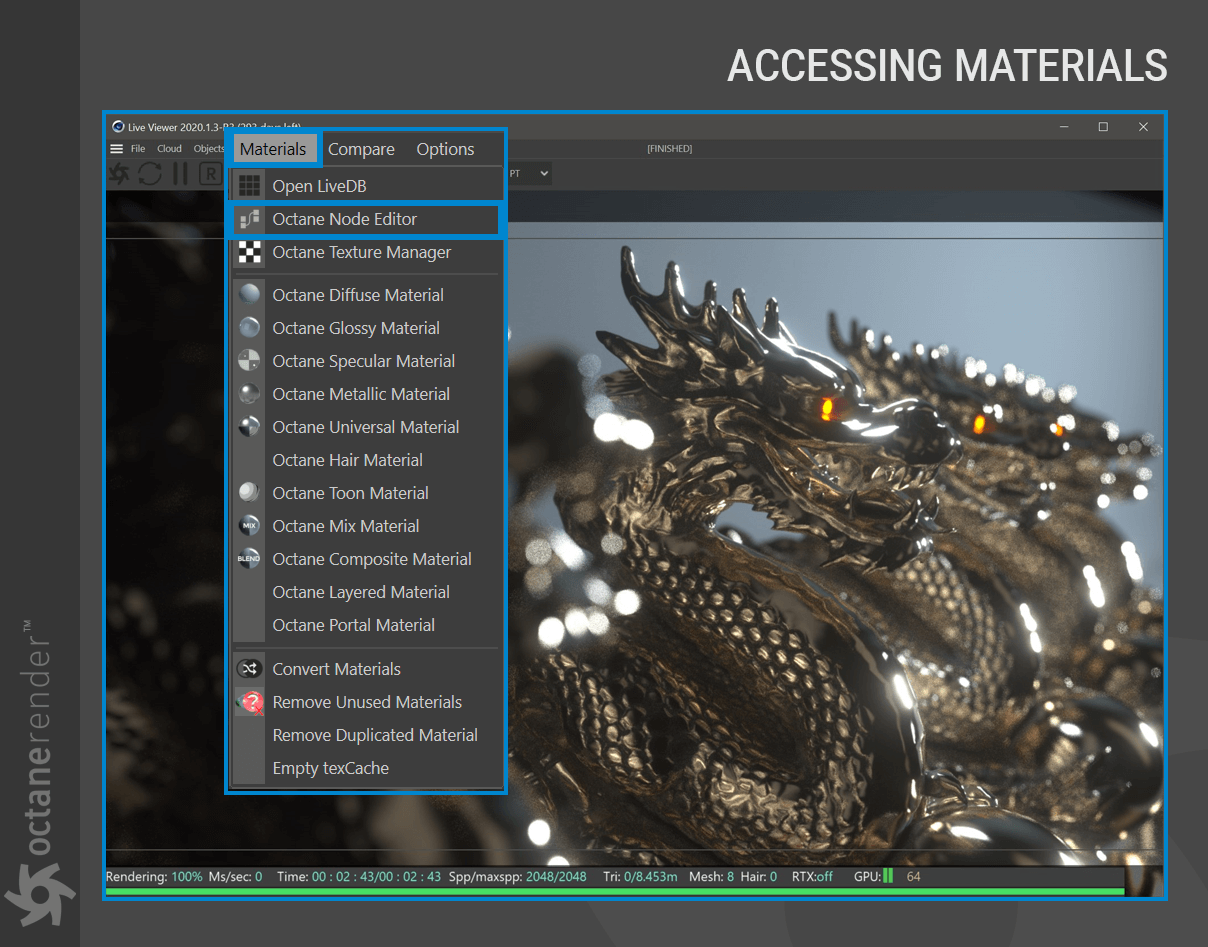
Go to Materials > and pick the material type from the menu list. A material thumbnail will appear in Cinema 4D’s material editor window. Double-click on it to get to the Material Editor.
USING THE C4D MATERIAL MANAGER
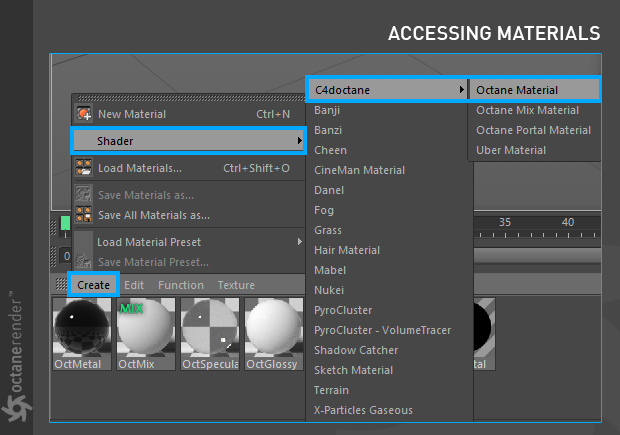
The second method is to use the Cinema 4D material manager. From this manager you can create a material from Shader / C4Doctane / Octane Material.
USING THE OCTANE NODE EDITOR
The third method is to use the Octane Node Editor. To do this, go to the Materials menu in the Live Viewer window and select Octane Node Editor.
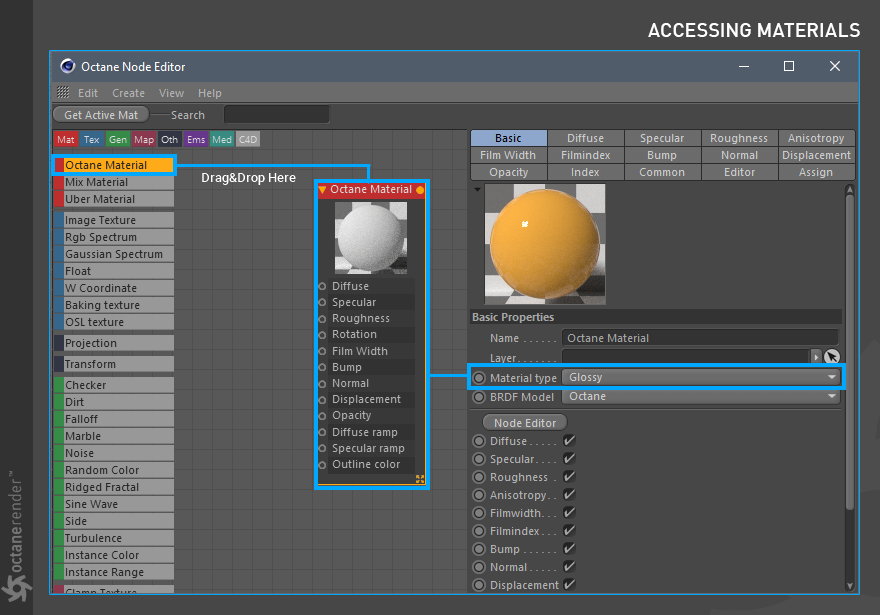
After opening the Node Editor, drag and drop the Octane Material button on the left menu to the middle area. Now, when this Node is selected, select the Basic option on the right side and create the material you want from the Material type section. More on the Node Editor here.
CREATING SHORTCUTS
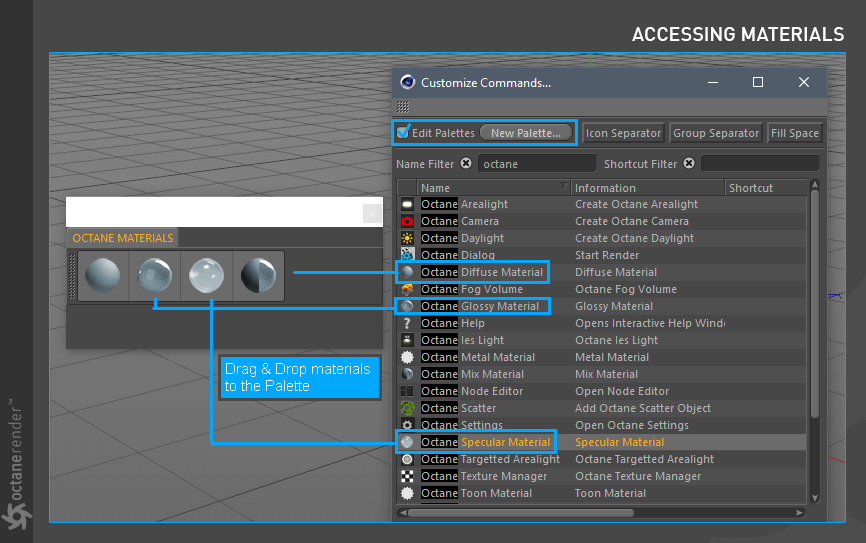
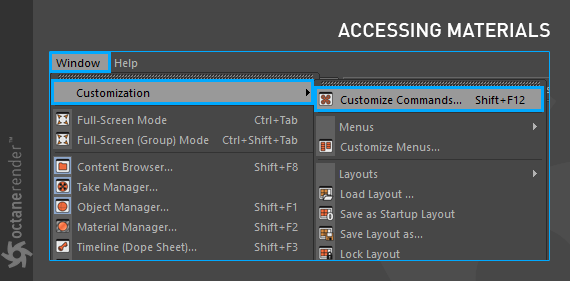
The shortest, quickest, and simplest way to access a material is to create material shortcuts: First select the Customize Commands from the Window menu of Cinema 4D (SHIFT + F12).
In the opened window, first click on New Palette and then click to Edit Palettes. Set the New Palette window size as desired. Now type Octane in the Name filter section. A list of commands that begin with the Octane immediately appears automatically. Drag and drop the materials from this area to the opening palette. That’s it. If you do not want to make a palette, you can drag and drop the icon of the relevant material directly at the interface of Cinema 4D. Do not forget to save it as “save as startup layout” again from the window menu after everything is done.
