Panoramic
The Panoramic Camera is used to create 360, VR or Dome Mapping. At the end of this chapter, we will explain how to render the equirectangular type and view in a 360 VR player.

CAMERA MODE
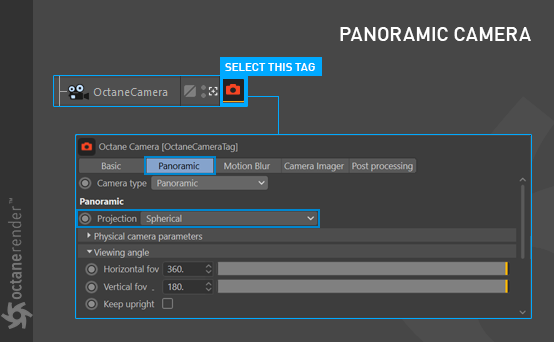
Specifies the panoramic projection that should be used, with three options: Spherical Camera Lens, Cylindrical Camera Lens and Cube Map. Single-face cube map projections are available allowing users to render only one face of the cube. This is useful for animation overlays in stereo panorama renderings.

FOVX (DEGREE)
The horizontal field of view in degrees. This sets the X coordinate for horizontal field of view of the camera in the scene. This is ignored when cube mapping is used.
FOVY (DEGREE)
The vertical field of view in degrees. This sets the Y coordinate for the vertical field of view of the camera in the scene. This is ignored when cube mapping is used.
KEEP UPRIGHT
If enabled, the panoramic camera is always oriented towards the horizon and the up-vector will stay in its default direction (vertical) at (0,1,0).
360° RENDER USING AN EQUIRECTANGULAR (SPHERE) SETUP
This example creates a 360° rendering for any VR player, such as Oculus, Vive or other devices. You can download the tutorial scene here.
1- Open the scene. Everything is already set up to begin.

2- Create an Octane Camera in the scene (Live Viewer Objects menu > Octane Camera). From the Object manager, select “Octane Camera Tag,” change the Camera Type to “Panoramic” and go to the “Panoramic” tab. Change the settings as seen in the image below.

3- Run Live Viewer. You will see a render as you see in the picture below. It will appear spherical when viewed in the appropriate application.

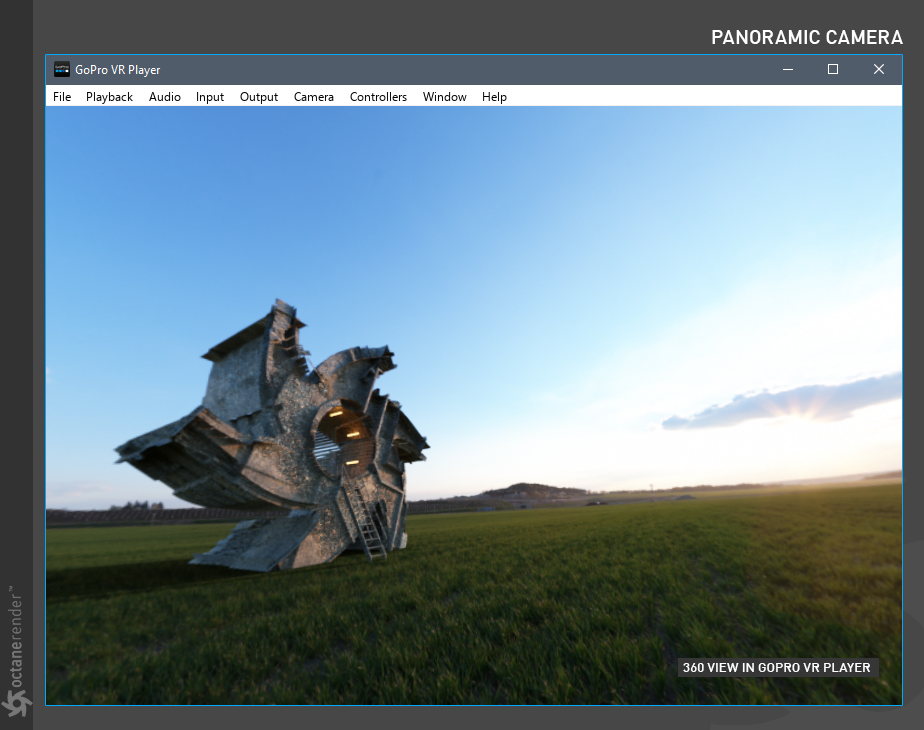
Drag and drop the image you have saved directly into the VR Player of your choice. The image will appear as below, and you will be able to navigate within the environment according to the features of the VR Player. You can also load your renders into Oculus, Vive, phone VR gear or YouTube.


