Create Render Job & Configure
Once your scene has finished uploading, you will need to create a “Render Job”. You cannot use ORC without creating a render job. You will now see the scene you uploaded in the “Scenes” section (your scenes will stay on the ORC system until you delete them). Click on the “scene section” and click on the “Create Job” you see on the right. When you click on Create Job, you will automatically go to the “Jobs” screen. You will set Orc settings for your scene there.

**
SETTING UP A RENDER JOB
After creating a “render job”, you can reconfigure the scene settings when you are in the jobs screen. This is your last chance to check everything or make new adjustments before starting Cloud render.
1. CONFIGURE RENDER JOB
The Configure Render Job panel will allow you to check or modify the general settings of your scene. Here you can also monitor your RNDR account usage and job progress.
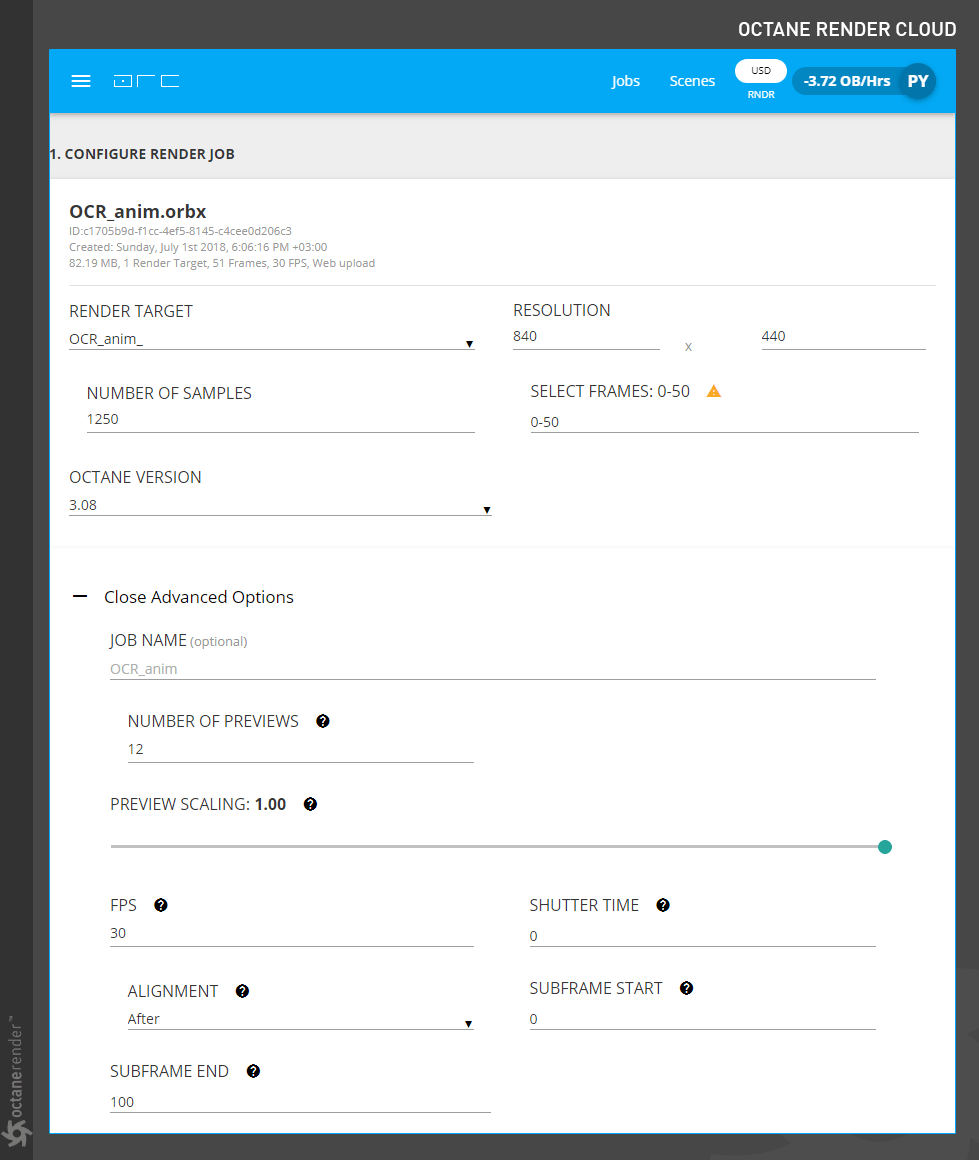
RENDER TARGET
Cinema 4D will create a render target automatically on export. It is usually related to the “Render Target” Node in Standalone. If you have created scenes in Standalone and set different “Render Target” nodes, you can choose from here, otherwise, you do not have to worry about this.
RESOLUTION
You can specify the render resolution. Any settings you make in Cinema 4D “render settings” will appear here. If you wish to render a low-resolution test, you can do so from here; you do not need to go back to Cinema 4D to do so. Do not forget to restore original resolution before you make the final render.
NUMBER OF SAMPLES
In Cinema 4D, the sample count you made from Octane settings appears here. You can increase or decrease as needed.
SELECT FRAMES
The frame setting you make in the “render settings” in C4D will appear here. However, we recommend that you make 10-15 frames test render before going to final render. From here you can specify which frame range you want to test or final render. You can also specify and render different frames from a sequence. For example, if you enter “15-25-35” in a 50-frame render, you will have rendered 15, 30 and 35th frame, respectively. Or if you enter “25-50, 15” you will first render frames 25 to 50 and then only the 15th frame.
OCTANE VERSION
You can choose from which Octane version you are working on. There are no versions older than 3.06.
JOB NAME (OPTIONAL)
You can enter any name here other than the name of the Render Target.
NUMBER OF PREVIEWS
Previews are updated based on the number of previews and the total frames your job has. Here you can designate how often it display the progress of the job.
PREVIEW SCALING
This controls the resolution of your previews. By default, the resolution is set to be the same as your job, but it can be scaled down to save on storage.
FPS
Your project FPS (frame per second) will appear here.
SHUTTER TIME
The Shutter Time field determines the duration of the shutter, which will affect the motion blur in the scene (if any is specified). Specifically, it is the time percentage relative to the duration of a single frame. You can keep the default value if you set Motion Blur in Cinema 4D or if Motion blur is off.
ALIGNMENT
Shutter Alignment specifies how the shutter interval is aligned to the current time. This determines when the camera shutter is triggered. Which can be set to Before, Symmetrical or After, and is applicable to each frame relative to the given frame rate.
SUBFRAME START & END
The Subframe Start and Subframe End fields allows you to reduce the rendered shutter interval to a sub-interval. This is useful if there is a need to increase the frame rate without having to re-compile the scene.
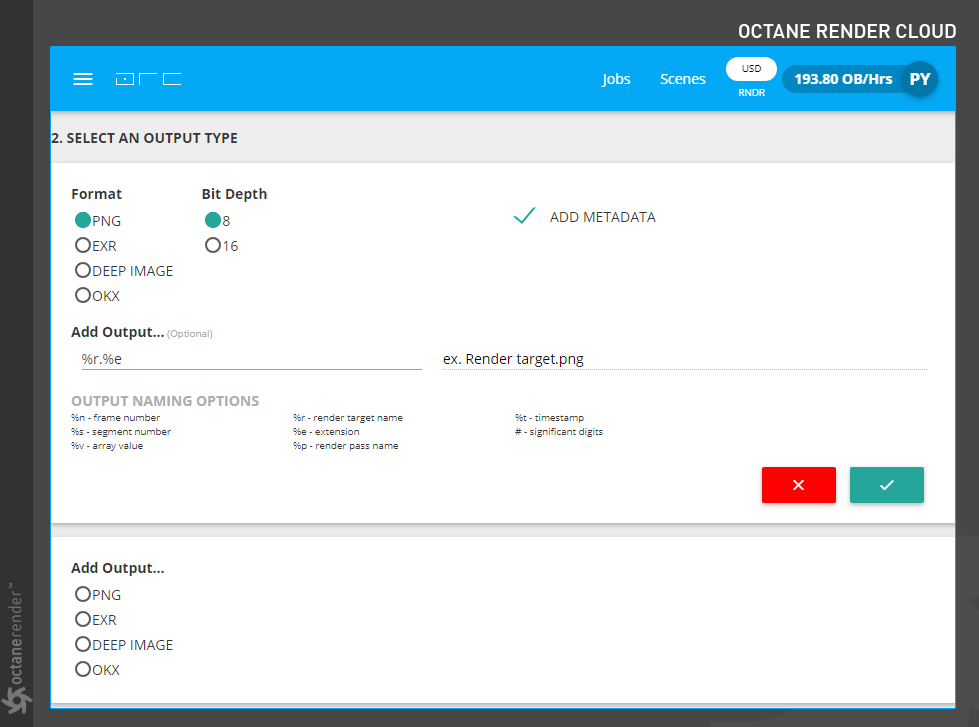
2. SELECT AN OUTPUT TYPE
From here you can specify the output format. Bit depth options vary according to image format. For example, you can choose 8 and 16-bit depth in PNG, or 16 and 32-bit depth options in EXR. It also appears in other options, depending on the image format. If you want to assign an alternate file name and image format, you can use the options immediately below.

若有收获,就点个赞吧
0 人点赞
