Generate
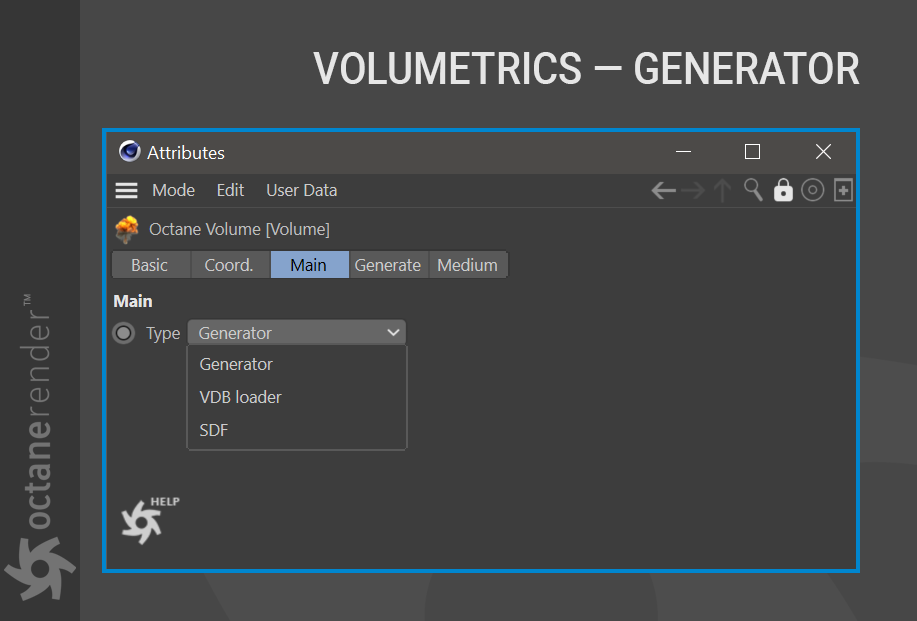
Create volumetric clouds from scratch with OctaneRender® via the Generate option in the Octane VDB Loader > Main tab and choose Generator from the Type menu options. The tab display will update to display a new tab, Generate.
The Generator will create a voxel grid value from a parametric texture input such as noise. A volume object will be drawn in the Cinema 4D viewport with the default settings. The Generate tab contains all of the options needed to create a volume and tune it as required.
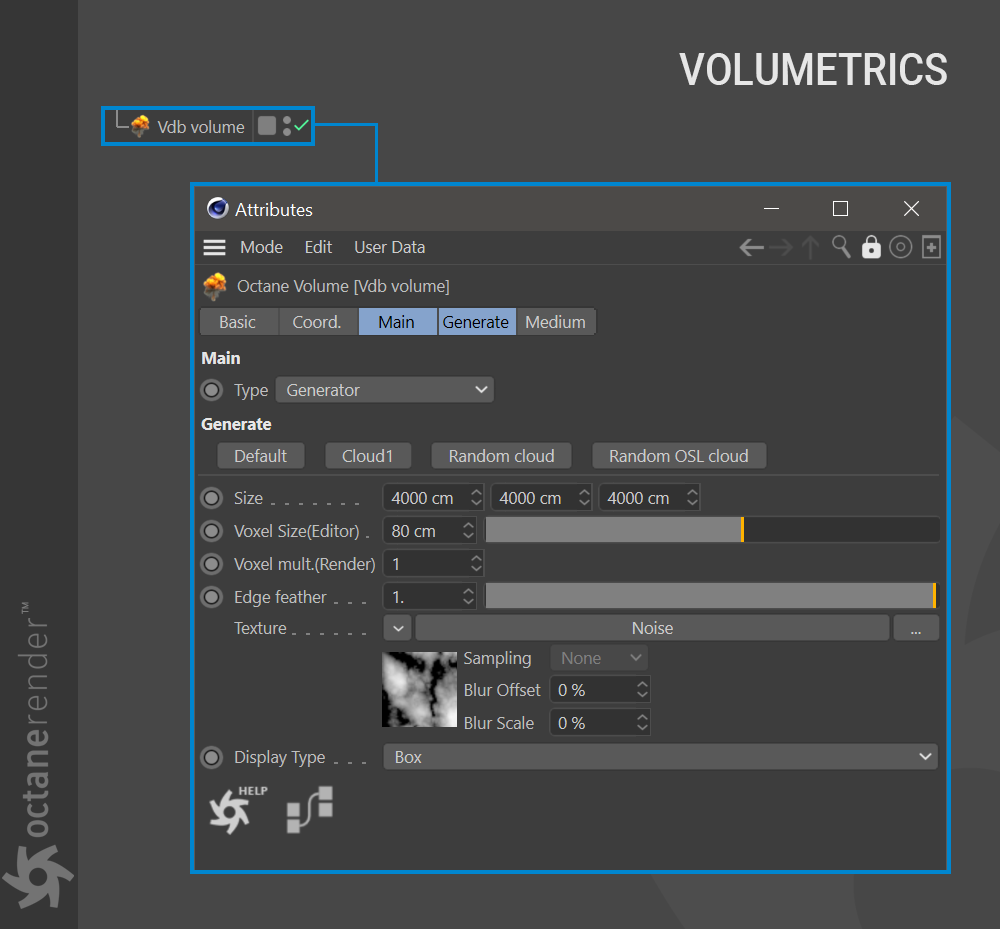
Press “Cloud 1” from the Preset buttons on the Generate Tab. This preset will update the voxel display and add a Cinema 4D Noise node the texture slot. This noise type is now driving the data represented in the Voxel grid, creating 3D voxel data from 2D procedural data. The noise type can be changed to produce a variety of volumetric effects. The noise texture in this preset is “Naki”.
| IMPORTANT: Voxel creation uses Cinema 4D noises only. Do not use any Octane noises. |
|---|

GENERATOR SETTINGS
PRESET BUTTONS
The preset buttons quickly create voxel data. The Default preset will return to the initial state of the VDB object. The Cloud 1 preset sets the Cinema 4D Naki noise in the texture channel. Each time you press the Random Cloud button, the noise type in the texture section changes to random.
SIZE & VOXEL SIZE (EDITOR)
These 2 options work together. Here you can set the Voxel size and number. The most important issue when working with voxel based is to make the right settings for voxel grid and voxel size. Because both GPU power and VRAM are used extensively and render times are quite high. So, you have to make these settings exactly according to your purpose. You can use the following formula when making both adjustments:

For example, if the Voxel grid size to x200 cm / y100 cm / z200 cm and voxel size to 12 cm, the number of voxels generated is 2294.41 according to this formula. This resolution is not appealing, but it will render quite fast, as shown in the illustration below.

Keep the grid size the same but change the voxel size to 4 cm. The number of voxels will be 62,500 according to the same formula. At such a voxel resolution, the use of GPU power and VRAM will increase and will render slower, but the quality will be much better. Do not make large changes to these values; go in small steps, as a tremendous amount of data is being generated — as the voxel size moves closer to zero, an extreme amount of memory will be consumed, and that can lead to instability.

VOXEL MULT. (RENDER)
This option will multiply the voxel grid by the amount specified when rendering. When using this option, refer to the following formula for an explanation on VRAM consumption in this case:

Following this formula, a voxel size of 10 cm and a Voxel Multiplier of 2 will result in a render voxel size of 10/2 = 5 cm in comparison, and the number of voxels in the Picture Viewer will be 2 2 2 = 8 times more than the number of voxels in Live Viewer, or 10/8, which will result in 512 times more calculations. So be careful when making this adjustment. It is easy to exceed VRAM and crash the plugin.

EDGE FEATHER
This option is used to feather the edges of voxels, which will impart a softer, less dense look.

TEXTURE
Use this slot to assign a Cinema 4D noise texture to define the volume.

DISPLAY TYPE
This option will determine how (or if) the volume will be represented in the viewport.

若有收获,就点个赞吧
0 人点赞
