Distribution Settings
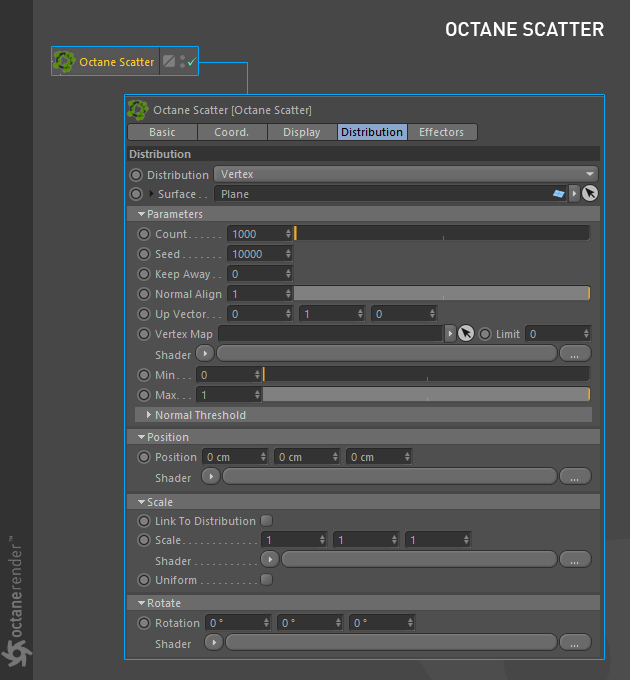
The Octane scatter object can produce instances and clone up to millions of objects, quickly and efficiently. To access the Octane Scatter object, select **Objects > Octane Scatter** from the Live Viewer menu. The Octane Scatter object will be placed in the Object Manager on creation. Select the Octane Scatter object and the controls for Octane Scatter will appear in the Attribute Manager, as illustrated below. There will be five tabs, but only three are specific to the function of Octane Scatter: Display, Distribution and Effectors.
LIMITATIONS
- Octane Scatter does not work properly with animated clones, as only the first iteration of the clone would be used (thus, no animation would appear). If animated clones are required, use a Mograph Cloner instead of Octane Scatter.
- Octane Scatter is not designed to work with animated surfaces as a target object. Scatter adjusts the number and position of copies by looking at the ratio of a single polygon face to the overall area. So, if any polygon area changes, the distribution is also seriously affected. If the Polygon area does not change dramatically, you can try scattering on animated surfaces, but no guarantees.
- Objects do not stick on the surface like Cinema 4D’s Cloner.
- Octane Scatter does not replace Cinema 4D’s Cloner and does not have advanced features like Cloner. You can produce grass, trees, rocks, buildings, or static objects quickly.
SIMPLE USAGE
To use Octane Scatter, create the Octane Scatter object make a hierarchy with the objects to scatter, as shown in the illustration below. Adjust the settings in the Distribution tab as discussed in the following sections. The following considerations apply:
- Multiple objects can be parented to Octane Scatter.
- Any parametric or geometric object can be cloned. Lights and cameras will not be cloned.
- Highly detailed objects can impact performance of Octane Scatter; make sure that scattered objects are optimized.

DISTRIBUTION SETTINGS
DISTRIBUTION
The options in the Distribution group determine how the objects clone/instance will be distributed. There are three options:
- Vertex
- Surface
- Use CSV File
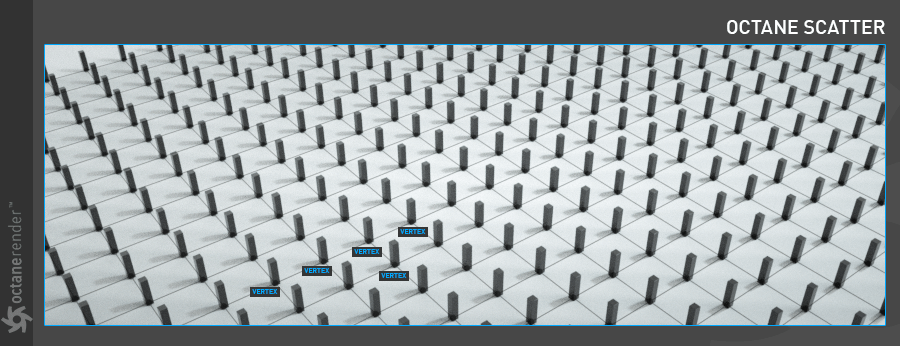
VERTEX
Distribution of the clones will correspond to the vertices of the Distribution Surface object.
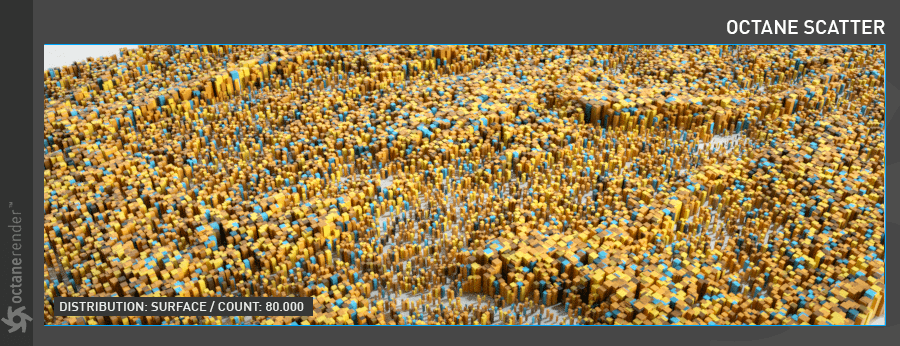
SURFACE
Distribution of the clones will occur over the entire surface of the Distribution Surface object. The clone Count, available in the parameters group, is used to set the number of clones to be scattered.
USE CSV FILE
A third-party CSV file (eg Houdini, Maya) can be used to distribute clones using matrix data. CSV is a matrix list that contains Position/Rotation/Scale data, and clones are scattered according to this data. The PSR values in Octane Scatter are disabled while in CSV mode.
SURFACE
Octane Scatter requires an object upon which the clones are scattered. To add an object to the Surface field, select the pick arrow next to the field drop down, or drag the target object into the field from the Object Manager.
COUNT
The Count attributes determines the number of objects to be scattered when the Distribution parameter is set to Surface.
SEED
The Seed attribute can be used to prevent exact spatial cloning when multiple Octane Scatter objects are used. Try changing the Seed to experiment with different scatter results.
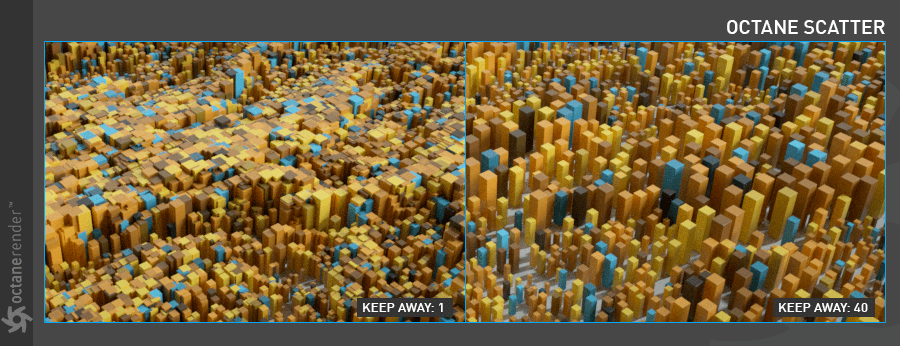
KEEP AWAY
The Keep Away parameter is used to determine the amount of padding between each clone. In situations with large number of clones, larger Keep Away values can create instability.
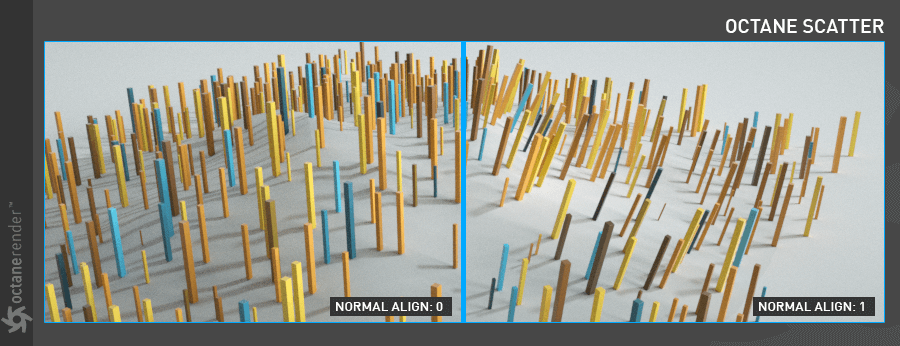
NORMAL ALIGN
Clone objects are positioned by default regarding to the normals on the Distribution Surface object. The range is between 0 and 1.
UP VECTOR
The Up Vector can be used to set the direction of clones. Up Vector works in conjunction Normal Align.

VERTEX MAP
A Vertex Map can also be used to specify distribution of the clones. Drag and drop the vertex tag into Vertex Map slot. The “Limit” parameter next to this option specifies the expansion area of the vertex map. You can narrow the vertex map to a value between zero and one.
You can also go to this link for the mini tutorial about the vertex map usage.

SHADER
Similar to the Cinema 4D Shader Effector, any procedural shader or grayscale image can be used to control clone distribution over the surface.
| IMPORTANT NOTE Do not use Octane textures (eg Octane noise, turbulence) in this field, as all texture types are GPU shaders in Octane — the Octane Scatter object is intended to work with CPU shaders only. |
|---|
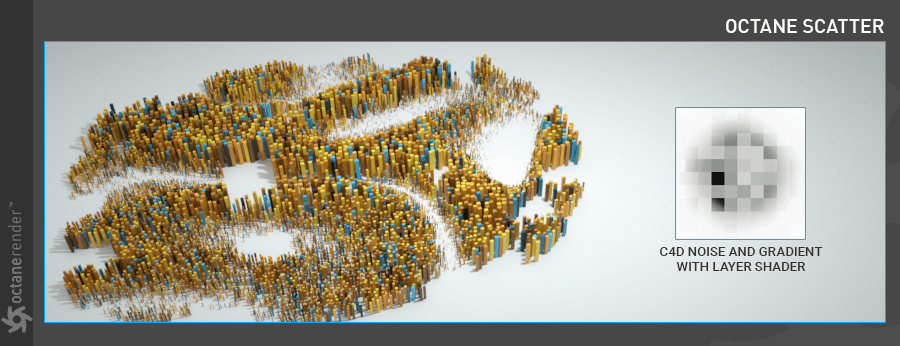
USING PROCEDURAL TEXTURES
Assign the preferred Cinema 4D procedural texture via the Shader Slot. In the illustration below, Noise and Gradient are used in a C4D Layer Shader. The Min and Max values can be used to tune the distribution.
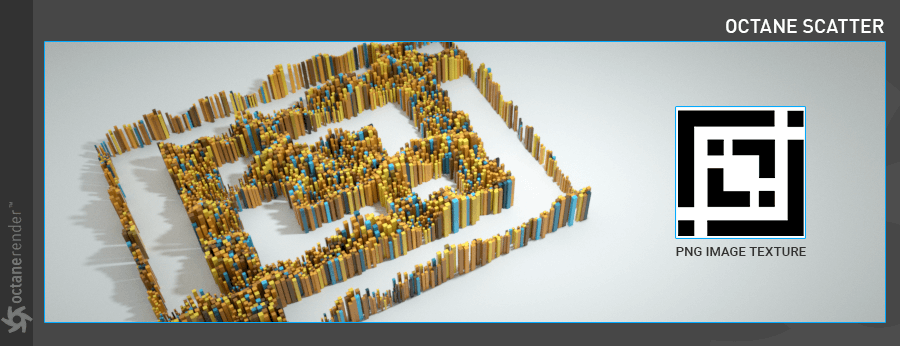
USING GRAY SCALE IMAGES
Clones are assigned to the lighter values of the grayscale image.
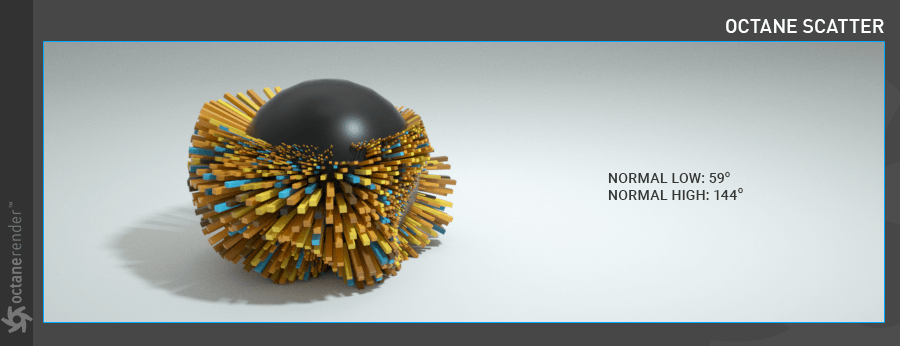
NORMAL THRESHOLD
Clones can be distributed according to the normals of the cloned surface, in a range between 0 and 180 degrees. When the Threshold is set to zero, the clones distribute parallel to the Distribution Surface object’s Y axis.
POSITION
The Position attribute uses either a grayscale image or procedural shader and enables the control position of the clones on the Y axis.
**

SCALE
The Scale parameter allows for direct scaling or variations to the scattered clones’ scale, using the either a grayscale image or procedural shader. The “Cranal” noise is used for the scale variation in the image below.

ROTATION
The Rotations parameter sets the rotation or add variations to clone rotations using the either a grayscale image or procedural shader in the X axis. In the illustration, “VL Noise” is used for the rotation variation of the clones.

TROUBLESHOOTING
If the clones are not rotated/oriented in the direction desired, check the Normal Align and Up Vector parameters in **Octane Scatter > Distribution > Parameters** section.
Try adjusting the Normal Align slider. If that doesn’t work, set Normal Align to 0.
With Normal Align set to 0, try adjusting the Up Vector. Up Vector requires three values, one each for X, Y and Z. When you set Normal Align to 0, you are excluding Normal Align from the calculation. Now it is a matter of which axis will produce the desired result. Set the first value to 1, while leaving the other values at 0. If that doesn’t work, set the next value to 1, while resetting the previous value to 0, and so on. One of these three values will do the trick. Adjust the Normal Align slider as needed to make small adjustments.

若有收获,就点个赞吧
0 人点赞
