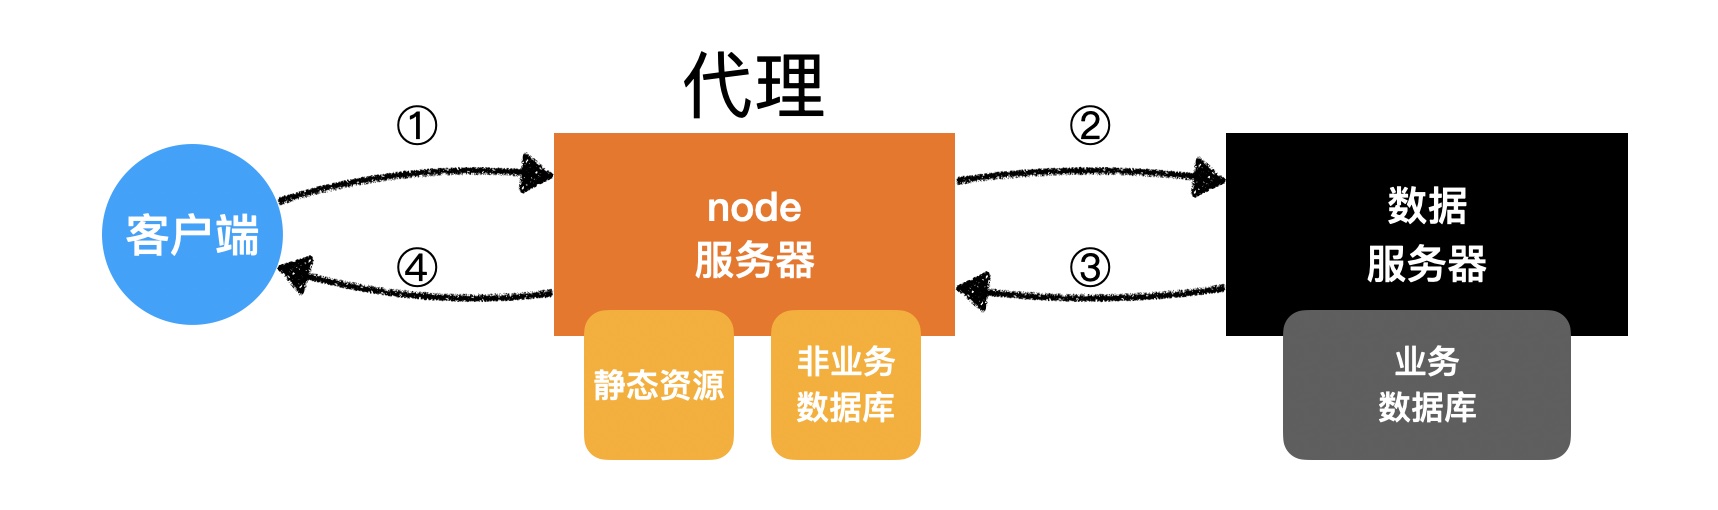
将nodo服务器做成代理服务器
第一种:使用http模块
// /data/api/xxxxx ---> http://yuanjin.tech:5100/api/xxxxconst http = require("http");module.exports = (req, res, next) => {const context = "/data";if (!req.path.startsWith(context)) {//不需要代理next();return;}// 需要代理// 此时请求的代理服务器地址为:http://127.0.0.1:9000/data/api/...// 数据服务器的接口为 http://yuanjin.tech:5100/api/...// 将客户端发送的过来的请求地址修改后去请求数据服务器const path = req.path.substr(context.length);// 创建代理请求对象 requestconst request = http.request({host: "yuanjin.tech",port: 5100,path: path,method: req.method,headers: req.headers,},(response) => {// 代理响应对象 responseres.status(response.statusCode);for (const key in response.headers) {res.setHeader(key, response.headers[key]);}response.pipe(res);});req.pipe(request); //把请求体写入到代理请求对象的请求体中};
第二种使用插件
插件名:http-proxy-middleware
文档:https://github.com/chimurai/http-proxy-middleware#install
vueCLI 使用也是和这个插件实现代理如图: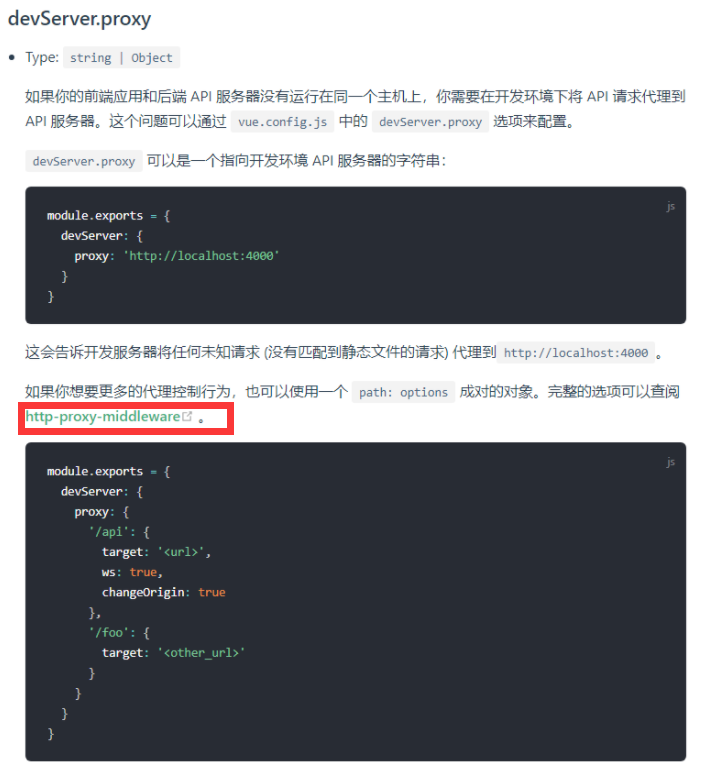
const { createProxyMiddleware } = require("http-proxy-middleware");const context = "/data";module.exports = createProxyMiddleware(context, {target: "http://yuanjin.tech:5100",pathRewrite: function (path, req) {// 此时请求的代理服务器地址为:http://127.0.0.1:9000/data/api/...// 数据服务器的接口为 http://yuanjin.tech:5100/api/...// 将客户端发送的过来的请求地址修改后去请求数据服务器return path.substr(context.length);},});

若有收获,就点个赞吧
0 人点赞
