html 兼容写法
html中可以使用条件注释的方法,对IE进行特殊处理。
条件注释通过注释演变而来:普通的浏览器认为内部内容为注释,
不进行加载而指定的浏览器会正常加载代码内容。
html条件注释写法
<!—[if lte IE9]>
小于等于IE9的浏览器可以看到
<![endif]—>
其中:书写时,两个标签前面都要加!,中括号内的每个单词必须用空格分隔。
if 如果
endif 结束如果
lte 比较符号,小于等于
lE 浏览器的品牌名称
9 表示版本
比较符号:
It less than 小于
Ite less than or equal 小于等于
gt greater than 大于
gte greater than or equal 大于等于
相等设置,不需要加任何比较符号即可
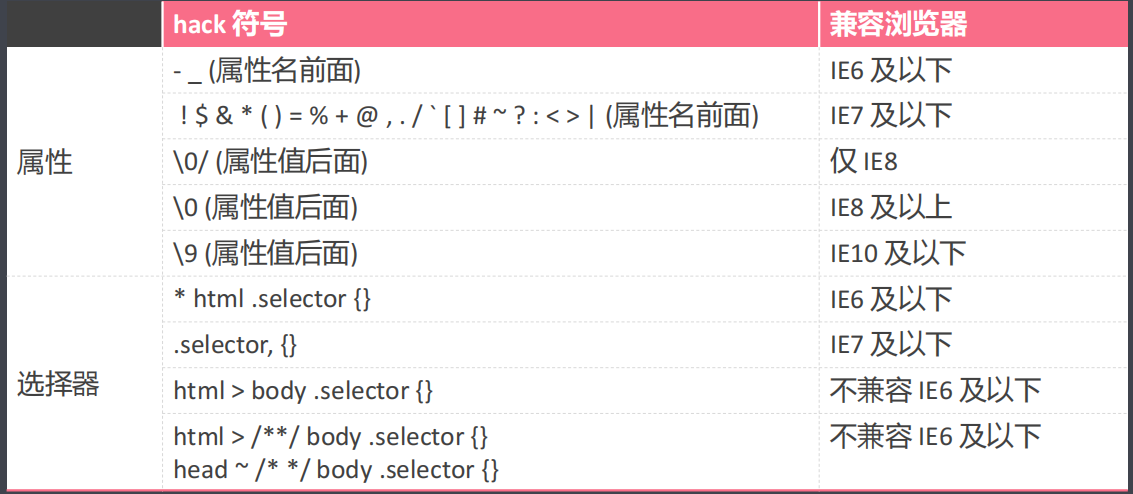
CSS hack
开发人员书写一份代码上传到服务器,一份代码提供所有用户下载,用户的浏览器不同,会出现渲染效果不同。为了保证所有用户浏览器加载效果相同,需要在同一份代码中书写不同的结构给不同的浏览器,这种方法就叫做 hack方法(Hacker黑客)。
hack方法就是在同一份代码中给不同的浏览器书写不同的css,保证最终加载效果一致。

几种常见的网页布局
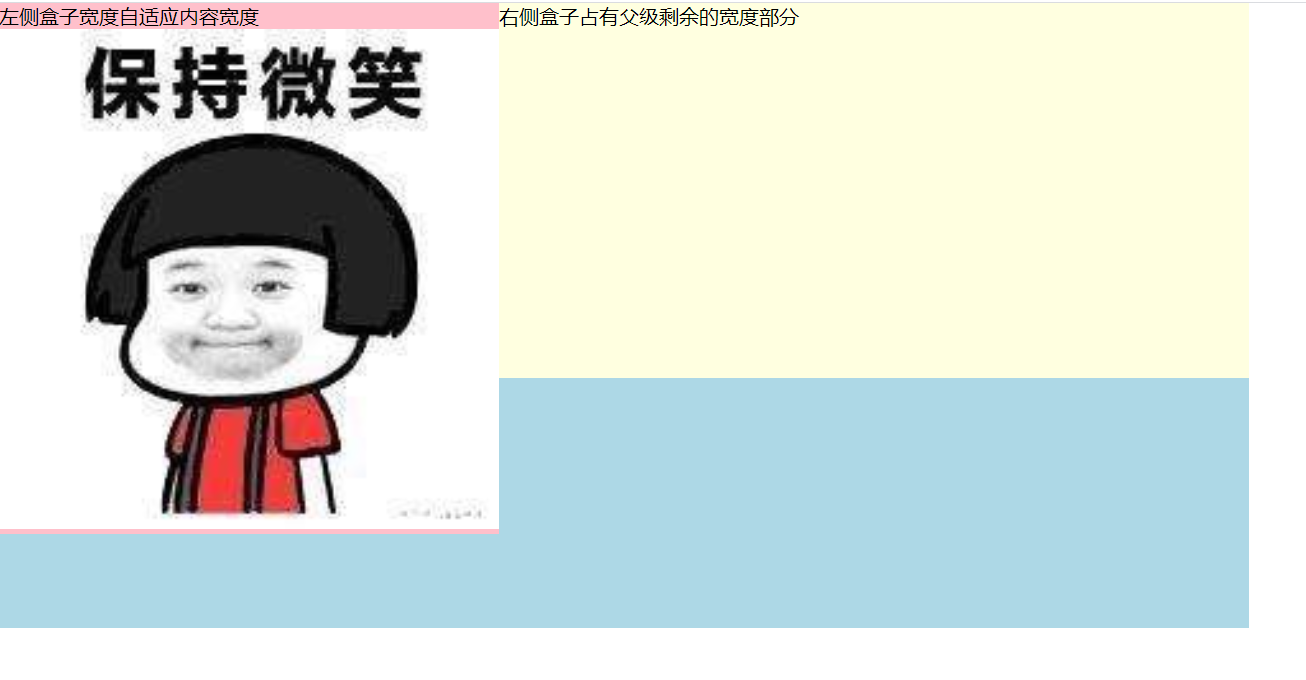
两列自适应布局:一列由内容撑开,另一列撑满剩余宽度
左侧盒子宽度自适应内容宽度,右侧盒子占有父级剩余的宽度部分

<style>
* {
margin: 0;
padding: 0;
}
.content {
width: 1000px;
height: 500px;
background-color: lightblue;
}
.left {
/ 浮动/
float: left;
background-color: pink;
}
.left img {
width: 400px;
}
.right {
height: 300px;
/ 触发 BFC,不会与浮动的元素重叠 /
overflow: hidden;
background-color: lightyellow;
}
</style>
</head>
<body>
<div class=“content”>
<div class=“left”>
<p>左侧盒子宽度自适应内容宽度</p>
<img src=“images/smile01.jpg” alt=“”>
</div>
<div class=“right”>
<p>右侧盒子占有父级剩余的宽度部分</p>
</div>
</div>
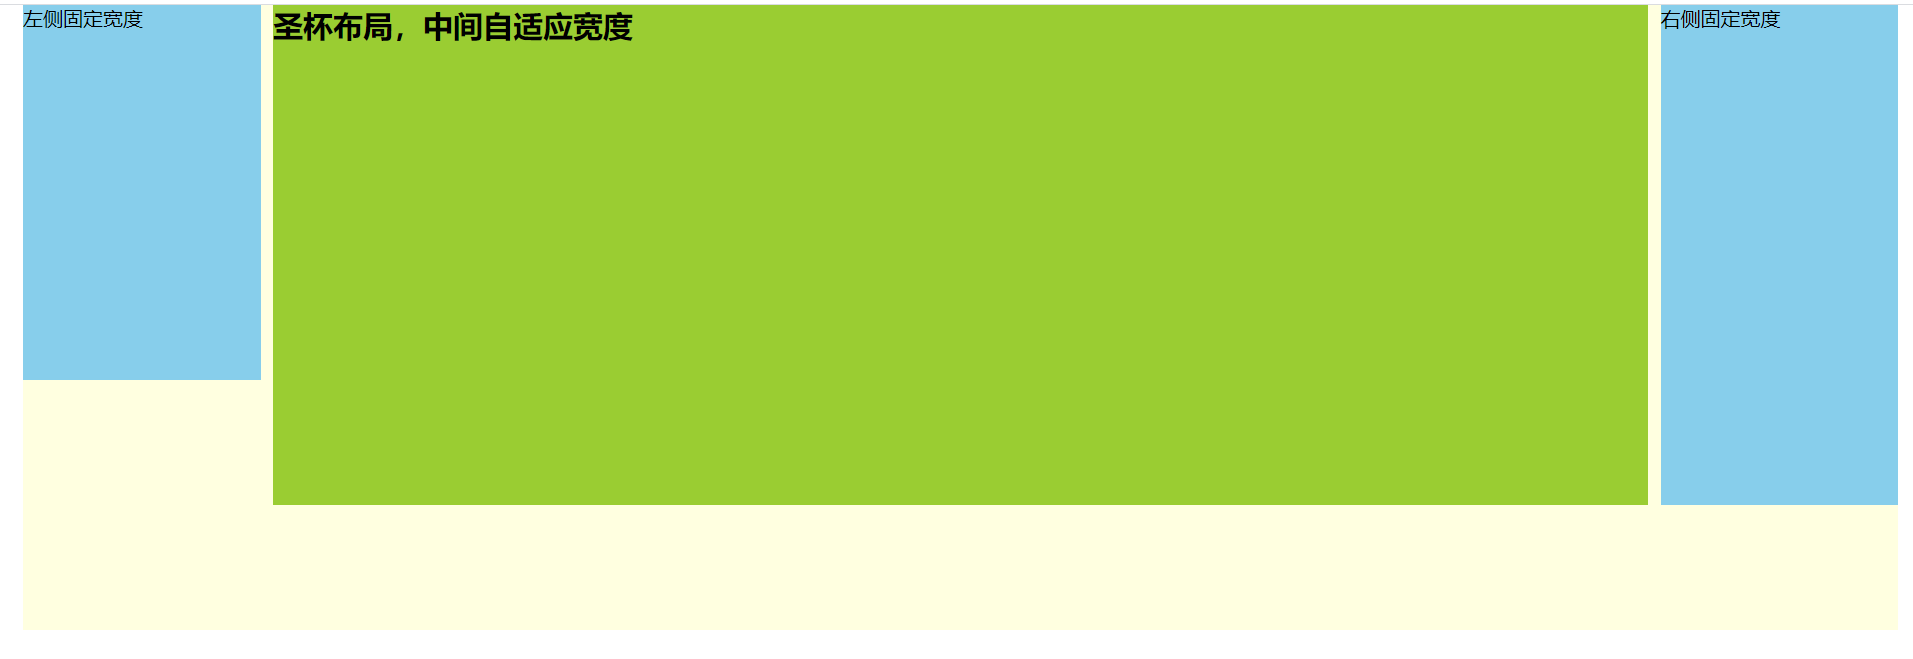
圣杯布局、双飞翼布局:两边固定宽度,中间自适应

<style>
* {
margin: 0;
padding: 0;
}
.container {
position: relative;
box-sizing: border-box;
max-width: 1500px;
height: 500px;
/ 用内边距为左右固定的两个子元素留取空位 /
padding-left: 200px;
padding-right: 200px;
margin: 0 auto;
background-color: lightyellow;
}
/ 定位在左侧,padding 区域 /
.left {
position: absolute;
left: 0;
top: 0;
width: 190px;
height: 300px;
background: skyblue;
}
/ 定位在右侧,padding 区域 /
.center {
width: 100%;
height: 400px;
background: yellowgreen;
}
.right {
position: absolute;
right: 0;
top: 0;
width: 190px;
height: 400px;
background: skyblue;
}
</style>
</head>
<body>
<div class=“container”>
<div class=“center”>
<h2>圣杯布局,中间自适应宽度</h2>
</div>
<div class=“left”>左侧固定宽度</div>
<div class=“right”>右侧固定宽度</div>
</div>
等高布局:子元素在父元素中高度相等

<style>
* {
margin: 0;
padding: 0;
}
.container {
position: relative;
box-sizing: border-box;
max-width: 1500px;
/ 父级不设置高度,被中间标准流内容撑开 /
/ 用内边距为左右固定的两个子元素留取空位 /
padding-left: 200px;
padding-right: 200px;
margin: 0 auto;
background-color: lightyellow;
}
/ 定位在左侧,padding 区域 /
.left {
position: absolute;
left: 0;
top: 0;
width: 190px;
/ 高度设置为父级的 100%,与父级共同变化 /
height: 100%;
background: skyblue;
}
/ 定位在右侧,padding 区域 /
.center {
width: 100%;
height: 300px;
background: yellowgreen;
}
.right {
position: absolute;
right: 0;
top: 0;
width: 190px;
height: 100%;
background: skyblue;
}
</style>
</head>
<body>
<div class=“container”>
<div class=“center”>
<h2>等高布局,中间自适应宽度,自身高度决定父级高度</h2>
</div>
<div class=“left”>左侧固定宽度,高度自动等于中间内容高度</div>
<div class=“right”>右侧固定宽度,高度自动等于中间内容高度</div>
</div>
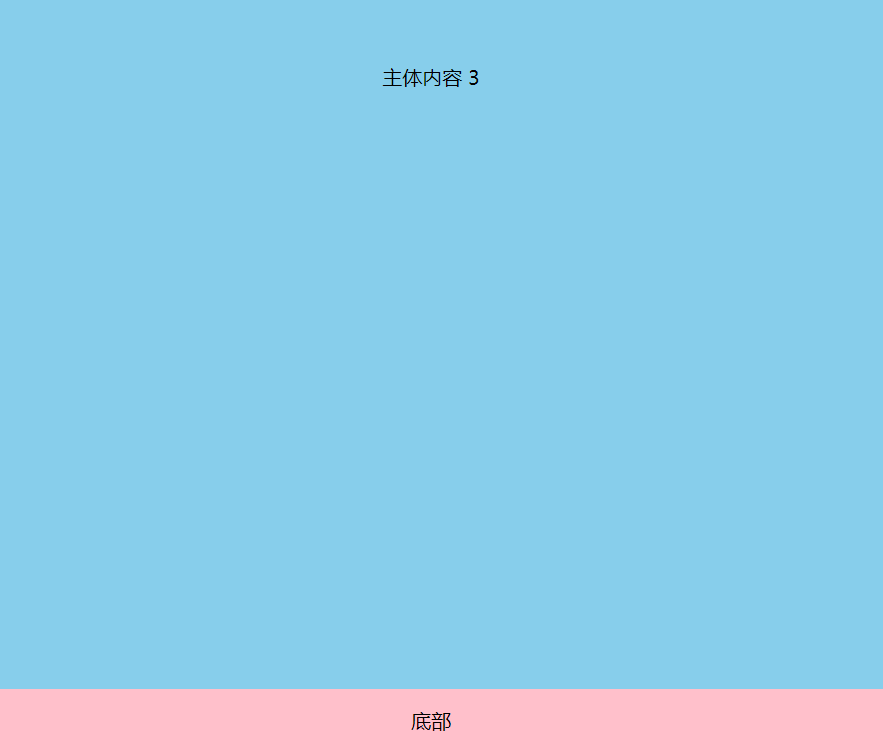
粘连布局:垂直方向,后面的元素在前面元素足够高时,紧跟在前面元素底部;前面元素高度不够时,后面的元素自动加载到页面的底部。

<style>
* {
margin: 0;
padding: 0;
}
需要给根元素设置
html,
body {
height: 100%;
}
.wrapper {
min-height: 100%;
设置最小高度
padding-bottom: 100px;
为footer留出空间
box-sizing: border-box;
内减
background: lightyellow;
text-align: center;
overflow: hidden;
}
.wrapper .main {
background-color: skyblue;
}
.wrapper .main p {
height: 500px;
}
.footer {
height: 100px;
margin-top: -100px;
上移进入wrapper区域
line-height: 50px;
background: pink;
text-align: center;
}
</style>
</head>
<body>
<div class=“wrapper”>
<div class=“main”>
<p>主体内容 1</p>
<p>主体内容 2</p>
<p>主体内容 3</p>
</div>
</div>
<div class=“footer”>底部</div>


