CSS
简写(语法糖)可能给编码带来了很多便利,但简写也会带来一些问题,来讨论一下 CSS 中的简写的”爱恨情仇”。
为什么说是爱恨情仇呢?因为简写带来了很多的便利,但凡事都有好有坏,不能说简写一点坏处都没有。所以就聊聊简写的 “好” 和 “坏”。
background
这个 CSS 属性大家肯定是再熟悉不过了,给元素设置背景色。
是这样?
.demo {background: #333;}
还是这样?
.demo {background-color: #333;}
应该都有吧,换作自己,平常这两者用哪个好像也是看心情,如果说肯定用前者啊,因为前者就一个单词,那其实后者也不麻烦,现在大家都用编辑器,在智能提示的辅佐下输入 bgc 再按回车就能打出 background-color: ; 了,其实也不麻烦。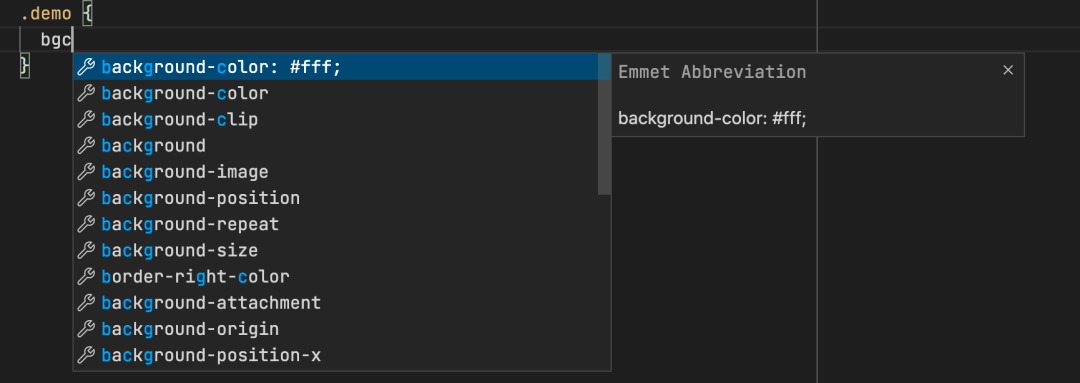
回到正题,其实这两种写法更推荐后者,为什么?来看个例子🌰。
<style>.demo {background: #333; /* 给元素设置了背景色#333 */}/* ... 中间隔了很多样式代码 */.demo:hover {background: url("example.png");}</style><div class="demo"/>
这个场景很简单:鼠标移到元素上就展示某张照片,未加载前用一个纯色占位。
然而实际效果是?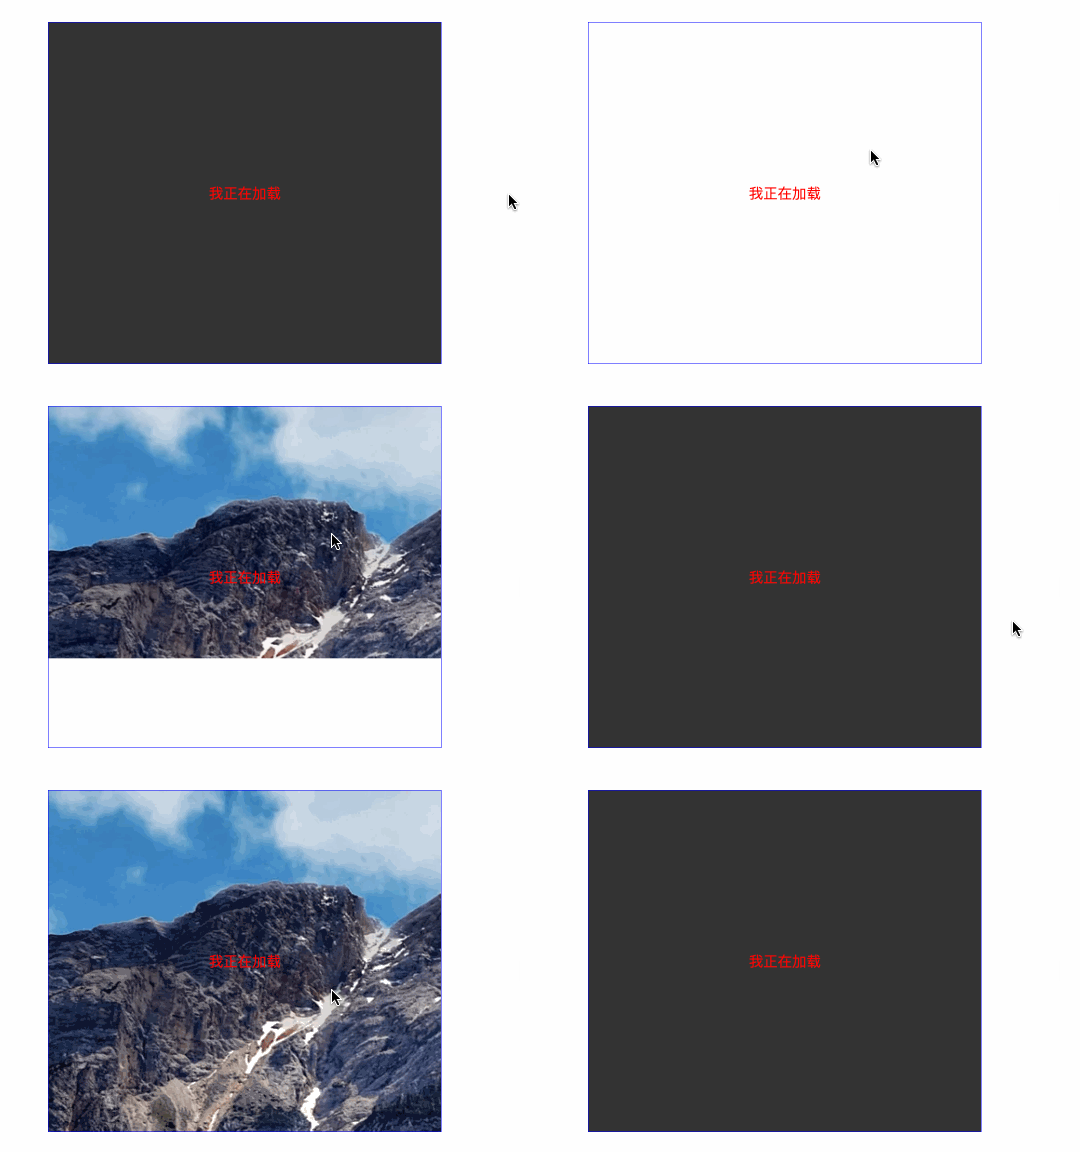
为了效果明显,加了边框、文字,网速调成 slow 3G。
可以看到 hover 时的 background 覆盖掉了前者的 background,使得效果差强人意。
是因为前者和后者都是 background,所以后者自然会覆盖前者吗?不全是。
即便前者用的 background-color: #333;,也仍然会被后者覆盖。
大家都知道 background 是一个语法糖,即很多属性的简写 👇:
那像例子中用 background: url('example.png')时,做了什么呢?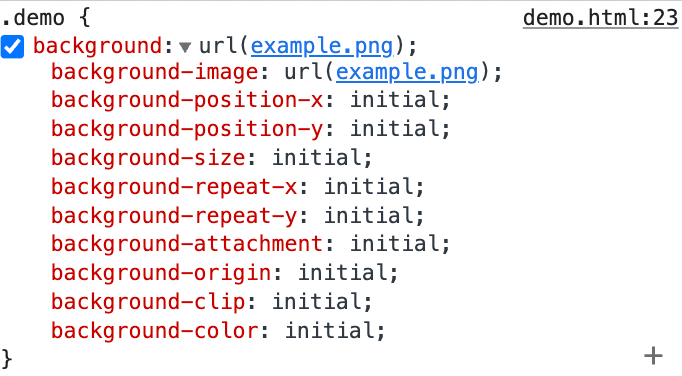
如上图所示,它默认把所有值都设置成了 initial,因此无论之前用到了其中哪个值都会被覆盖,虽然 initial 设置了跟没设置是一样的,都表示保持元素该属性的初始值。
会不会有人想说:一直都这么用的,都没遇到啥问题啊!
只想说一句:可能运气比较好,等代码比较复杂了,可能会回来补这个窟窿的。
结论:这就是一个简写造成的隐患,大家能避免则避免。
margin
又提了一个大家再熟悉不过的属性 margin,这里面又有啥坑呢?没啥坑,就是想介绍一下其它用法。
以下都是它的简写:
margin: 10px 20px 30px 40pxmargin: 10px 20px 30pxmargin: 10px
这些简写确实省去了不少的代码量。
投身到一个例子🌰中:现在想让元素水平居中,想用 margin 来实现。
<style>.parent {width: 300px;height: 300px;border: 1px solid black;}.child {width: 100px;height: 100px;background-color: red;margin: auto; /* 水平居中 */}</style><div class="parent"><div class="child"/></div>
效果符合预期: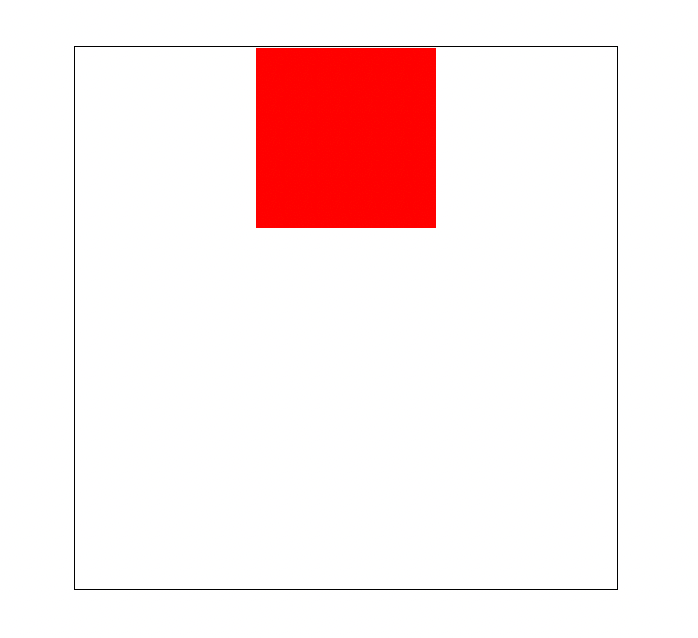
但使用 margin: auto 时有没有那么一瞬间想过,前面是否设置过 margin-top 或 margin-bottom 呢?比如这样:
<style>.parent {width: 300px;height: 300px;border: 1px solid black;}+ .child {+ margin-top: 100px;+ }+ /* ...省略几百行代码 */.child {width: 100px;height: 100px;background-color: red;margin: auto; /* 水平居中 */}</style><div class="parent"><div class="child"/></div>
预期的效果是什么样的?而此时的效果是什么样的?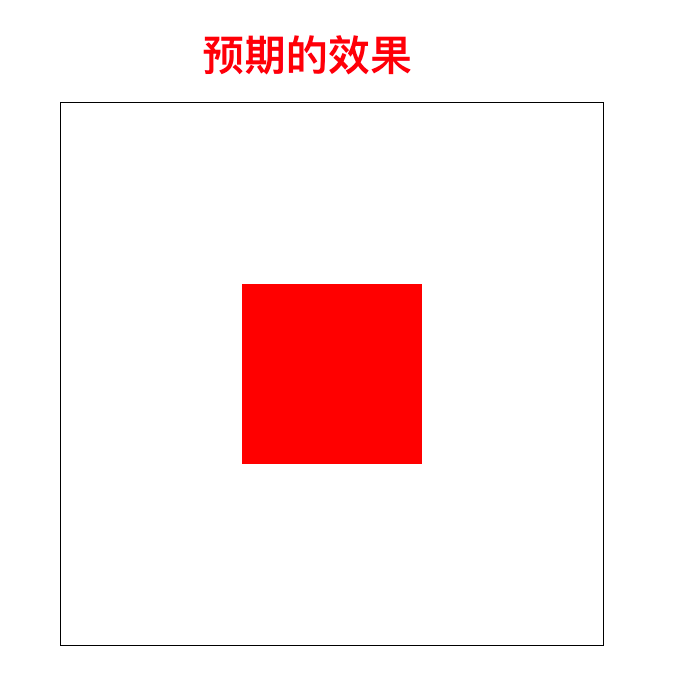
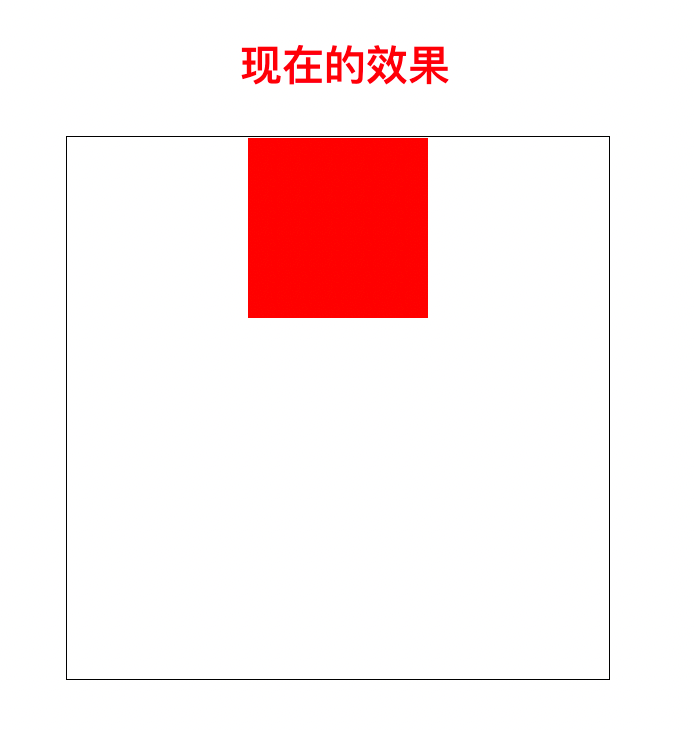
可以看到,预期是想要既水平居中,又距离顶部 100px,而现在 margin-top 被覆盖了。
其实单纯想实现水平居中完全没必要用 margin: auto,因为本意是不想去修改顶部和底部的间距的,只是因为用了这个简写,不得不这么做。
不然试试另一个简写?只处理水平的间距。
<style>.parent {width: 300px;height: 300px;border: 1px solid black;}.child {margin-top: 100px;}/* ...省略几百行代码 */.child {width: 100px;height: 100px;background-color: red;- margin: auto; /* 水平居中 */+ margin-inline: auto; /* 真正的只是水平居中 */}</style><div class="parent"><div class="child"/></div>
这样同样能实现想要的效果,且不会影响 margin-top 和 margin-bottom 的属性。
那同理,有没有能只影响竖直方向的 margin 的简写呢?当然有,那就是 margin-block。
一起来看另一个例子🌰。
<style>.parent {position: relative;border: 1px solid black;width: 300px;height: 300px;}.child {position: absolute;top: 0;bottom: 0;left: 0;right: 0;width: 100px;height: 100px;margin: auto;background-color: red;}</style><div class="parent"><div class="child"/></div>
效果如下: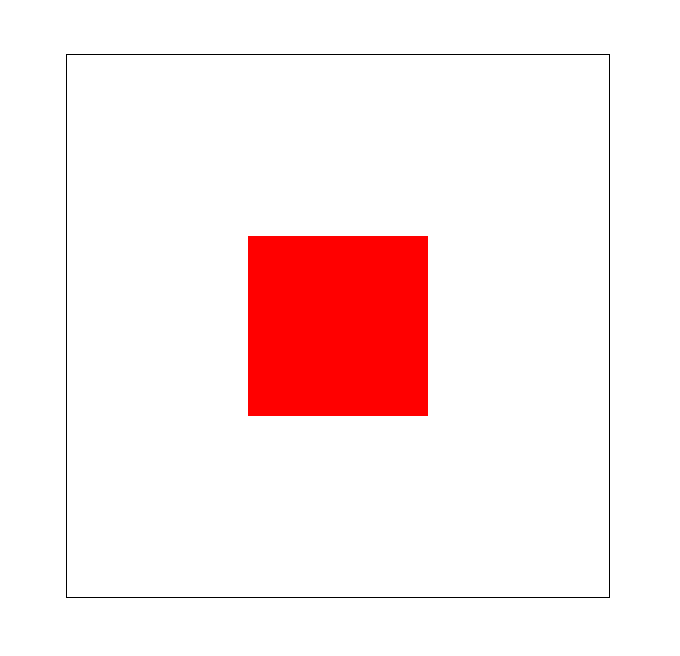
这是一种对于非相对定位的垂直水平居中方法(记好了,面试官问垂直水平居中的方法又多了一个),是从 HTML 原生的 <dialog/> 标签中了解到的。
为什么要用这个例子呢,就是想引申出这个知识点,分享一下最近看到的小 tips。
可以删除 margin: auto,用上前面说的 margin-inline: auto 和 margin-block: auto。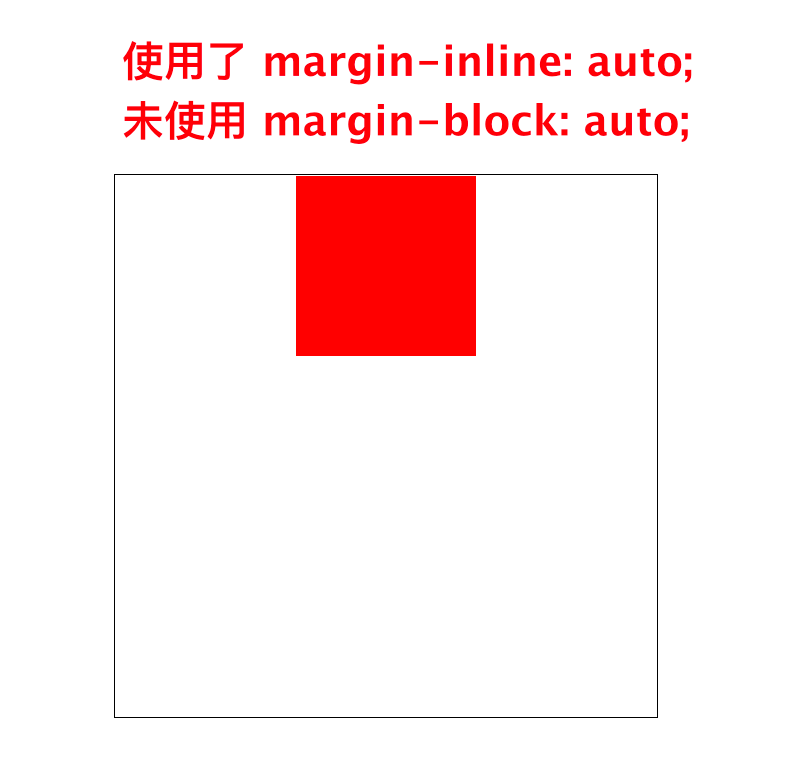
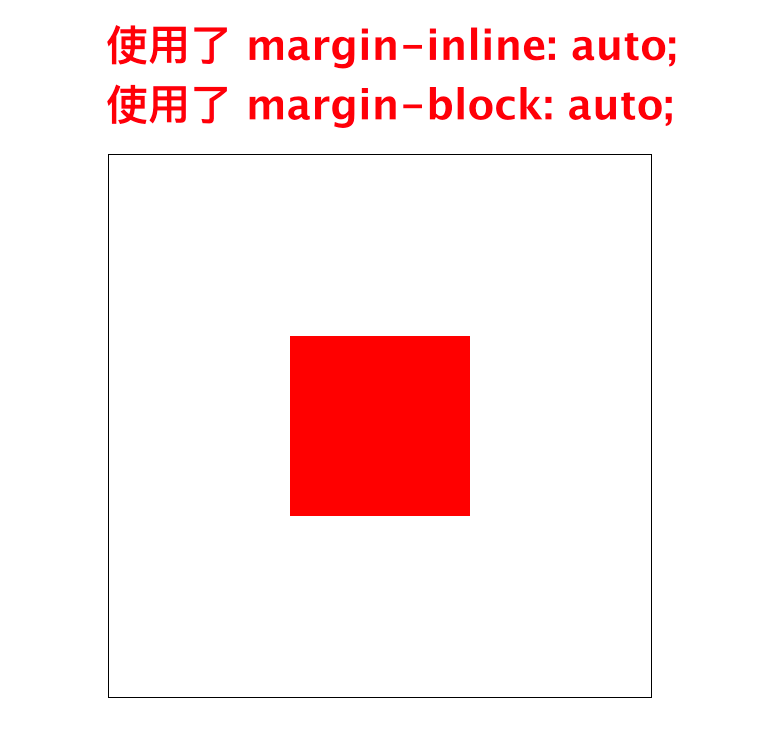
结论:margin 的简写不如 background 那么复杂,但使用上了 margin-inline 和 margin-block 也可以给自己降低心智负担。
inset
上面说了那么多简写带来的隐患,要不再来说说简写带来的好处?
还是举个例子🌰。
<style>.parent {position: relative;border: 3px solid blue;margin: 200px;width: 300px;height: 300px;}.child {position: absolute;top: 0;bottom: 0;left: 0;right: 0;background-color: red;}</style><div class="parent"><div class="child"/></div>
这段代码大家应该都很熟悉,给 .child 元素设置成了绝对定位,并赋予了以下属性:
top: 0;bottom: 0;left: 0;right: 0;
然后元素就撑满父元素了,达到了 width: 100% + height: 100% 的效果,那为啥不直接设置宽高都 100% 呢?只用设置两个属性。
❌❌❌ 不这么做的原因还是要回到 position 本身,当一个元素脱离文档流时,若未设置 top、bottom、left、right,默认元素停留的位置就是其未脱离文档流时的位置。
可能有点绕,直接上张图。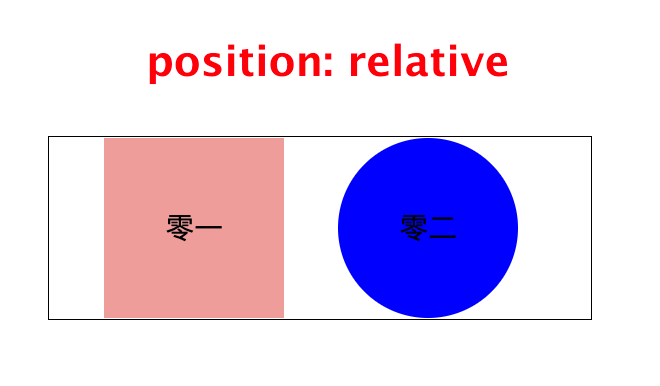
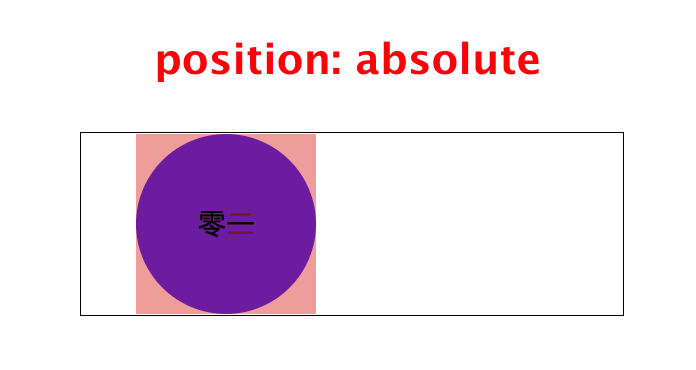
可以看到,零一 这个元素在脱离文档流后,仍然是停留在它处于文档流时的位置,那此时如果给他设置宽高 100% 会是什么样呢?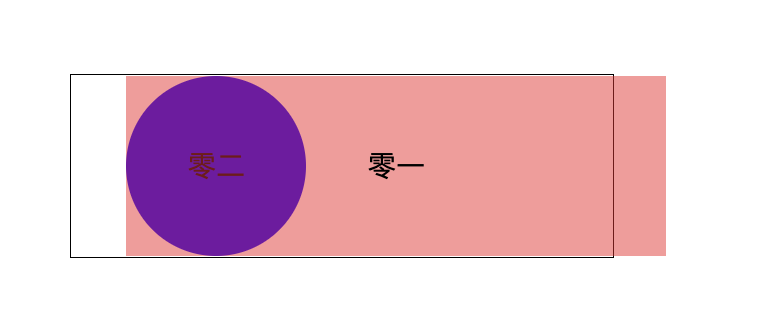
漂亮,超出父元素了,虽然解决这个问题也很简单,直接加一个 left: 0 即可,但还有更简单的方法,那就是用 inset 这个属性。
其实 inset 就是 top、right、bottom、left 的简写,不知道为什么,看过很多人的代码,都没用过这个属性,所以也给大家安利一下。
语法跟 margin 类似,因此用它来简化刚才的代码。
<style>.parent {position: relative;border: 3px solid blue;margin: 200px;width: 300px;height: 300px;}.child {position: absolute;- top: 0;- bottom: 0;- left: 0;- right: 0;+ inset: 0;background-color: red;}</style><div class="parent"><div class="child"/></div>
这里为什么又推荐大家用 inset 了呢?本质是因为此处确实是需要同时设置上下左右四个值的,那为何不用 inset 呢?
border
其实 border 这个还好,还是建议用简写的哈,只不过有一个特殊的 case,给大家分享一下,避免踩坑。
有这样一个场景:一个元素本身没有边框,当鼠标移入时出现边框,边框从有到无要有过渡动画;同时鼠标移除,边框消失,也伴随有过渡动画。
<style>.demo {width: 100px;height: 100px;background-color: lightblue;border: none;box-sizing: border-box;transition: border 1s linear;}.demo:hover {border: 4px solid red}</style><div class="demo"/>
大部分人都会这么写对不对?效果如何呢?可惜只成功了一半!
为什么鼠标移出时,border 的过渡动画消失了?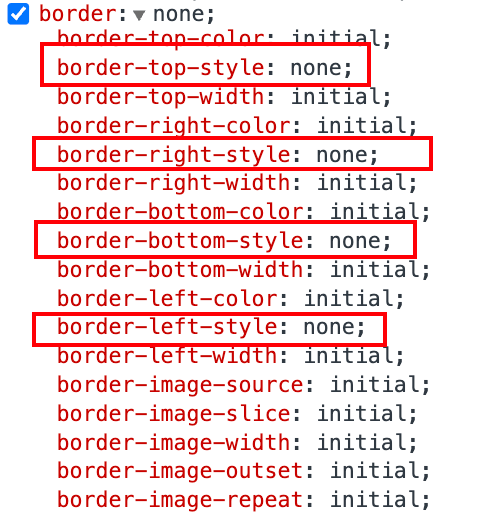
图中可以看到,border: none 其实就是把 border-style 设置成了 none,大家都知道 transition 对于 border 的过渡动画其实是针对 border-color 和 border-width 的,但如果 border-style 都没有,那还怎么看得到过渡动画呢?
所以想要实现鼠标移出时的过渡动画,就不能用 border: none 这个简写了,那该怎么办?
想到了一个思路,可能不是最完美的,但根本看不出瑕疵,大家可以借鉴一下:
将元素的 border 初始状态设置为 border: 0px solid transparent,这样既保证了 border-style 的存在,又能保证边框会从 4px 过渡到 0px,颜色也从 有 过渡到 无。
效果如下:
总结
对于 「到底该如何使用简写?」 这个问题,建议:需要一次性设置简写属性中全部或绝大部分属性时,可以使用简写;反之,则不太应该使用简写。

