CSS
到目前为止,最喜欢 Framer Motion 的部分是它神奇的布局动画—将 layout prop 拍在任何运动组件上,看着该组件从页面的一个部分无缝过渡到下一个部分。
<motion.div layout />
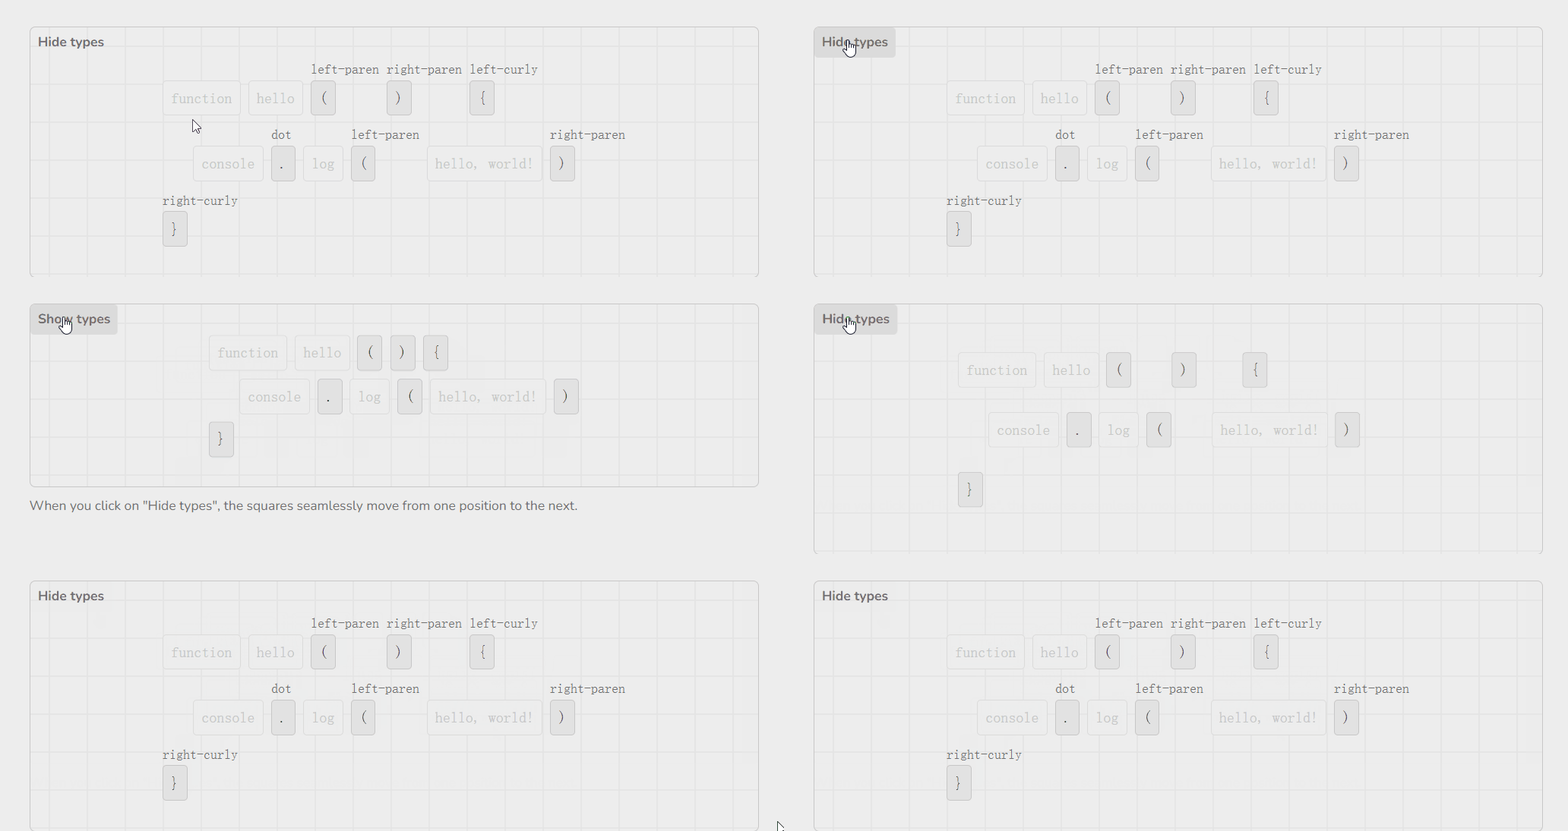
在这里主要介绍:
- 布局变化:它们是什么,何时发生。
- 基于CSS的方法以及为什么它们并不总是有效。
- FLIP:是Framer Motion使用的技术。
布局变化
当页面上的一个元素影响其他元素改变位置时,就会发生布局变化。例如,改变一个元素的宽度或高度就是一种布局变化,因为任何相邻的元素都必须移动,以便为该元素的新尺寸腾出空间。
同样,改变元素的justify-content属性也是一种布局变化,因为它导致该元素的子元素改变位置。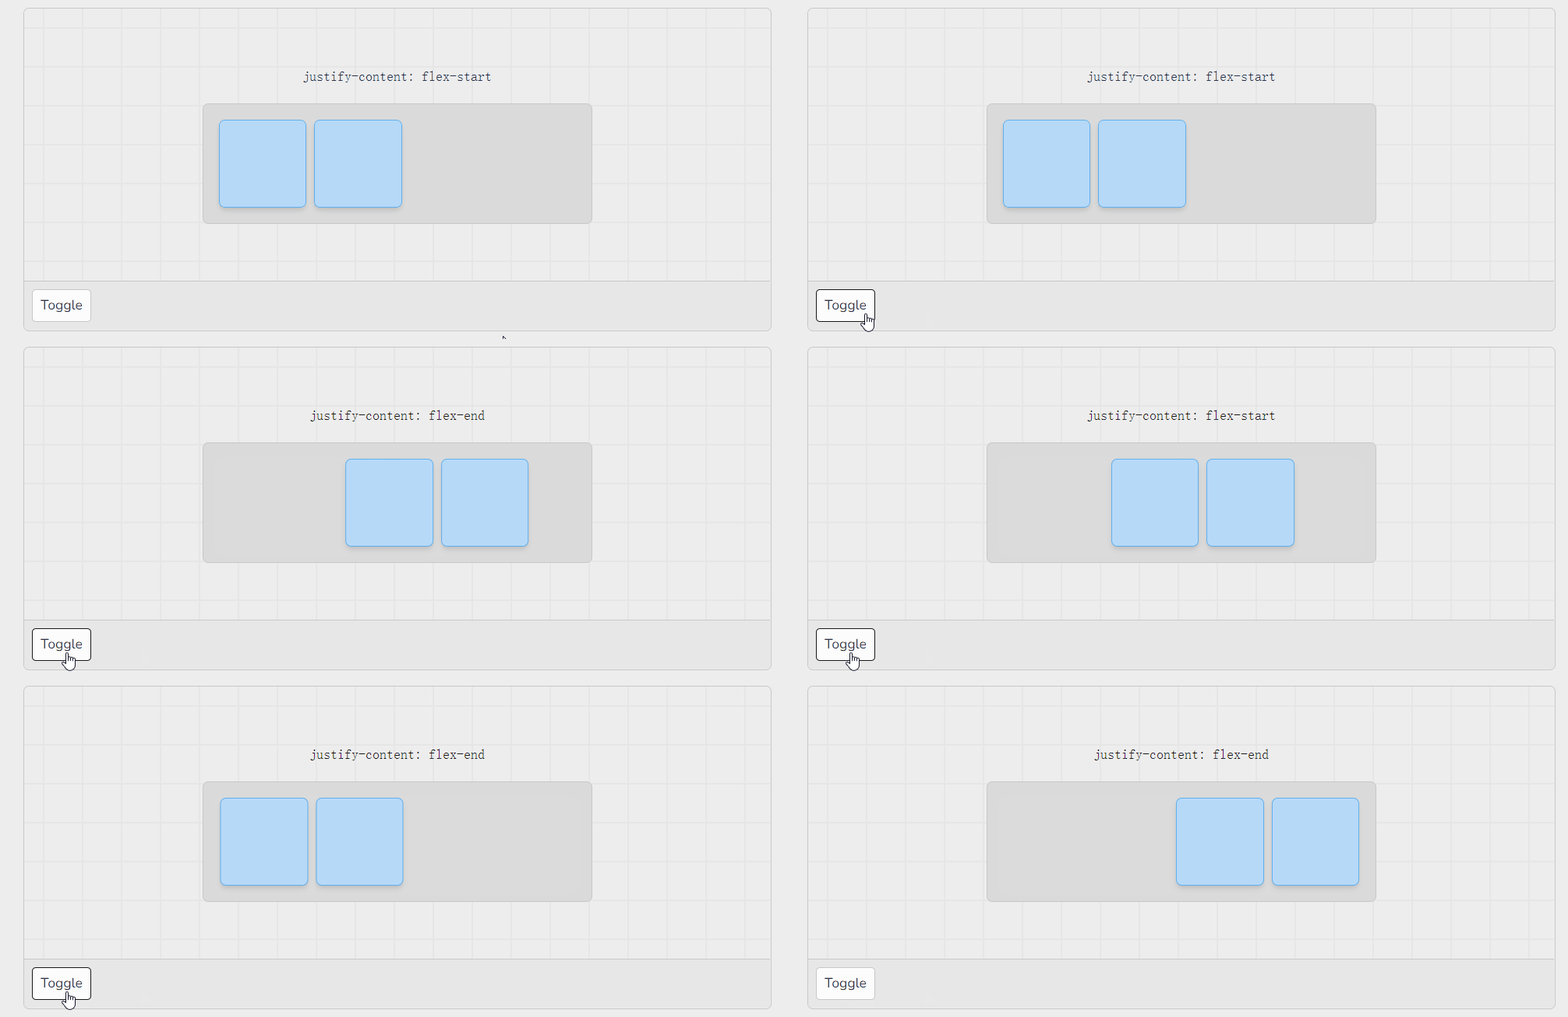
不过,像scale属性的变化并不是布局的改变,因为它的变化不影响页面上的其他元素。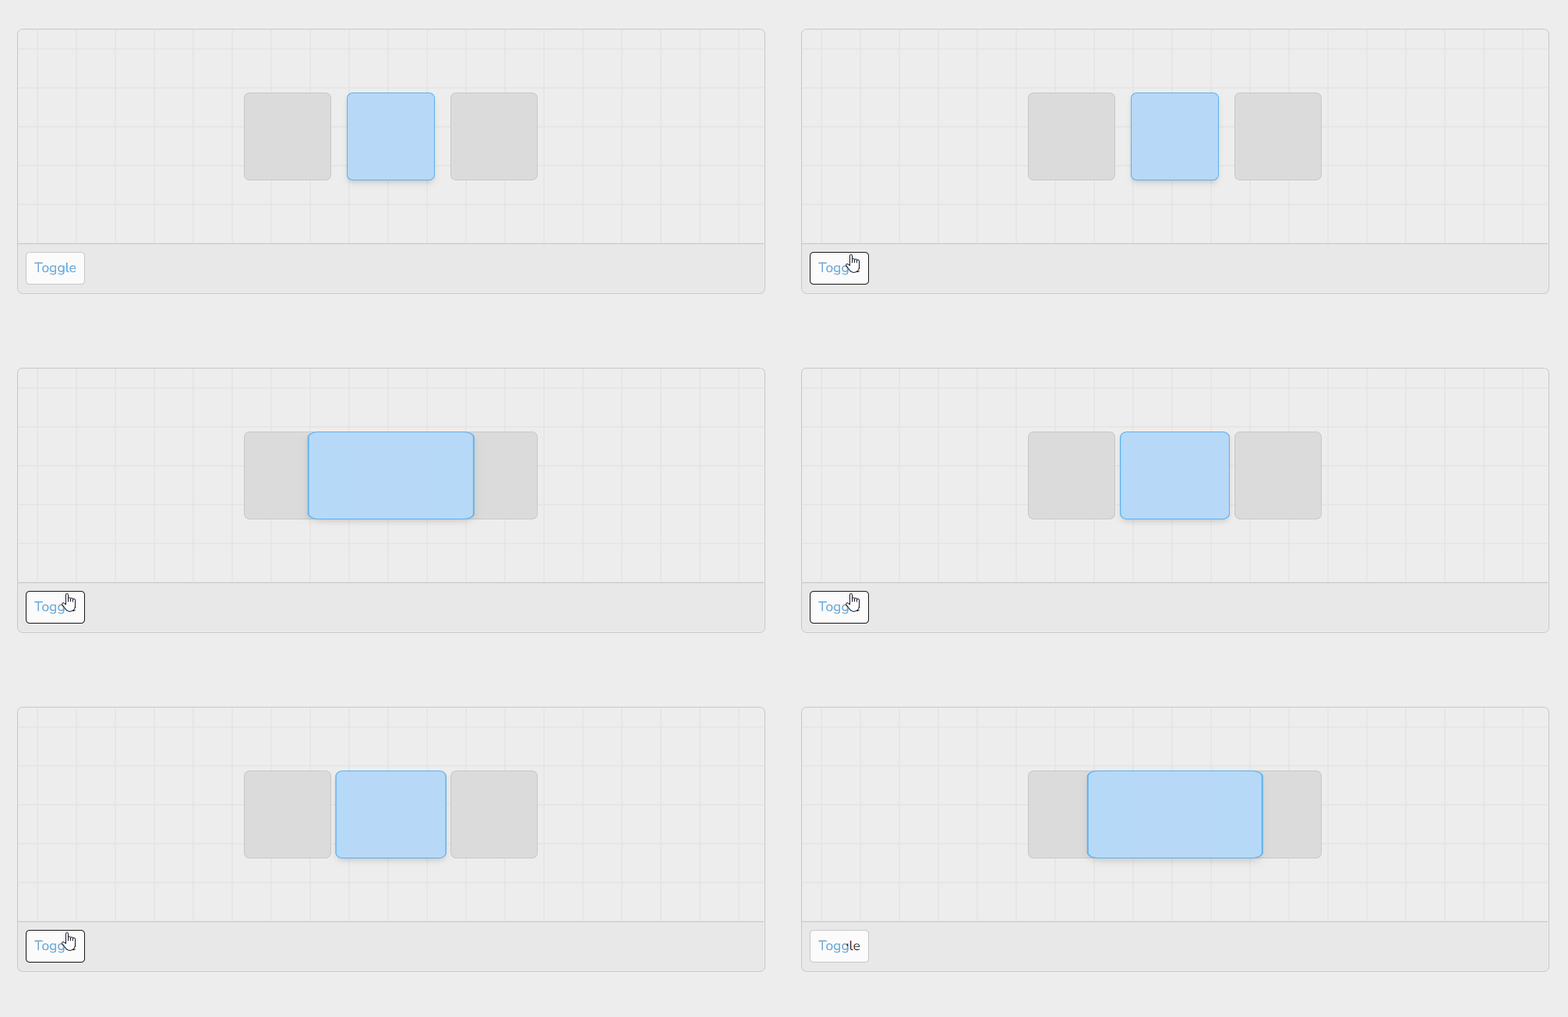
用CSS做动画
那么,如何将布局变化做成动画呢?一种方法是直接使用 CSS过渡使属性产生动画:
现在,当 square 改变宽度时,它将在其大小之间无缝动画化: ```javascript // Motion.js import React from ‘react’ import ‘./styles.css’.square {transition: width 0.2s ease-out;}
export default function Motion({ toggled }) { return
}
**style.css**```css.active {border: 1px solid hsl(208, 77.5%, 76.9%);background: hsl(209, 81.2%, 84.5%);width: 120px;height: 120px;border-radius: 8px;transition: width 0.5s ease-out;}.toggled {width: 200px;}
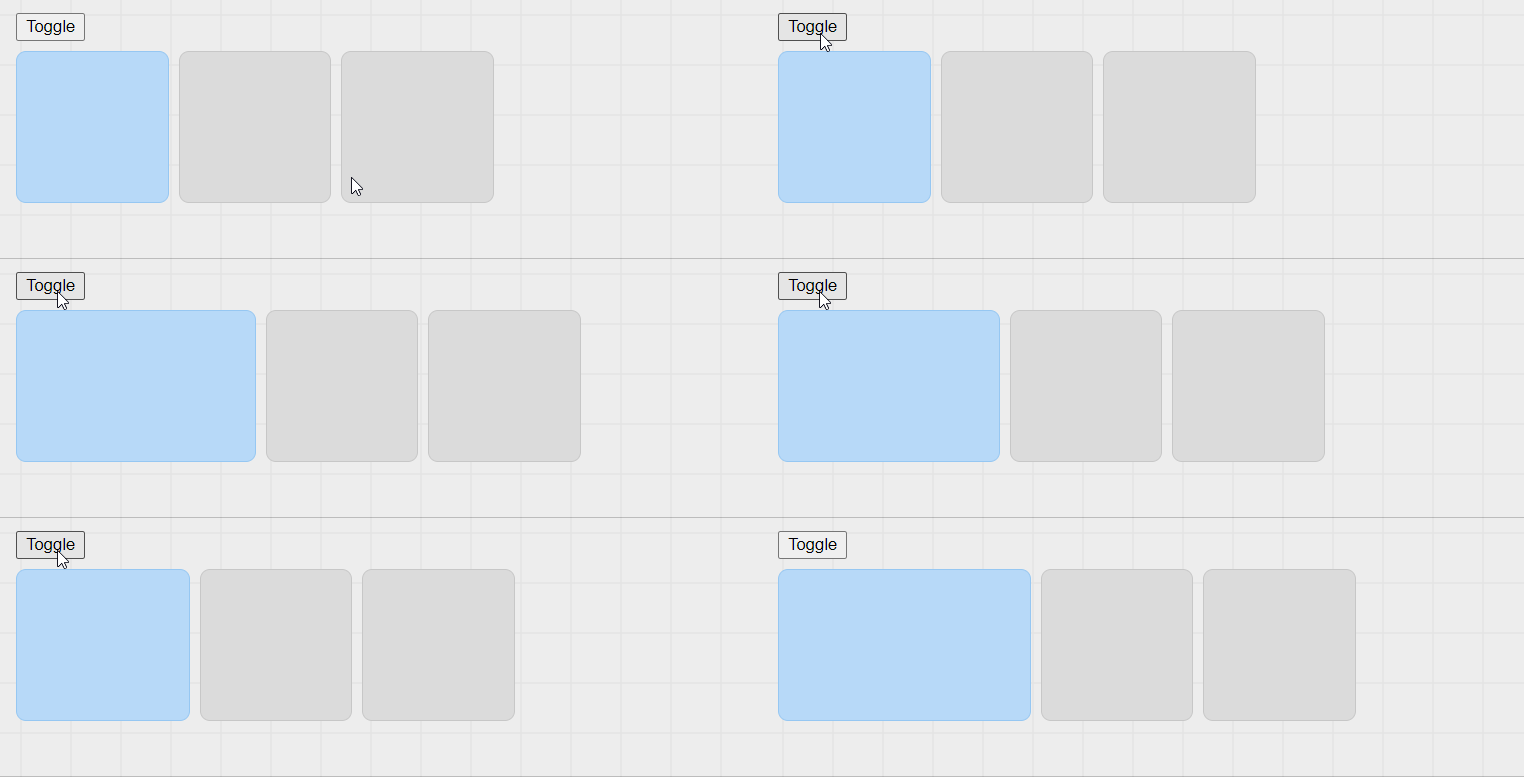
看上去,CSS 也可以做动画,但它有两个主要的缺点:
- 不能把所有东西都做成动画。例如,不能对justify-content的变化制作动画,因为justify-content不是一个可动画的属性。
- 性能问题。涉及布局变化的CSS动画通常比基于 transform 的动画更昂贵,所以你可能会发现动画在低端设备上不那么流畅。
性能
- 不要预先优化 如果在低端设备上没有注意到任何性能问题,而且CSS transition 对你有效,那么就不要担心!只有在需要时才进行优化。
涉及布局变化的CSS动画通常比其他CSS动画更昂贵,因为它影响到周围的其他元素。这是因为浏览器必须在动画的每一帧中重新计算页面的布局—对于一个60FPS的动画来说,这意味着每秒钟要计算60次!
回顾上面动画。注意到灰色的盒子看起来也在做动画,尽管只过渡了蓝色的盒子: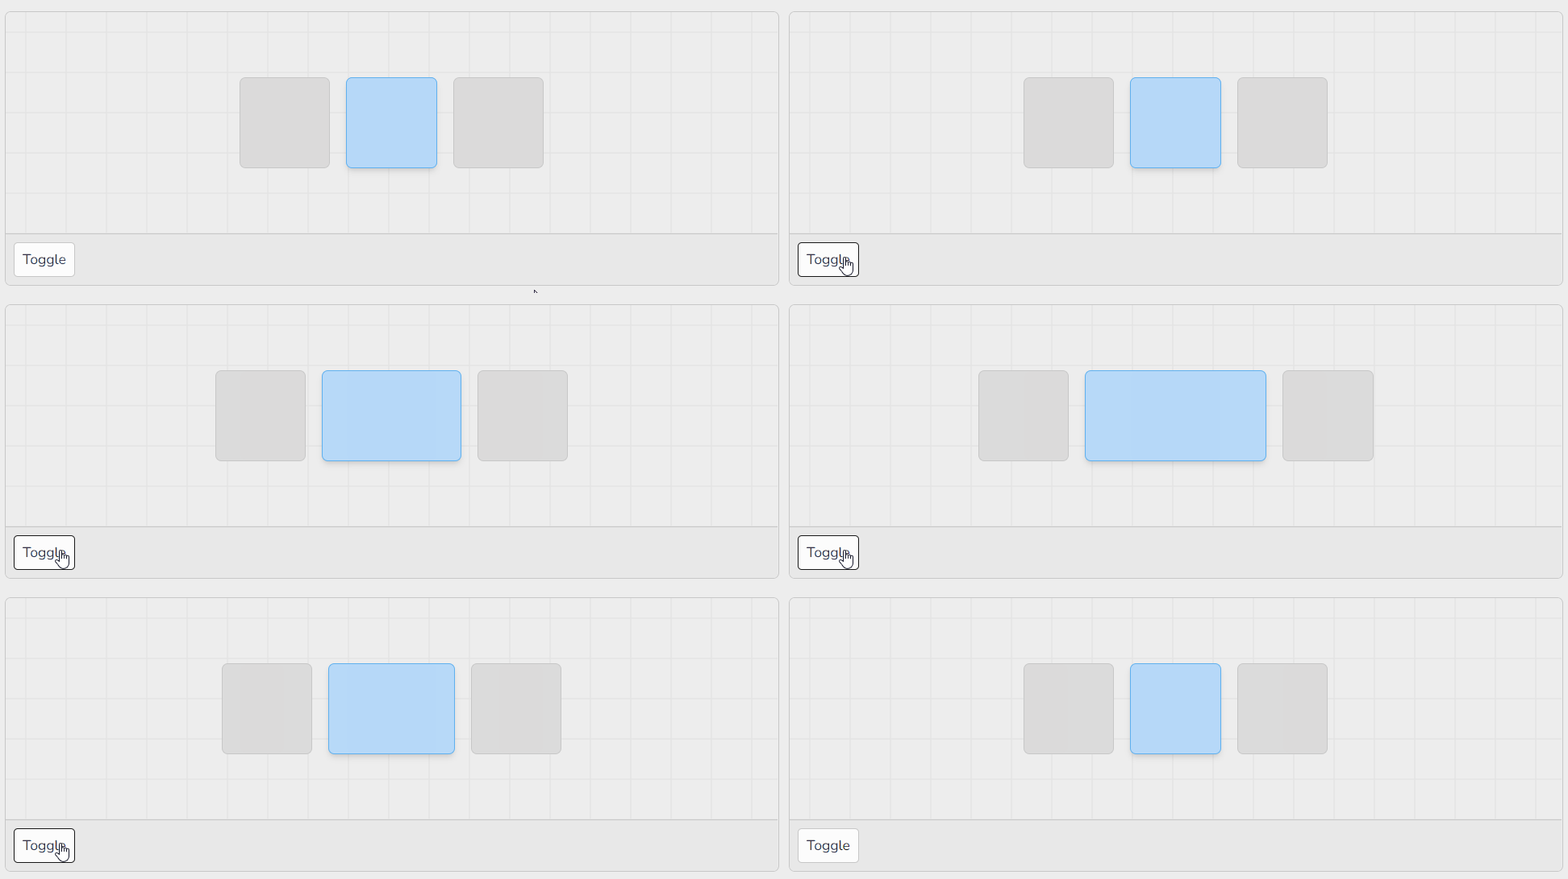
发生这种情况的原因是,每次蓝框的尺寸发生变化时,浏览器都会重新计算灰框的位置。
另一方面,浏览器可以更快地对 transform 等CSS属性进行动画处理,因为它们不影响布局。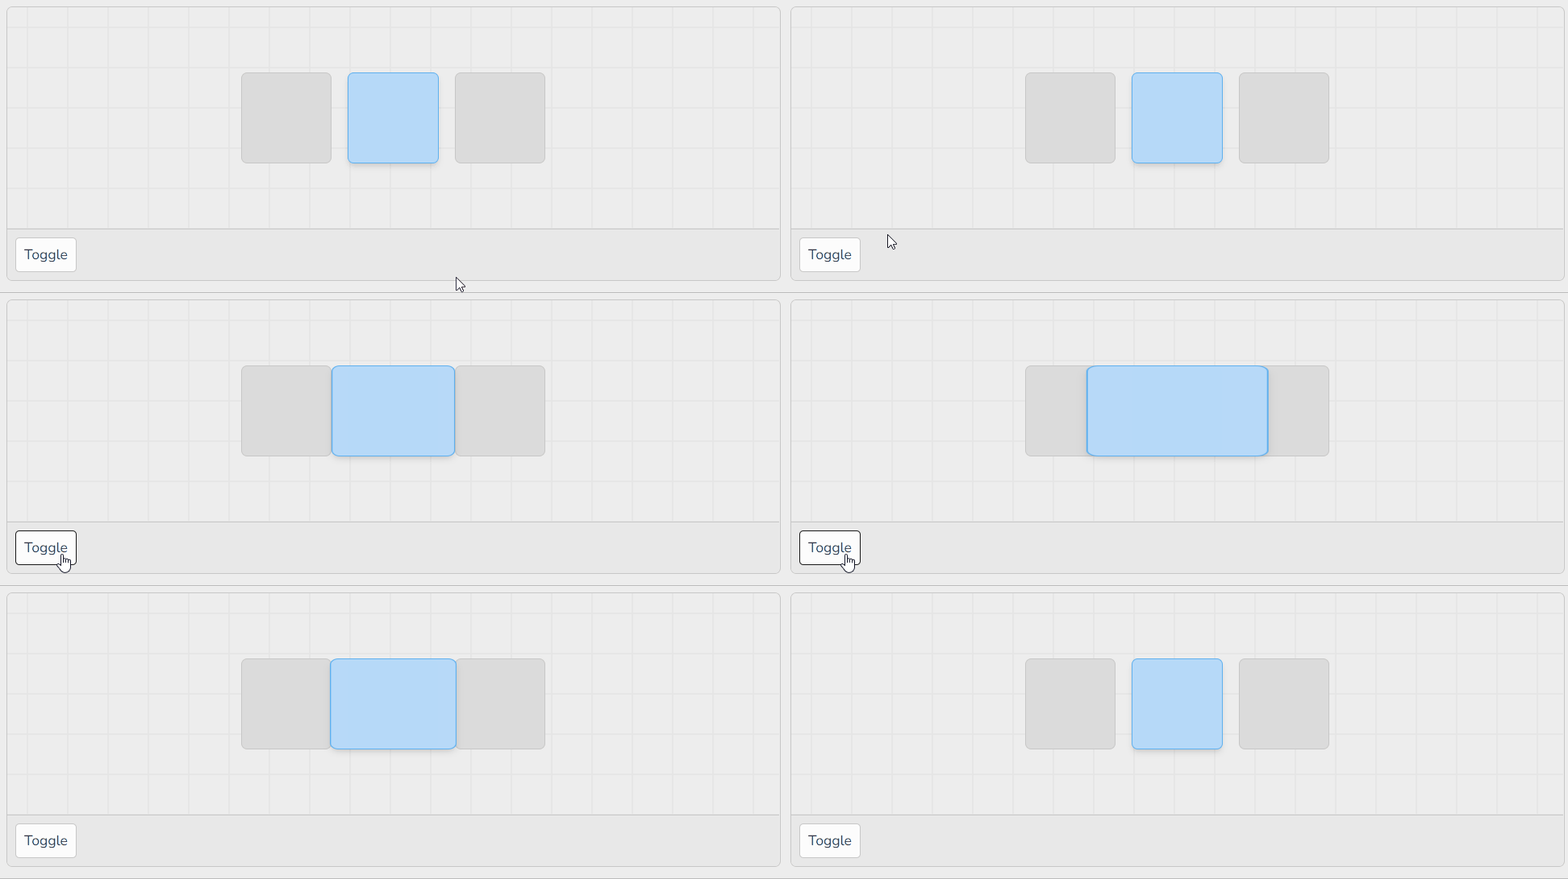
注意,随着蓝色方框的增长,灰色方框保持原状!
所以,如果 transform 的动画成本更低,是否可以用 transform 来代替布局变化?
是的,可以!
FLIP
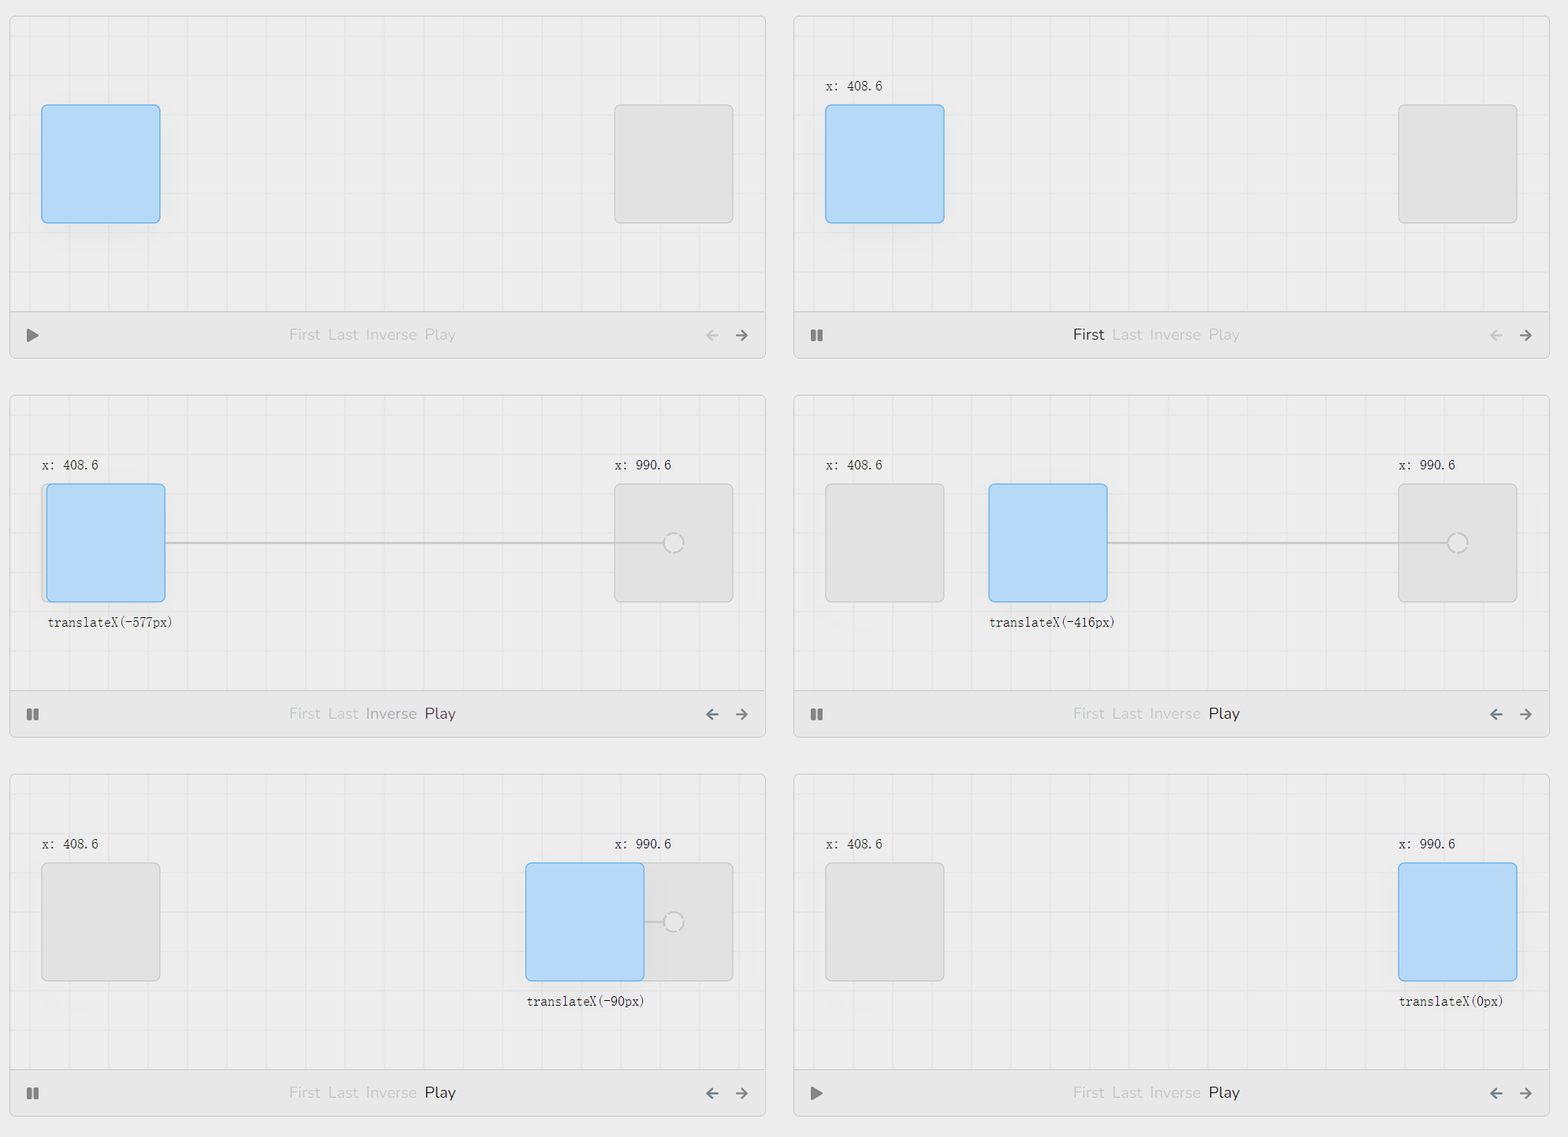
FLIP 是 First, Last, Inverse, Play 的缩写,它是一种技术,可以使用 “快速” 的 CSS 属性(如transform)对 “slow” 的布局变化制作动画。FLIP甚至可以对 “不可动画” 的属性(如justify-content)进行动画处理。Framer Motion使用FLIP来实现其布局动画。
顾名思义,FLIP是一种四步技术,它通过颠倒浏览器所做的任何布局变化来工作。通过动画演示justify-content从flex-start到flex-end的变化来弄清楚它是如何工作的。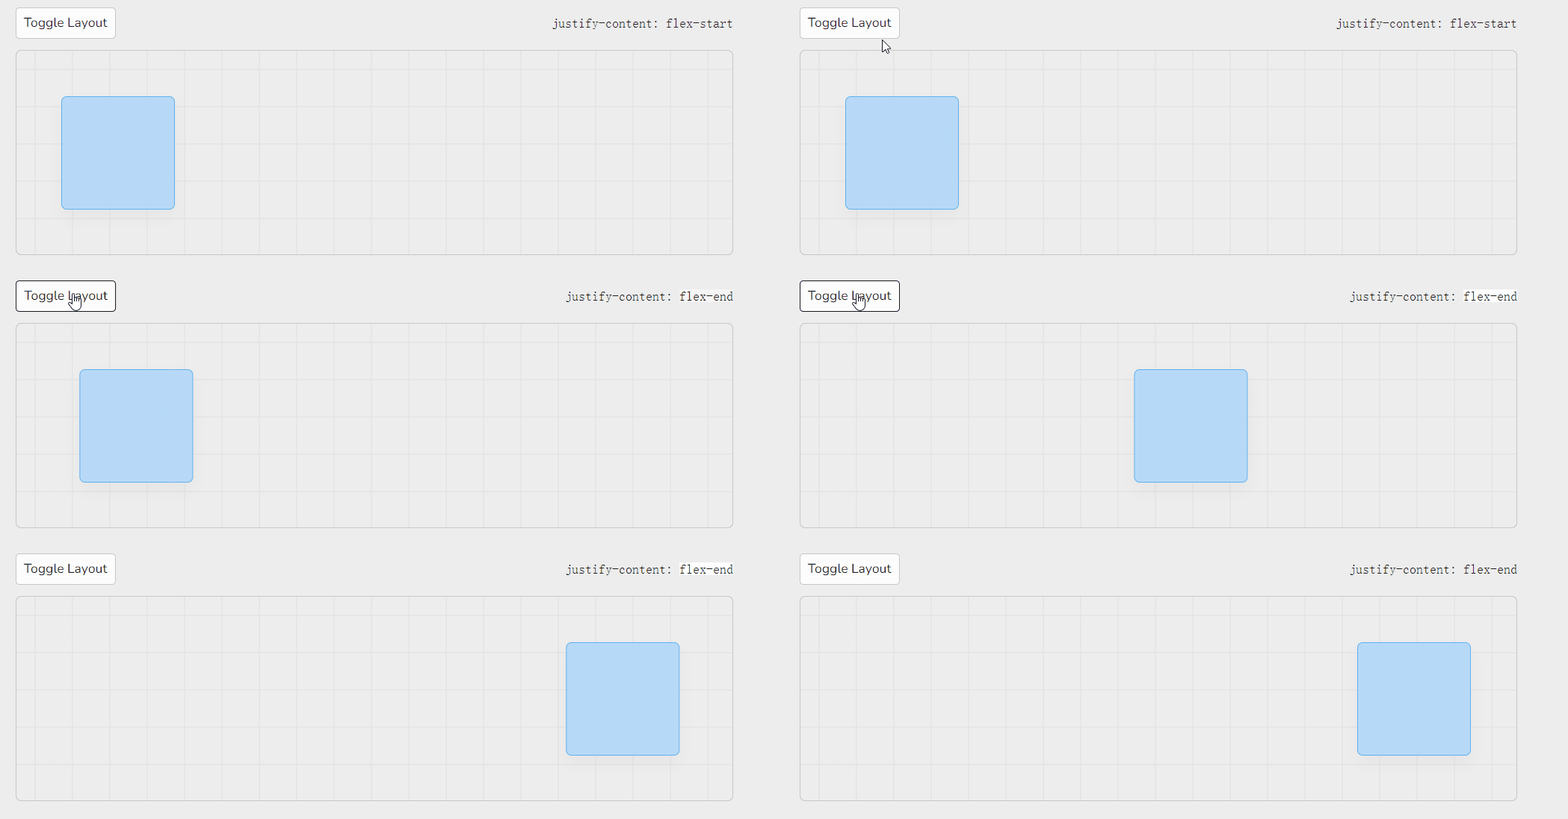
First
在 First 中,在任何布局变化发生之前,测量要做动画的元素的位置:
获取元素位置的一种方法是使用HTML元素的.getBoundingClientRect()方法:
const Motion = (props) => {const ref = React.useRef();React.useLayoutEffect(() => {const { x, y } = ref.current.getBoundingClientRect();}, []);return <div ref={ref} {...props} />;};
Last
在 Last 这一步中,测量布局变化后元素的位置: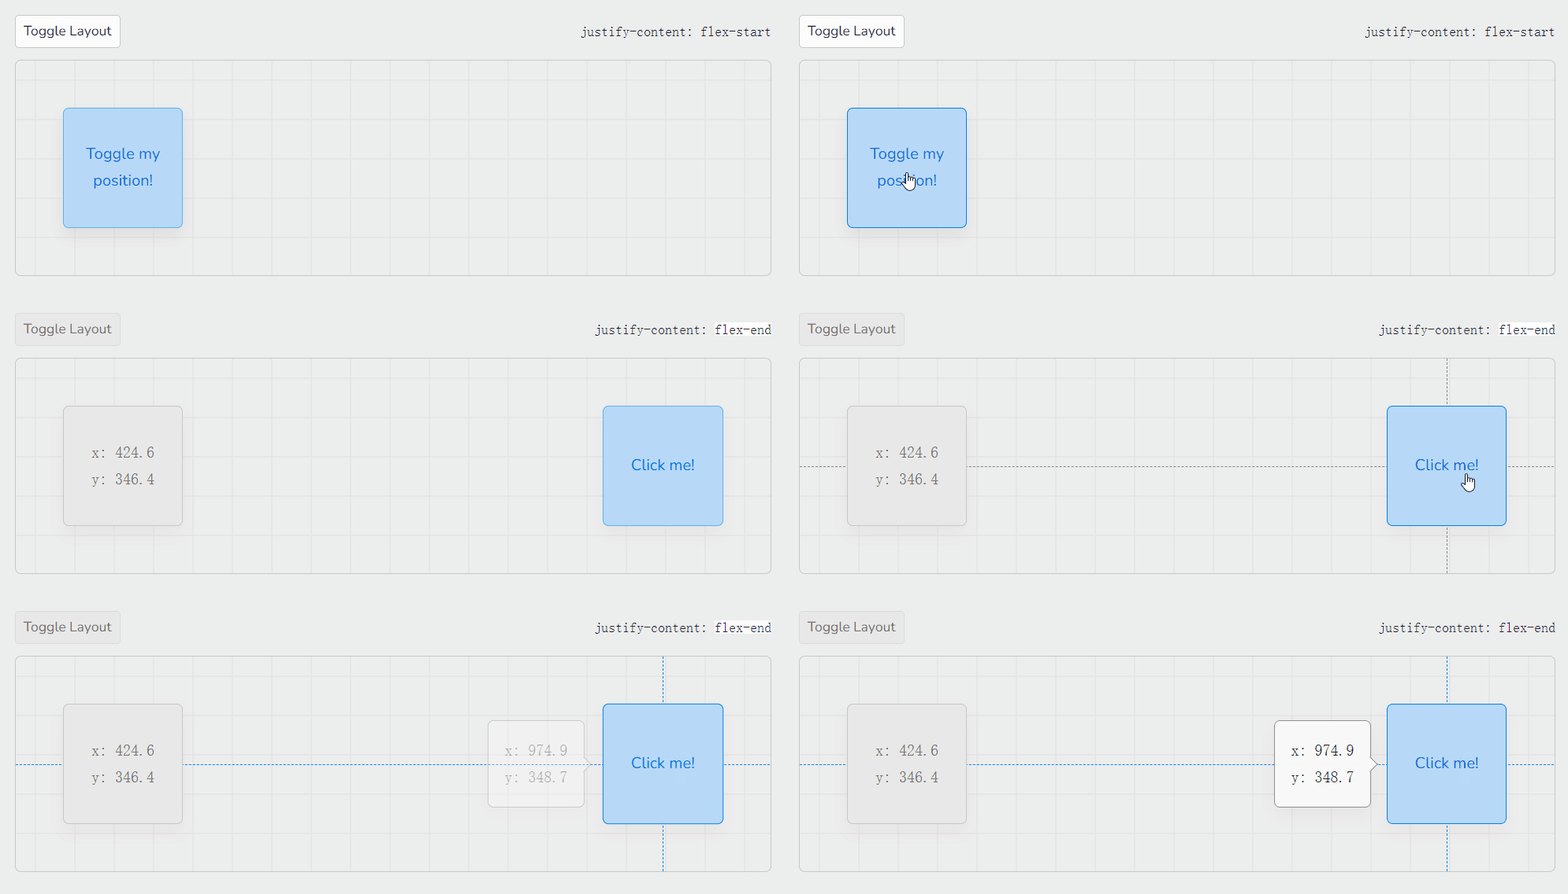
为了在代码中实现这一点,首先假设布局的改变意味着组件刚刚重新渲染了。所以先从useEffect钩子中删除依赖数组,使钩子每次渲染都能运行。
试着触发几次布局变化,检查控制台,看看显示的x和y值是什么。
App.js
import React from 'react'import Motion from './Motion'import './styles.css'export default function App() {const [toggled, toggle] = React.useReducer(state => !state, false)return (<div id="main"><button onClick={toggle}>Toggle</button><div id="wrapper" style={{ justifyContent: toggled ? 'flex-end' : 'flex-start' }}><Motion /></div></div>)}
Motion.js
import React from 'react'export default function Motion() {const squareRef = React.useRef()React.useLayoutEffect(() => {const box = squareRef.current?.getBoundingClientRect()if (box) { console.log(box.x, box.y) }})return <div id="motion" ref={squareRef} />}
Inverse
在 inverse 阶段,修改正方形的位置,使其看起来像是根本没有移动过。要做到这一点,要比较所做的两个测量,并计算出一个 transform ,然后应用到正方形上。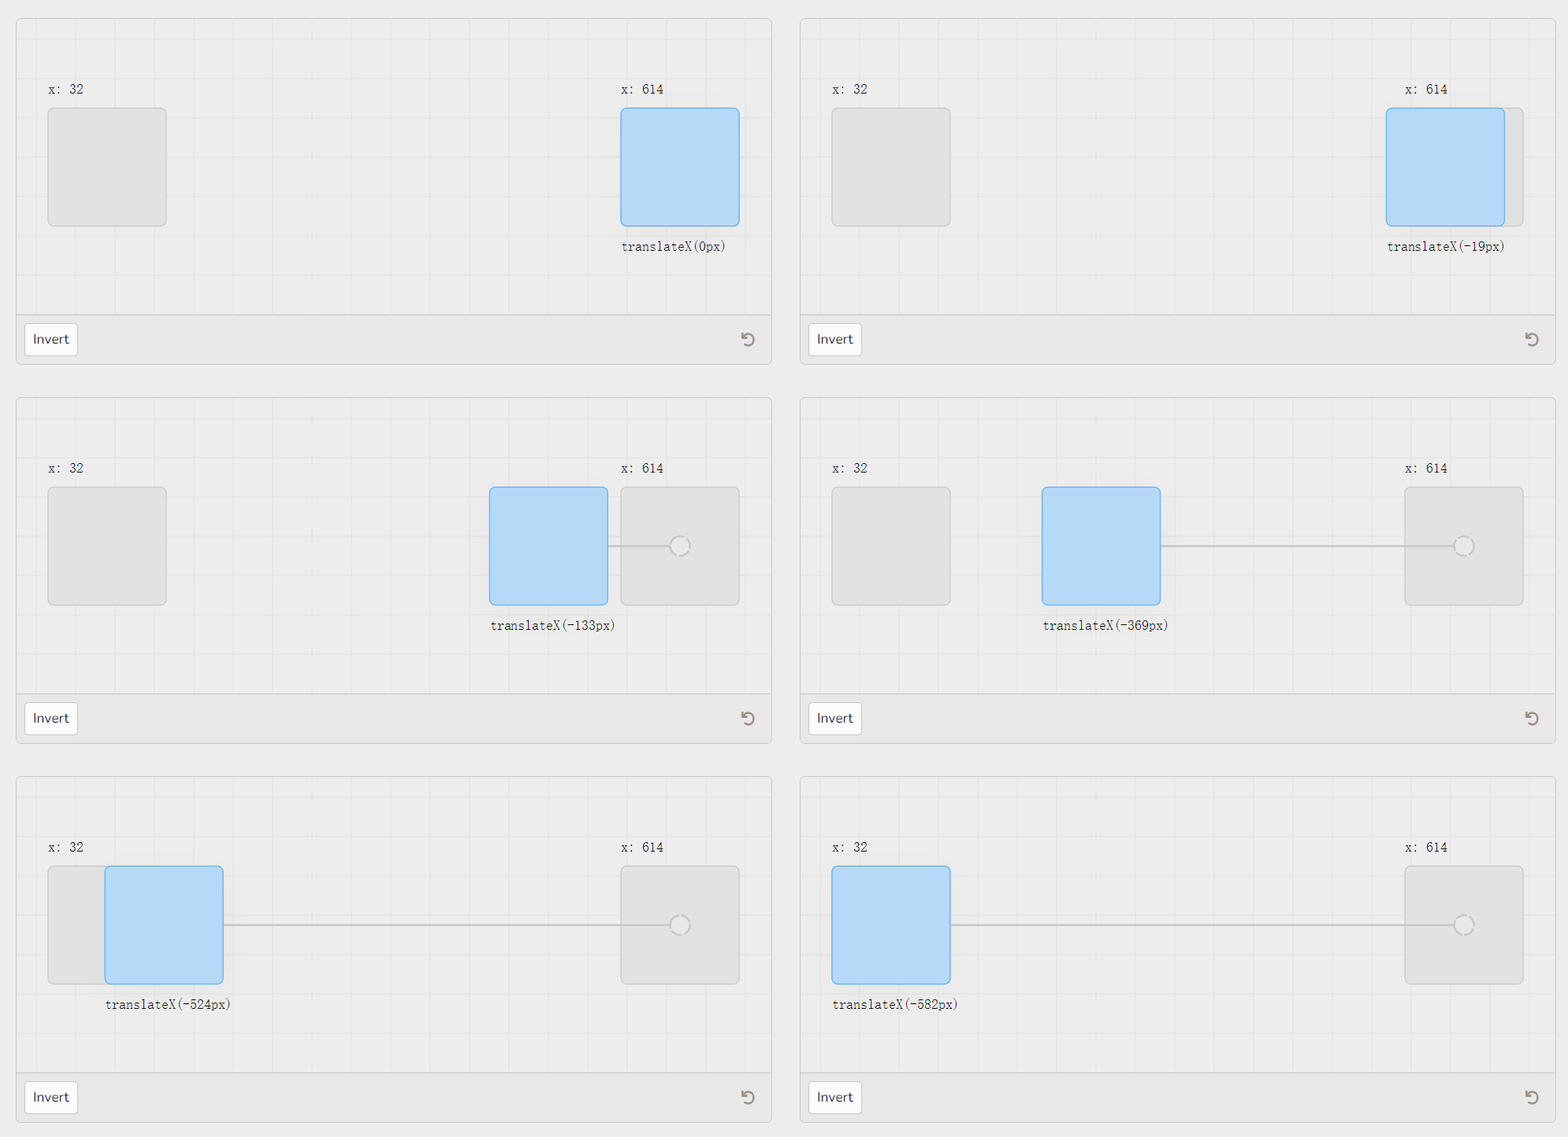
使用 React 实现的代码:
App.js
import React from 'react'import Motion from './Motion'import './styles.css'export default function App() {const [toggled, toggle] = React.useReducer(state => !state, false)return (<div id="main"><button onClick={toggle}>Toggle</button><div id="wrapper" style={{ justifyContent: toggled ? 'flex-end' : 'flex-start' }}><Motion /></div></div>)}
Motion.js
import React from 'react'export default function Motion() {const squareRef = React.useRef();const initialPositionRef = React.useRef();React.useLayoutEffect(() => {const box = squareRef.current?.getBoundingClientRect();if (moved(initialPositionRef.current, box)) {// get the difference in positionconst deltaX = initialPositionRef.current.x - box.x;const deltaY = initialPositionRef.current.y - box.y;console.log(deltaX, deltaY);// apply the transform to the boxsquareRef.current.style.transform = `translate(${deltaX}px, ${deltaY}px)`;}initialPositionRef.current = box;});return <div id="motion" ref={squareRef} />;}const moved = (initialBox, finalBox) => {// we just mounted, so we don't have complete data yetif (!initialBox || !finalBox) return false;const xMoved = initialBox.x !== finalBox.x;const yMoved = initialBox.y !== finalBox.y;return xMoved || yMoved;}
Play
到目前为止,有一个正方形,它被施加了一个 transform,在按下切换键后没有移动。
在FLIP的最后一步,即 Play 步骤中,将这个 transform 动画化为零,让正方形动画化到它的最终位置。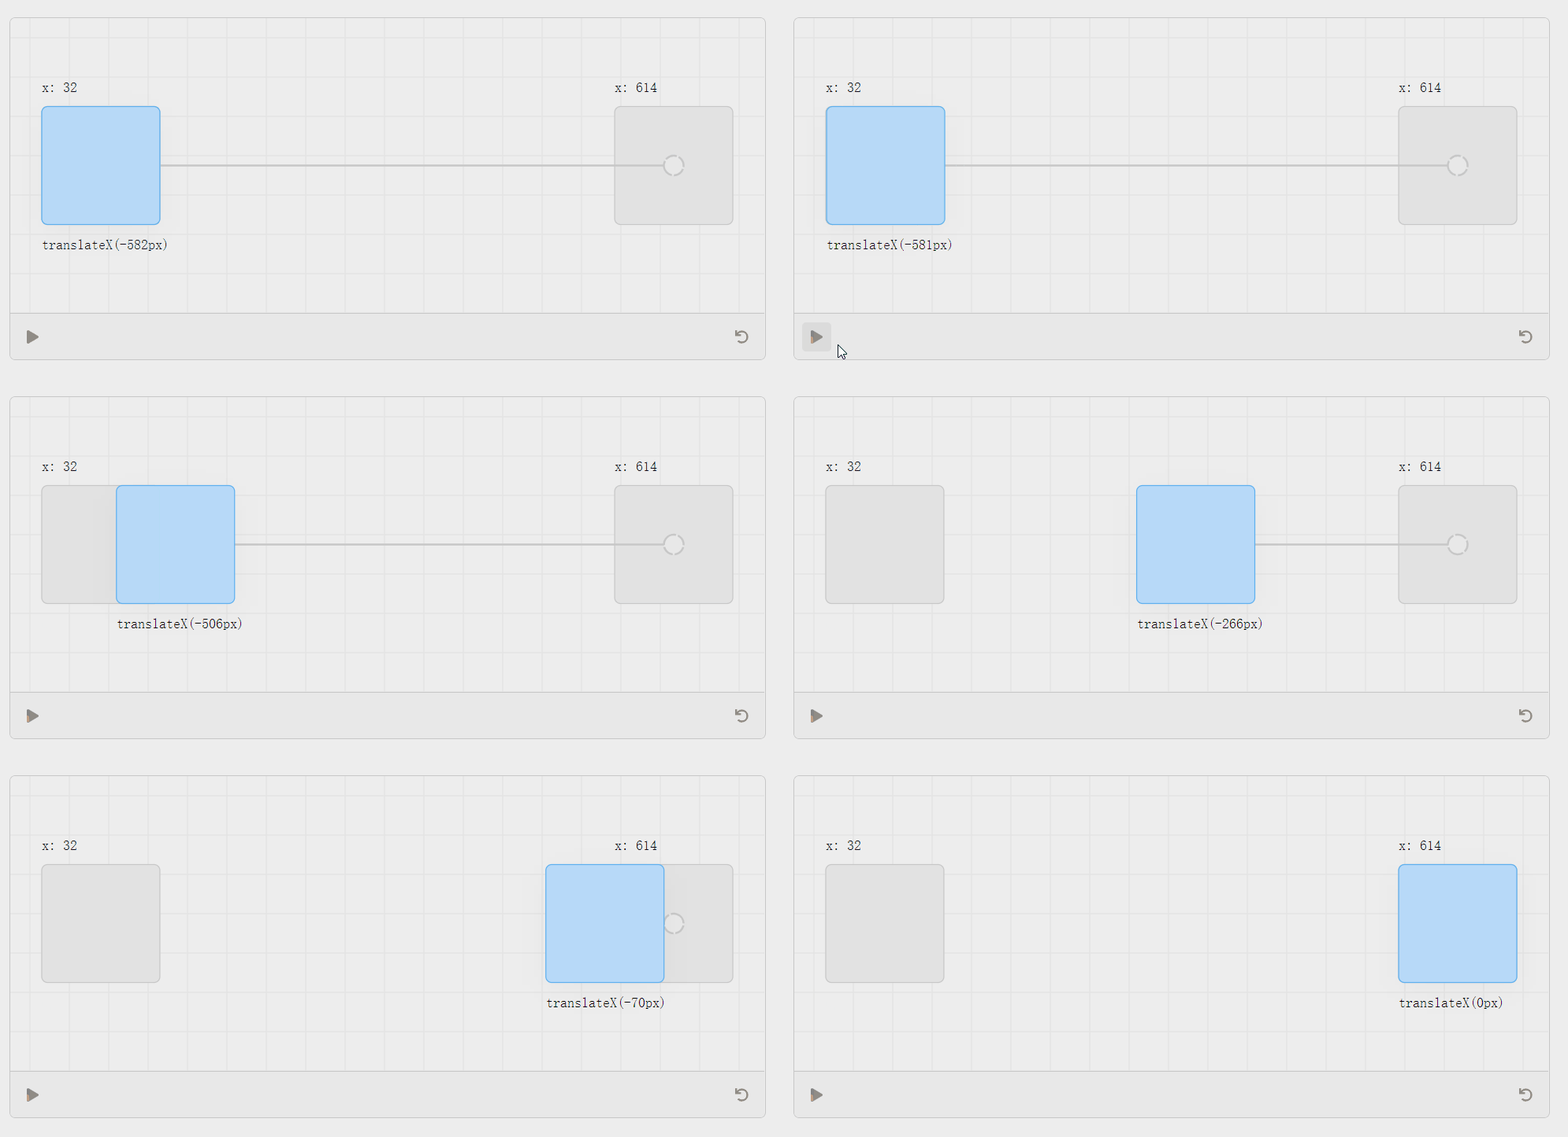
有多种方法可以实现这个动画;个人选择使用Popmotion的animate函数。
import React from 'react'import { animate } from 'popmotion'export default function Motion() {const squareRef = React.useRef();const initialPositionRef = React.useRef();React.useLayoutEffect(() => {const box = squareRef.current?.getBoundingClientRect();if (moved(initialPositionRef.current, box)) {// get the difference in positionconst deltaX = initialPositionRef.current.x - box.x;const deltaY = initialPositionRef.current.y - box.y;// inverse the change using a transformsquareRef.current.style.transform = `translate(${deltaX}px, ${deltaY}px)`;// animate back to the final positionanimate({from: 1,to: 0,duration: 2000,onUpdate: progress => {squareRef.current.style.transform =`translate(${deltaX * progress}px, ${deltaY * progress}px)`;}})}initialPositionRef.current = box;});return <div id="motion" ref={squareRef} />;}const moved = (initialBox, finalBox) => {// we just mounted, so we don't have complete data yetif (!initialBox || !finalBox) return false;const xMoved = initialBox.x !== finalBox.x;const yMoved = initialBox.y !== finalBox.y;return xMoved || yMoved;}
把所有东西放在一起
动画的大小
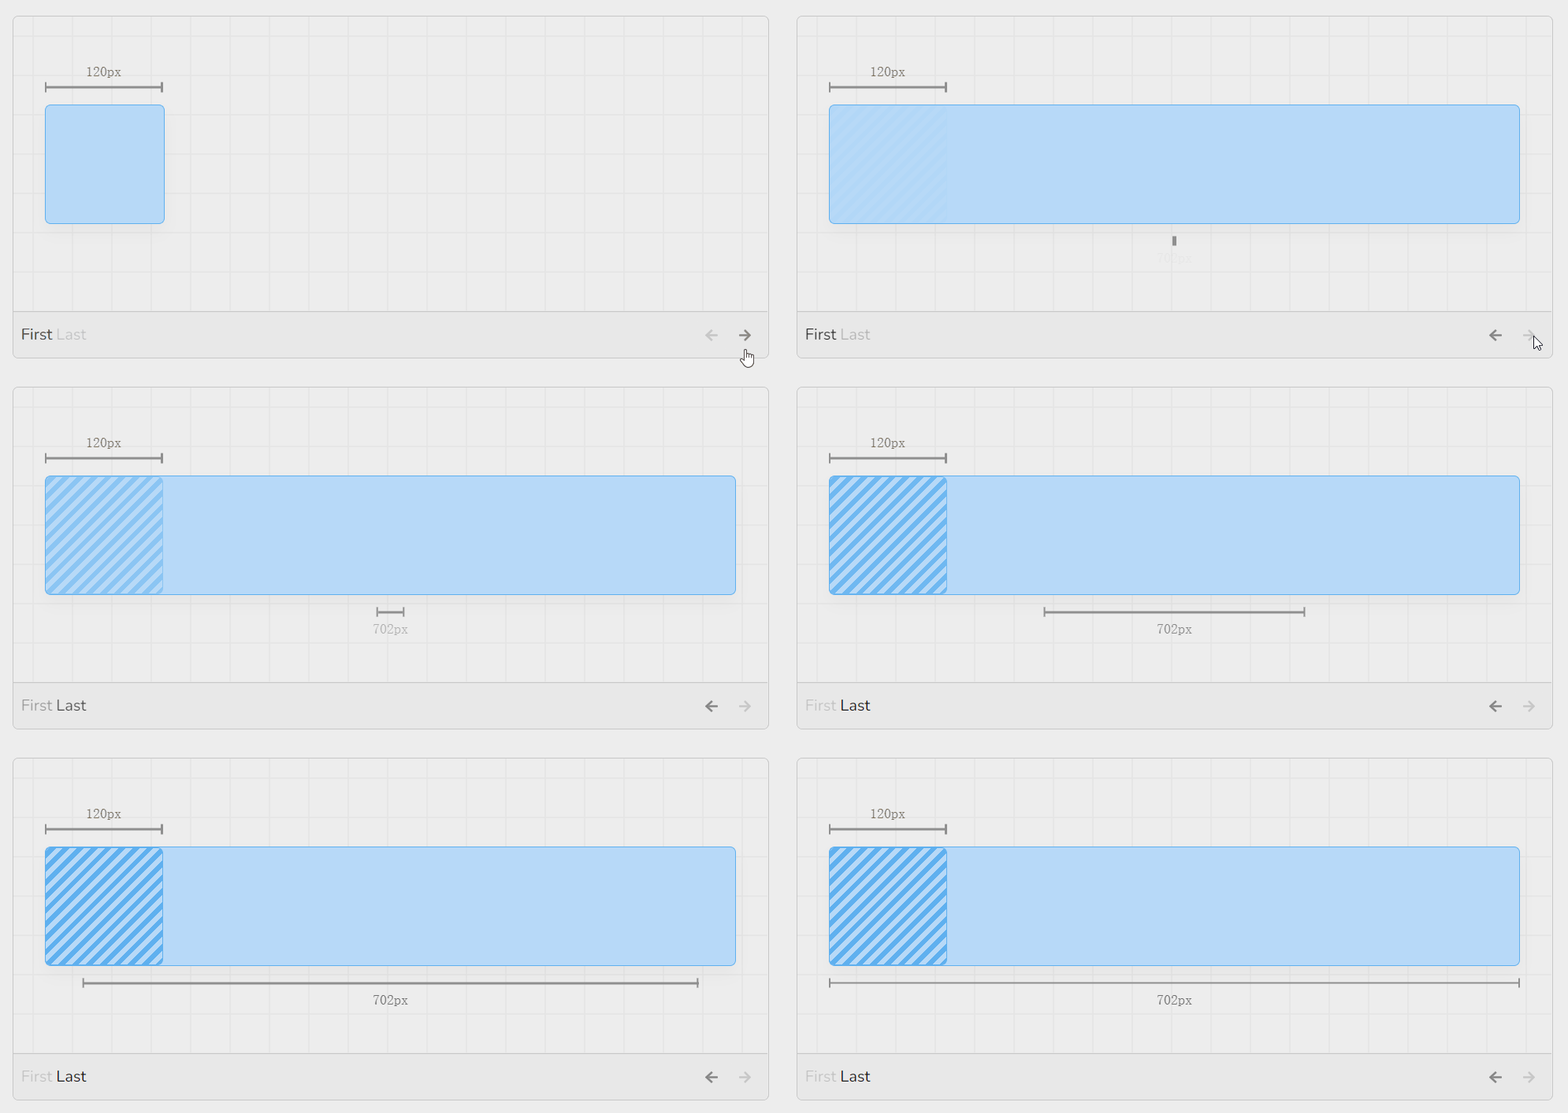
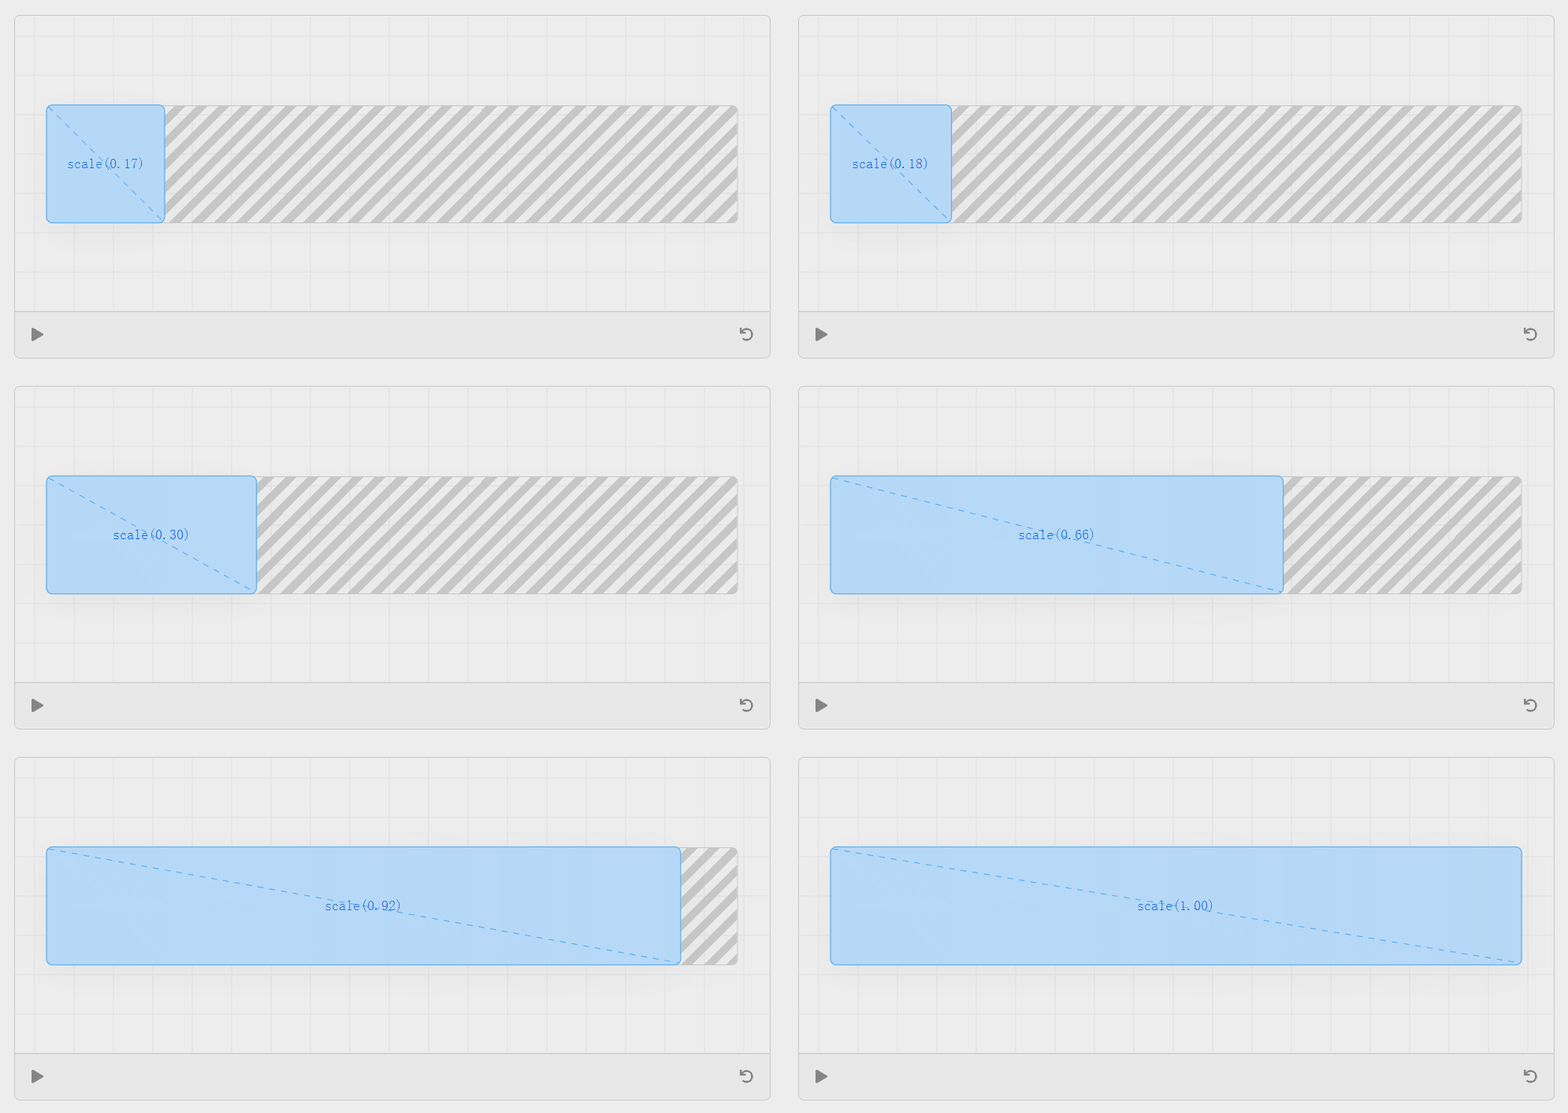
到目前为止,只用FLIP来制作位置变化的动画。但对于大小来说,可以用同样的方法吗,试着复制下面的动画,在这个动画中,正方形被拉伸到充满整个容器。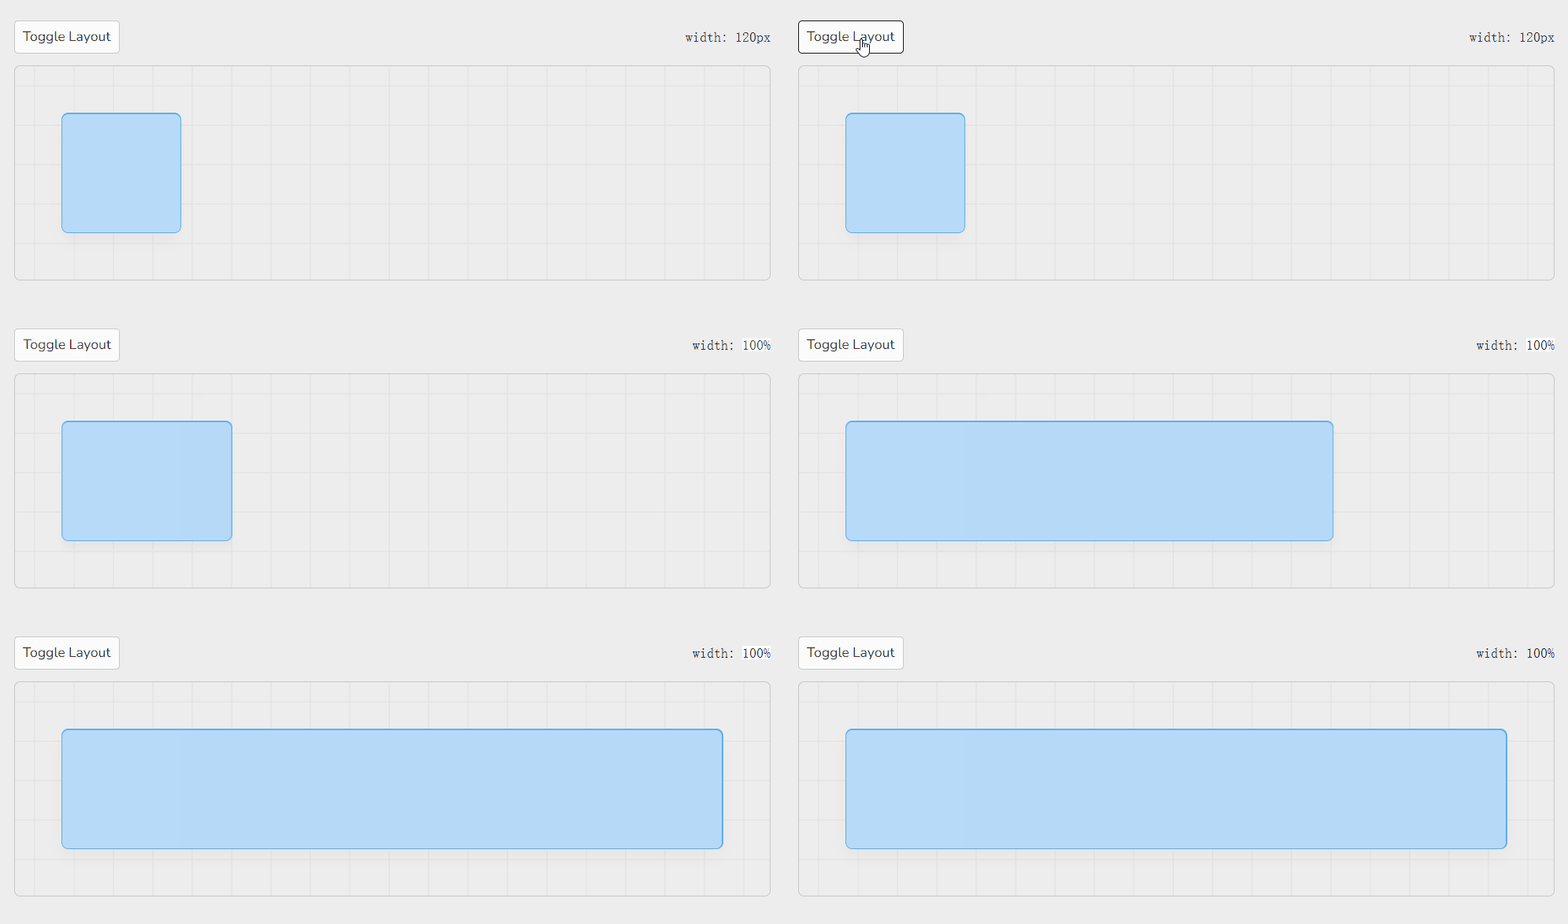
测量尺寸变化
首先要测量布局改变前后的正方形的大小。碰巧是提,用来测量正方形的.getBoundingClientRect()方法也刚好返回元素的 width 和 height:
const { width, height } = squareRef.current.getBoundingClientRect();
反转尺寸变化
为了反转尺寸变化,将用最终尺寸除以初始尺寸:
const deltaWidth = box.width / initialBoxRef.current.width;
得到一个比例后,可以将其传递给 scale 属性:
squareRef.current.style.transform = `scaleX(${deltaWidth})`;
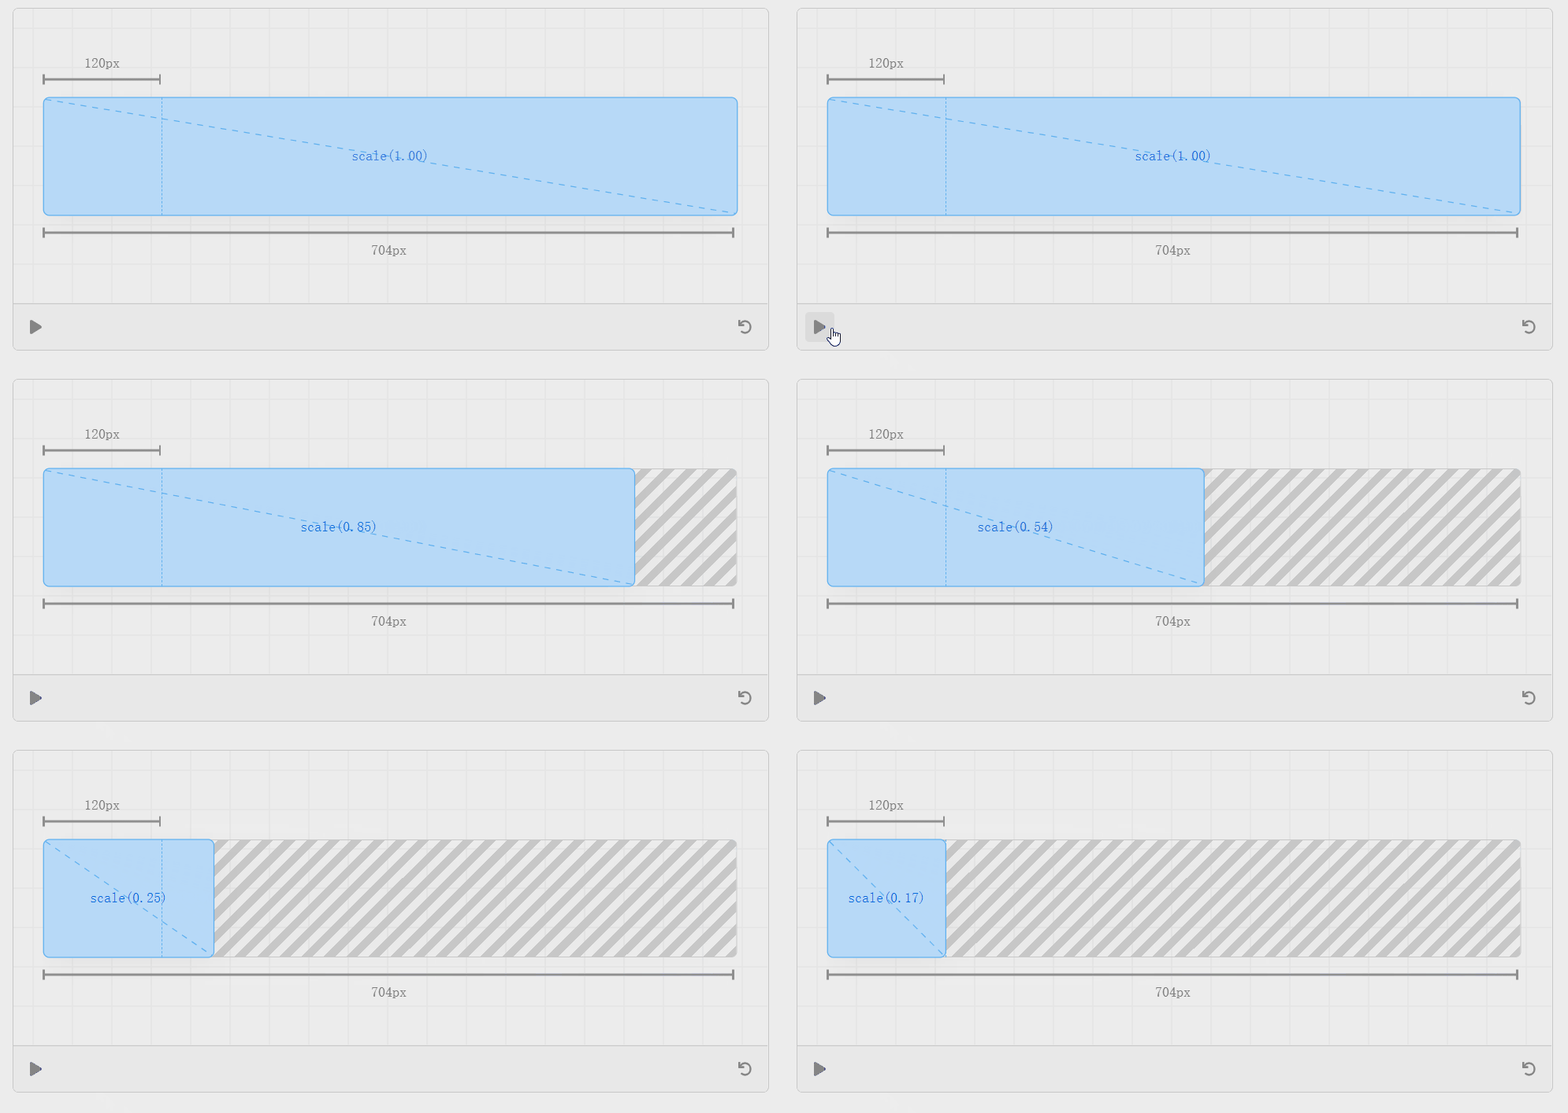
不会像position那样将比例动画到0,而是将比例动画到1(如果将比例动画到0,元素将完全消失):
animate({from: deltaWidth,to: 1,// ...});
使用 position 固定大小
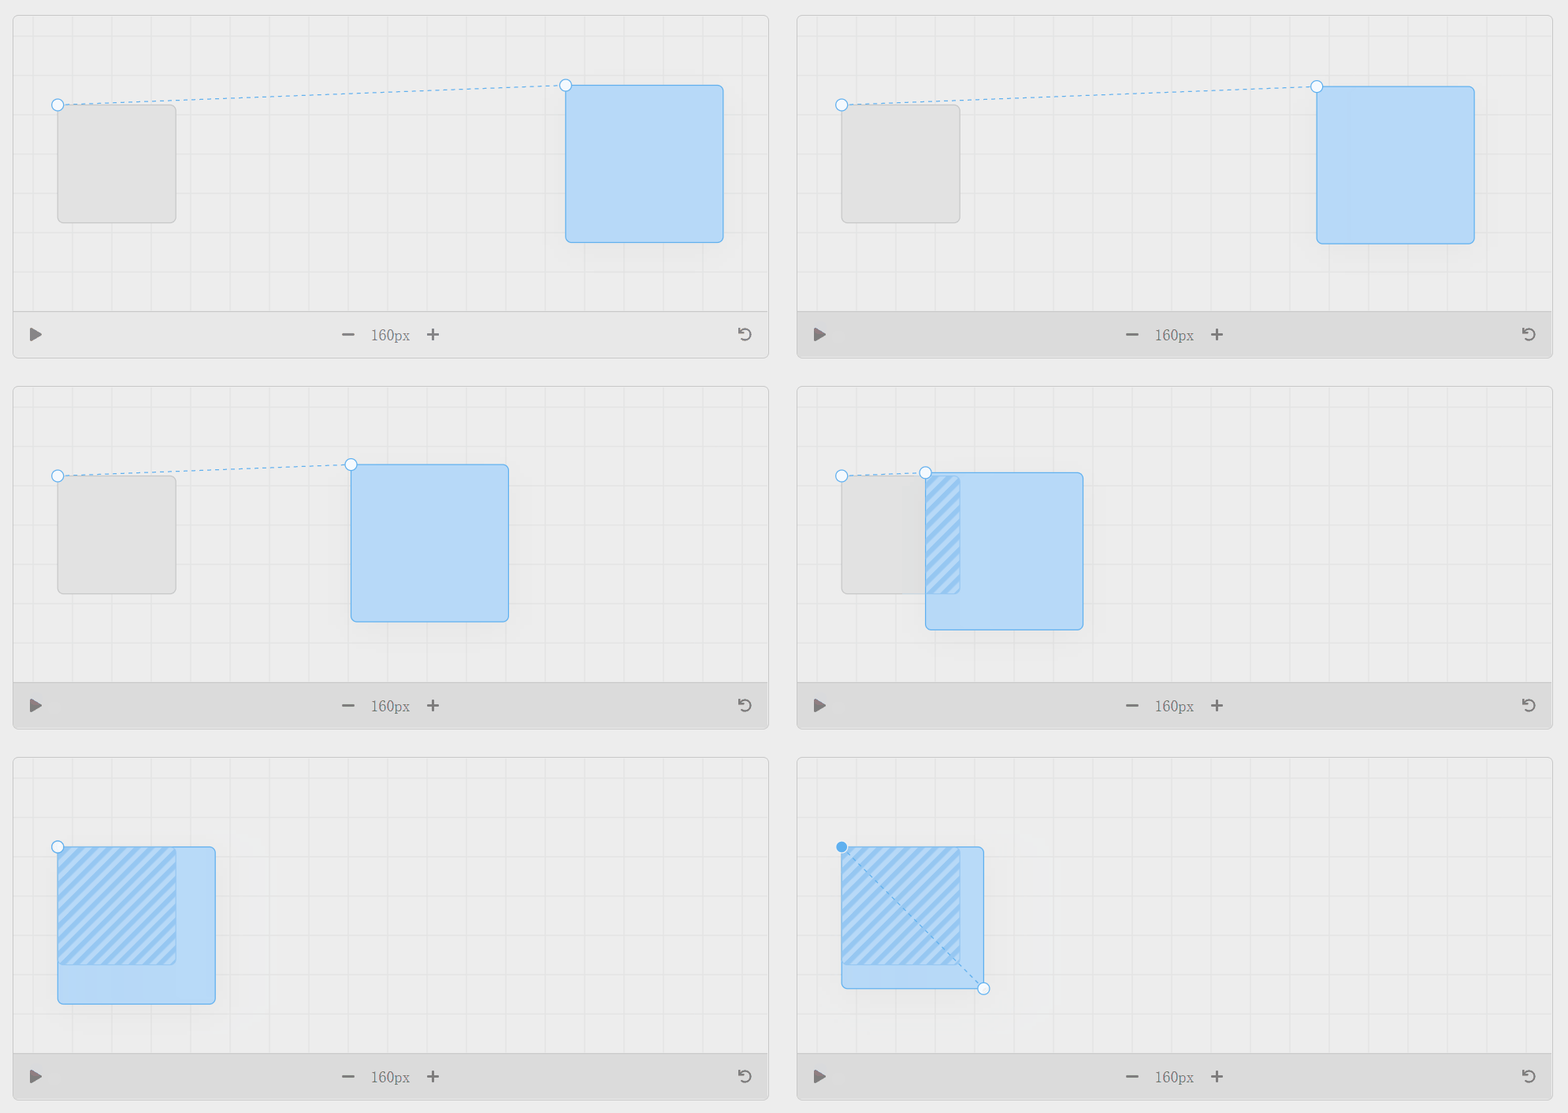
到目前为止,已经能够使用FLIP为位置和大小的变化制作动画。当试图将大小和位置都做成动画时会发生什么?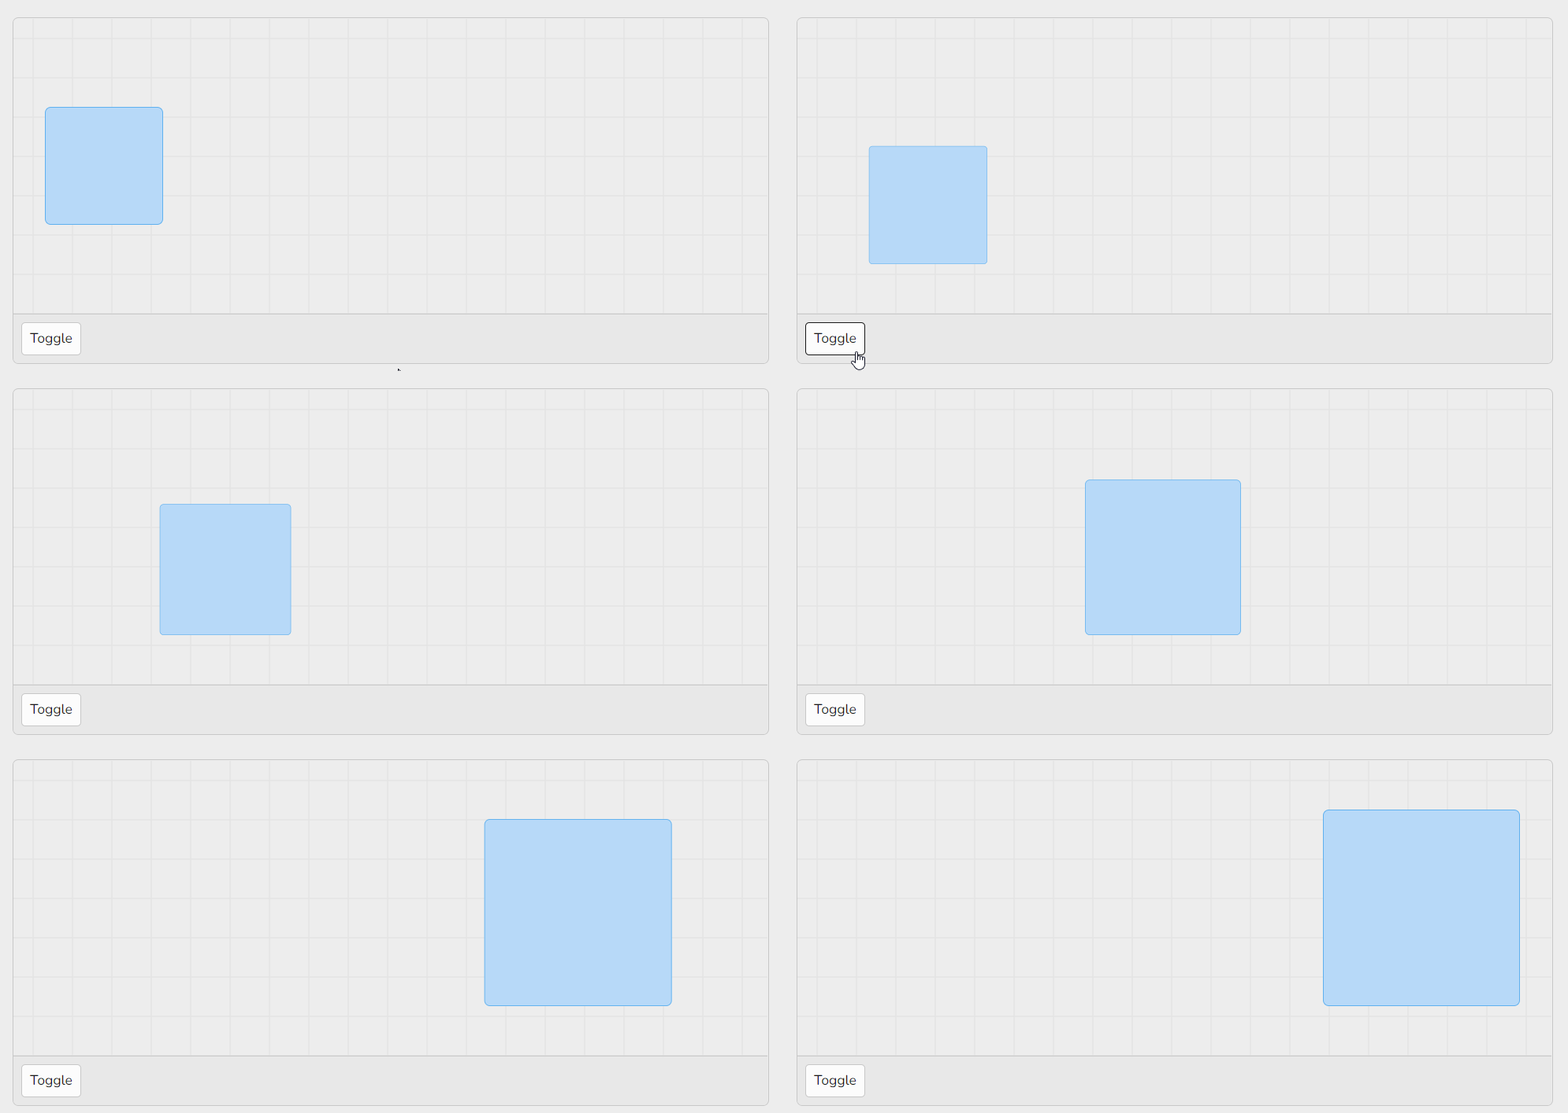
嗯,这看起来有点不对劲。这里发生了什么?如果在 play 步骤之前暂停动画,可以看到在 inverse 转步骤中出了问题—正方形没有完全与它的原始位置对齐: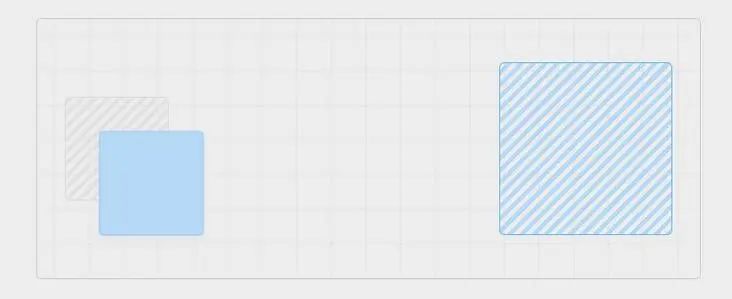
修复转换的起点
试着搞清楚这个问题。
当把位置和大小的变化结合起来时,在逆向步骤中进行了两个独立的变换—平移和缩放。如果单独看一下这些变换,就可以知道这个正方形是如何结束的:
算法首先将最终位置的左上角与原始位置的左上角对齐,然后将其缩小到初始尺寸。
缩放变换似乎是这里的罪魁祸首—它从正方形的中心开始缩放,导致正方形最终出现在错误的位置。现在,如果把变换的原点改为左上角,使其与平移相一致……
squareRef.current.style.transformOrigin = "top left";
如果 Transform Origin 发生变化怎么办?
当然,这个解决方案的最大问题是,已经硬编码了 transform origin 的值。如果用户想要一个不同的变换原点呢?在这种情况下,布局动画应该仍然有效。
诀窍在于确保 inverse 步骤比较了两个方块的变换原点之间的距离。换句话说,这个错误的发生是因为测量的距离和变换原点之间的差异:getBoundingClientRect()返回元素的左上角,而变换原点默认是在元素的中心。
只有当两个正方形的大小相同时,左上角的点之间的距离和中心之间的距离才是相等的。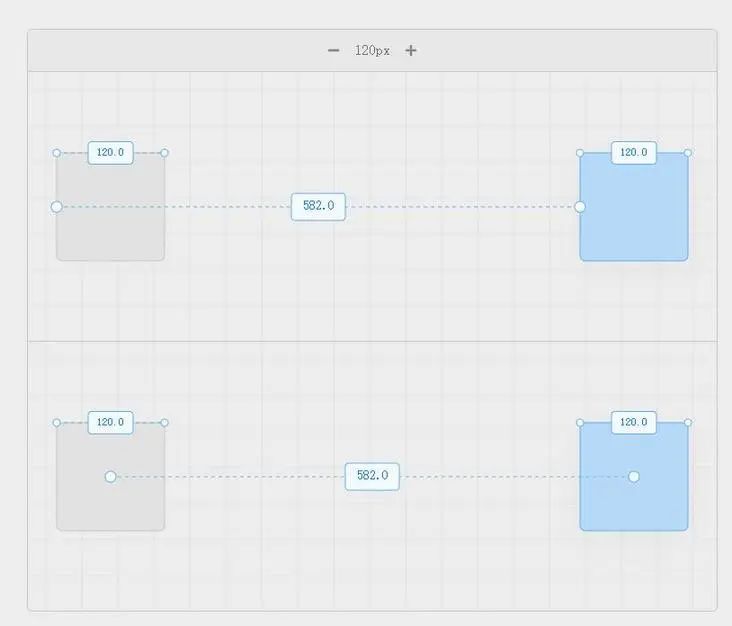
为了简单起见,在这里只比较水平距离—如果考虑到垂直距离,同样的概念也适用。
当最终的正方形较大时,中心之间的距离大于左上角各点之间的距离。同样,当最终的正方形较小时,中心之间的距离小于左上角各点之间的距离。
有了这个见解,也可以通过使用中心之间的距离而不是左上角的点来解决这个问题。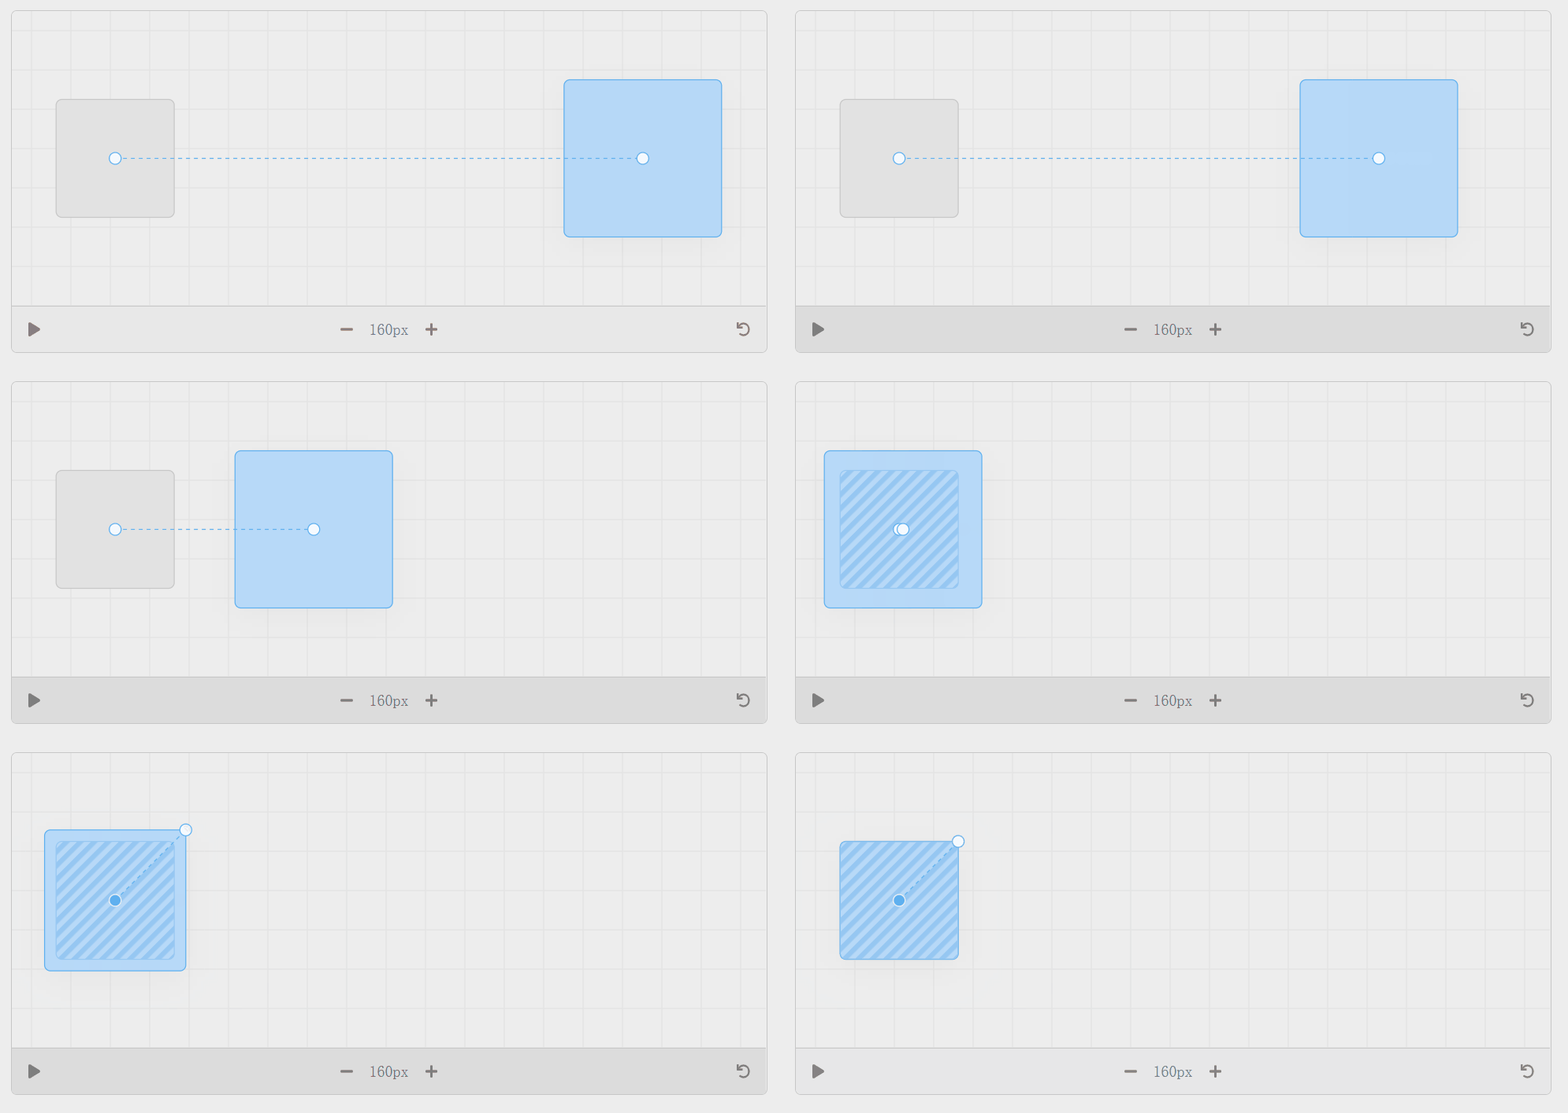
纠正子元素的变形
到目前为止,已经能够制作一个布局动画,可以无缝过渡到大小和位置的变化。现在增加一个测试—如果元素有子元素会怎样?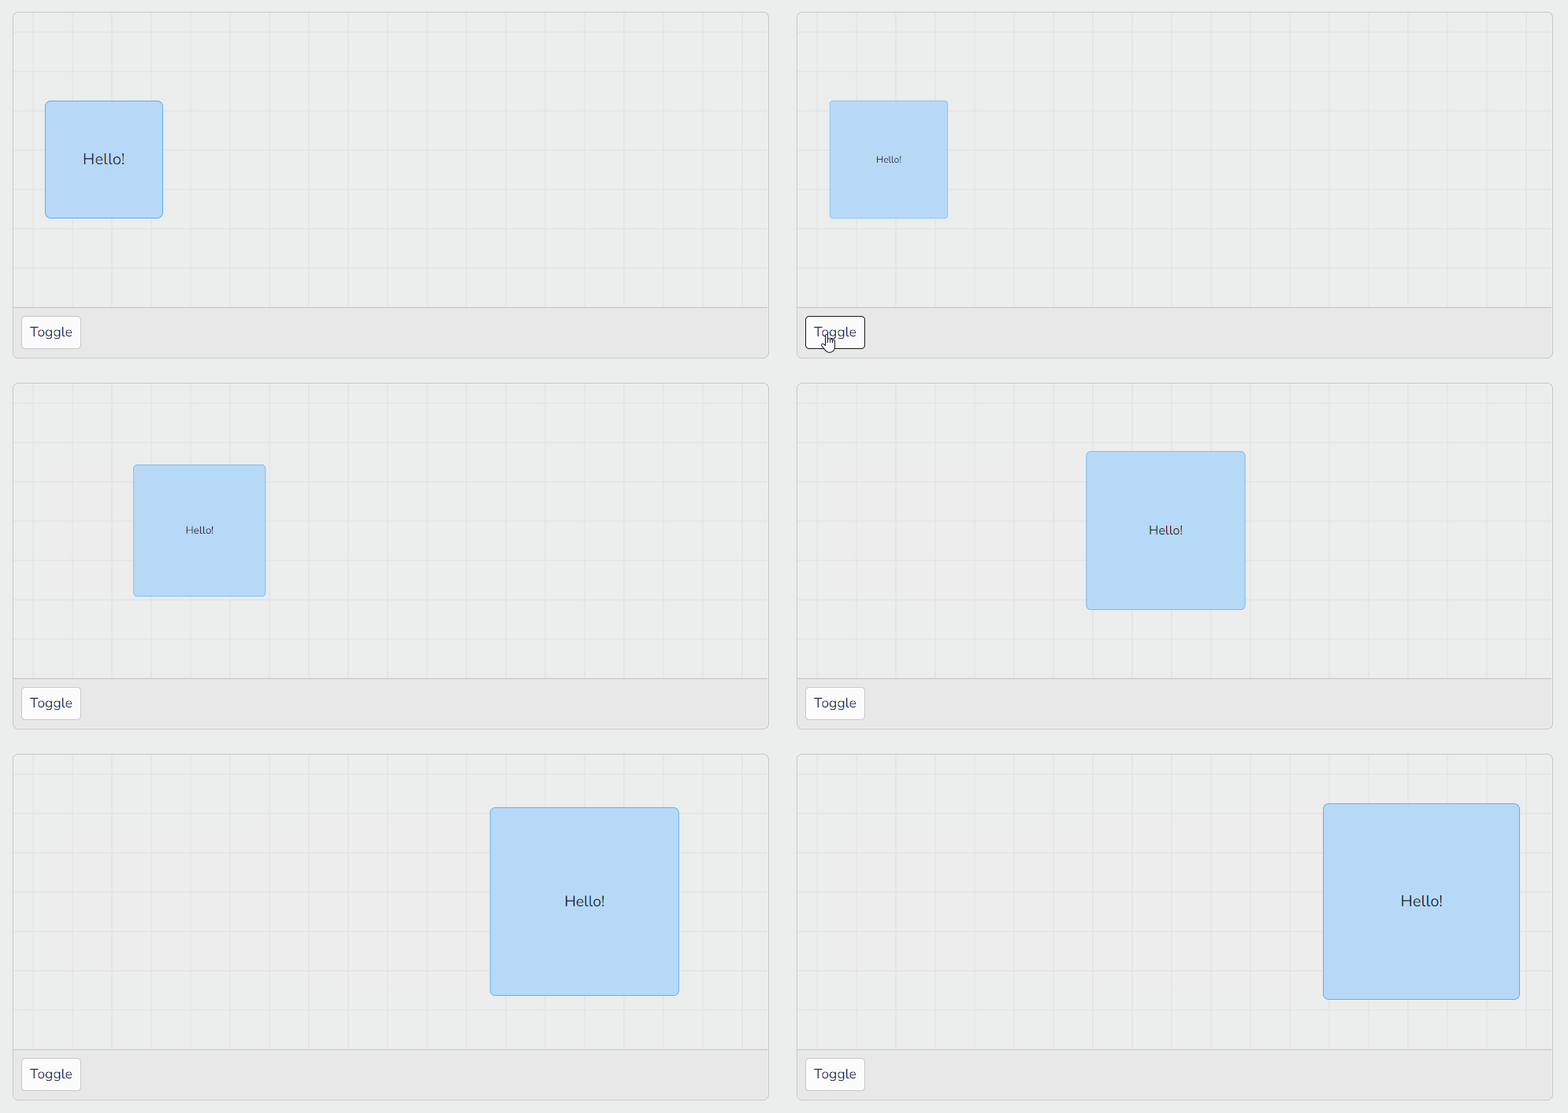
如上图可以看到文字大小被改了。怎样才能解决这个问题呢?
导致该问题的原因还 是inverse 比例变换。当反转到一个较小的正方形时,文本最终会变小,因为正方形被按比例缩小。同样地,当反转到一个较大的正方形时,文本最终会变大,因为正方形被按比例放大了。
反比例公式
一种方法是在子元素上应用另一种变换,”抵消”父元素的变换。子元素的变换公式:
childScale = 1 / parentScale
例如:父元素变大两倍,那么子方需要将其尺寸减半,才能保持相同的尺寸。试着移动下面的滑块,注意文字是如何保持相同大小的,而不管广场的大小如何。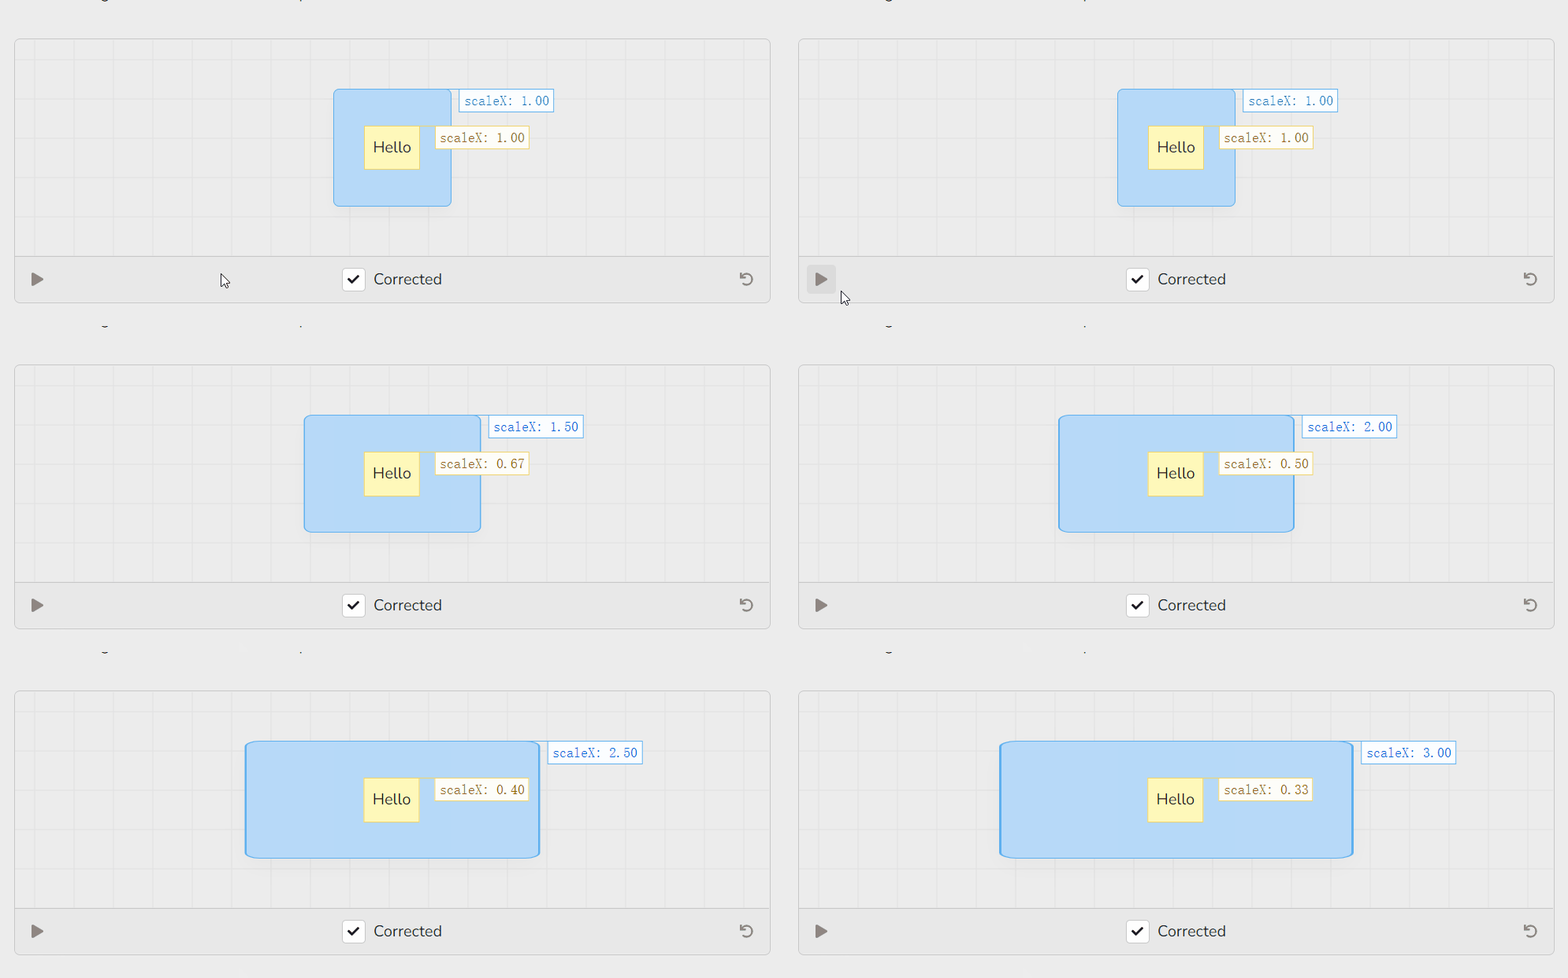
现在,如何将其与布局动画相结合呢?
尝试
尝试的第一件事是,在父元素要做动画之前,先计算一次反比例,然后在子元素上单独运行一个动画。
const inverseTransform = {scaleX: 1 / parentTransform.scaleX,scaleY: 1 / parentTransform.scaleY,};play({from: inverseTransform,to: { scaleX: 1, scaleY: 1 },});
例如,如果父元素动画从scaleX: 2到scaleX: 1,那么子代将从scaleX: 1 / 2到scaleX:1,只要比例校正的时间与父元素动画相同,这种方法应该是可行的。
但是,运行起来效果却是错误的: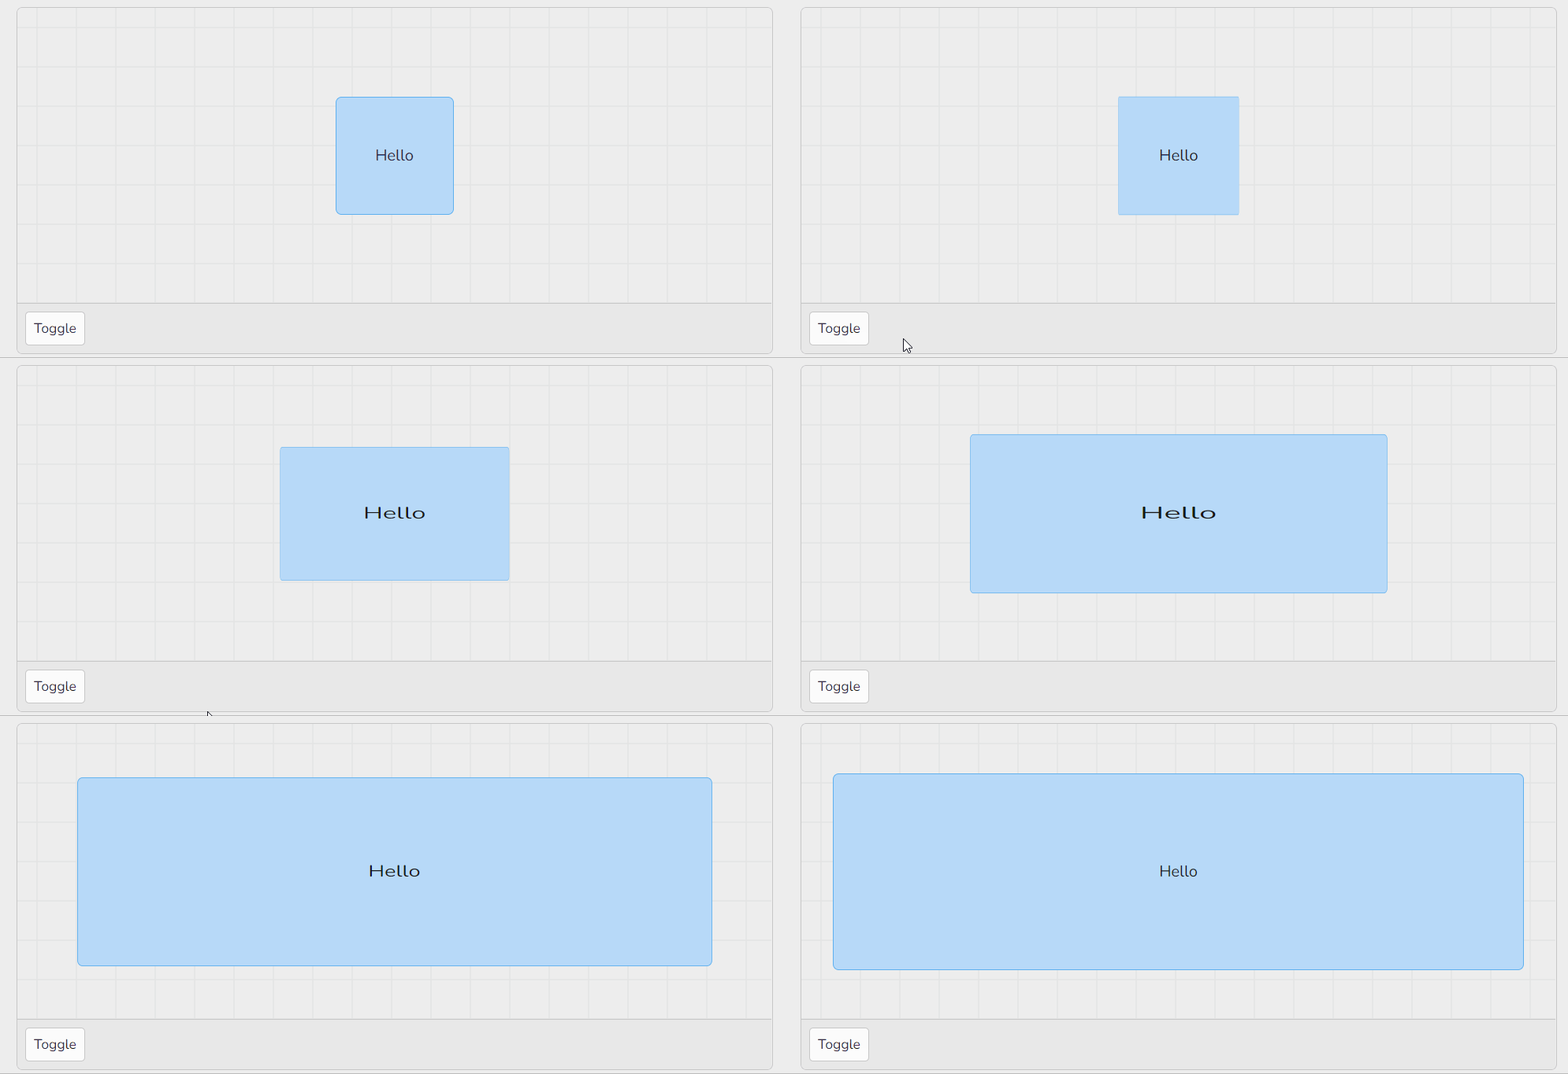
在整个动画过程中,文字明显地在改变。
正确的缩放时间
这里的问题就在于这个假设:
只要比例校正的时间与父动画相同,这种方法应该是有效的。
正常情况下,”正确” 反转比例不会以与父动画相同的方式变化,它有点像做自己的事情。
在上面的例子中,蓝线表示父方的比例,而黄线表示子方的比例。请注意,蓝线是一条直线,而黄线则有点像曲线。这告诉我们,反比例的时间与父比例的时间是不一样的!
为了解决这个问题,可以这么做:
- 提前计算出正确的时间
- 每当父元素比例发生变化时,计算反比例。
(2)恰好比(1)简单得多,而且还允许在父元素上处理各种不同的时序。这也是 Framer Motion使用的方法。
animate({from: inverseTransform,to: {x: 0,y: 0,scaleX: 1,scaleY: 1,},onUpdate: ({ x, y, scaleX, scaleY }) => {parentRef.style.transform = `...`;const inverseScaleX = 1 / scaleX;const inverseScaleY = 1 / scaleY;childRef.style.transform = `scaleX(${inverseScaleX}) scaleY(${inverseScaleY}) ...`;},});
App.js
import React from 'react'import Motion from './Motion'import './styles.css'export default function App() {const [toggled, toggle] = React.useReducer(state => !state, false)const [corrected, toggleCorrected] = React.useReducer(state => !state, false)return (<div id="main"><div><button onClick={toggle}>Toggle</button><label><input type="checkbox" checked={corrected} onChange={toggleCorrected} />Corrected</label></div><div id="wrapper" style={{ justifyContent: 'center' }}><Motion toggled={toggled} corrected={corrected}>Hello!</Motion></div></div>)}
Motion.js
const changed = (initialBox, finalBox) => {// we just mounted, so we don't have complete data yetif (!initialBox || !finalBox) return false;// deep compare the two boxesreturn JSON.stringify(initialBox) !== JSON.stringify(finalBox);}const invert = (el, from, to) => {const { x: fromX, y: fromY, width: fromWidth, height: fromHeight } = from;const { x, y, width, height } = to;const transform = {x: x - fromX - (fromWidth - width) / 2,y: y - fromY - (fromHeight - height) / 2,scaleX: width / fromWidth,scaleY: height / fromHeight,};el.style.transform = `translate(${transform.x}px, ${transform.y}px) scaleX(${transform.scaleX}) scaleY(${transform.scaleY})`;return transform;}
其实不是这样的?
在这种情况下,使比例校正工作的方式是通过将子元素包裹在<div>中,并将比例校正应用于<div>中,这会有一些问题:
- 一个运动组件在DOM中有两个元素,从用户体验的角度来看,这可能是个问题
- 所有子组件都进行了比例校正,不可能一个子组件被校正而另一个子组件不被校正
- 如果子组件也在做动画,可能会有问题—我没有测试过,但我认为比例校正会导致问题,因为扭曲了子组件的坐标空间
Framer Motion 的做法有点不同,必须让子组件成为布局组件来选择加入比例校正。
<motion.article layout><motion.h1 layout>Hello!</motion.h1> <-- is scale corrected<p>World!</p> <-- is not scale corrected</motion.article>
这个API意味着子组件需要能够 “钩住 “父组件的动画,这让实现变得更加复杂。
选择不以这种方式实现,因为不想脱离核心的比例校正概念。如果有兴趣,可以看看 Framer Motion源代码,他们使用一种叫做 “投影节点( “projection nodes”)”的东西来维护自己的类似DOM的运动组件树。
来源:https://www.nan.fyi/magic-motion
