全局组件与局部组件
官方文档
Vue.createApp()函数的参数传递的是根组件的属性
使用app.component()注册全局组件
const app = Vue.createApp({...})app.component('my-component-name', {/* ... */})
全局组件的组件名一般小写,用连字符-分隔
全局注册的组件的可以在任意组件中使用,且会一直存在
组件具备可复用性,组件数据具有独占性
可以通过普通的javascript对象声明局部组件
const ComponentA = {data(){},methods:{},template: ''}const ComponentB = {/* ... */}const app = Vue.createApp({components: {'component-a': ComponentA,'component-b': ComponentB}})
局部组件名称用驼峰式,首字母大写
局部组件需要在components属性中声明才能使用
props传值和props验证
一般情况下,props以数组形式列出,props还可以以对象形式列出,用于对props进行验证
props传值
props验证
2个要注意的点:
如果一次传递多个props,可以用v-bind绑定一个对象传递, 这个对象的所有属性对将作为单独的props
post: {id: 1,title: 'My Journey with Vue'}
<blog-post v-bind="post"></blog-post>
等价于
<blog-post v-bind:id="post.id" v-bind:title="post.title"></blog-post>
props大小写
传递props时要用kebab-case分隔形式名称
<blog-post post-title="hello!"></blog-post>
接收props时要用驼峰式
const app = Vue.createApp({})app.component('blog-post', {// camelCase in JavaScriptprops: ['postTitle'],template: '<h3>{{ postTitle }}</h3>'})
单向数据流
子组件可以使用父组件的数据,但不能直接修改父组件的数据
Non-prop attribute
官方文档
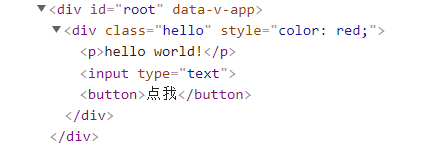
父组件给子组件传值,子组件未通过props接收,那么这个值将自动添加根节点的attribute中
const app = Vue.createApp({template: `<my-component class="hello" style="color:red;"/>`})app.component('my-component',{template: `<div><p>hello world!</p><input type="text"><button>点我</button></div>`})
子组件可以通过this.$attrs获取到传递的值
app.component('my-component',{created(){console.log(this.$attrs)},// ...})
如果想要根元素内的其他元素继承传递的属性,使用v-bind="$attrs"即可
app.component('my-component',{template: `<div><p>hello world!</p><input type="text" v-bind="$attrs"><button>点我</button></div>`})
如果你不希望组件的根元素继承 attribute,你可以在组件的选项中设置 inheritAttrs: false。
app.component('my-component',{inheritAttrs: false,template: `<div><p>hello world!</p><input type="text" v-bind="$attrs"><button>点我</button></div>`})
父子组件通过事件通信
子组件可以通过$emit向父组件抛出事件
<script>const app = Vue.createApp({data(){return {count: 1}},methods:{handleAddOne(value){this.count = value}},template: `<my-component :count="count" @add-one="handleAddOne"/>`})app.component('my-component',{props:['count'],methods:{handleBtnClick(){this.$emit('addOne', this.count + 1)}},template: `<div>{{count}}<button @click="handleBtnClick">+1</button></div>`})app.mount("#root")</script>
Vue3中取消了.sync修饰符,取而代之的是v-model
<script>const app = Vue.createApp({data(){return {count: 1}},template: `<my-component :count="count" @update:count="count = $event"/>`})app.component('my-component',{props:['count'],methods:{handleBtnClick(){this.$emit('update:count', this.count + 1)}},template: `<div>{{count}}<button @click="handleBtnClick">+1</button></div>`})app.mount("#root")</script>
上面的代码在vue2等价于使用.sync修饰符
<my-component :count.sync="count" />
但是在vue3中要使用v-model, 且props的名称默认写成modelValue
<script>const app = Vue.createApp({data(){return {count: 1}},template: `<my-component v-model="count"/>`})app.component('my-component',{props:['modelValue'],methods:{handleBtnClick(){this.$emit('update:modelValue', this.modelValue + 1)}},template: `<div>{{modelValue}}<button @click="handleBtnClick">+1</button></div>`})app.mount("#root")</script>
如果要自定义props的名称,则要写成v-model:xxx,这样允许绑定多个v-model
<ChildComponent v-model:title="pageTitle" v-model:content="pageContent" /><!-- 是以下的简写: --><ChildComponent:title="pageTitle"@update:title="pageTitle = $event":content="pageContent"@update:content="pageContent = $event"/>
v-model自定义修饰符
const app = Vue.createApp({data(){return {count: 'a'}},template: `<my-component v-model.capitalize="count"/>`})app.component('my-component',{props:{modelValue: String,modelModifiers: {default: ()=>({})}},methods:{handleBtnClick(){let value = this.modelValue + 'b'if(this.modelModifiers.capitalize){value = value.charAt(0).toUpperCase() + value.slice(1)}this.$emit('update:modelValue', value)}},template: `<div>{{modelValue}}<button @click="handleBtnClick">+b</button></div>`})
通过modelModifiers接收修饰符,如果修饰符xxx存在,this.modelModifiers.xxx则为true
对于带参数的 v-model 绑定,生成的 prop 名称将为 arg + “Modifiers”:
<my-component v-model:description.capitalize="myText"></my-component>
app.component('my-component', {props: ['description', 'descriptionModifiers'],emits: ['update:description'],template: `<input type="text":value="description"@input="$emit('update:description', $event.target.value)">`,created() {console.log(this.descriptionModifiers) // { capitalize: true }}})
插槽slot
官方文档
插槽用于父子组件间传递DOM,是内容分发的出口
动态组件和异步组件
官方文档
动态组件: 通过component标签和is属性绑定组件名,实现动态切换
使用keep-alive标签记住组件切换时的状态
const app = Vue.createApp({data(){return {currentItem: 'input-item'}},methods: {handleClick(){if(this.currentItem === 'input-item'){this.currentItem = 'common-item'}else{this.currentItem = 'input-item'}}},template:`<keep-alive><component :is="currentItem" /></keep-alive><button @click="handleClick">切换</button>`})
异步组件:以异步方式返回组件
app.component('async-common-item', Vue.defineAsyncComponent(()=>{return new Promise((resolve, reject) => {setTimeout(()=>{resolve({template: `<div>this is an async component</div>`})},4000)})}))
v-once
让组件只渲染一次,即使数据发生变化也不再渲染
app.component('terms-of-service', {template: `<div v-once><h1>Terms of Service</h1>... a lot of static content ...</div>`})
ref
在渲染之后,获取到DOM节点
const app = Vue.createApp({mounted(){console.log(this.$refs.divRef)},template: `<div ref="divRef">hello</div>`})
或者用于获取子组件的引用,以便调用子组件的方法(慎用)
const app = Vue.createApp({mounted(){this.$refs.child.sayHello()},template: `<my-component ref="child"></my-component>`})app.component('my-component',{methods:{sayHello(){console.log('hello')}},template: `<div>hello</div>`})
provide/inject
官方文档
如果子组件嵌套很深,避免用props逐层传递数据,可以使用provide/inject
const app = Vue.createApp({provide:{name: 'jack'},template: `<son></son>`})app.component('son',{template: `<grandson></grandson>`})app.component('grandson',{inject:['name'],template: `<div>{{this.name}}</div>`})
如果要传递父组件的data或其他属性,要改用函数形式返回对象
const app = Vue.createApp({data(){return {name: 'jack'}},provide(){return {username: this.name}},template: `<son></son>`})app.component('son',{template: `<grandson></grandson>`})app.component('grandson',{inject:['username'],template: `<div>{{this.username}}</div>`})

若有收获,就点个赞吧
0 人点赞
