React特点:
- 单向数据流,单向渲染
- 虚拟DOM
- 组件化
Robot-Gallery小项目
创建 npx create-react-app robot-gallery --template typescript
将函数组件类型设置为React.FC, 可见其传入的泛型为P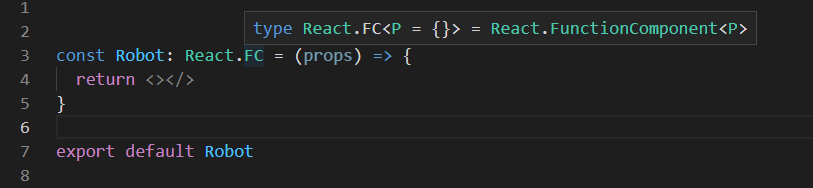
通过泛型设置props的类型
interface RobotProp {id: numbername: stringemail: string}const Robot: React.FC<RobotProp> = (props) => {return <></>}
一个随机获取机器人头像的网站https://robohash.org/:id
<img src={`https://robohash.org/${id}`} alt="robot" />
导入json文件
import robots from './mockdata/robots.json'
CSS模块化
将css文件与tsx文件放在相同目录下,css文件以.module.css格式结尾
安装typescript-plugin-css-modules
npm install typescript-plugin-css-modules --save-dev
在tsconfig.json中添加配置
{"compilerOptions": {// ..."plugins":[{"name":"typescript-plugin-css-modules"}]},// ...}
在项目根目录新建.vscode目录,新建settings.json文件,写入下列内容,让vscode能提示css对象
{"typescript.tsdk": "node_modules/typescript/lib","typescript.enablePromptUseWorkspaceTsdk": true}
如果你的typescript不能识别.css文件,需要新建custom.d.ts文件,写入下列内容
(create-react-app已经写好了.module.css的声明,所以用.module.css文件就行)
declare module "*.css" {const css: {[key:string]:string};export default css;}
.d.ts文件只包含类型声明,不包含逻辑,不会被编译,也不会被webpack打包
模块化引入css
import style from './index.css'<div className={style.app} />
直接引入css文件
import './index.css'<div className="app" />
加载媒体资源与字体资源
媒体资源和字体资源(fonts/images/icons)都放在assets目录中
引入自定义字体
将.ttf字体文件放入fonts目录, 在index.css中引入字体
@font-face {font-family: 'Slidefu';src: local('Slidefu'), url(./assets/fonts/Slidefu-Regular-2.ttf) format('truetype');}
使用字体
h1 {font-family: 'Slidefu';font-size: 72px;}
class组件
import React from 'react'import styles from './ShoppingCart.module.css'interface Props {}interface State {isOpen: Boolean}export class ShoppingCart extends React.Component<Props, State> {constructor(props: Props) {super(props)this.state = {isOpen: false,}}render() {return (<div className={styles.cartContainer}><buttonclassName={styles.button}onClick={() => {this.setState({ isOpen: !this.state.isOpen })}}>购物车(2件)</button><divclassName={styles.cartDropDown}style={{ display: this.state.isOpen ? 'block' : 'none' }}><ul><li>robot 1</li><li>robot 2</li></ul></div></div>)}}
class组件需要import React
state只能在constructor中初始化
props是只读的immutable
Component的泛型如下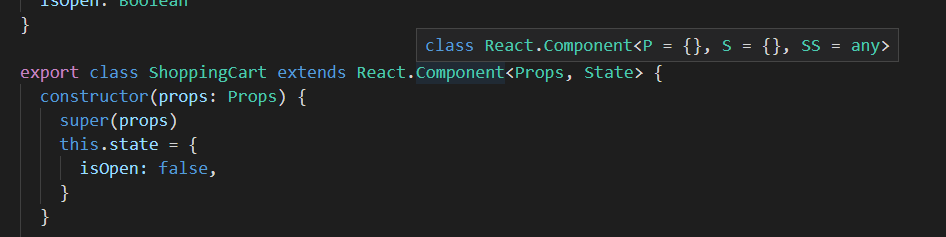
使用React-Icons添加购物车图标
react icons 官网
安装 yarn add react-icons
使用(可以通过size属性指定大小)
import { FiShoppingCart } from 'react-icons/fi'class Xxx extends React.Component {render() {return <FiShoppingCart size="10px" />}}
事件处理
如果在onClick里直接传递event参数,可以看到React自动绑定了事件类型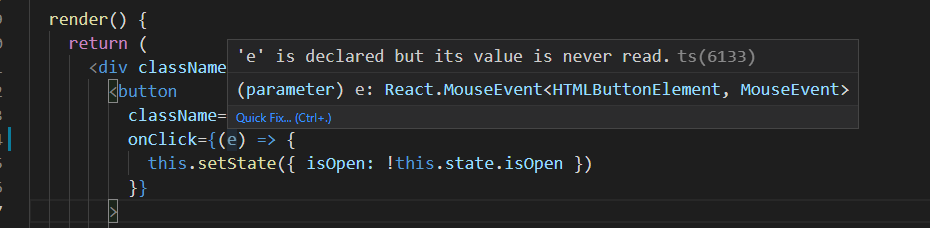
把事件处理函数移到外面则不知道事件类型,将鼠标移至onClick上可推断事件类型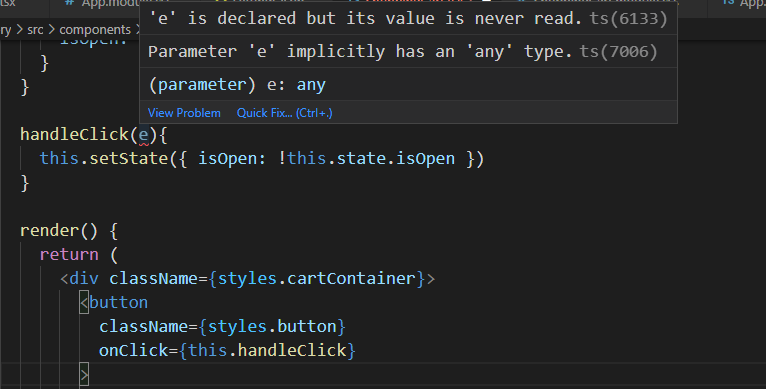
React会强制把this变成undefined
handleClick(e: React.MouseEvent<HTMLButtonElement>) {console.log(this) // undefinedthis.setState({ isOpen: !this.state.isOpen })}
解决办法:
在onClick中bind this
onClick={this.handleClick.bind(this)}
使用箭头函数
handleClick = (e: React.MouseEvent<HTMLButtonElement>) => {console.log(this)this.setState({ isOpen: !this.state.isOpen })}
event.target V.S. event.currentTarget
**event.target**—— 引发事件的层级最深的元素。**event.currentTarget**(=**this**)—— 处理事件的当前元素(绑定了事件处理程序的元素)handleClick = (e: React.MouseEvent<HTMLButtonElement>) => {if((e.target as HTMLElement).nodeName === 'SPAN') {this.setState({ isOpen: !this.state.isOpen })}}
异步处理-获取api数据
使用https://jsonplaceholder.typicode.com/提供的假数据
componentDidMount() {fetch('https://jsonplaceholder.typicode.com/users').then((response) => response.json()).then((data) => {this.setState({ robotGallery: data })})}
对于从api获取的数据,定义成any类型是没有问题的,因为返回的数据具有不确定性,
不能为了使用Type而放弃JavaScript的灵活性interface State {robotGallery: any[]}
setState是异步的还是同步的?
React中的setState是同步执行,异步更新的
React不会每次setState都更新,这样太损耗性能,而会将多个setState的调用合并为一个来执行<buttononClick={() => {this.setState({ count: this.state.count + 1 })this.setState({ count: this.state.count + 1 })this.setState({ count: this.state.count + 1 })this.setState({ count: this.state.count + 1 })this.setState({ count: this.state.count + 1 })console.log(this.state.count)}}>{this.state.count}</button>
上面的代码中count只会更新一次
setState接受第二个参数,在第二个参数中可以获取到更新后的stateonClick={() => {this.setState({ count: this.state.count + 1 }, () =>console.log(this.state.count))}}
第一个参数使用回调函数,函数的第一次参数是上一个state, 由此可以使state即时更新
onClick={() => {this.setState((preState, preProps) => {return { count: preState.count + 1 }})this.setState((preState, preProps) => {return { count: preState.count + 1 }})this.setState((preState, preProps) => {return { count: preState.count + 1 }})}}
React生命周期
mounting: 创建虚拟DOM,渲染UI
- Updating: 更新虚拟DOM,重新渲染UI
- Unmounting: 删除虚拟DOM, 移除UI ```jsx // Mounting componentDidMount(){}
// Updating componentWillReceiveProps // 已废弃 state getDerivedStateFromProps(nextProps, prevState){} shouldComponentUpdate(nextProps, nextState){} componentDidUpdate(){}
// Unmounting componentWillUnmount(){} ```

若有收获,就点个赞吧
0 人点赞
