NodeJs是基于Chrome V8引擎的运行时环境**node -v**检查NodeJs版本号
浏览器还不支持 JavaScript 的最新特性,这就是为什么在浏览器中运行的代码必须是babel转译过的。而在后端运行 JavaScript 的情况是不同的。 最新版本的 Node 支持大部分最新的 JavaScript 特性,因此我们可以使用最新的特性而不必转译我们的代码。
让我们来实现一个简单的“hello world”应用
新建一个目录,运行命令npm init,会得到一个package.json文件
{"name": "node","version": "1.0.0","description": "","main": "index.js","scripts": {"test": "echo \"Error: no test specified\" && exit 1"},"author": "","license": "ISC"}
可以看到程序入口是index.js
在scripts添加一行 start
"scripts": {"start": "node index.js","test": "echo \"Error: no test specified\" && exit 1"},
在项目根目录新建index.js文件
console.log("hello world")
运行命令
node index.js
或者
npm start
Simple web server
简单的web服务器
修改index.js
const http = require('http')const app = http.createServer((request, response) => {response.writeHead(200, { 'Content-Type': 'text/plain' })response.end('Hello World')})const PORT = 3001app.listen(PORT)console.log(`Server running on port ${PORT}`)
npm start
在终端看到输出 Server running on port 3001
浏览器看到hello world
http://localhost:3001/xxx 也能看到相同的内容
NodeJs使用的是commonJS语法
修改index.js,使其返回json数据
const http = require('http')let notes = [{id: 1,content: "HTML is easy",date: "2019-05-30T17:30:31.098Z",important: true},{id: 2,content: "Browser can execute only Javascript",date: "2019-05-30T18:39:34.091Z",important: false},{id: 3,content: "GET and POST are the most important methods of HTTP protocol",date: "2019-05-30T19:20:14.298Z",important: true}]const app = http.createServer((request, response) => {response.writeHead(200, { 'Content-Type': 'application/json' })response.end(JSON.stringify(notes))})const PORT = 3001app.listen(PORT)console.log(`Server running on port ${PORT}`)
'Content-Type': 'application/json'告诉接收方数据返回的是json格式
Express
使用Node内置的http web服务器可行,但是项目变大时很麻烦
改用express库
安装
npm install express
可以看到package.json被添加了依赖
{// ..."dependencies": {"express": "^4.17.1"}}
源代码安装在nodemodules文件夹中
^4.17.1 前面的插入符号表示,当项目的依赖项更新时,安装的 express 版本至少为 _4.17.1。 但是,所安装的 express 版本也可以具有较大的patch 号(最后一个数字)或较大的minor 号(中间的数字)的版本。 第一个major 号表示库的主版本必须相同。
更新依赖
npm update
在新电脑重新安装依赖
npm install
Web and express
修改index.js
- 引入express函数
- app.get设置路由,在浏览器输入相应url得到相应数据 ```javascript const express = require(‘express’) const app = express()
let notes = [ … ]
app.get(‘/‘, (req, res) => { res.send(‘
Hello World!
‘) })app.get(‘/api/notes’, (req, res) => { res.json(notes) })
const PORT = 3001
app.listen(PORT, () => {
console.log(Server running on port ${PORT})
})
json是字符串,在命令行输入node, 进入[node-repl](https://nodejs.org/docs/latest-v8.x/api/repl.html),可以验证这一点<br />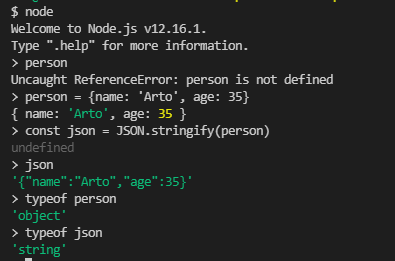<a name="dQ2os"></a>### nodemon如果我们修改了服务端代码,每次都要手动重启服务器,使用nodemon可以解决这个问题<br />nodemon 将监视启动 nodemon 的目录中的文件,如果任何文件发生更改,nodemon 将自动重启node应用。<br />将nodemon安装成开发者依赖```bashnpm install --sav-dev nodemon
安装报错
解决办法:
npm config set strict-ssl false
安装完成后, 可以看到devDependencies中有了nodemon,如果不小心安装到了dependencies中,手动修改package.json文件如下图样子也是可以的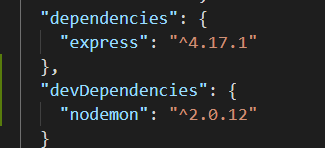
使用如下命令启动应用
node_modules/.bin/nodemon index.js
命令太长,写入scripts
"scripts": {"start": "node index.js","dev": "nodemon index.js","test": "echo \"Error: no test specified\" && exit 1"},
命令行运行, 注意这里多了一个run
npm run dev
使用yarn不需要加run
yarn dev
REST
让我们扩展我们的应用,使它提供与json-server 相同的 RESTful HTTP API 。
Representational State Transfer,又名REST
Rest 是一种架构风格,用于构建可伸缩的 web 应用。
在我们的应用中,像便笺这样的单数实体,在 RESTful thinking 中称为resource。 每个resource都有一个相关联的 URL,这个 URL 是资源的唯一地址。
一个约定是结合resource 类型名称和resource的唯一标识符来创建resource唯一的地址。
假设我们的服务的根 URL 是 www.example.com/api 。
如果我们将便笺的资源类型定义为notes,那么标识为10的便笺资源的地址就是唯一的地址www.example.com/api/notes/10。
所有便笺资源的整个集合的 URL 是 www.example.com/api/notes 。
我们可以对资源执行不同的操作。要执行的操作由 HTTP动词verb 定义:
| URL | verb | functionality |
|---|---|---|
| notes/10 | GET | fetches a single resource |
| notes | GET | fetches all resources in the collection |
| notes | POST | creates a new resource based on the request data |
| notes/10 | DELETE | removes the identified resource |
| notes/10 | PUT | replaces the entire identified resource with the request data |
| notes/10 | PATCH | replaces a part of the identified resource with the request data |
这就是我们如何粗略地定义 REST 所指的 统一接口 uniform interface ,这意味着一种一致的定义接口的方式,使系统能够进行合作。
Fetching a single resource
获取单一资源
使用冒号语法为路由定义参数, 路由中的参数通过request.params访问
app.get('/api/notes/:id', (request, response) => {const id = request.params.idconst note = notes.find(note => note.id === id)response.json(note)})
当请求为http://localhost:3001/api/notes/1时什么都没有,使用console.log大法调试
注意,这里要查看命令行终端,而不是浏览器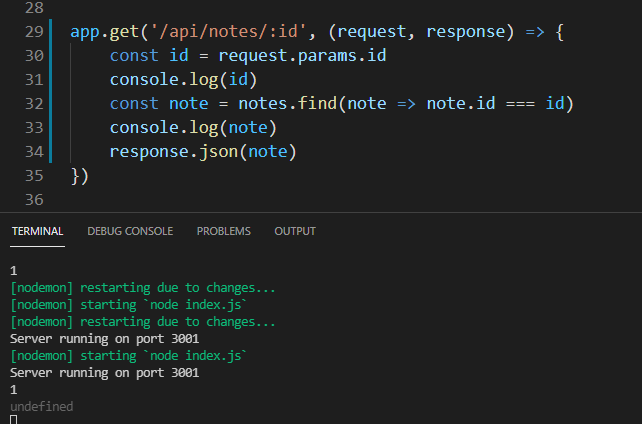
最后发现 id 变量包含一个字符串“1” ,而便笺的 id 是整数。使用Number转换
app.get('/api/notes/:id', (request, response) => {const id = Number(request.params.id)const note = notes.find(note => note.id === id)response.json(note)})
如果我们搜索一个不存在的id,浏览器也会响应,状态码是200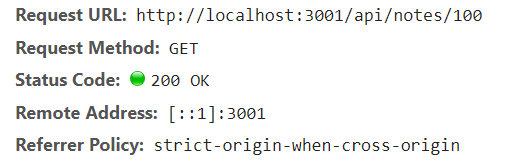
修改代码,将状态设为404,且不返回任何数据
app.get('/api/notes/:id', (request, response) => {const id = Number(request.params.id)const note = notes.find(note => note.id === id)if (note) {response.json(note)} else {response.status(404).end()}})
Delete resources
删除资源,用204状态相应请求,不返回任何数据
(不管要删除的资源是否存在,都返回204)
app.delete('/api/notes/:id', (request, response) => {const id = Number(request.params.id)notes = notes.filter(note => note.id !== id)response.status(204).end()})
Postman
使用postman测试
https://www.postman.com/downloads/
下载并安装desktop app后,打开浏览器登录postman, 打开workspace, create request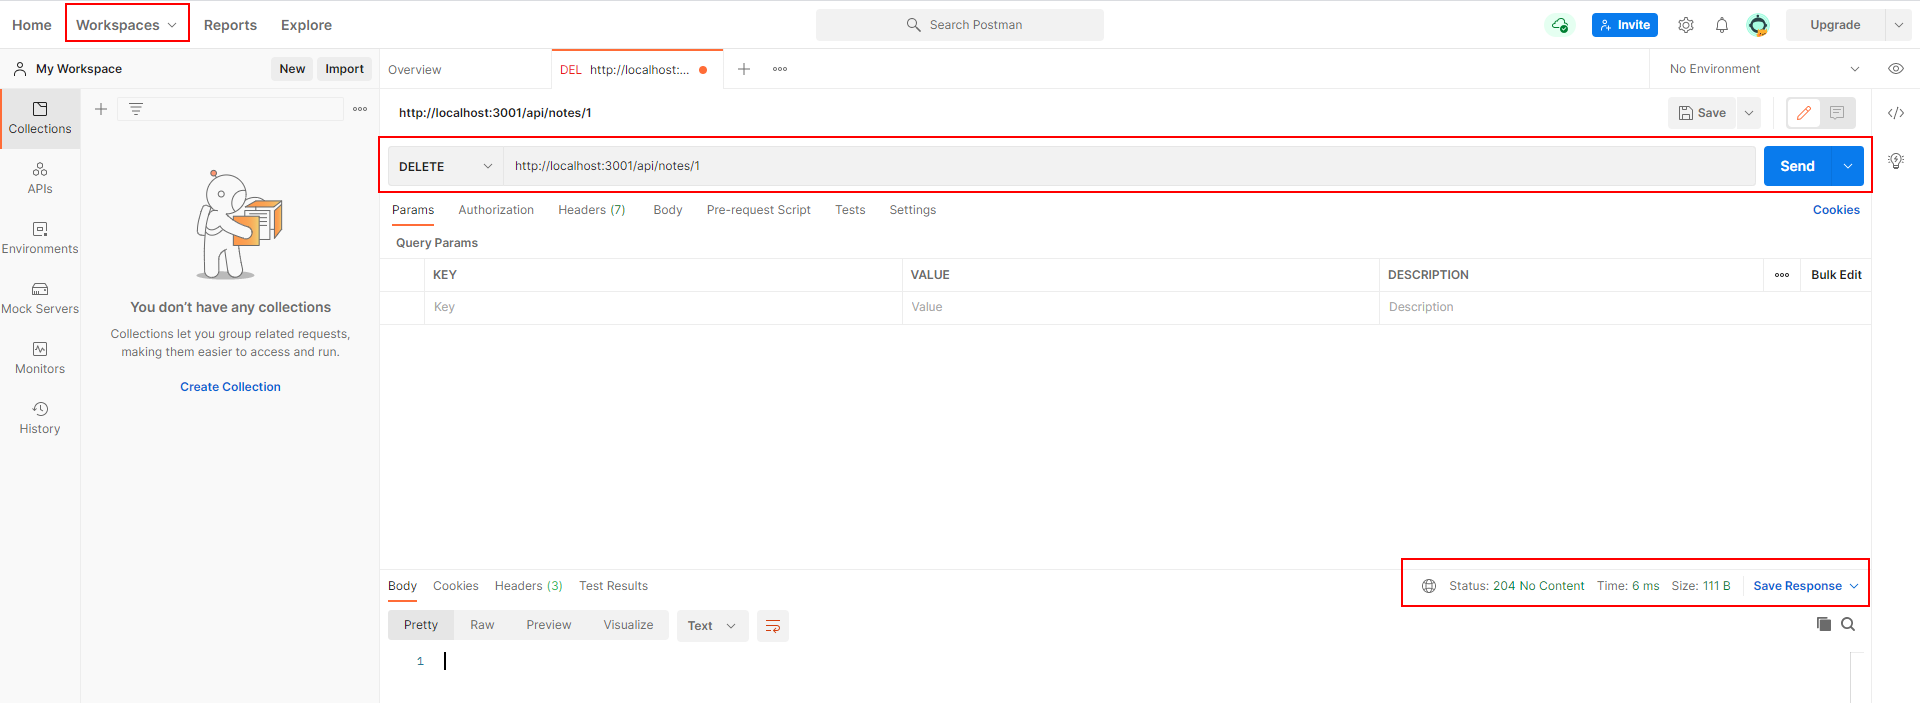
The Visual Studio Code REST client
VS Code安装REST client插件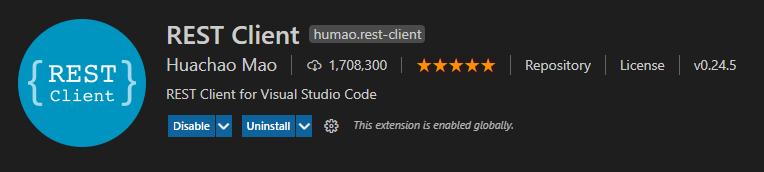
在项目根目录创建requests文件夹,将request写在.rest文件内,点击Send Request发送请求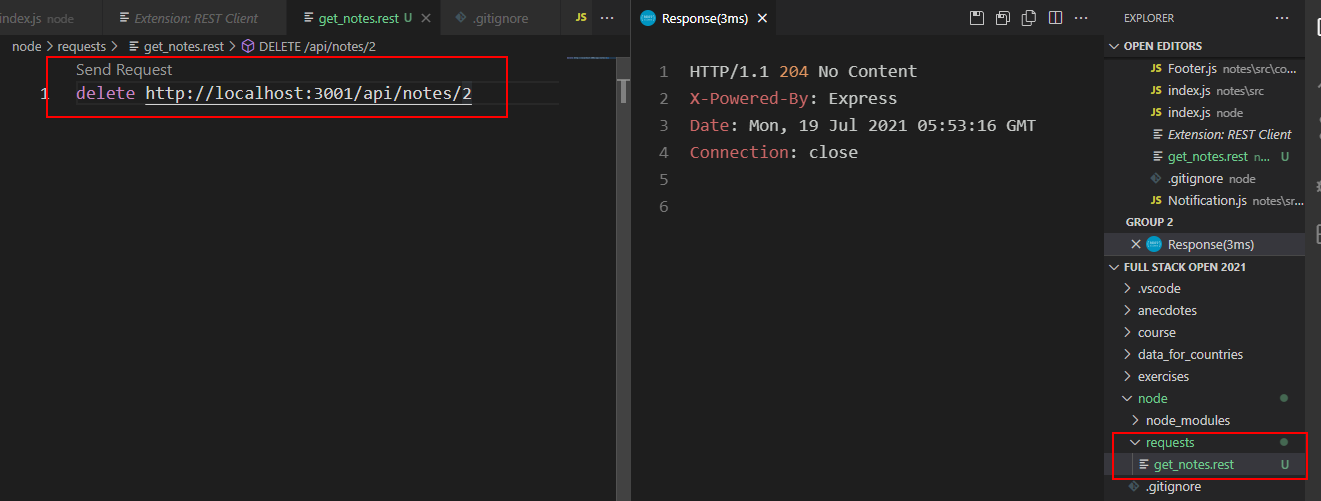
webstorm有内建好的的HTTP 客户端。创建一个新的以 .rest为扩展的文件,编辑器会展示给你选项来创建和运行你的请求。你可以通过阅读这个文档来探索更多。
Receiving data
为了方便地访问数据,我们需要 express json-parser的帮助,它与命令app.use(express.json())一起使用。
const express = require('express')const app = express()app.use(express.json())//...app.post('/api/notes', (request, response) => {const note = request.bodyconsole.log(note)response.json(note)})
事件处理函数可以从request 对象的body 属性访问数据。
如果没有 json-parser,body 属性将是undefined的。 Json-parser 的功能是获取请求的 JSON 数据,将其转换为 JavaScript 对象,然后在调用路由处理程序之前将其附加到请求对象的 body 属性。
使用Postman测试post请求, 注意看如何定义body中传送的数据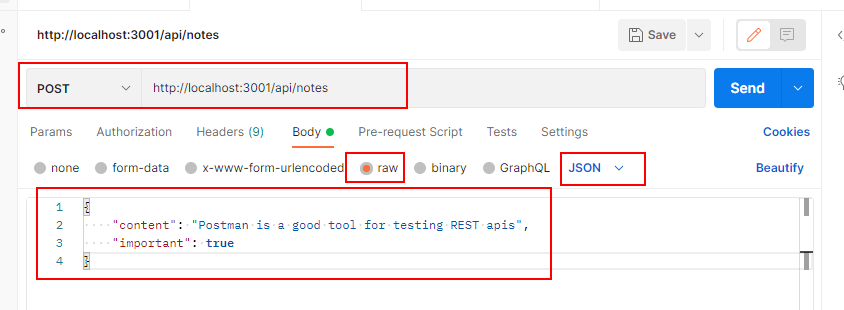
如果ContentType/Header没有设置正确的值,服务器将无法正确解析数据。
如果使用VS Code的REST client插件, 则像下图一样测试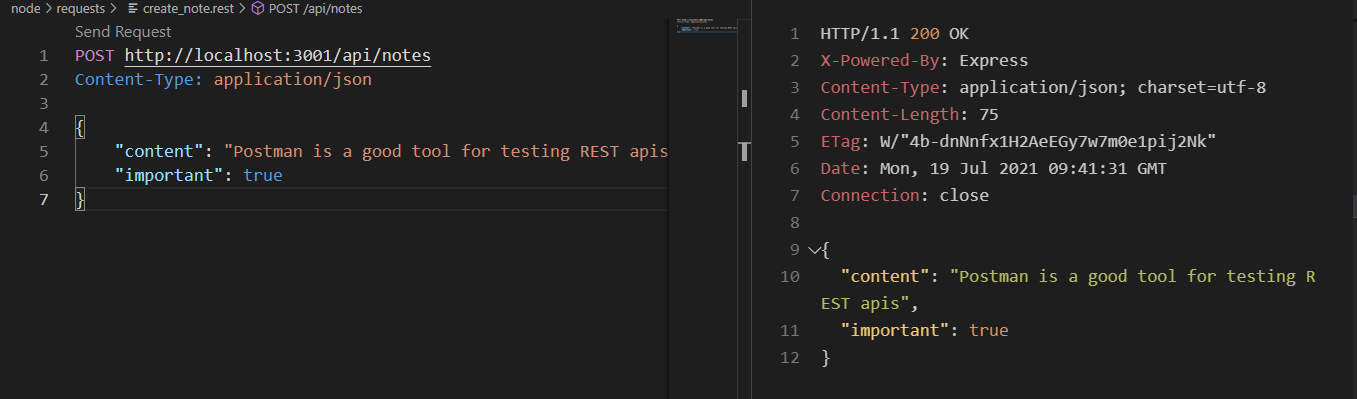
Rest 客户端相对于 Postman 的一个好处是,请求可以在项目仓库的根目录轻松获得,并且可以分发给开发团队中的每个人。也可以添加利用 ###分割符向相同文件中添加多个请求
在代码中可以使用console.log(request.headers)查看头部
实现pos请求的正式代码
const generateId = () => {const maxId = notes.length > 0? Math.max(...notes.map(n => n.id)): 0return maxId + 1}app.post('/api/notes', (request, response) => {const body = request.bodyconsole.log(body)if (!body.content) {return response.status(400).json({error: 'content missing'})}const note = {content: body.content,important: body.important || false,date: new Date(),id: generateId()}notes = notes.concat(note)response.json(note)})
- 求最大id用了Math.max()方法,使用…将数组扩展(spread)
- 获得最大id的方法并不推荐,后面会有更好的
- 在服务器生成时间戳比在浏览器生成更好
-
express方法总结
app.use(express.json()) 才能读取request.body
- response.status()设置状态
- response.json()返回json数据
- response.end()什么都不返回
- response.send()既可以返回字符串也可以返回json
About HTTP request types
关于HTTP请求类型
HTTP 标准讨论了与请求类型相关的两个属性,安全 和 幂等性 。
安全性意味着执行请求不能在服务器中引起任何副作用。 副作用是指数据库的状态不能因请求而改变,响应只能返回服务器上已经存在的数据。
Http 标准还定义了应该是安全的请求类型HEAD。 实际上,HEAD 应该像 GET 一样工作,但是它只返回状态码和响应头。 当您发出 HEAD 请求时,不会返回响应主体。
除了 POST 之外的所有 HTTP 请求都应该是幂等:
即(除了错误或过期问题) N > 0 相同请求的副作用与单个请求相同。 方法 GET、 HEAD、 PUT 和 DELETE 都具有此属性
这意味着,如果一个请求有副作用,那么无论发送多少次请求,结果都应该是相同的。
Post 是唯一既不是安全性 也不是幂等 的 HTTP 请求类型。
Middleware
中间件
我们之前使用的 express json-parser是所谓的中间件。
中间件是可用于处理请求和响应对象的函数。
让我们实现我们自己的中间件,打印有关发送到服务器的每个请求的信息。
中间件是一个接收三个参数的函数:
const requestLogger = (request, response, next) => {console.log('Method:', request.method);console.log('Path: ', request.path);console.log('Body: ', request.body);console.log('---');next()}app.use(requestLogger)
next()函数将控制权交给下一个中间件
如果我们希望在调用路由事件处理程序之前执行中间件函数,则必须在路由之前use中间件函数。
让我们在路由之后添加如下中间件,它用于捕获对不存在的路由发出的请求。 对于这些请求,中间件将返回 JSON 格式的错误消息。
const unknodwnEndpoint = (request, response) => {response.status(404).json({ error: 'unknown endpoint' })}app.use(unknodwnEndpoint)
Exercise 3.7-3.8
使用日志中间件 morgan
安装
npm install morgan
使用morgan, 预设格式为tiny
const express = require('express')const app = express()const morgan = require('morgan')app.use(express.json())app.use(morgan('tiny'))

自定义格式
const express = require('express')const app = express()const morgan = require('morgan')app.use(express.json())app.use(morgan(function (tokens, req, res) {return [tokens.method(req, res),tokens.url(req, res),tokens.status(req, res),tokens.res(req, res, 'content-length'), '-',tokens['response-time'](req, res), 'ms',JSON.stringify(req.body)].join(' ')}))


若有收获,就点个赞吧
0 人点赞
