json-server和axios
安装json-server
npm install json-server --save-dev
在package.json中添加script
"scripts": {"server": "json-server -p3001 --watch db.json",// ...}
在项目根目录创建db.json文件
{"notes": [{"content": "the app state is in redux store","important": true,"id": 1},{"content": "state changes are made with actions","important": false,"id": 2}]}
使用命令**npm run server**启动json-server
安装axios
npm install axios
在services/notes.js中编写get方法
import axios from 'axios'const baseUrl = 'http://localhost:3001/notes'const getAll = async () => {const response = await axios.get(baseUrl)return response.data}export default { getAll }
初始化store
在noteReducer中添加INIT_NOTES action处理方法及action creator
// ...const noteReducer = (state = [], action) => {console.log('ACTION:', action)switch (action.type) {case 'NEW_NOTE':return [...state, action.data]case 'INIT_NOTES':return action.data// ...}}export const initializeNotes = (notes) => {return {type: 'INIT_NOTES',data: notes,}}// ...
在index.js中初始化store
import noteReducer, { initializeNotes } from './reducers/noteReducer'import noteService from './services/notes'// ...const store = createStore(reducer, composeWithDevTools())noteService.getAll().then(notes =>store.dispatch(initializeNotes(notes)))
将便签初始化移动到App组件中
import React, {useEffect} from 'react'import NewNote from './components/NewNote'import Notes from './components/Notes'import VisibilityFilter from './components/VisibilityFilter'import noteService from './services/notes'import { initializeNotes } from './reducers/noteReducer'import { useDispatch } from 'react-redux'const App = () => {const dispatch = useDispatch()useEffect(() => {noteService.getAll().then(notes => dispatch(initializeNotes(notes)))}, [])return (<div><NewNote /><VisibilityFilter /><Notes /></div>)}export default App
在useEffect中ESLint会有警告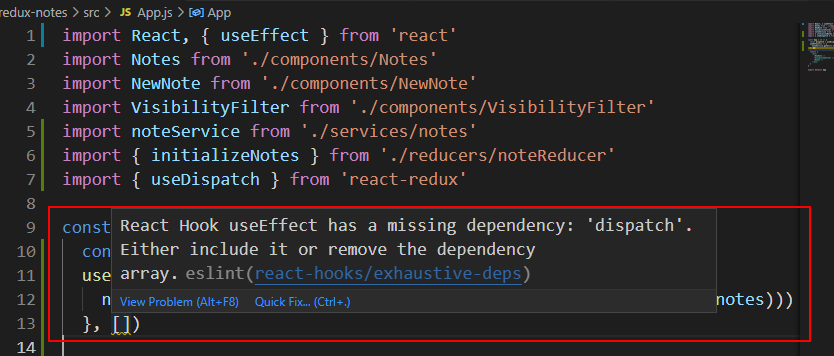
解决方法一:将dispatch添加到[]
const App = () => {const dispatch = useDispatch()useEffect(() => {noteService.getAll().then(notes => dispatch(initializeNotes(notes)))}, [dispatch])// ...}
当dispatch变量的值发生变化时,useEffect将再次执行(虽然这不是我们想要的)
解决方法二:添加注释禁用ESLint(不推荐)
const App = () => {const dispatch = useDispatch()useEffect(() => {noteService.getAll().then(notes => dispatch(initializeNotes(notes)))},[]) // eslint-disable-line react-hooks/exhaustive-deps// ...}
创建新便签
在services/notes.js新建createNew方法
const baseUrl = 'http://localhost:3001/notes'const getAll = async () => {const response = await axios.get(baseUrl)return response.data}const createNew = async (content) => {const object = { content, important: false }const response = await axios.post(baseUrl, object)return response.data}export default {getAll,createNew,}}
修改组件NewNote的addNote方法
import React from 'react'import { useDispatch } from 'react-redux'import { createNote } from '../reducers/noteReducer'import noteService from '../services/notes'const NewNote = (props) => {const dispatch = useDispatch()const addNote = async (event) => {event.preventDefault()const content = event.target.note.valueevent.target.note.value = ''const newNote = await noteService.createNew(content)dispatch(createNote(newNote))}return (<form onSubmit={addNote}><input name="note" /><button type="submit">add</button></form>)}export default NewNote
修改action创建器createNote
export const createNote = (data) => {return {type: 'NEW_NOTE',data,}}
Asynchronous actions and redux thunk
异步actions和redux thunk
与服务器的通信发生在组件的功能内部并不是很好。 如果能够将通信从组件中抽象出来就更好了。
redux thunk
Redux Thunk middleware allows you to write action creators that return a function instead of an action. The thunk can be used to delay the dispatch of an action, or to dispatch only if a certain condition is met. The inner function receives the store methods dispatch and getState as parameters.
Redux Thunk中间件允许action creator返回一个函数,用于推迟action的dispatch或者在特定条件下才dispatch,内部函数接受store的dispatch和getState作为参数
安装redux-thunk
npm install redux-thunk
在初始化store时允许使用thunk
import { createStore, applyMiddleware } from 'redux';import thunk from 'redux-thunk';import rootReducer from './reducers/index';// Note: this API requires redux@>=3.1.0const store = createStore(rootReducer, applyMiddleware(thunk));
初始化时可以使用withExtraArgument传入更多参数,如果有多个额外参数,可传入对象,如{api, Whatever}
const store = createStore(reducer,applyMiddleware(thunk.withExtraArgument(api)),);// laterfunction fetchUser(id) {return (dispatch, getState, api) => {// you can use api here};}
使用thunk将通信移出组件
将store独立成单独的文件src/store.js
import { createStore, combineReducers, applyMiddleware } from 'redux'import thunk from 'redux-thunk'import { composeWithDevTools } from 'redux-devtools-extension'import noteReducer from './reducers/noteReducer'import filterReducer from './reducers/filterReducer'const reducer = combineReducers({notes: noteReducer,filter: filterReducer,})const store = createStore(reducer, composeWithDevTools(applyMiddleware(thunk)))export default store
修改reducer里的action创建器createNote和initializeNotes使用thunk, 先从服务器获取数据,再dispatch
import noteService from '../services/notes'const noteReducer = (state = [], action) => {// ...}export const createNote = (content) => {return async (dispatch) => {const newNote = await noteService.createNew(content)dispatch({type: 'NEW_NOTE',data: newNote,})}}// ...export const initializeNotes = () => {return async (dispatch) => {const notes = await noteService.getAll()dispatch({type: 'INIT_NOTES',data: notes,})}}export default noteReducer
原先组件内需要通信的地方,现在只需要简单地调用action creator
const App = () => {const dispatch = useDispatch()useEffect(() => {dispatch(initializeNotes()))},[dispatch])// ...}
const NewNote = () => {const dispatch = useDispatch()const addNote = async (event) => {event.preventDefault()const content = event.target.note.valueevent.target.note.value = ''dispatch(createNote(content))}// ...}
Exercise 6.15 - 6.18
实现投票功能
在servcie中添加update和get方法
注意,在json-server中id前不需要加冒号
const update = async (id, content) => {const response = await axios.put(`${baseUrl}/${id}`, content)return response.data}const get = async (id) => {const response = await axios.get(`${baseUrl}/${id}`)return response.data}
修改vote action creator
export const voteAction = (id) => {return async (dispatch) => {const anecdote = await anecdotesService.get(id)anecdote.votes += 1const votedAnecdote = await anecdotesService.update(id, anecdote)dispatch({type: 'VOTE',votedAnecdote,})}}
修改action对应的处理方法
const anecdoteReducer = (state = [], action) => {switch (action.type) {case 'VOTE': {return state.map((item) =>item.id !== action.votedAnecdote.id ? item : action.votedAnecdote)}// ...}}

若有收获,就点个赞吧
0 人点赞
