References across collections
用户和便签应该是一对多的关系,如果是关系型数据库,便签可以将user作为外键
mongoDB是文档型数据库
可以在note里存入user的id
[{content: 'HTML is easy',important: false,_id: 221212,user: 123456,},-- snip --]
或者在user里存入note的id组成的数组
[{username: 'mluukkai',_id: 123456,notes: [221212, 221255],},-- snip --]
又或者可以直接将具体的notes作为user的属性
[{username: 'mluukkai',_id: 123456,notes: [{content: 'HTML is easy',important: false,},{content: 'The most important operations of HTTP protocol are GET and POST',important: true,},],},-- snip --]
Mongoose schema for users
这里,我们选择将 note 的 id 以数组的形式存储到 user 当中
让我们定义一个 model 来表示 User 吧, models/user.js 代码如下:
const mongoose = require('mongoose')const userSchema = new mongoose.Schema({username: String,name: String,passwordHash: String,notes: [{type: mongoose.Schema.Types.ObjectId,ref: 'Note'}],})userSchema.set('toJSON', {transform: (document, returnedObject) => {returnedObject.id = returnedObject._id.toString()delete returnedObject._iddelete returnedObject.__v// the passwordHash should not be revealeddelete returnedObject.passwordHash}})const User = mongoose.model('User', userSchema)module.exports = User
让我们展开 model/note.js 文件中 note 的 schema,让 note 包含其创建者的信息。
const noteSchema = new mongoose.Schema({content: {type: String,required: true,minlength: 5},date: Date,important: Boolean,user: {type: mongoose.Schema.Types.ObjectId,ref: 'User'}})
Creating users
让我们来实现一个创建 User 的路由
密码不能明文存储,安装bcrypt 用来生成密码的哈希值
注:windows安装bcrypt会报错,改用bcryptjs
npm install bcryptjs
controllers/users.js定义user路由
const bcrypt = require('bcryptjs')const usersRouter = require('express').Router()const User = require('../models/user')usersRouter.post('/', async (request, response) => {const body = request.bodyconst saltRounds = 10const passwordHash = await bcrypt.hash(body.password, saltRounds)const user = new User({username: body.username,name: body.name,passwordHash,})const savedUser = await user.save()response.json(savedUser)})module.exports = usersRouter
在app.js中使用路由
const usersRouter = require('./controllers/users')// ...app.use('/api/users', usersRouter)
编写自动化测试所需的工作量要少得多,而且它将使应用的开发更加容易。
Creating a new note
创建note的代码也要跟着改变
const User = require('../models/user')//...notesRouter.post('/', async (request, response, next) => {const body = request.bodyconst user = await User.findById(body.userId)const note = new Note({content: body.content,important: body.important === undefined ? false : body.important,date: new Date(),user: user._id})const savedNote = await note.save()user.notes = user.notes.concat(savedNote._id)await user.save()response.json(savedNote.)})
Populate
我们希望我们的 API 以这样的方式工作,即当一个 HTTP GET 请求到/api/users 路由时,User 对象同样包含其创建 Note 的内容,而不仅仅是 Note 的 id。 在关系型数据库中,这个功能需求可以通过 join query 实现。
Mongoose 的 join 是通过populate 方法完成的。让我们更新返回所有 User 的路由:
usersRouter.get('/', async (request, response) => {const users = await User.find({}).populate('notes')response.json(users)})
这样获取到的user就包含notes内容了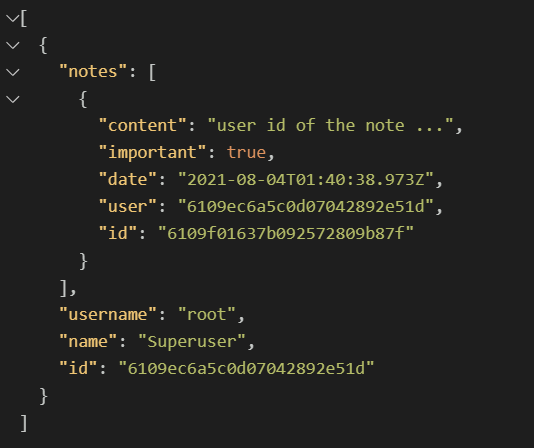
我们可以使用 populate 的参数来选择要显示的内容,1表示显示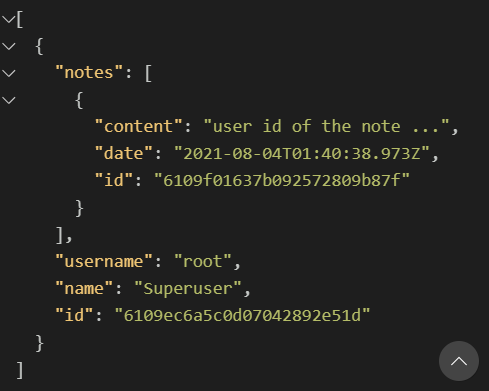

若有收获,就点个赞吧
0 人点赞
