JSON服务器
从本节开始研究“后端”,即服务器端功能
我们使用JSON服务器作为我们的服务器
Json-server 将所有数据存储在服务器上的db.json 文件中。 在现实世界中,数据会存储在某种数据库中。 然而,json-server 是一个方便的工具,可以在开发阶段使用服务器端功能,而不需要编写任何程序。
你可以全局安装JSON服务器
npm install -g json-server
全局安装不是必须的。因为我们可以在应用的根目录使用 npx 命令运行json-server
默认情况下,json-server在端口3000上启动; 但是由于 create-react-app 项目设置了3000端口,因此我们必须为 json-server 定义一个备用端口,比如端口3001。
npx json-server --port 3001 --watch db.json
在项目根目录新建一个db.json文件
{"notes": [{"id": 1,"content": "HTML is easy","date": "2019-05-30T17:30:31.098Z","important": true},{"id": 2,"content": "Browser can execute only JavaScript","date": "2019-05-30T18:39:34.091Z","important": false},{"id": 3,"content": "GET and POST are the most important methods of HTTP protocol","date": "2019-05-30T19:20:14.298Z","important": true}]}
让我们在浏览器中输入地址 http://localhost:3001/notes。 我们可以看到JSON-server 以 JSON 格式提供了我们之前写到文件的便笺:
JSONView插件可以格式化json数据
接下来,我们要实现从JSON-server获取数据和存储数据到JSON-server
The browser as a runtime environment
浏览器作为运行时环境
我们的第一个任务是从地址 http://localhost:3001/notes 获取已经存在的便笺到 React 应用。
旧方法用XMLHttpRequest获取数据,也称为使用 XHR 对象发出的 HTTP 请求:
const xhttp = new XMLHttpRequest()xhttp.onreadystatechange = function() {if (this.readyState == 4 && this.status == 200) {const data = JSON.parse(this.responseText)// handle the response that is saved in variable data}}xhttp.open('GET', '/data.json', true)xhttp.send()
使用 XHR已经不再推荐了,而且浏览器已经广泛支持基于所谓的promises的fetch方法,而不是 XHR 使用的事件驱动模型。
npm
我们将使用axios库来代替浏览器和服务器之间的通信。 它的功能类似于fetch,但是使用起来更友好。
现在,几乎所有的 JavaScript 项目都是使用node包管理器定义的,也就是npm
项目使用 npm 的一个明确的说明是位于项目根目录的package.json 文件
{"name": "notes","version": "0.1.0","private": true,"dependencies": {"@testing-library/jest-dom": "^5.11.4","@testing-library/react": "^11.1.0","@testing-library/user-event": "^12.1.10","react": "^17.0.2","react-dom": "^17.0.2","react-scripts": "4.0.3","web-vitals": "^1.0.1"},"scripts": {"start": "react-scripts start","build": "react-scripts build","test": "react-scripts test","eject": "react-scripts eject"},-- snip --}
dependencies 定义了项目的依赖
要使用 axios。 理论上,我们可以在package.json 文件中直接定义它,但最好是从命令行安装它
npm install axios
注意:npm-commands 应该始终在项目根目录中运行,在这个目录中可以找到package.json 文件。
安装完成后,axios被添加到了dependencies中
除了将 axios 添加到依赖项之外,npm install 命令还下载了库代码。 与其他依赖项一样,代码可以在根目录中的node_modules 目录中找到。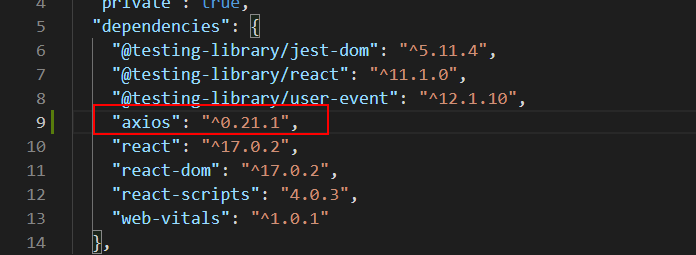
通过执行如下命令将json-server 安装为开发依赖项(—save-dev代表仅在开发过程中使用)
npm install json-server --save-dev
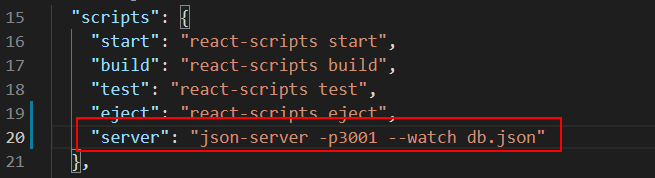
在script中添加一行
"server": "json-server -p3001 --watch db.json"
此时,我们可以通过下面的命令启动 json-server
npm run server# 或者yarn server
我们使用了两次 npm 安装命令,但是有一点不同:
npm install axiosnpm install json-server --save-dev
参数之间有细微的差别。axios 被安装为应用的运行时依赖项 (—save),因为程序的执行需要库的存在。 而另一个, json-server 是作为开发依赖项(—save-dev)安装的,因为程序本身并不需要它。 它用于在软件开发过程中提供帮助。
Yarn和npm命令对比
| npm install | yarn |
|---|---|
| npm install react —save | yarn add react |
| npm uninstall react —save | yarn remove react |
| npm install react —save-dev | yarn add react —dev |
| npm update —save | yarn upgrade |
| npm install -g react | yarn global add react |
Axios and Promises
打开2个终端,分别运行json-server和react项目
在项目的index.js中添加
import axios from 'axios'const promise = axios.get('http://localhost:3001/notes')console.log(promise)const promise2 = axios.get('http://localhost:3001/foobar')console.log(promise2)
当index.js变化时,React不会自动感知;
在项目的根目录创建一个 .env 文件,并加上**FAST_REFRESH=false**, 重启项目。
可以看到上面2个promise一个fullfilled, 一个rejected
Axios 的 get 方法会返回一个promise。
Mozilla’s 网站上的文档对promises 做了如下解释:
A Promise is an object representing the eventual completion or failure of an asynchronous operation. Promise承诺是一个对象,用来表示异步操作的最终完成或失败
换句话说,promise 是一个表示异步操作的对象,它可以有三种不同的状态:
- The promise is pending提交中: 这意味着最终值(下面两个中的一个)还不可用。
- The promise is fulfilled兑现: 这意味着操作已经完成,最终的值是可用的,这通常是一个成功的操作。 这种状态有时也被称为resolve。
- The promise is rejected拒绝:它意味着一个错误阻止了最终值,这通常表示一个失败操作。
如果我们想要访问Promise表示的操作的结果,那么必须为promise注册一个事件处理。 这是通过 .then方法实现的。
const promise = axios.get('http://localhost:3001/notes')promise.then(response => {console.log(response)})
通常不单独声明一个promise变量,而是把.then方法直接写在axios调用方法后面
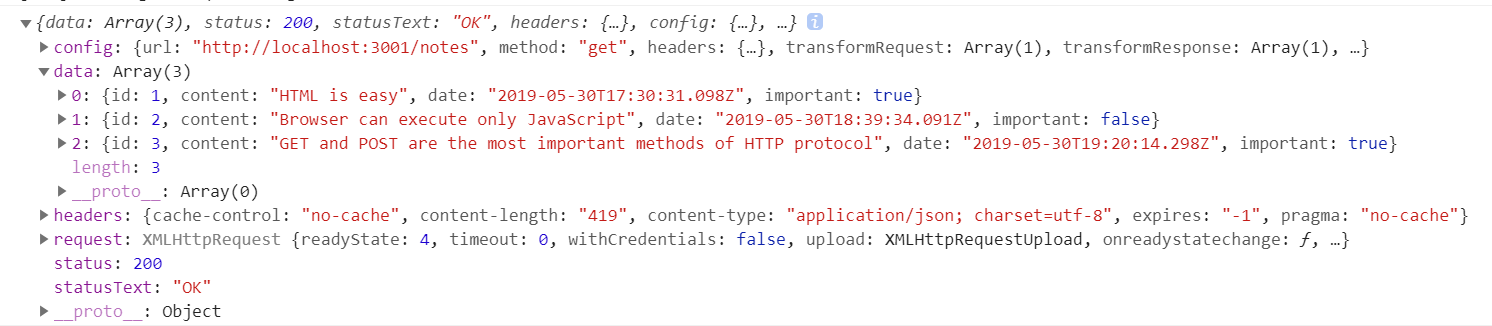
axios.get('http://localhost:3001/notes').then(response => {const notes = response.dataconsole.log(notes)})
服务器返回的数据是纯文本,基本上只有一个长字符串。 Axios 库仍然能够将数据解析为一个 JavaScript 数组。
让我们从json-server获取数据并渲染到App,下面的代码会有问题,比如只有获得了response才能渲染App组件。
import ReactDOM from 'react-dom';import App from './App';import axios from 'axios'axios.get('http://localhost:3001/notes').then(response => {const notes = response.dataReactDOM.render(<App notes={notes} />,document.getElementById('root'));})
Effect-hooks
The Effect Hook lets you perform side effects in function components. Data fetching, setting up a subscription, and manually changing the DOM in React components are all examples of side effects.
fetch数据,设置订阅,手动更改DOM都可以使用Effect-hooks
将notes项目中的App.js修改如下:
import React, { useState, useEffect } from 'react'import axios from 'axios'import Note from './components/Note'const App = () => {const [notes, setNotes] = useState([])const [newNote, setNewNote] = useState('')const [showAll, setShowAll] = useState(true)useEffect(() => {console.log('effect')axios.get('http://localhost:3001/notes').then(response => {console.log('promise fulfilled')setNotes(response.data)})}, [])console.log('render', notes.length, 'notes')-- snip --}
会发现三个console.log一次输出如下:
render 0 noteseffectpromise fulfilledrender 3 notes
react先渲染了一次App组件,
然后执行useEffect,
获取到数据后setNotes(response.data)修改了状态,再次渲染App组件
让我们重写useEffect
const hook = () => {console.log('effect')axios.get('http://localhost:3001/notes').then(response => {console.log('promise fulfilled')setNotes(response.data)})}useEffect(hook, [])
默认情况下,effects 在每次渲染完成后运行,但是你可以选择只在某些值发生变化时才调用。
useEffect的第二个参数用于指定effect运行的频率。
如果第二个参数是一个空数组 [],那么这个effect只在组件的第一次渲染时运行。
我的思考:useEffect解决了上面要获取到response才能渲染App组件的问题
exercise 2.12 - 2.14
REST API
API https://restcountries.eu 以机器可读的格式,提供了不同国家的大量数据。即所谓的 REST API。
创建一个应用,可以查看不同国家的数据。 应用能从all中获取数据。
控制台要始终开着, 不然有错误都不知道
遍历数组用for(let i of arr)
import React, { useEffect, useState } from 'react'import axios from 'axios'const Languages = ({ lan }) => (<><h1>Languages</h1><ul>{lan.map(item => <li key={item.nativeName}>{item.nativeName}</li>)}</ul></>)const ShowCountries = ({ countries, allData }) => {if (countries.length > 10) {return <div>Too many matches, specify another filter</div>} else if (countries.length === 1) {for (let item of allData) {if (item.name === countries[0]) {return (<div><h1>{item.name}</h1><div>capital: {item.capital}</div><div>population: {item.population}</div><Languages lan={item.languages} /><div><img src={item.flag} alt='flag' width="500" /></div></div>)}}return <div>hahaha</div>} else {return countries.map(item => <div key={item}>{item}</div>)}}const App = () => {const [allData, setAllData] = useState([])const [allCountries, setAllCountries] = useState([])const [countries, setCountries] = useState([])useEffect(() => {axios.get('https://restcountries.eu/rest/v2/all').then(response => {console.log(response)setAllData(response.data)setAllCountries(response.data.map(item => item.name))})}, [])const handleInputChange = (event) => {setCountries(allCountries.filter(item => item.indexOf(event.target.value) >= 0))}return (<><div>find countries: <input type='text' onChange={handleInputChange}></input></div><ShowCountries countries={countries} allData={allData} /></>)}export default App;
使用天气api
有几十个天气数据提供商。 我用了https://weatherstack.com/
几乎所有气象服务都需要 api-key。 不要将 api-key 保存到源代码管理Git中! 也不能将 api-key 硬编码到源代码中。 取而代之的是使用环境变量来保存密钥。
假设 api-key 是t0p53cr3t4p1k3yv4lu3,可以在启动应用时提供api-key:
REACT_APP_API_KEY='t0p53cr3t4p1k3yv4lu3' npm start // For Linux/macOS Bash($env:REACT_APP_API_KEY='t0p53cr3t4p1k3yv4lu3') -and (npm start) // For Windows PowerShellset REACT_APP_API_KEY='t0p53cr3t4p1k3yv4lu3' && npm start // For Windows cmd.exe
您可以从 process.env 对象访问密钥的值:
const api_key = process.env.REACT_APP_API_KEY// variable api_key has now the value set in startup
如果你使用npx create-react-app …创建了应用,并且想要为环境变量使用其他名称,则环境变量必须以REACTAPP开头。你还可以通过在项目中创建一个名为.env的文件并添加以下内容来使用’.env’ 文件,而不是每次都在命令行中定义。
# .envREACT_APP_API_KEY=t0p53cr3t4p1k3yv4lu3
在axios中使用天气api
axios.get(`http://api.weatherstack.com/current?access_key=${process.env.REACT_APP_API_KEY}&query=${item.capital}`).then(response => {setWeather(response.data)})
参考

若有收获,就点个赞吧
0 人点赞
