Java 序列化
首先解释一下序列化的概念
把对象转换为字节序列的过程称为对象的序列化。
什么情况下需要用到序列化
- 把的内存中的对象状态保存到一个文件中或者数据库中时候;
- 使用套接字在网络上传送对象的时候;
- 通过RMI传输对象的时候;
总之一句话,只要对内存中的对象进行持久化或网络传输, 都需要进行序列化和反序列化。
如果研究过一些常用的RPC通信框架,可以发现它们极少使用Java自带的序列化,什么原因?
1、无法跨语言
通过Java的原生Serializable接口与ObjectOutputStream实现的序列化,只有java语言自己能通过ObjectInputStream来解码,其他语言,如C、C++、Python等等,都无法对其实现解码。而在实际开发生产中,有时不可避免的需要基于不同语言编写的应用程序之间进行通信,这个时候Java自带的序列化就无法搞定了。
2、性能差
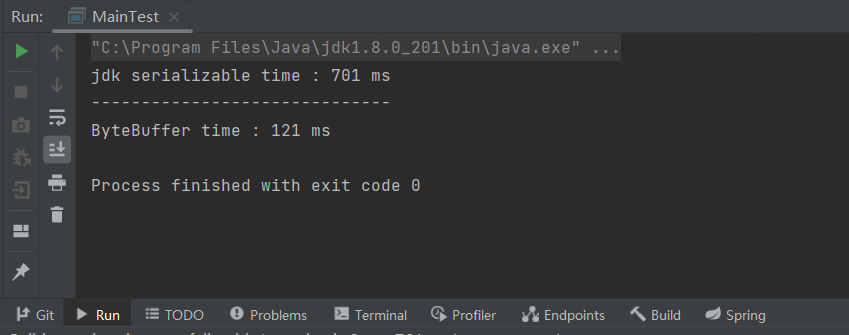
来对比Java自带的序列化与NIO中的ByteBuffer编码的性能
UserInfo类
import java.io.Serializable;import java.nio.ByteBuffer;public class UserInfo implements Serializable {private static final long serialVersionUID = 1L;private Long id;private String name;public Long getId() {return id;}public void setId(Long id) {this.id = id;}public String getName() {return name;}public void setName(String name) {this.name = name;}public byte[] codeC() {ByteBuffer buffer = ByteBuffer.allocate(1024);byte[] value = this.name.getBytes();buffer.putInt(value.length);buffer.put(value);buffer.putLong(this.id);buffer.flip();byte[] result = new byte[buffer.remaining()];buffer.get(result);return result;}public byte[] codeC(ByteBuffer buffer) {buffer.clear();byte[] value = this.name.getBytes();buffer.putInt(value.length);buffer.put(value);buffer.putLong(this.id);buffer.flip();byte[] result = new byte[buffer.remaining()];buffer.get(result);return result;}}
测试类
import java.io.ByteArrayOutputStream;import java.io.ObjectOutputStream;import java.nio.ByteBuffer;public class MainTest {public static void main(String[] args) throws Exception {UserInfo info = new UserInfo();info.setId(1L);info.setName("Tom");int loop = 100_0000;ByteArrayOutputStream bout = null;ObjectOutputStream out = null;long start = System.currentTimeMillis();for (int i = 0; i < loop; i++) {bout = new ByteArrayOutputStream();out = new ObjectOutputStream(bout);out.flush();out.close();byte[] b = bout.toByteArray();bout.close();}System.out.println("jdk serializable time : " + (System.currentTimeMillis() - start) + " ms");System.out.println("------------------------------");start = System.currentTimeMillis();ByteBuffer buffer = ByteBuffer.allocate(1024);for (int i = 0; i < loop; i++) {byte[] bytes = info.codeC(buffer);}System.out.println("ByteBuffer time : " + (System.currentTimeMillis() - start) + " ms");}}
3、序列后的码流太大
java序列化的大小是二进制编码的5倍多!
序列化后的二进制数组越大,占用的存储空间就越多,如果是进行网络传输,相对占用的带宽就更多,也会影响系统的性能。
来测试一下:
import java.io.ByteArrayOutputStream;import java.io.ObjectOutputStream;public class MainTest {public static void main(String[] args) throws Exception {UserInfo info = new UserInfo();info.setId(1L);info.setName("Tom");ByteArrayOutputStream bout = new ByteArrayOutputStream();ObjectOutputStream out = new ObjectOutputStream(bout);out.writeObject(info);out.flush();out.close();byte[] b = bout.toByteArray();System.out.println("jdk serializable: " + b.length);bout.close();System.out.println("ByteBuffer : " + info.codeC().length);}}
输出结果:
正是由于Java自带的序列化存在这些问题,开源社区涌现出很多优秀的序列化框架。
看一下比较主流的序列化框架的特点,可以从以下方面对比:
- 是否支持跨平台,跨语言是否符合系统要求
- 编码后的码流大小
- 效率
- 使用上是否便捷(包括社区维护、API复杂度等)
可以方便结合自身业务来选择适合自己的一款,来优化系统的序列化性能。
Protobuf
- 结构化数据存储格式(xml,json等)
- 高性能编解码技术
- 语言和平台无关,扩展性好,支持java、C++、Python三种语言。
- Google开源
使用Protobuf进行序列化,他和XML,json一样都有自己的语法,xml的后缀是.xml,json文件的后缀是.json,自然Protobuf文件的后缀就是.proto。
下面使用Protobuf来封装一段消息,通过一个案例简单介绍一下它的使用。
首先用Protobuf的语法格式来写一段需要序列化的对象,命名格式为:Msg.proto
syntax = "proto3";option java_package = "cn.edu.hust.netty.demo10";option java_outer_classname = "MessageProto";message RequestMsg{bytes msgType = 1;string receiveOne = 2;string msg = 3;}message ResponseMsg{bytes msgType = 1;string receiveOne = 2;string msg = 3;}
:::tips
syntax = "proto3";表示在protoc3中需要指定对应的语法版本,否则会报如下错误
在protoc3中不允许required字段 :::
关于Message.proto中的语法格式,简单就上面的语法说明一下:
- option java_package:表示生成的.java文件的包名
- option java_outer_classname:生成的java文件的文件名
- message :为他的基本类型,如同java中的class一样
字段修饰符:
- required:一个格式良好的消息一定要含有1个这种字段。表示该值是必须要设置的;
- optional:消息格式中该字段可以有0个或1个值(不超过1个)。
- repeated:在一个格式良好的消息中,这种字段可以重复任意多次(包括0次)。重复的值的顺序会被保留。表示该值可以重复,相当于java中的List。
字符类型稍微有些不同:double,float,int32,int64,bool(boolean) ,string,bytes。稍微有些不同,String,boolean,int有差别。
另外可以看到上面3个字段分别赋值了,这个值是什么意思呢?消息定义中,每个字段都有唯一的一个数字标识符。这些标识符是用来在消息的二进制格式中识别各个字段的,一旦开始使用就不能够再改变。注:[1,15]之内的标识号在编码的时候会占用一个字节。[16,2047]之内的标识号则占用2个字节。所以应该为那些频繁出现的消息元素保留 [1,15]之内的标识号。
关于Protobuf 的语法就简单的介绍这么多,更多细节可以查阅文档吧。下面开始使用Protobuf 来进行序列化。
首先在工程中引入protobuf的jar包,目前官方版本最高3.2,这里用3.0的:
<dependency><groupId>com.google.protobuf</groupId><artifactId>protobuf-java</artifactId><version>3.0.2</version></dependency>
Protobuf的文件已经定义好了,下就需要把它编译成java代码,这里借助到google为提供的脚本工具protoc。要注意protoc的版本需要和Protobuf的版本对应上,不然不同的版本之间会有一些差异解析可能会有问题。
protoc工具的下载地址:https://github.com/protocolbuffers/protobuf/releases
protoc-3.17.3-win64.zip
接着进cmd输入如下命令:
D:\LinkSpace\Download\DevelopPackage\JDK\protoc-3.17.3-win64\bin\protoc.exe .\Msg.proto --java_out=./

主要是第三句命令。如果输入没有报错的话proto文件夹应该会生成一个子文件夹:
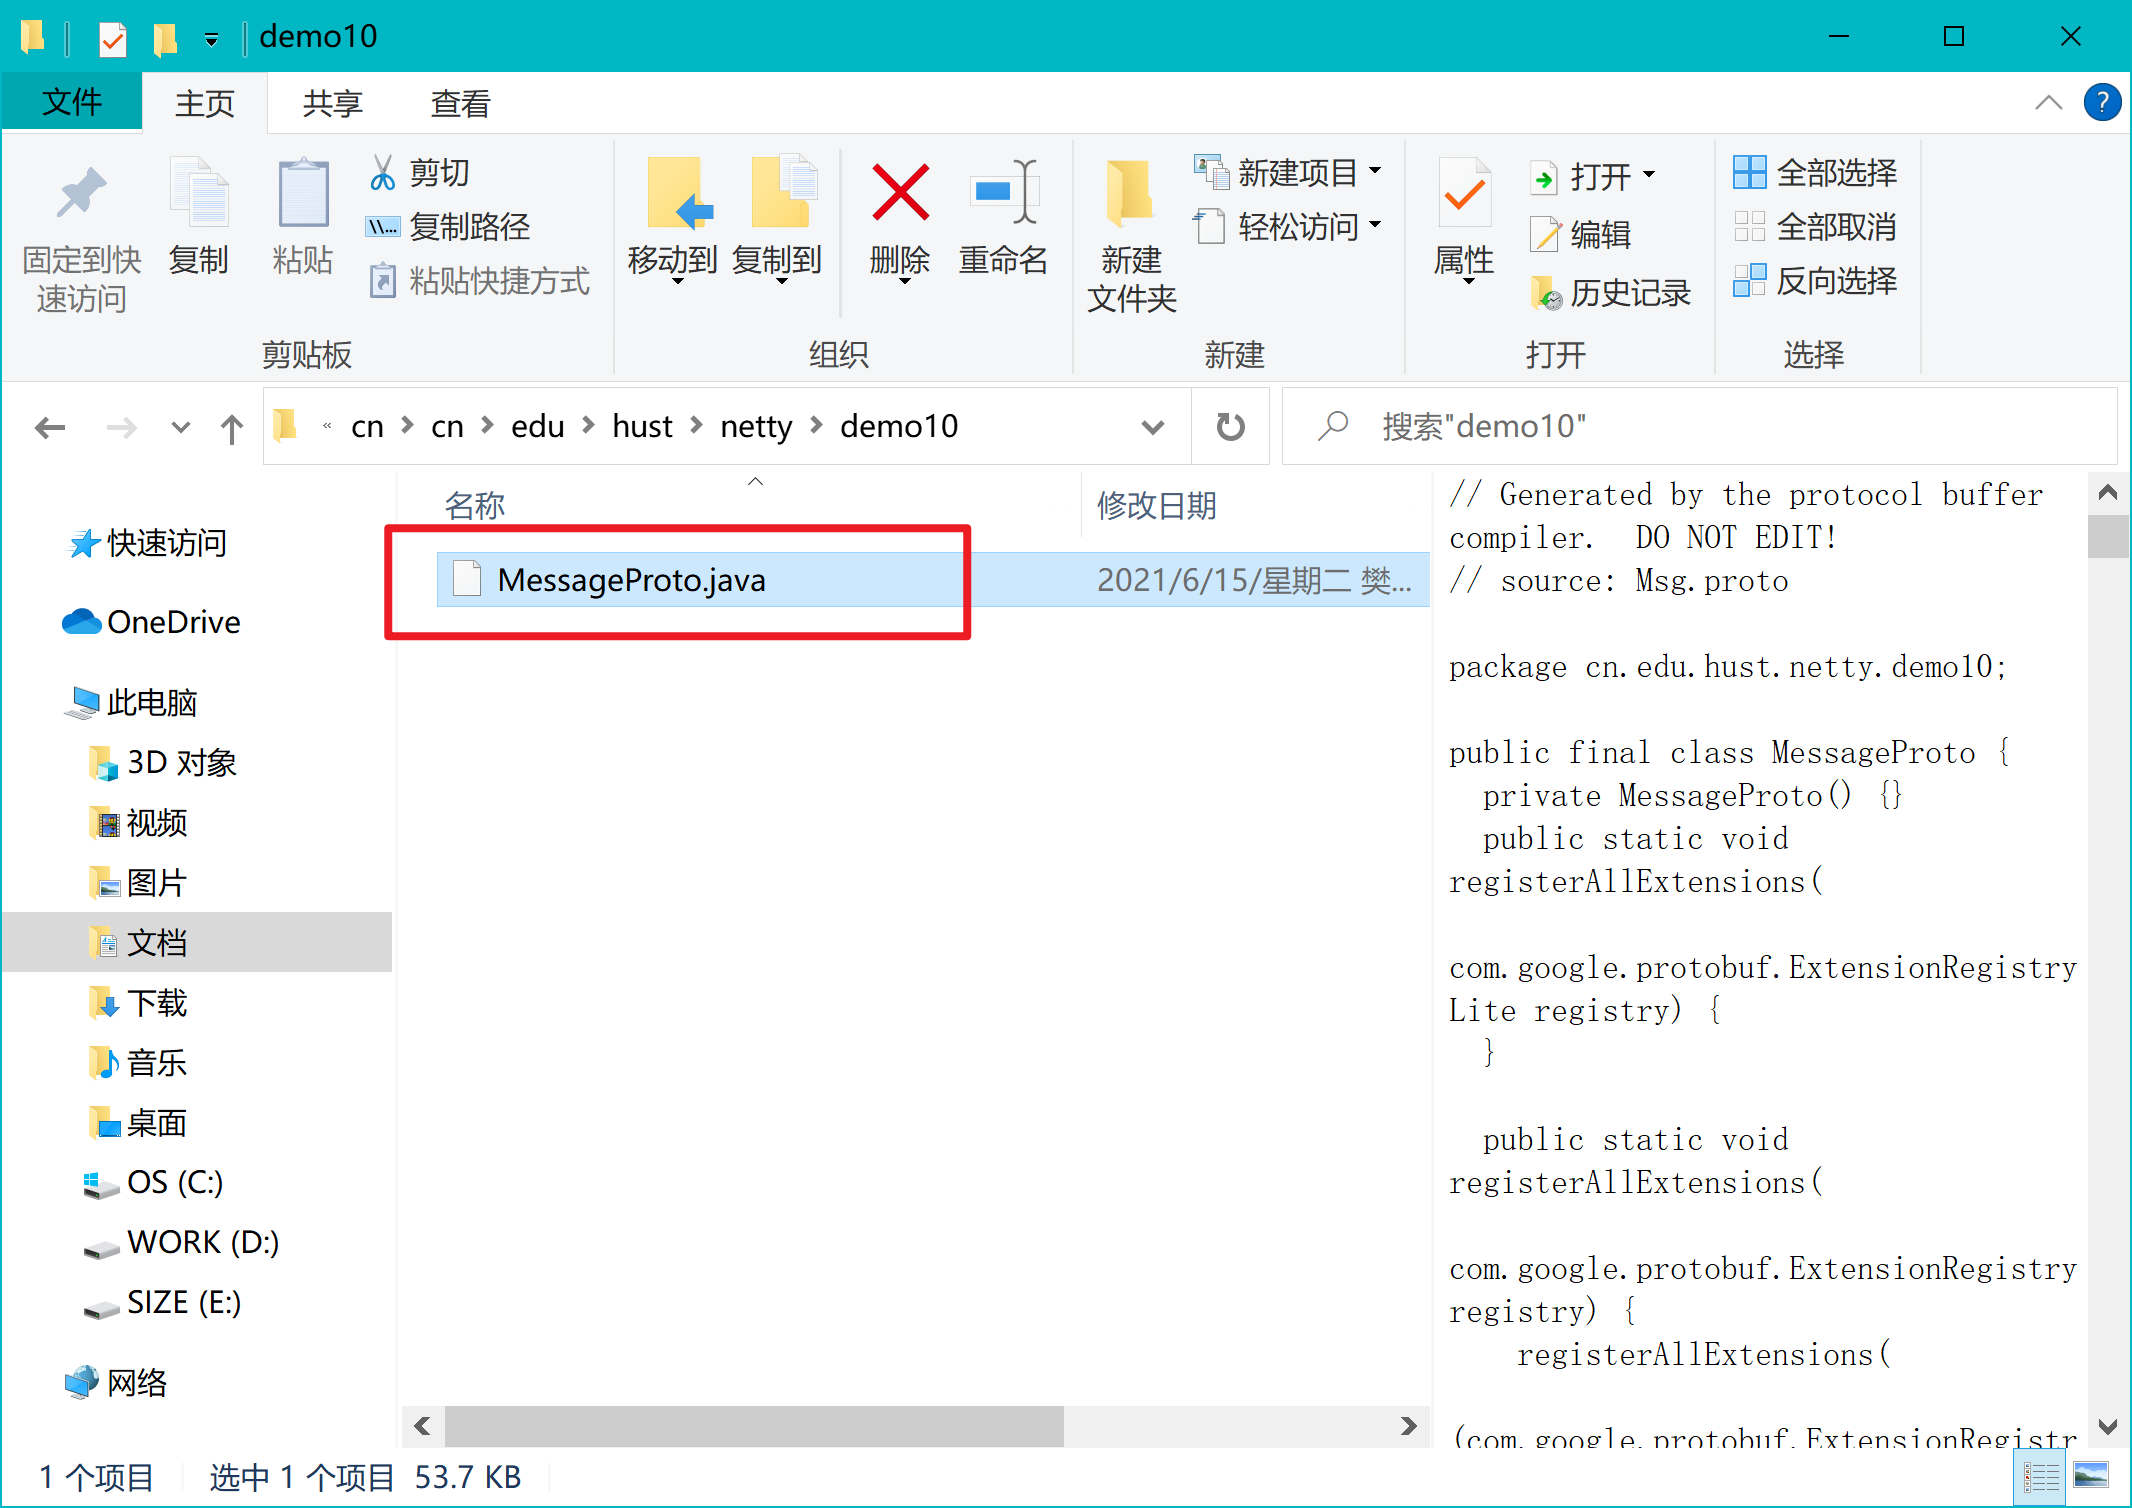
进去该文件夹会看到已经生成了MessageProto.java文件,这时候已经完成了protobuf序列化文件的生成。然后把该文件拷贝至工程目录下。接下来用生成的文件去发消息吧。还是服务端和客户端。
服务端:
public class ProtoBufServer {private int port;public ProtoBufServer(int port) {this.port = port;}public void start(){EventLoopGroup bossGroup = new NioEventLoopGroup();EventLoopGroup workGroup = new NioEventLoopGroup();ServerBootstrap server = new ServerBootstrap().group(bossGroup,workGroup).channel(NioServerSocketChannel.class).childHandler(new ServerChannelInitializer());try {ChannelFuture future = server.bind(port).sync();future.channel().closeFuture().sync();} catch (InterruptedException e) {e.printStackTrace();}finally {bossGroup.shutdownGracefully();workGroup.shutdownGracefully();}}public static void main(String[] args) {ProtoBufServer server = new ProtoBufServer(7788);server.start();}}
服务端Initializer:
public class ServerChannelInitializer extends ChannelInitializer<SocketChannel> {@Overrideprotected void initChannel(SocketChannel socketChannel) throws Exception {ChannelPipeline pipeline = socketChannel.pipeline();pipeline.addLast(new ProtobufVarint32FrameDecoder());pipeline.addLast(new ProtobufDecoder(MessageProto.RequestMsg.getDefaultInstance()));pipeline.addLast(new ProtoBufServerHandler());}}
服务端handler:
public class ProtoBufServerHandler extends ChannelInboundHandlerAdapter {@Overridepublic void channelActive(ChannelHandlerContext ctx) throws Exception {MessageProto.ResponseMsg.Builder builder = MessageProto.ResponseMsg.newBuilder();builder.setMsgType(ByteString.copyFromUtf8("CBSP"));builder.setReceiveOne("小红");builder.setMsg("你好,你有啥事");ctx.writeAndFlush(builder.build());}@Overridepublic void channelRead(ChannelHandlerContext ctx, Object msg) throws Exception {MessageProto.RequestMsg m = (MessageProto.RequestMsg)msg;System.out.println("Client say: "+m.getReceiveOne()+","+m.getMsg());}@Overridepublic void exceptionCaught(ChannelHandlerContext ctx, Throwable cause) throws Exception {super.exceptionCaught(ctx, cause);ctx.close();}}
客户端:
public class ProtoBufClient {private int port;private String address;public ProtoBufClient(int port, String address) {this.port = port;this.address = address;}public void start(){EventLoopGroup group = new NioEventLoopGroup();Bootstrap bootstrap = new Bootstrap();bootstrap.group(group).channel(NioSocketChannel.class).handler(new ClientChannelInitializer());try {ChannelFuture future = bootstrap.connect(address,port).sync();future.channel().closeFuture().sync();} catch (Exception e) {e.printStackTrace();}finally {group.shutdownGracefully();}}public static void main(String[] args) {ProtoBufClient client = new ProtoBufClient(7788,"127.0.0.1");client.start();}}
客户端Initializer:
public class ClientChannelInitializer extends ChannelInitializer<SocketChannel> {protected void initChannel(SocketChannel socketChannel) throws Exception {ChannelPipeline pipeline = socketChannel.pipeline();pipeline.addLast(new ProtobufVarint32LengthFieldPrepender());pipeline.addLast(new ProtobufEncoder());pipeline.addLast(new ProtoBufClientHandler());}}
客户端handler:
public class ProtoBufClientHandler extends ChannelInboundHandlerAdapter {@Overridepublic void channelRead(ChannelHandlerContext ctx, Object msg) throws Exception {MessageProto.ResponseMsg m = (MessageProto.ResponseMsg)msg;System.out.println("Server say: "+m.getReceiveOne()+","+m.getMsg());}@Overridepublic void channelActive(ChannelHandlerContext ctx) throws Exception {MessageProto.RequestMsg.Builder builder = MessageProto.RequestMsg.newBuilder();builder.setMsgType(ByteString.copyFromUtf8("CBSP"));builder.setReceiveOne("小明");builder.setMsg("你好,我找你有事");ctx.writeAndFlush(builder.build());}@Overridepublic void channelInactive(ChannelHandlerContext ctx) throws Exception {System.out.println("Client is close");}}
Thrift
- 支持多种语言(C++、C#、Cocoa、Erlag、Haskell、java、Ocami、Perl、PHP、Python、Ruby和SmallTalk)
- 使用了组建大型数据交换及存储工具,对于大型系统中的内部数据传输,相对于Json和xml在性能上和传输大小上都有明显的优势。
- 支持通用二进制编码,压缩二进制编码,优化的可选字段压缩编解码等三种方式。
-
Jackson
Jackson所依赖的jar包较少,简单易用并且性能也要相对高些。
- 对于复杂类型的json转换bean会出现问题,一些集合Map,List的转换出现问题。
Jackson对于复杂类型的bean转换Json,转换的json格式不是标准的Json格式
Gson
Gson是目前功能最全的Json解析神器
- Gson的应用主要为toJson与fromJson两个转换函数,无依赖,不需要例外额外的jar
类里面只要有get和set方法,Gson完全可以将复杂类型的json到bean或bean到json的转换,是JSON解析的神器
FastJson
无依赖,不需要例外额外的jar,能够直接跑在JDK上。
- FastJson在复杂类型的Bean转换Json上会出现一些问题,可能会出现引用的类型,导致Json转换出错,需要制定引用。
- FastJson采用独创的算法,将parse的速度提升到极致,超过所有json库。
- 频繁爆漏洞,被相当部分公司禁止使用


