- create-react-app只是创建了一个最基本的reactdemo,需要手动安装 react-router,redux等
- DVA 是基于 redux、redux-saga 和 react-router 的轻量级前端数据流框架
- dva = redux + redux-saga + react-router
- dva没有新概念,只是封装了redux
- react视图层框架 + dva数据流框架 = 复杂的SPA应用架构
- dva特点
- 数据共享 models,数据可以 connect任何组件
- 数据和视图逻辑分离,effects
- 异步请求
https://github.com/xlsdg/dva-antd-starter/blob/master/src/router.jsx
https://github.com/ant-design/create-react-app-antd
dva是一个非常轻量级的封装
reactreact-router-domconnected-react-routerreduxredux-saga
dva-cli创建项目
yarn global add dva-cli
dva -v # 查看版本号
dva-cli version 0.10.1
dva创建项目
dva new mydva cd mydva npm start
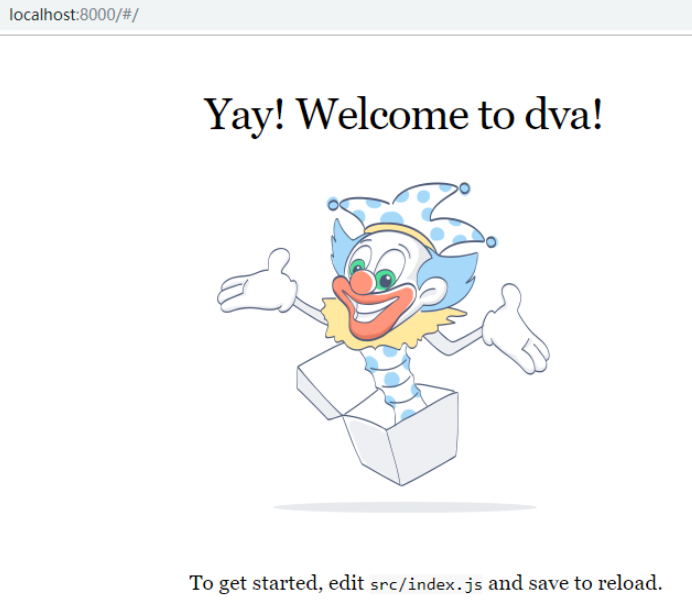
3. 出现这个界面,就说明 dva项目创建成功<a name="27JTr"></a>### dva目录结构```jsx.roadhogrc.mock.js Mock配置文件.webpackrc 自定义的webpack配置文件,JSON格式如果需要 JS格式,修改为 .webpackrc.js
dva数据流程
- 输入 URL渲染对应组件,用户在 view层组件中,触发 一个action
- 组件 dispatch(action) 触发 model里面的函数
a. 同步,直接进入 reducer里面的方法
b. 异步,进入 effects里面的方法,fetch获取接口数据 - 组件通过 connect连接数据

app.model({namespace: 'products',state: {list: [],loading: false,},subscriptions: [function(dispatch) {dispatch({type: 'products/query'});},],// 异步代码,要 dispatch(action)到 reducers修改 state// 类似 vue的 action,commit() 到 mutation修改 stateeffects: {['products/query']: function*() {yield call(delay(800));yield put({type: 'products/query/success',payload: ['ant-tool', 'roof'],});},},reducers: { // 同步代码,类似 vue的 mutation['products/query'](state) {return { ...state, loading: true, };},['products/query/success'](state, { payload }) {return { ...state, loading: false, list: payload };},},});
dva概念
- models
- connect
- dispatch
- action
- reducer

models
/src/models/indexPage.js- namespace 命名空间
- 只能用字符串
- 大型项目有很多 model,通过 namespace区分
- state 初始值
- 表示当前状态,可以设置初始值
- 优先级低于 app.model({ state})
- reducers 同步操作
- (state, action) => newState;reducer修改 state
- 处理同步操作,修改 state
- effects:ajax异步操作,副作用
- ajax请求后台接口,不能修改 state
- dispatch(action) 调用 reducer修改 state
- 类似 vue的 actions - commit(‘actionName’, {}) 到 mutations里面,mutation再修改 store
- IO异步,操作数据库等
- action
- 是 reducers,effects的触发器
import { getUsers } from '../services/user'export default {namespace: 'indexPage', // 命名空间,通过 this.props.indexPage获取数据// 初始化的数据state: {data: [ // tbody 表格的数据{"key": "10", "name": "张飞宇", "age": 12}],columns: [ // thead 表头{title: '姓名',dataIndex: 'name',key: 'name',},{title: '年龄',dataIndex: 'age',key: 'age',}]},subscriptions: {setup({ dispatch, history }) { // eslint-disable-line}},effects: { // generator函数*add({ payload }, { call, put }) {const users = yield call(getUsers, {}) // services/user,要import导入yield put({type: 'addUser', // effects 提交的是 reducers的方法payload: { data: users.data.data }})}},reducers: { // store依赖的清单addUser(state, action) {const data = [...action.payload.data, ...state.data]return { ...state, data }}}}
connect
- 装饰器写法,给装饰对象赋予不具备的能力
- connect让组件获取 model中的数据,触发model中的方法
- mapStateToProps,把 dva中的 state通过 props 传递个组件
- mapDispatchToProps,通过 props把 dispatch方法传递给组件
connect()()conect(mapStateToProps, mapDispatchToProps)(Component)
dispatch
- dispatch是个纯函数,将 action发送给 store
- 组件触发 model的唯一方法
- diapatch接收一个对象作为参数,这个参数称之为 action
- store,全局唯一的数据源;收到 action后会更新数据
- view,react的UI层,从 store获取数据,渲染成 html代码
- 只要 store有变化,view就会自动更新
const action = {type: 'changeValue',payload: ev.target.value}dispatch(action)
action
- action是描述 组件/UI事件的一个对象
- 必须包含 type字段,payload是参数
- actionTypes.js,保存 action常量;推荐用 constants.js保存常量
- actionReducer.js,抽离所有 action到一个页面
{type: 'changeValue',payload: ev.target.value}
reducer
- 每个 reducer都是一个纯函数,接收 (state, action);没有副作用
- 最多一层嵌套,保持 state 的扁平化
- 深层嵌套会让 reducer 很难写和难以维
app.model({namespace: 'todos',state: {},reducers: {remove(state, { payload: id }) {return state.filter(todo => todo.id !== id)},// state嵌套太深,不好维护more(state, { payload: todo }) {const todos = state.a.b.todos.concat(todo)const b = { ...state.a.b, todos }const a = { ...state.a, b }return { ...state, a }}}}
effects
- put 触发 action
- call 调用异步逻辑,支持 promise
- call & put是 redux-saga的方法
- select 从 state里面获取数据
- 函数必须是 Generator函数, 返回的是迭代器,通过 yield 关键字实现暂停功能
import {AsyncAdd} from '../request'app.model({namespace: 'todos',state: { todo: [], value: 'ok' },effects: {*addRemote({ payload: todo }, { put, call, select }) {const res = yield call(AsyncAdd, todo);const value = select(state => state.value)yield put({ type: 'add', payload: {data: res.data, value} });},},reducer: {add (state, action) {}}})
subscriptions
1. 用于收集其他来源的 action,是个订阅,订阅一个数据源2. 然后 dispatch(action), app.start() 被执行3. 数据源可以是:1. 当前的时间2. 服务器的 websocket 连接3. keyboard 输入操作4. 滚动条5. geolocation 变化6. history 路由变化等4. 如果要使用 app.unmodel(),subscription 必须返回 unlisten 方法,用于取消数据订阅
app.model({namespace: 'todo',// app.start() 时被执行subscriptions: {// 监听 history变化,当进入 / 触发 load actionsetup ({history, dispatch}) {return history.listen(({pathname}) => {if (pathname === '/') dispatch({ type: 'load' })})},onClick ({ dispatch }) {document.addEventListener('click', () => {dispatch({ type: 'save' })})},backHistory ({ dispatch, history }) {history.lisen(location => {console.log('location')})}}})
app
const app = dva({history, // 指定给路由用的 history,默认是 hashHistoryinitialState, // 指定初始数据,优先级高于 model 中的 stateonError, // effect 执行错误或 subscription 通过 done 主动抛错时触发,可用于管理全局出错状态。onAction, // 在 action 被 dispatch 时触发onStateChange, // state 改变时触发,可用于同步 state 到 localStorage,服务器端等onReducer, // 封装 reducer 执行。比如借助 redux-undo 实现 redo/undoonEffect, // 封装 effectonHmr, // 热替换相关extraReducers, // 指定额外的 reducer,比如 redux-form 需要指定额外的 form reducerextraEnhancers, // 指定额外的 StoreEnhancer ,比如结合 redux-persist 的使用});// hashHistory 转 BrowserHistoryimport createHistory from 'history/createBrowserHistory';const app = dva({history: createHistory(),});// dva-loadingimport createLoading from 'dva-loading';app.use(createLoading(opts));app.model({namespace: 'todo',state: {value: '',data: []},reducers: {add (state, { payload: todo }) {// 保存数据到 statereturn [...state, data: todo]}},effects: {*save (state, action) {yield call(saveServer, state.todo)yield put({ type: 'add', payload: state.todo })}}})
父子组件通信
- 父组件管理 state,子组件通过 props获取 state
- 修改 state;子组件调用父组件的方法来 setState
- 方法通过属性方式传递给子组件
dva数据流程
- index.js入口
- 通过 url匹配 routes里面的组件;加载 components里面的公共组件
- 组件 dispatch(action)
- models 通过 action 改变 state;在services里面 ajax请求后台接口
- 通过 connect重新渲染 routes里面的组件

dva-cli项目目录
- 默认安装的npm包: dva & react & react-dom
- 代码规范 eslint & husky
{"private": true,"scripts": {"start": "roadhog server","build": "roadhog build","lint": "eslint --ext .js src test","precommit": "npm run lint"},"dependencies": {"dva": "^2.4.1","react": "^16.2.0","react-dom": "^16.2.0"},"devDependencies": {"babel-plugin-dva-hmr": "^0.3.2","eslint": "^4.14.0","eslint-config-umi": "^0.1.1","eslint-plugin-flowtype": "^2.34.1","eslint-plugin-import": "^2.6.0","eslint-plugin-jsx-a11y": "^5.1.1","eslint-plugin-react": "^7.1.0","husky": "^0.12.0","redbox-react": "^1.4.3","roadhog": "^2.5.0-beta.4"}}
antd安装
- npm 安装 antd, babel-plugin-import 按需加载 antd样式和脚本
- 编辑 .webpackrc,配置 antd按需加载
npm install antd babel-plugin-import
mock数据
- .roadhogrc.mock.js
- mock 数据太多时,可以拆分后放到
./mock文件夹中- 然后在
.roadhogrc.mock.js引入
- 然后在
- api参考 express4.*
export default {// 请求 /api/users 时会返回 JSON 格式的数据'GET /api/users': { users: [{ username: 'admin' }] },// 自定义函数'POST /api/users': (req, res) => { res.end('OK'); },}
组件动态加载
- 最好封装一下,每个路由组件都这么写一遍很麻烦
import dynamic from 'dva/dynamic';const UserPageComponent = dynamic({app,models: () => [import('./models/users'),],component: () => import('./routes/UserPage'),})
dva-loading
- 处理 loading 状态的 dva 插件,基于 dva 的管理 effects 执行的 hook 实现
- dva-loading会在 state 中添加一个
loading字段,该字段可自定义 - 自动处理网络请求的状态,不需再去写
showLoading和hideLoading方法 - 在
./src/index.js中引入使用即可- opts 仅有一个
namespace字段,默认为loading
- opts 仅有一个
import createLoading from 'dva-loading';const app = dva();app.use(createLoading(opts))
models
- models是dva的数据流核心
- 可以理解为 redux、react-redux、redux-saga 的封装
- 通常一个模块对应一个model,基本的格式
dva 6个 api
- namespace 当前model的命名空间
- 全局state上的一个属性,必须是字符串
- 不能点点点,创建多层命名空间;错误的用法
index.page.user - 组件中触发 action,要带上命名空间,,
{type: 'user/fetch'} - 当前model中触发 action不需要命名空间,
{type: 'save'}
- state 初始值
- reducer 处理同步
- 纯函数,不可变值;类似 redux的 reducer
- 唯一可以修改 state的,由 action触发;
- 有 state & action2个形参,
save(state, action) {}
- effects 处理异步
- 不能直接修改 state,能触发 action
- 只能是 generator函数
- 有 action & effects2个形参
fetch({ payload }, { call, put }) {} - effects包含 call, put, select 3个形参
- call 请求ajax接口
- put 触发 action
- select 用于从 state中获取数据
- subscriptions 订阅数据
- 根据情况,dispatch(action)
- 格式:
({ dispatch, history }, done) => {}
model流程演示
- 监听路由变化,当进入
/user页面时,执行 effects中的 fetch ajax请求,获取后台数据 - 然后 fetch中触发 reducers中的 save方法,将后台数据保存到 state中
import { getUser } from '../services/user.js' // 统一管理 ajax接口export default {namespace: 'user',state: {usre: {}},subscriptions: {setup({ dispatch, history }) { // eslint-disable-linereturn history.listen(({pathname}) => {if (pathname === '/usre') dispatch({type: 'fetch'})})}},effects: {*fetch({ payload }, { call, put }) { // eslint-disable-lineconst res = yield put(getUser, payload.data)yield put({ type: 'save', data: res.data })},},reducers: {save(state, action) {return { ...state, ...action.payload }}}}
services/user.js
- 用 axios也行,哪个熟练用哪个
import request from '../utils/request'export const getUsers = () => request('/api/users')
dva数据流管理
components新增组件
- /src/components
- Header.js 公共导航栏
- Layout.js 布局
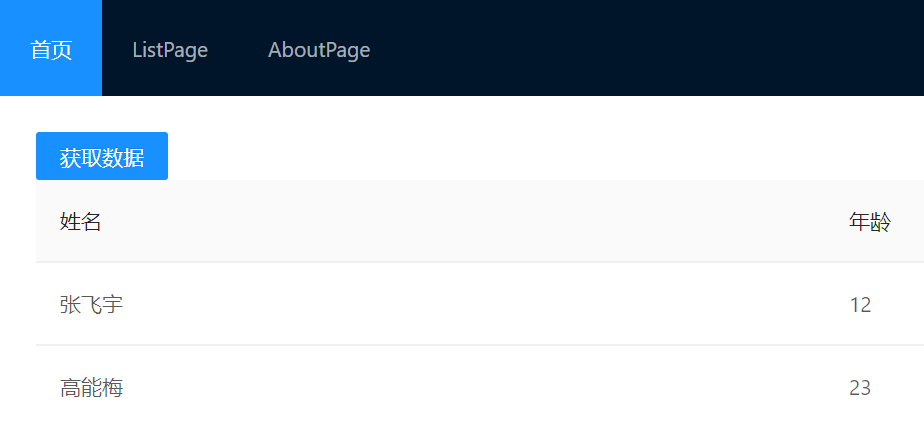
// Header.jsimport React, { Component } from "react"import { Menu } from "antd"import { Link } from "dva/router"class Header extends Component {render() {return (<Menutheme="dark"mode="horizontal"defaultSelectedKeys={["1"]}style={{ lineHeight: "64px" }}><Menu.Item key="1"><Link to="/">首页</Link></Menu.Item><Menu.Item key="2"><Link to="/list">ListPage</Link></Menu.Item><Menu.Item key="3"><Link to="/about">AboutPage</Link></Menu.Item></Menu>)}}export default Header// Layout.jsimport React, { Component } from "react"import Header from "./Header"class Layout extends Component {render() {const { children } = this.propsreturn (<div><Header /><div style={{ background: "#fff", padding: '24px' }}>{children}</div></div>)}}export default Layout

routes新增页面
- /src/routes/
- list/ListPage.js
- about/AboutPage.js ```jsx // list/ListPage.js import React, { Component } from ‘react’ import { connect } from ‘dva’
class ListPage extends Component { render () { return (
list/ListPage.js this.props.children 类似于 vue 的slot
) } } ListPage.propTypes = {} export default connect()(ListPage)// about/AboutPage.js import React, { Component } from ‘react’ import { connect } from ‘dva’
const AboutPage = props => { return
about/AboutPage.js props.children 类似于 vue 的slot
} AboutPage.propTypes = {} export default connect()(AboutPage)
<a name="104144f4"></a>### /router.js 连接路由1. /router.js 把新建的页面给 import引入2. 完成这个操作后,点击路由就会切换不同的页面```jsximport React from 'react';import { Router, Route, Switch } from 'dva/router';import IndexPage from './routes/IndexPage';// newPageimport Layout from './components/Layout'import ListPage from './routes/list/ListPage'import AboutPage from './routes/about/AboutPage'function RouterConfig({ history }) {return (<Router history={history}><Layout><Switch>{/*路径为 /的时候匹配到IndexPage;exact,精确匹配如果不加 exact,则/list, /about, /whatever都会匹配到IndexPageexact精确匹配,只有输入 /的时候才会匹配到 IndexPage*/}<Route path="/" exact component={IndexPage} /><Route path="/list" exact component={ListPage} /><Route path="/about" exact component={AboutPage} /></Switch></Layout></Router>);}export default RouterConfig;
/models创建模型
- /srcmodels/IndexPage.js
- namespace 命名空间
- 组件中,用 this.props.indexPage 获取 state的数据
import { getUsers } from '../services/user'export default {namespace: 'indexPage', // 命名空间,通过 this.props.indexPage获取数据// 初始化的数据state: {data: [ // tbody 表格的数据{"key": "10", "name": "张飞宇", "age": 12}],columns: [ // thead 表头{title: '姓名',dataIndex: 'name',key: 'name',},{title: '年龄',dataIndex: 'age',key: 'age',},]},subscriptions: {setup({ dispatch, history }) { // eslint-disable-line},},effects: { // generator函数*fetch({ payload }, { call, put }) { // eslint-disable-lineyield put({ type: 'save' });},*add({ payload }, { call, put }) {const users = yield call(getUsers, {}) // services/user,要import导入yield put({type: 'addUser', // effects 提交的是 reducers的方法payload: { data: users.data.data }})}},reducers: { // store依赖的清单save(state, action) {return { ...state, ...action.payload };},addUser(state, action) {const data = [...action.payload.data, ...state.data]return { ...state, data }}}}
routes页面绑定models数据
- /src/routes/IndexPage.js
import React from "react"import { connect } from "dva"import { Button, Table } from "antd"// IndexPage用 models/indexPage.js的数据,要用 connect连接const IndexPage = props => {const { dispatch, indexPage: { data, columns } } = propsfunction changeData() {dispatch({type: 'indexPage/add', // 调用 models/indexPage.js的 addpayload: {}})}// const { data, columns } = props.indexPagereturn (<div><Button type="primary" onClick={changeData}>获取数据</Button><Table columns={columns} dataSource={data} /></div>);};IndexPage.propTypes = {}// connect(models/数据)(routes/组件)// models/indexpage.js中的 state数据, 就关联到 routes/IndexPage.jsexport default connect(({ indexPage }) => ({ indexPage }) // 返回一个对象)(IndexPage)
services ajax请求
- /src/services/user.js
- request请求库,用自己熟练的,比如 axios
- 在 /src/utils/request.js 里面封装 axios请求
import request from '../utils/request'// import axios from 'axiosexport const getUsers = () => request('/api/users')
mock数据
- .roadhogrc.mock.js 设置mock数据,或自己搭建服务器
const users = [{"key": "1", "name": "王达美", "age": 30},{"key": "2", "name": "刘高三", "age": 20}]export default {'GET /api/users': { data: users }}
组件 dispatch(action)
- dva规范:必须通过触发 actoin来改变 state
- 同步修改:直接调用model中的reducer
- ajax异步:先触发effects,然后调用reducer
- dispatch(action) 到 reducer,在 reducer里面改变 state
// 1 IndexPage.js 组件 dispatch(action)const IndexPage = props => {const { dispatch, indexPage: { data, columns } } = propsfunction changeData() {dispatch({type: 'indexPage/add', // 触发 models/indexPage.js的 add方法payload: {}})}return (<div><Button type="primary" onClick={changeData}>获取数据</Button><Table columns={columns} dataSource={data} /></div>)}
/models/indexPage.js
- effects 可以获取全局的 state,也可以触发 action
- yield关键字表示每一操作
- call() 表示调用 异步函数
- put() 表示 dispacth(action)
- 组件内调用 models要加上命名空间
- 当前 model调用不需要加 命名空间
- effects 里面的函数必须是 generator函数 ```jsx import { getUsers } from ‘../services/user’
export default { namespace: ‘indexPage’, // 命名空间,通过 this.props.indexPage获取数据
// 初始化的数据 state: { data: [], // tbody 表格的数据 columns: [ // thead 表头 { title: ‘姓名’,dataIndex: ‘name’,key: ‘name’ }, { title: ‘年龄’,dataIndex: ‘age’,key: ‘age’ }, ] }, subscriptions: { setup({ dispatch, history }) { // eslint-disable-line } },
effects: { // generator函数 *fetch({ payload }, { call, put }) { // eslint-disable-line yield put({ type: ‘save’ }) },
*add({ payload }, { call, put }) {const res = yield call(getUsers, {}) // services/user,要import导入yield put({type: 'ADDUSER', // effects 提交的是 reducers的方法payload: { data: res.data }})}
},
reducers: { // store依赖的清单 save(state, action) { return { …state, …action.payload }; },
[ADDUSER'](state, action) {const data = [...action.payload.data, ...state.data]return { ...state, data }}
} }
到这里,完成了一个基本的 dva数据流程,从新建页面到 connect绑定数据的异步操作。<a name="index.js"></a>## app1. index.js中的 app 就是 dva的实例,实例化 dva的参数有:1. history2. initialState 初始数据,优先级高于 model的 state,默认 {}3. onError4. onActoin5. onReducer6. onEffect7. onHmr8. extraReducers9. extraEnhancers2. indexjs留出了 model 模型,router路由的位置,开发中1. 所有的 model模型都要在 index.js注册,才能用 connect关联组件```jsximport dva from 'dva';import './index.css';// 1. Initializeconst app = dva();// 2. Plugins// app.use({});// 3. Model 所有的model模型都要在这注册,才能用connect跟组件关联起来app.model(require('./models/indexPage').default);// 4. Router 引用了router.jsapp.router(require('./router').default);// 5. Startapp.start('#root');
app参数
const app = dva({history,initialState,onError,onAction,onStateChange,onReducer,onEffect,onHmr,extraReducers,extraEnhancers,})
app.use
history
- history是给路由用的,默认 hashHistory
- 要用 browserHistory,安装 history,然后在 index.js引入
import dva from 'dva';import createHistory from 'history/createBrowserHistory';const app = dva({history: createHistory()});
connect-router.js
- 写完 model 和组件后,需要将 model 和组件连接起来
- connect就是 react-redux的 connect
- connect连接组件后,默认参数 dispatch, state,还有 location, history
import React from 'react'import { connect } from 'dva'const User = ({ dispatch, user }) => {return <div className="root"></div>}export default connect(({ user }) => ({ user }) // 返回一个对象)(User)
错误处理
- dva 里,effects 和 subscriptions 的抛错全部会走 onError hook
- 在 onError 里统一处理错误,全局捕获effects & subscriptions的错误
- 对某些 effects进行错误捕获,需要在 effect 内部
try {} catch() {}
// 全局错误处理const app = dva({onError(err, dispatch) {console.error(err);}})// 函数内部错误处理app.model({effects: {*addRemote() {try {// Your Code Here} catch(e) {console.log(e.message)}}}})
ajax异步请求
- dva集成了
isomorphic-fetch处理异步请求 - 在
./src/utils/request.js,简单封装了 fetch - https://github.com/matthew-andrews/isomorphic-fetch
- 推荐用 axios,多个项目保持一致性,不推荐用 fetch
- fetch细节
- fetch请求默认不带cookie,需要设置fetch(url,{credentials: ‘include’})
- 服务器返回400、500等错误码不会reject,返回成功态 resolve
- 只有网路错误请求不能完成时才会reject
- 基于 Promise,支持 async/await
npm install --save isomorphic-fetch es6-promise
proxy代理
- create-react-app创建的项目,在
package.json里设置代理
"proxy": "http://api.xxxx.com" // 单个域名的大力// 多个子域的代理"proxy": {"/api/v2": {"target": "http://v2.lulongwen.com","changeOrigin":true},"/api/v1":{"target":"http://v1.lulongwen.com","changeOrigin":true}}
- antd 代理,package.json同级目录,创建
.roadhogrc文件
{"entry": "src/index.js","extraBabelPlugins": ["transform-runtime","transform-decorators-legacy","transform-class-properties",["import", { "libraryName": "antd", "libraryDirectory": "es", "style": "css" }]],"env": {"development": {"extraBabelPlugins": ["dva-hmr"]}},"externals": {"g2": "G2","g-cloud": "Cloud","g2-plugin-slider": "G2.Plugin.slider"},"ignoreMomentLocale": true,"theme": "./src/theme.js","proxy": {"/api": {"target": "http://api.xxxx.com/","changeOrigin": true}}}
roadhog
- 包含 dev, build, test的命令行工具
- 基于 react-dev-utils,和 create-react-app基本一致,可配置版的 create-react-app
npm i roadhog -groadhog -v

