这篇 react-router 的 API 用法,针对 react-router-dom v5
:::info
React-router-dom@6 官网:https://reactrouter.com/docs/en/v6
React-router-dom@5 官网:https://v5.reactrouter.com/web/guides/quick-start
:::
一、正确理解 react-router
1. 理解单页面应用
单页面应用是使用一个 html 下,一次性加载 js, css 等资源,所有页面都在一个容器页面下,页面切换实质是组件的切换。
2. react-router 初探
① react-router 、react-router-dom、history 三者关系
history可以理解为 react-router的核心,也是整个路由原理的核心,里面集成了 popState、history、pushState等 原生 JS 路由 API
react-router可以理解为 react-router-dom的核心,里面封装了Router、Route、Switch等核心组件,实现了从路由的改变到组件的更新的核心功能,在我们项目中只要一次性引入react-router-dom就可以了
react-router-dom,在react-router的核心基础上,添加了
- 用于跳转的
Link组件 history模式下的BrowserRouterhash模式下的HashRouter
所谓BrowserRouter 和 HashRouter,只不过是用了 history库中createBrowserHistory 和 createHashHistory的方法
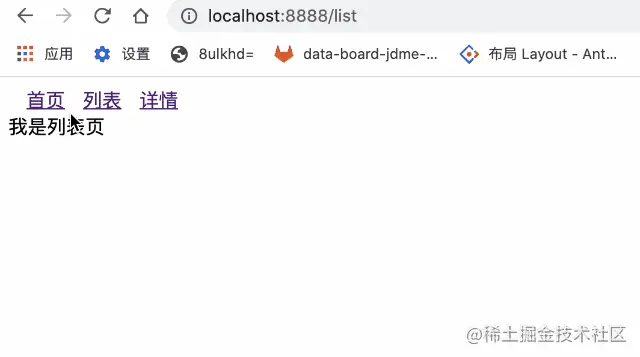
② 小 demo
import { BrowserRouter as Router, Switch, Route, Redirect,Link } from 'react-router-dom'import Detail from '../src/page/detail'import List from '../src/page/list'import Index from '../src/page/home/index'const menusList = [{name: '首页',path: '/index'},{name: '列表',path: '/list'},{name: '详情',path: '/detail'},]const index = () => {return <div ><div ><Router ><div>{/* link 路由跳转 */menusList.map(router=><Link key={router.path} to={ router.path } ><span className="routerLink" >{router.name}</span></Link>)}</div><Switch><Route path={'/index'} component={Index} ></Route><Route path={'/list'} component={List} ></Route><Route path={'/detail'} component={Detail} ></Route>{/* 路由不匹配,重定向到/index */}<Redirect from='/*' to='/index' /></Switch></Router></div></div>}
二、单页应用实现原理
单页面应用路由实现原理是,切换 url,监听 url 变化,从而渲染不同的页面组件
主要的方式有history模式和hash模式
下面介绍 原生 JS API
1. history 模式原理
改变路由
history.pushState(state, title, path)state:一个与指定网址相关的状态对象,·popstate事件触发时,该对象会传入回调函数。如果不需要可填nulltitle:新页面的标题,但是所有浏览器目前都忽略这个值,可填nullpath:新的网址,必须与当前页面处在同一个域。浏览器的地址栏将显示这个地址
history.replaceState(state, title, path)popState事件window.addEventListener('popstate',function(e){/* 监听改变 */})
同一个文档的
history对象出现变化时,就会触发popState事件。history.pushState可以使浏览器地址改变,但无需刷新页面。
⭐ 注意:**history.pushState()**和**history.replaceState()**不会触发**popState**事件popState事件只会在浏览器某些行为下触发,比如点击后退、前进 或者 调用history.back()、history.forward()、history.go()方法2. hash 模式原理
改变路由
window.location.hash
const http = require('http')const path = require('path')const fs = require('fs')const server = http.createServer((req, res) => {const source = fs.readFileSync(path.resolve(__dirname, './index.html'))res.end(source)})server.listen(3000, () => {console.log('server is listening on port 3000');})
还有许多地方可以优化的
- 优化 history 重写函数
- 多级嵌套路由渲染时,删除局部标签,而不是
div#root的所有子元素router[*]不存在时,给予一个临时函数router封装成类,提供方法注册路由路径 和 渲染组件,而不是直接是对象
<!DOCTYPE html><html lang="en"><head><meta charset="UTF-8"><meta http-equiv="X-UA-Compatible" content="IE=edge"><meta name="viewport" content="width=device-width, initial-scale=1.0"><title>Document</title><style>body {margin: 0}</style></head><body><div id="root"></div><script>(function () {// 重写 history 的方法const rawPushState = history.pushStatehistory.pushState = function (data, unused, url) {document.getElementById('root').innerHTML = ''router[url] ? router[url]() : router['*']()rawPushState.call(this, data, unused, url)}const rawReplaceState = history.replaceStatehistory.replaceState = function (data, unused, url) {document.getElementById('root').innerHTML = ''router[url] ? router[url]() : router['*']()rawReplaceState.call(this, data, unused, url)}})()const pathname = location.pathname// 不同路由对于的页面const router = {'/': () => {const fragment = document.createDocumentFragment()fragment.appendChild(document.createTextNode('首页'))const button = document.createElement('button')button.innerText = '跳转'button.onclick = () => {history.pushState({}, '', '/work')}fragment.appendChild(button)document.getElementById('root').appendChild(fragment)},'/work': () => {document.getElementById('root').innerHTML = 'work'},'/user': () => {document.getElementById('root').innerHTML = 'user'},'*': () => {document.getElementById('root').innerHTML = '404'}}// 首次渲染,渲染对于页面的资源router[pathname] ? router[pathname]() : router['*']()</script></body></html>
参考文章

若有收获,就点个赞吧
0 人点赞
