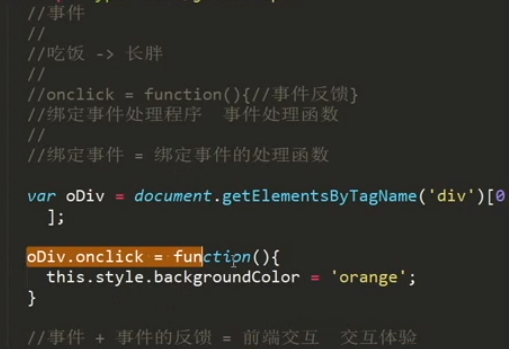
<!DOCTYPE html><html lang="en"><head><meta charset="UTF-8"><meta http-equiv="X-UA-Compatible" content="IE=edge"><meta name="viewport" content="width=device-width, initial-scale=1.0"><title></title><style>div {width: 100px;height: 100px;background-color: green;}</style></head><body><div></div><script>//事件//吃饭// onclick = function () {//事件反馈}//绑定事件处理程序 事件处理函数//绑定事件=绑定事件的处理函数/*点击,鼠标移入移出,这是天生就有的能力,有默认值,添加的是发生事件的反馈*/var oDiv = document.getElementsByTagName('div')[0];/*句柄,onclick句柄,onclick=function() {}事件句柄,事件句柄的绑定方式,事件句柄绑定在哪个元素上,哪个元素就是事件源*/oDiv.onclick = function () {this.style.backgroundColor = 'orange';}//事件+事件的反馈=前端交互 交互体验//这是前端的核心价值//如何绑定事件处理函数// elem.onclick = function() {// }</script></body></html>
每个元素都有点击事件,点击方法,点击的反馈默认没有,绑定的是事件的反馈,绑定的是当点击事件发生时,会产生的效果。
前端的核心是交互,用户点击,产生变化,用户看见变化。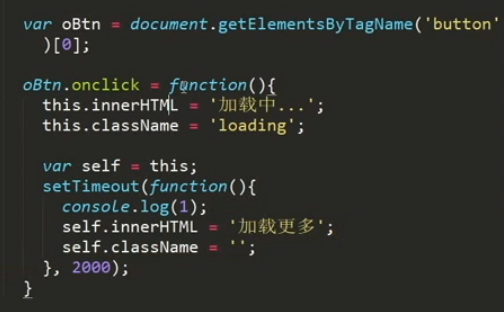
触发两个事件

触发一个事件,因为一个方法,指向一个空间
绑定事件处理函数on
写法一
obj.onclick = functin(){}
<!DOCTYPE html><html lang="en"><head><meta charset="UTF-8"><meta http-equiv="X-UA-Compatible" content="IE=edge"><meta name="viewport" content="width=device-width, initial-scale=1.0"><title></title><style>button{outline: none;}.loading{background-color: #ddd;color: #fff;}</style></head><body><button>加载更多</button><button onclick="console.log(1)">加载更多</button>/*内联事件监听器,这样写不好,事件与逻辑分开,模块化不能这么写*/<script>var oBtn=document.getElementsByTagName('button')[0];oBtn.onclick = function() {this.innerHTML = "加载中...";this.className = "loading";var self=this;//setTimeout(function() {console.log(1);console.log(this)//window,函数调用指向windowself.innerHTML = "加载更多";self.className='';},2000)}// oBtn.onclick = function() {// console.log('加载更多数据');// }/* 只能绑定一个函数,兼容性好*/</script></body></html>
写法二
obj.onclick = fn;function fn(){内容}
写法三 :当函数fn有参数的情况下使用匿名函数来传参
obj.onclick = function(){fn(param)};function fn(param){//内容}
行内事件监听器
<button onclick="test()">加载更多</button>
缺点:无法在同一个元素上绑定多个处理函数 后面的绑定函数会覆盖前面的绑定函数
<style>.loading{background-color: cadetblue;}</style></head><body><button>加载更多</button></body><script>var oBtn = document.getElementsByTagName('button')[0];oBtn.onclick = function(){this.innerHTML = '加载中....';this.className = 'loading';var self = this;setTimeout(function(){console.log(1);self.innerHTML = '加载更多';self.className = '';},2000);}oBtn.onclick = function(){console.log('加载更多数据'); //只会打印此处函数}</script>
句柄的方式,因为onclick赋予新的看见地址,覆盖了前面的
不能同一个事件绑定多个函数
addEventListener
事件 函数名 是否捕获
addEventListener(event,funtionName,useCapture)
写法一
obj.addEventListener("click",function(){//do something}));
写法二 没参数可以直接写函数名
obj.addEventListener("click",fn,fasle));function fn(){//do something..}
写法三 函数有参数时需要使用匿名函数来传递参数
obj.addEventListener("click",function(){fn(parm)},false);
优点:可以绑定多个事件处理函数 W3C规范
缺点:IE9不兼容,
<!DOCTYPE html><html lang="en"><head><meta charset="UTF-8"><meta http-equiv="X-UA-Compatible" content="IE=edge"><meta name="viewport" content="width=device-width, initial-scale=1.0"><title>Document</title><style>.loading{background-color: cadetblue;}</style></head><body><button>加载更多</button></body><script>var oBtn = document.getElementsByTagName('button')[0];oBtn.addEventListener('click',function(){this.innerHTML = '加载中....';this.className = 'loading';var self = this;setTimeout(function(){self.innerHTML = '加载更多';self.className = '';},2000);},false)oBtn.addEventListener('click',function () {console.log('加载更多数据');},false)</script></html>
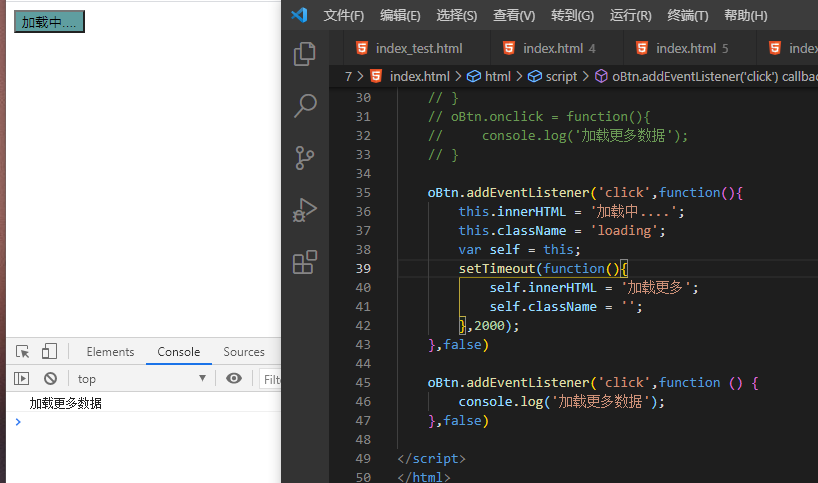
打印2次,如果是绑定2次一个方法,只打印1次,与attachEvent这点不一样
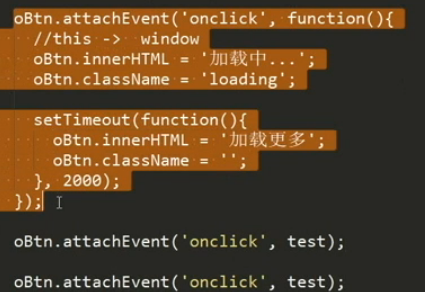
IE8及以下的绑定方法
attachEvent(事件类型,事件处理函数)
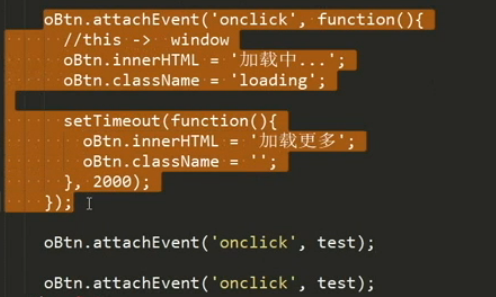
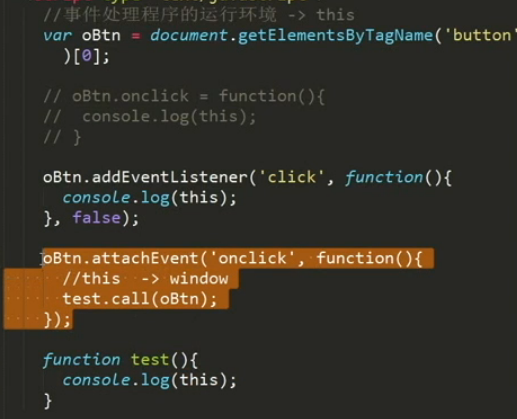
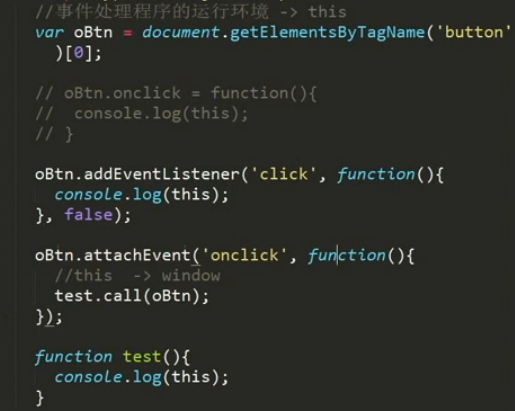
此函数的内部的this指向window
<!DOCTYPE html><html lang="en"><head><meta charset="UTF-8"><meta http-equiv="X-UA-Compatible" content="IE=edge"><meta name="viewport" content="width=device-width, initial-scale=1.0"><title>Document</title><style>.loading{background-color: cadetblue;}</style></head><body><button>加载更多</button></body><script>var oBtn = document.getElementsByTagName('button')[0];oBtn.attachEvent('click',function(){this.innerHTML = '加载中....';this.className = 'loading';var self = this;setTimeout(function(){self.innerHTML = '加载更多';self.className = '';},2000);})oBtn.attachEvent('click',function () {console.log('加载更多数据');})</script></html>
解决闭包点击问题
<!DOCTYPE html><html lang="en"><head><meta charset="UTF-8"><meta http-equiv="X-UA-Compatible" content="IE=edge"><meta name="viewport" content="width=device-width, initial-scale=1.0"><title>Document</title><style>.loading{background-color: cadetblue;}</style></head><body><ul><li>1</li><li>2</li><li>3</li><li>4</li><li>5</li></ul></body><script>var oLi = document.getElementsByTagName('li'),len = oLi.length,item;for(var i= 0;i<len;i++){(function (i) {item = oLi[i];item.addEventListener('click',function(){console.log(i)},false)}(i));}</script></html>
封装addEvent方法(兼容IE的绑定事件方法)
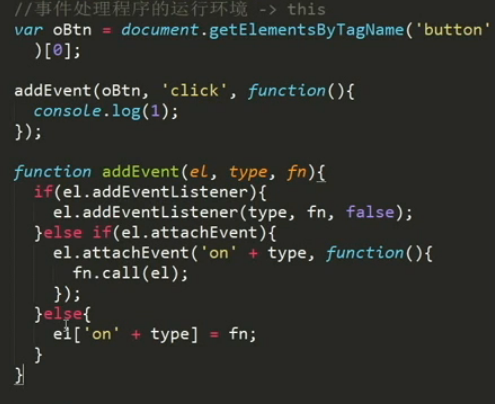
var oBtn = document.getElementsByTagName('button')[0];addEvent(oBtn,'click',function(){console.log(1);});function addEvent(el,type,fn){console.log(el);if(el.addEventListener){el.addEventListener(type,fn,false);}else if(el.attachEvent){el.attachEvent('on'+type,function(){fn.call(el); //将this指向改为调用的本身});}else{el['on'+type] = fn;}}
var oBtn = document.getElementsByTagName('button')[0];addEvent(oBtn,'click',function(){console.log(1);});//元素,事件类型,触发的方法function addEvent(el,type,fn){console.log(el);if(el.addEventListener){//方法存在el.addEventListener(type,fn,false);}else if(el.attachEvent){el.attachEvent('on'+type,function(){fn.call(el); //将this指向改为调用的本身});}else{el['on'+type] = fn;//相当于el.on,例子el.onclick=func}}
demo
<!DOCTYPE html><html lang="en"><head><meta charset="UTF-8"><meta http-equiv="X-UA-Compatible" content="IE=edge"><meta name="viewport" content="width=device-width, initial-scale=1.0"><title>Document</title><style>.loading{background-color: cadetblue;}</style></head><body><ul><li>1</li><li>2</li><li>3</li><li>4</li><li>5</li></ul><button>加载更多</button></body><script>var oBtn = document.getElementsByTagName('button')[0];addEvent(oBtn,'click',function(){console.log(1);});function addEvent(el,type,fn){console.log(el);if(el.addEventListener){el.addEventListener(type,fn,false);}else if(el.attachEvent){el.attachEvent('on'+type,function(){fn.call(el); //将this指向改为调用的本身});}else{el['on'+type] = fn;}}</script></html>
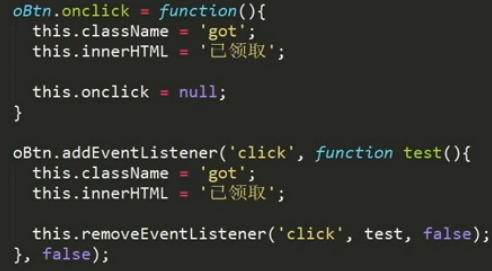
移除事件处理函数的方法
element.onclick = null/fasle;//取消点击方法element.addEventListener('click',test,false); //参数与下方remove一一对应element.removeEventListener('click',test,false);IE的方法elment.attachEvent('onclick',test);elment.detachEvent('onclick',test);//方法参数不一样
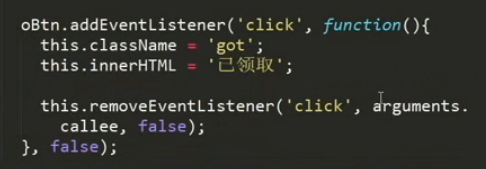
<!DOCTYPE html><html lang="en"><head><meta charset="UTF-8"><meta http-equiv="X-UA-Compatible" content="IE=edge"><meta name="viewport" content="width=device-width, initial-scale=1.0"><title></title><style>button{outline: none;border: none;width: 100px;height: 30px;background-color: red;color: #fff;}.got{background-color: #ddd;}</style></head><body><button>领取优惠券</button><script>var oBtn=document.getElementsByTagName('button')[0];//移除oBtn.onclick = function() {this.className='got';this.innerHTML = "已领取";this.onclick=null;}//移除1oBtn.addEventListener('click',test,false);function test() {this.className = 'got';this.innerHTML = '以领取';this.removeEventListener('click',test,false);}oBtn.attachEvent("onclick",test)oBtn.detachEvent("onclick",test)//移除2oBtn.addEventListener('click',function test() {this.className = 'got';this.innerHTML = '以领取';this.removeEventListener('click',test,false);})//移除3oBtn.addEventListener('click',function() {this.className = 'got';this.innerHTML = '以领取';console.log(arguments.callee)this.removeEventListener('click',arguments.callee,false);//得到匿名函数})</script></body></html>
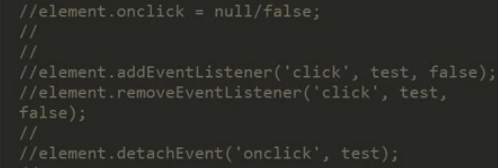
一一对应的
封装removeEvent删除事件处理函数
//移除事件function removeEvent(elem,type,fn){if(elem.addEventListener){elem.removeEventListener(type,fn,false);}else if(elem.attachEvent){elem.detachEvent('on'+type,fn);}else{elem['on'+type] = null}}
使用场景 优惠券领取后不可再领取 this.onclick = null;
demo
//写法一:var oBtn = document.getElementsByTagName('button')[0];oBtn.onclick = function(){this.className = 'got';this.innerHTML = '已领取';this.onclick = null; //**********}//写法二:var oBtn = document.getElementsByTagName('button')[0];oBtn.addEventListener('click',test,false);function test(){this.className = 'got';this.innerHTML = '已领取';this.removeEventListener('click',test,false);}//写法三var oBtn = document.getElementsByTagName('button')[0];oBtn.addEventListener('click',function test(){this.className = 'got';this.innerHTML = '已领取';this.removeEventListener('click',test,false);},false);//写法四非严格模式下 arguments.calleevar oBtn = document.getElementsByTagName('button')[0];oBtn.addEventListener('click',function(){this.className = 'got';this.innerHTML = '已领取';this.removeEventListener('click',arguments.callee,false);},false);
HTML 小记
a标签不能嵌套a标签 嵌套了会自动分开
事件冒泡与捕获
true事件捕获 ,父向子元素传递,父元素指向事件源,到事件源停止
false事件冒泡,子元素向父元素方向传递,传递子元素的事件并且触发父元素的事件
事件源:点击的元素
从里面向外面传递,向body元素的方向,只要是元素逻辑就行
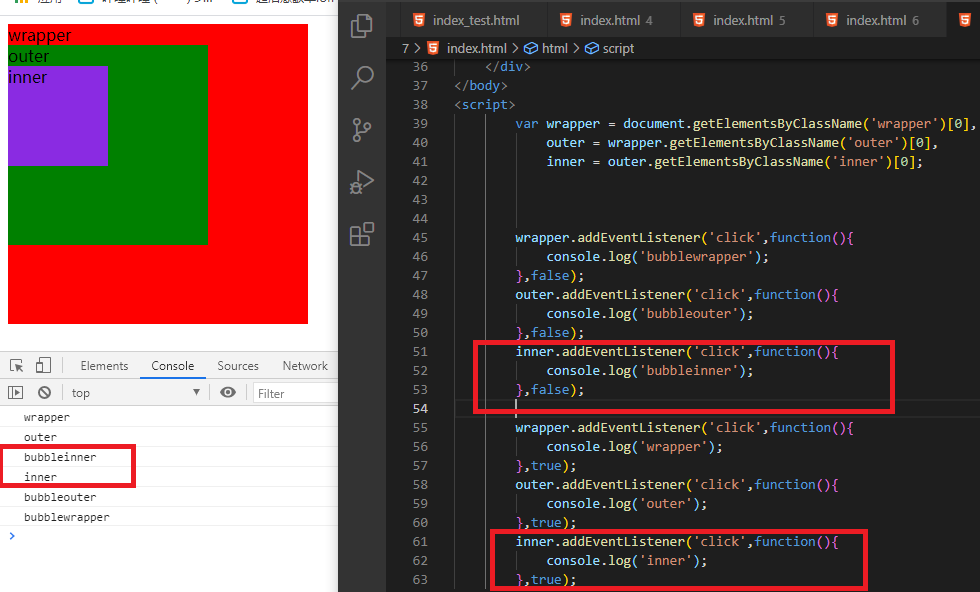
<!DOCTYPE html><html lang="en"><head><meta charset="UTF-8"><meta http-equiv="X-UA-Compatible" content="IE=edge"><meta name="viewport" content="width=device-width, initial-scale=1.0"><title>Document</title><style>.wrapper{display: block;width: 300px;height: 300px;background-color: green;}.outer{display: block;width: 200px;height: 200px;background-color: red;}.inner{display: block;width: 100px;height: 100px;background-color: orange;}</style></head><body><div class="wrapper"><div class="outer"><div class="inner">inner</div>outer</div>wrapper</div></body><script>var wrapper = document.getElementsByClassName('wrapper')[0],outer = wrapper.getElementsByClassName('outer')[0],inner = outer.getElementsByClassName('inner')[0];wrapper.addEventListener('click',function(){console.log('wrapper-f');},false);outer.addEventListener('click',function(){console.log('outer-f');},false);inner.addEventListener('click',function(){console.log('inner-f');},false);wrapper.addEventListener('click',function(){console.log('wrapper-t');},true);outer.addEventListener('click',function(){console.log('outer-t');},true);inner.addEventListener('click',function(){console.log('inner-t');},true);</script></html>
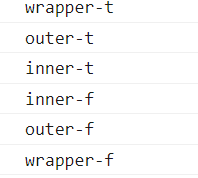
先捕获,后冒泡,与绑定顺序无关,默认是冒泡
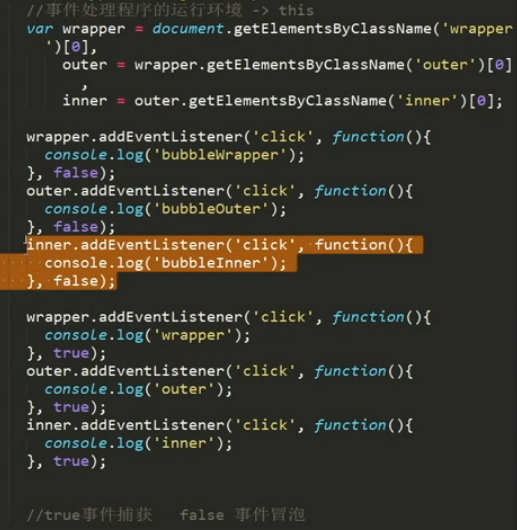
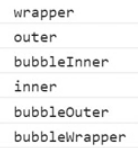
结果不一样
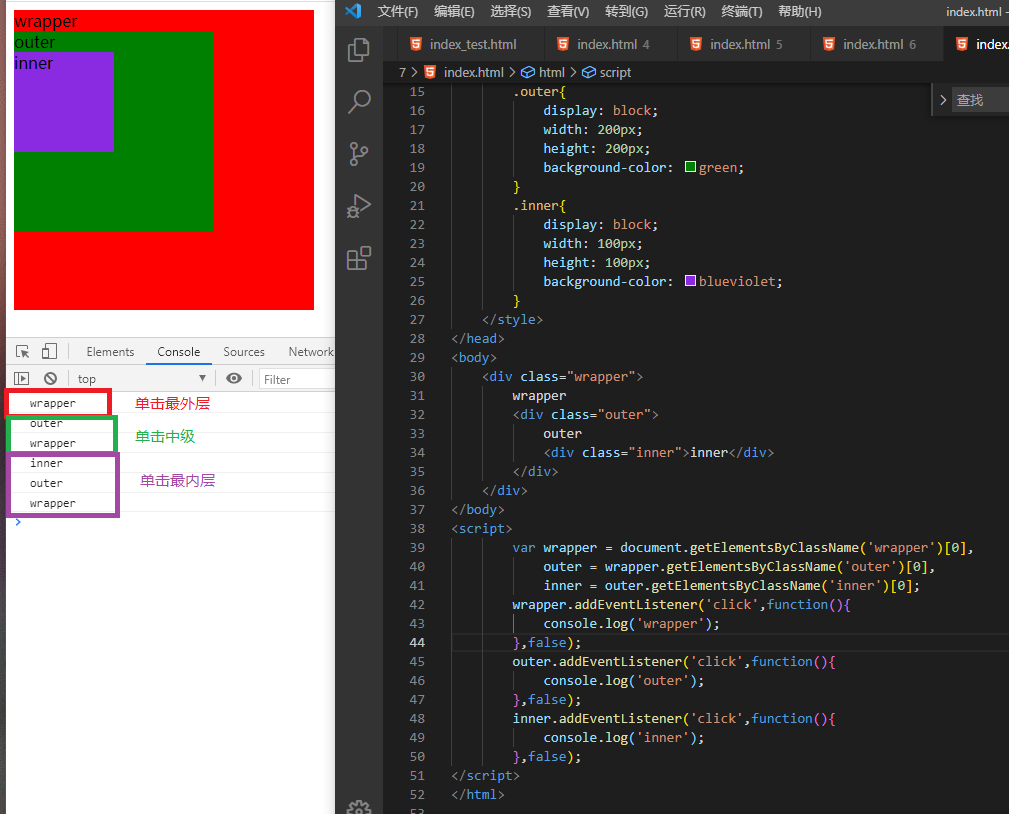
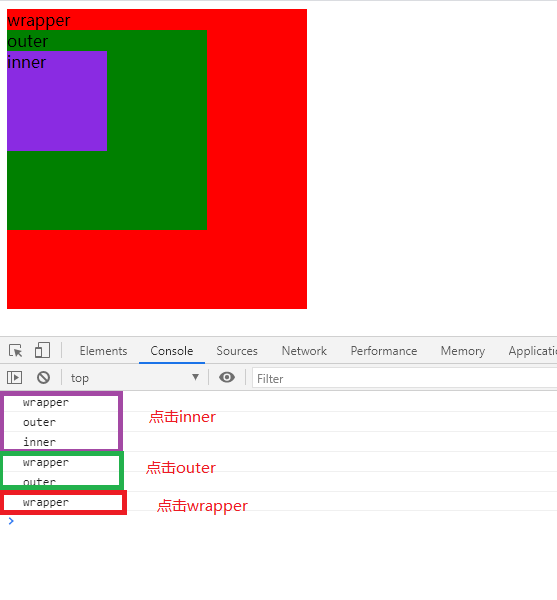
事件冒泡
addEventListener(‘click’,function(){},false); false:冒泡
从事件源开始触发的事件会传递触发父元素的同一事件 此例中为click
<!DOCTYPE html><html lang="en"><head><meta charset="UTF-8"><meta http-equiv="X-UA-Compatible" content="IE=edge"><meta name="viewport" content="width=device-width, initial-scale=1.0"><title>Document</title><style>.wrapper{display: block;width: 300px;height: 300px;background-color: red;}.outer{display: block;width: 200px;height: 200px;background-color: green;}.inner{display: block;width: 100px;height: 100px;background-color: blue;}</style></head><body><div class="wrapper"><div class="outer"><div class="inner"></div></div></div></body><script>var wrapper = document.getElementsByClassName('wrapper')[0],outer = wrapper.getElementsByClassName('outer')[0],inner = outer.getElementsByClassName('inner')[0];wrapper.addEventListener('click',function(){console.log('wrapper');},false);outer.addEventListener('click',function(){console.log('outer');},false);inner.addEventListener('click',function(){console.log('inner');},false);</script></html>
事件捕获
addEventListener(‘click’,function(){},true); true:冒泡
从事件源的最顶层父元素开始触发并依次触发其子元素 直至事件源 此例中为click
事件源:触发事件的对象
<!DOCTYPE html><html lang="en"><head><meta charset="UTF-8"><meta http-equiv="X-UA-Compatible" content="IE=edge"><meta name="viewport" content="width=device-width, initial-scale=1.0"><title>Document</title><style>.wrapper{display: block;width: 300px;height: 300px;background-color: red;}.outer{display: block;width: 200px;height: 200px;background-color: green;}.inner{display: block;width: 100px;height: 100px;background-color: blueviolet;}</style></head><body><div class="wrapper">wrapper<div class="outer">outer<div class="inner">inner</div></div></div></body><script>var wrapper = document.getElementsByClassName('wrapper')[0],outer = wrapper.getElementsByClassName('outer')[0],inner = outer.getElementsByClassName('inner')[0];wrapper.addEventListener('click',function(){console.log('wrapper');},true);outer.addEventListener('click',function(){console.log('outer');},true);inner.addEventListener('click',function(){console.log('inner');},true);</script></html>
事件源不存在捕获或冒泡 按照代码顺序执行
没有冒泡与捕获的事件
focus blur change submit reset select
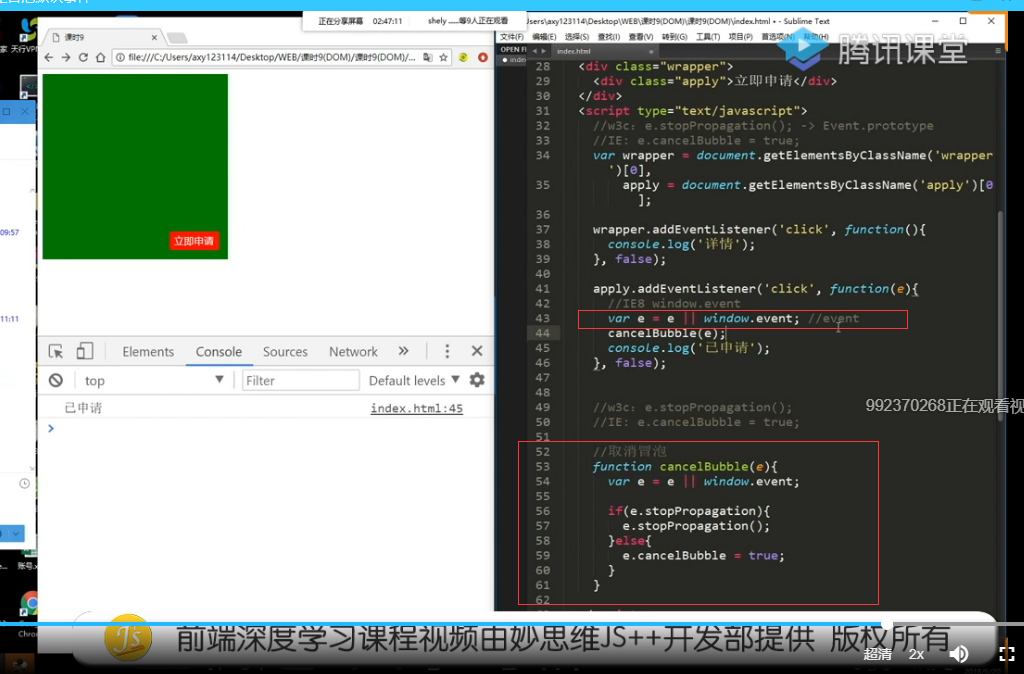
阻止冒泡与捕获
w3c: e.stopPropagation()
IE:e.cancelBubble = true
封装cancelBubble阻止冒泡与捕获方法
//阻止冒泡与捕获function cancelBubble(e){var e = e || window.event;//因为ie8 e里面拿不到事件,事件在window.event里面if(e.stopPropagation){e.stopPropagation();}else{e.cancelBubble = true}}
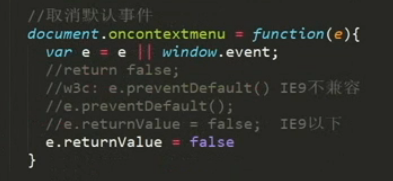
阻止默认事件
1.return false //仅支持句柄事件中使用
2.e.preventDefault() //IE9不兼容
3.e.returnValue = false; //IE9以下
封装preventDefaultEvent阻止默认行为函数
//阻止默认函数行为function preventDefaultEvent(e){var e = e || window.event;if(e.preventDefault){e.preventDefault();}else{e.returnValue = false;}}
应用场景
1.允许a标签之外的元素进行页面跳转 点击icon
<body><a href="http://www.baidu.com" class="link" target="_blank"><div class="inner">点击</div></a></body><script>var inner = document.getElementsByClassName('inner')[0];inner.onclick = function(e){var e = e || window.event;e.preventDefault();console.log('我点击了');}</script>
2.表单的跳转的刷新
<body><form action=""><input type="text" name="content"/><input type="submit" id="submit" value="提交"/></form></body><script>var submit = document.getElementById('submit');submit.onclick = function(e){var e = e || window.event;e.preventDefault();console.log('提交了');}</script>
阻止前
阻止后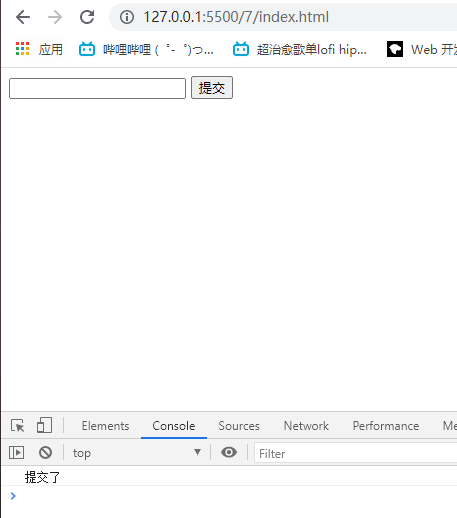
HTML小知识 :点击提交会将url上带上其他input name的参数
<form action=""><input type="text" name="content"/><input type="submit" id="submit" value="提交"/></form>
