本章将带你了解一个真正的多方通信是如何搭建起来的。
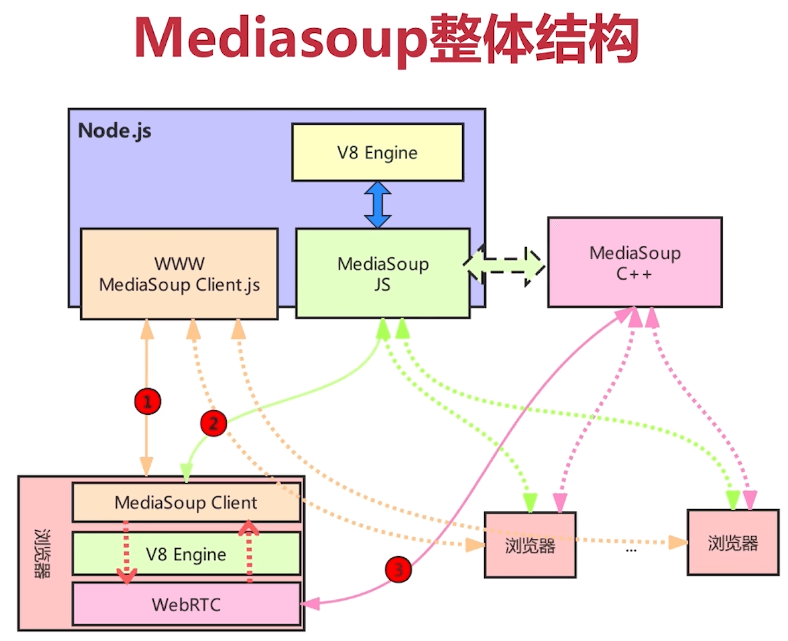
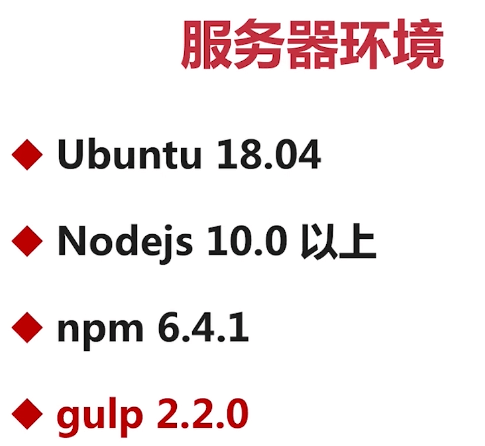
13-1 Mediasoup的运行环境

Mac安装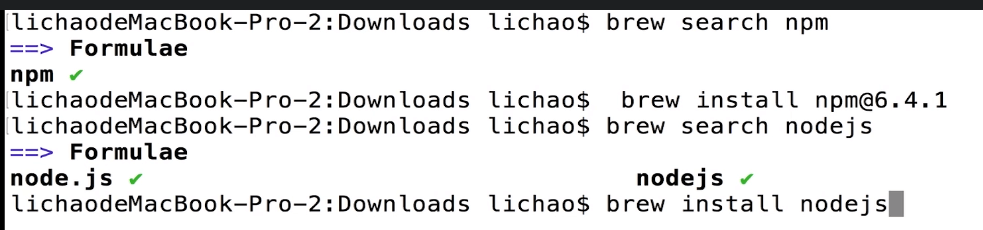
https://www.yuque.com/caokunchao/pelvyg/kv389s
13-2 Mediasoup Demo的布署
1)搭建环境
git clone https://github.com/versatica/mediasoup-demo.gitcd mediasoup-demo/ubuntu@VM-8-4-ubuntu:~/lichao_audio_video/server_webrtc/mediasoup-demo$ git branch -a* v3remotes/origin/HEAD -> origin/v3remotes/origin/piperemotes/origin/test-directtransport-rtpremotes/origin/v1remotes/origin/v2remotes/origin/v3ubuntu@VM-8-4-ubuntu:~/lichao_audio_video/server_webrtc/mediasoup-demo$ git checkout v3Already on 'v3'Your branch is up to date with 'origin/v3'.ubuntu@VM-8-4-ubuntu:~/lichao_audio_video/server_webrtc/mediasoup-demo$ lsaiortc app broadcasters CHANGELOG.md README.md server
app 客户端代码
broadcasters 用户推流的一个模块,如通过FFmpeg进行一个广播推流到Mediasoup服务器。
server 服务端代码,信令服务+媒体服务
2)配置服务端
cd servernpm installcp config.example.js config.js
npm install
1.
77 verbose Linux 5.11.0-40-generic
78 verbose argv “/home/charles/Softwares/node-v16.3.0-linux-x64/bin/node” “/home/charles/Softwares/node-v16.3.0-linux-x64/bin/npm” “install”
79 verbose node v16.3.0
80 verbose npm v7.15.1
81 error code EINVALIDTAGNAME
82 error Invalid tag name “>=^16.0.0”: Tags may not have any characters that encodeURIComponent encodes.
83 verbose exit 1
resolve:
npm install -g npm
2.
npm WARN deprecated urix@0.1.0: Please see https://github.com/lydell/urix#deprecated
npm WARN deprecated resolve-url@0.2.1: https://github.com/lydell/resolve-url#deprecated
npm WARN deprecated chokidar@2.1.8: Chokidar 2 will break on node v14+. Upgrade to chokidar 3 with 15x less dependencies.
npm ERR! code 1
npm ERR! path /home/charles/AudioVideoDev/mediasoup-learn/mediasoup-demo/server/node_modules/mediasoup
npm ERR! command failed
npm ERR! command sh -c node npm-scripts.js postinstall
npm ERR! npm-scripts.js [INFO] running task “postinstall”
npm ERR! npm-scripts.js [INFO] executing command: node npm-scripts.js worker:build
npm ERR! npm-scripts.js [INFO] running task “worker:build”
npm ERR! npm-scripts.js [INFO] executing command: make -C worker
npm ERR! make: Entering directory ‘/home/charles/AudioVideoDev/mediasoup-learn/mediasoup-demo/server/node_modules/mediasoup/worker’
npm ERR! # Updated pip and setuptools are needed for meson
npm ERR! # --system is not present everywhere and is only needed as workaround for
npm ERR! # Debian-specific issue (copied from
npm ERR! # https://github.com/gluster/gstatus/pull/33),,) fallback to command without
npm ERR! # --system if the first one fails.
npm ERR! python3 -m pip install —system —target=/home/charles/AudioVideoDev/mediasoup-learn/mediasoup-demo/server/node_modules/mediasoup/worker/out/pip pip setuptools || \
npm ERR! python3 -m pip install —target=/home/charles/AudioVideoDev/mediasoup-learn/mediasoup-demo/server/node_modules/mediasoup/worker/out/pip pip setuptools || \
npm ERR! echo “Installation failed, likely because PIP is unavailable, if you are on Debian/Ubuntu or derivative please install the python3-pip package”
npm ERR! Installation failed, likely because PIP is unavailable, if you are on Debian/Ubuntu or derivative please install the python3-pip package
npm ERR! # Install meson and ninja using pip into custom location, so we don’t
npm ERR! # depend on system-wide installation.
npm ERR! python3 -m pip install —upgrade —target=/home/charles/AudioVideoDev/mediasoup-learn/mediasoup-demo/server/node_modules/mediasoup/worker/out/pip meson ninja
npm ERR! make: Leaving directory ‘/home/charles/AudioVideoDev/mediasoup-learn/mediasoup-demo/server/node_modules/mediasoup/worker’
npm ERR! /usr/bin/python3: No module named pip
npm ERR! /usr/bin/python3: No module named pip
npm ERR! /usr/bin/python3: No module named pip
npm ERR! make: * [Makefile:56: meson-ninja] Error 1
npm ERR! A complete log of this run can be found in:
npm ERR! /home/charles/.npm/_logs/2021-11-28T13_52_29_376Z-debug.log
reslove:
sudo apt install python3-pip
4、
charles@charles-VirtualBox:~/codes/mediasoup/mediasoup-demo/server$ npm install
npm WARN deprecated source-map-url@0.4.1: See https://github.com/lydell/source-map-url#deprecated
npm WARN deprecated source-map-resolve@0.5.3: See https://github.com/lydell/source-map-resolve#deprecated
npm WARN deprecated chokidar@2.1.8: Chokidar 2 does not receive security updates since 2019. Upgrade to chokidar 3 with 15x fewer dependencies
npm WARN deprecated urix@0.1.0: Please see https://github.com/lydell/urix#deprecated
npm WARN deprecated resolve-url@0.2.1: https://github.com/lydell/resolve-url#deprecated
npm ERR! code ECONNREFUSED
npm ERR! syscall connect
npm ERR! errno ECONNREFUSED
npm ERR! FetchError: request to https://codeload.github.com/versatica/mediasoup/tar.gz/a9f366151926479fbbc87530ada9d57bff707821 failed, reason: connect ECONNREFUSED 127.0.0.1:443
npm ERR! at ClientRequest.
npm ERR! at ClientRequest.emit (node:events:527:28)
npm ERR! at TLSSocket.socketErrorListener (node:_http_client:454:9)
npm ERR! at TLSSocket.emit (node:events:539:35)
npm ERR! at emitErrorNT (node:internal/streams/destroy:157:8)
npm ERR! at emitErrorCloseNT (node:internal/streams/destroy:122:3)
npm ERR! at processTicksAndRejections (node:internal/process/task_queues:83:21)
npm ERR! FetchError: request to https://codeload.github.com/versatica/mediasoup/tar.gz/a9f366151926479fbbc87530ada9d57bff707821 failed, reason: connect ECONNREFUSED 127.0.0.1:443
npm ERR! at ClientRequest.
npm ERR! at ClientRequest.emit (node:events:527:28)
npm ERR! at TLSSocket.socketErrorListener (node:_http_client:454:9)
npm ERR! at TLSSocket.emit (node:events:539:35)
npm ERR! at emitErrorNT (node:internal/streams/destroy:157:8)
npm ERR! at emitErrorCloseNT (node:internal/streams/destroy:122:3)
npm ERR! at processTicksAndRejections (node:internal/process/task_queues:83:21) {
npm ERR! code: ‘ECONNREFUSED’,
npm ERR! errno: ‘ECONNREFUSED’,
npm ERR! syscall: ‘connect’,
npm ERR! address: ‘127.0.0.1’,
npm ERR! port: 443,
npm ERR! type: ‘system’
npm ERR! }
npm ERR!
npm ERR! If you are behind a proxy, please make sure that the
npm ERR! ‘proxy’ config is set properly. See: ‘npm help config’
npm ERR! A complete log of this run can be found in:
npm ERR! /home/charles/.npm/_logs/2022-05-27T15_58_14_858Z-debug-0.log
charles@charles-VirtualBox:~/codes/mediasoup/mediasoup-demo/server$
关掉科学上网看看。
修改config.js
/*** IMPORTANT (PLEASE READ THIS):** This is not the "configuration file" of mediasoup. This is the configuration* file of the mediasoup-demo app. mediasoup itself is a server-side library, it* does not read any "configuration file". Instead it exposes an API. This demo* application just reads settings from this file (once copied to config.js) and* calls the mediasoup API with those settings when appropriate.*/const os = require('os');module.exports ={// Listening hostname (just for `gulp live` task).//修改地方1:如果是想在app目录运行gulp live,则外部使用公网地址打开显示,则需要修改为公网地址// 例如domain : '1.14.148.33',domain : 'localhost',// Signaling settings (protoo WebSocket server and HTTP API server).https :{listenIp : '0.0.0.0',// NOTE: Don't change listenPort (client app assumes 4443).listenPort : process.env.PROTOO_LISTEN_PORT || 4443,// NOTE: Set your own valid certificate files.tls :{//修改地方:2:需要生成一个证书秘钥,这个用命令自行生成,并放置相对应的目录//${__dirname} 为当前目录,可以放在当前目录下//openssl genrsa -out key.pem 2048//openssl req ‐new ‐x509 ‐key key.pem ‐out cert.pem ‐days 1095cert : process.env.HTTPS_CERT_FULLCHAIN || `${__dirname}/certs/cert.pem`,key : process.env.HTTPS_CERT_PRIVKEY || `${__dirname}/certs/key.pem`}},// mediasoup settings.mediasoup :{// Number of mediasoup workers to launch.numWorkers : Object.keys(os.cpus()).length,// mediasoup WorkerSettings.// See https://mediasoup.org/documentation/v3/mediasoup/api/#WorkerSettingsworkerSettings :{logLevel : 'warn',logTags :['info','ice','dtls','rtp','srtp','rtcp','rtx','bwe','score','simulcast','svc','sctp'],rtcMinPort : process.env.MEDIASOUP_MIN_PORT || 40000,rtcMaxPort : process.env.MEDIASOUP_MAX_PORT || 49999},// mediasoup Router options.// See https://mediasoup.org/documentation/v3/mediasoup/api/#RouterOptionsrouterOptions :{mediaCodecs :[{kind : 'audio',mimeType : 'audio/opus',clockRate : 48000,channels : 2},{kind : 'video',mimeType : 'video/VP8',clockRate : 90000,parameters :{'x-google-start-bitrate' : 1000}},{kind : 'video',mimeType : 'video/VP9',clockRate : 90000,parameters :{'profile-id' : 2,'x-google-start-bitrate' : 1000}},{kind : 'video',mimeType : 'video/h264',clockRate : 90000,parameters :{'packetization-mode' : 1,'profile-level-id' : '4d0032','level-asymmetry-allowed' : 1,'x-google-start-bitrate' : 1000}},{kind : 'video',mimeType : 'video/h264',clockRate : 90000,parameters :{'packetization-mode' : 1,'profile-level-id' : '42e01f','level-asymmetry-allowed' : 1,'x-google-start-bitrate' : 1000}}]},// mediasoup WebRtcTransport options for WebRTC endpoints (mediasoup-client,// libmediasoupclient).// See https://mediasoup.org/documentation/v3/mediasoup/api/#WebRtcTransportOptionswebRtcTransportOptions :{listenIps :[{//修改地方3ip : '0.0.0.0', //内网ipannouncedIp : '1.14.148.xx' //修改为公网ip地址}],initialAvailableOutgoingBitrate : 1000000,minimumAvailableOutgoingBitrate : 600000,maxSctpMessageSize : 262144,// Additional options that are not part of WebRtcTransportOptions.maxIncomingBitrate : 1500000},// mediasoup PlainTransport options for legacy RTP endpoints (FFmpeg,// GStreamer).// See https://mediasoup.org/documentation/v3/mediasoup/api/#PlainTransportOptionsplainTransportOptions :{listenIp :{//修改地方4ip : '0.0.0.0', //内网ipannouncedIp : '1.14.148.xx' //修改为公网ip地址},maxSctpMessageSize : 262144}}};
记得防火墙开放端口
40000-49999 TCP和UDP
还有 4443 TCP
3)测试
# 安装cnpmnpm install -g cnpm --registry=https://registry.npm.taobao.orgcnpm -v# cd到server服务端目录下运行cnpm start# cd到app客户端目录下运行cnpm install -g gulpcnpm installgulp live
输入gulp live后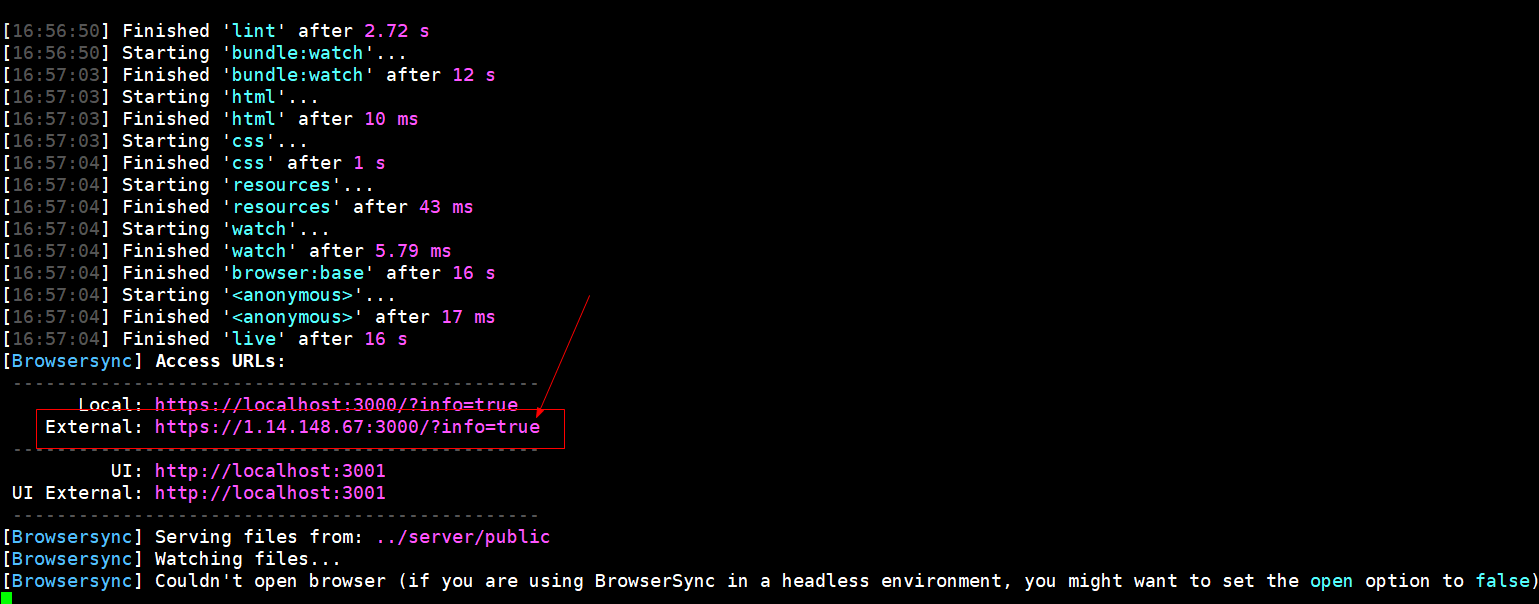 此时,使用谷歌浏览器访问
https://1.14.148.67:3000/?info=true
注意,需要在云服务器那边开放3000 TCP端口。
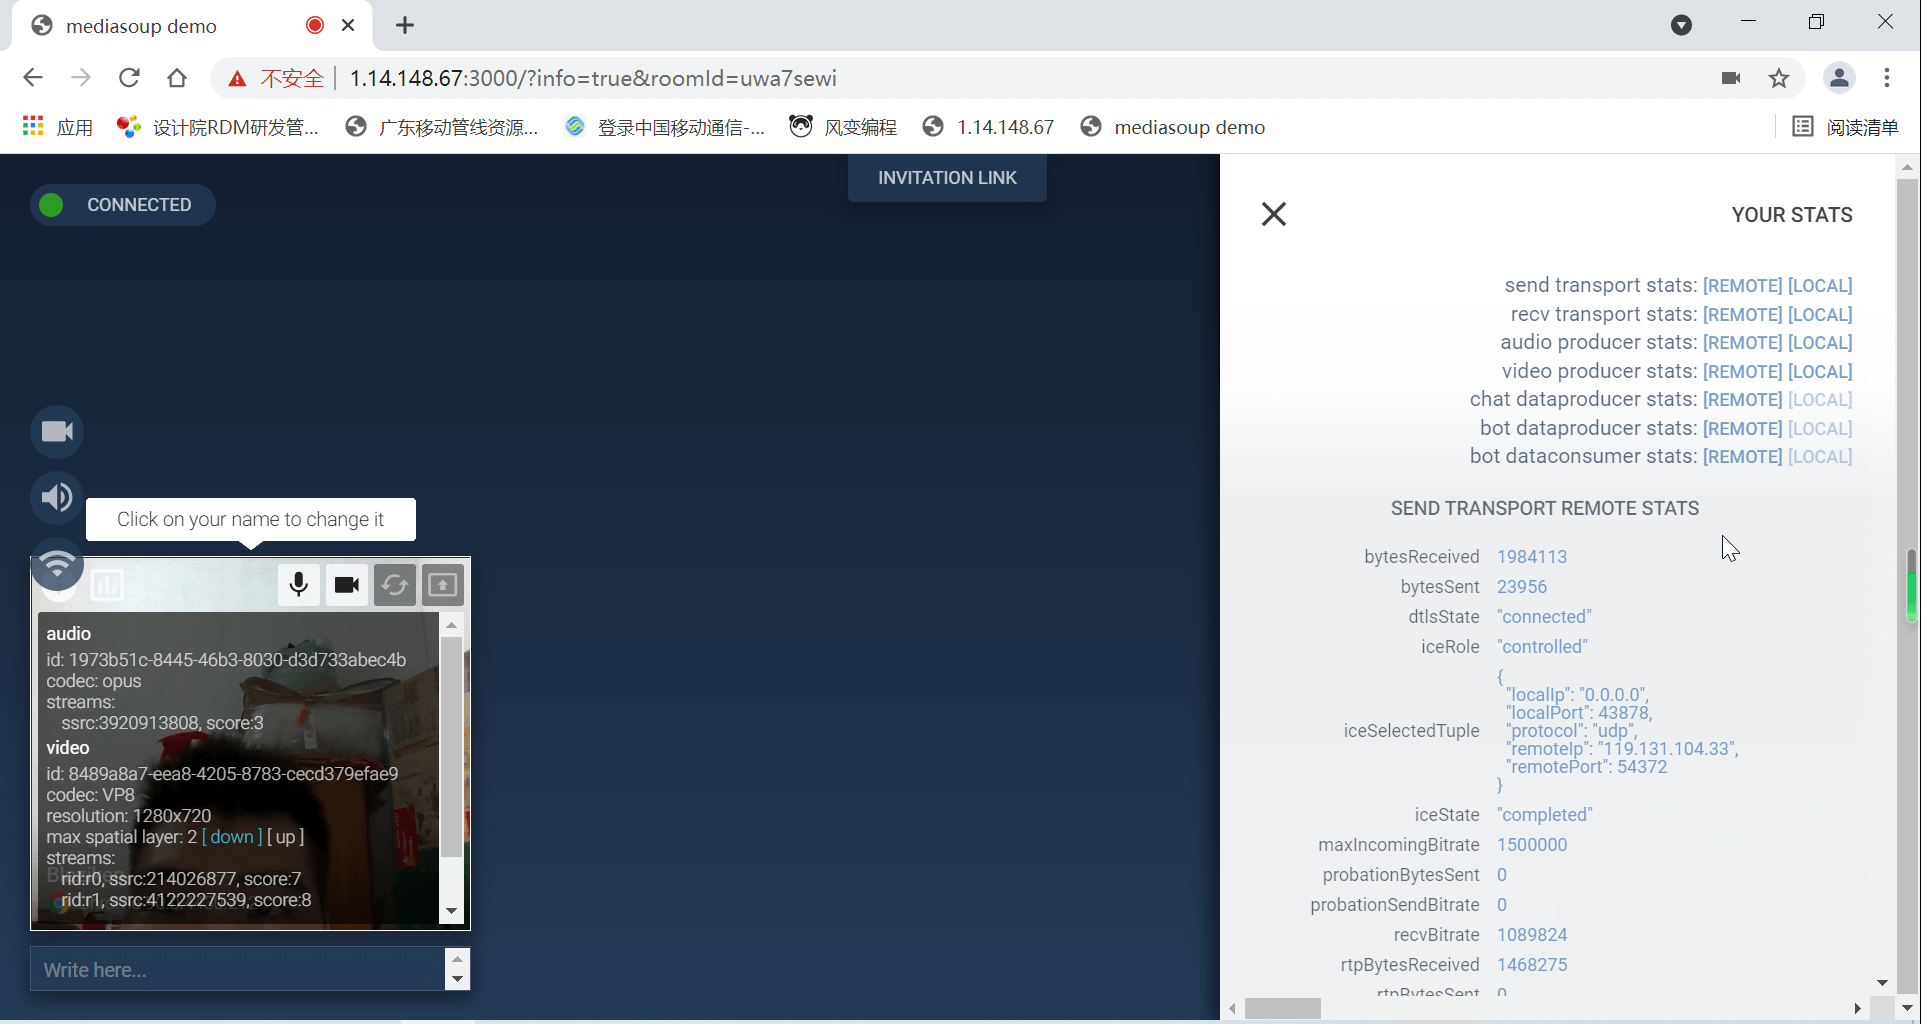
拷贝当前带着房间号的链接,然后新建标签页打开链接后,会在当前房间添加随机名称的用户。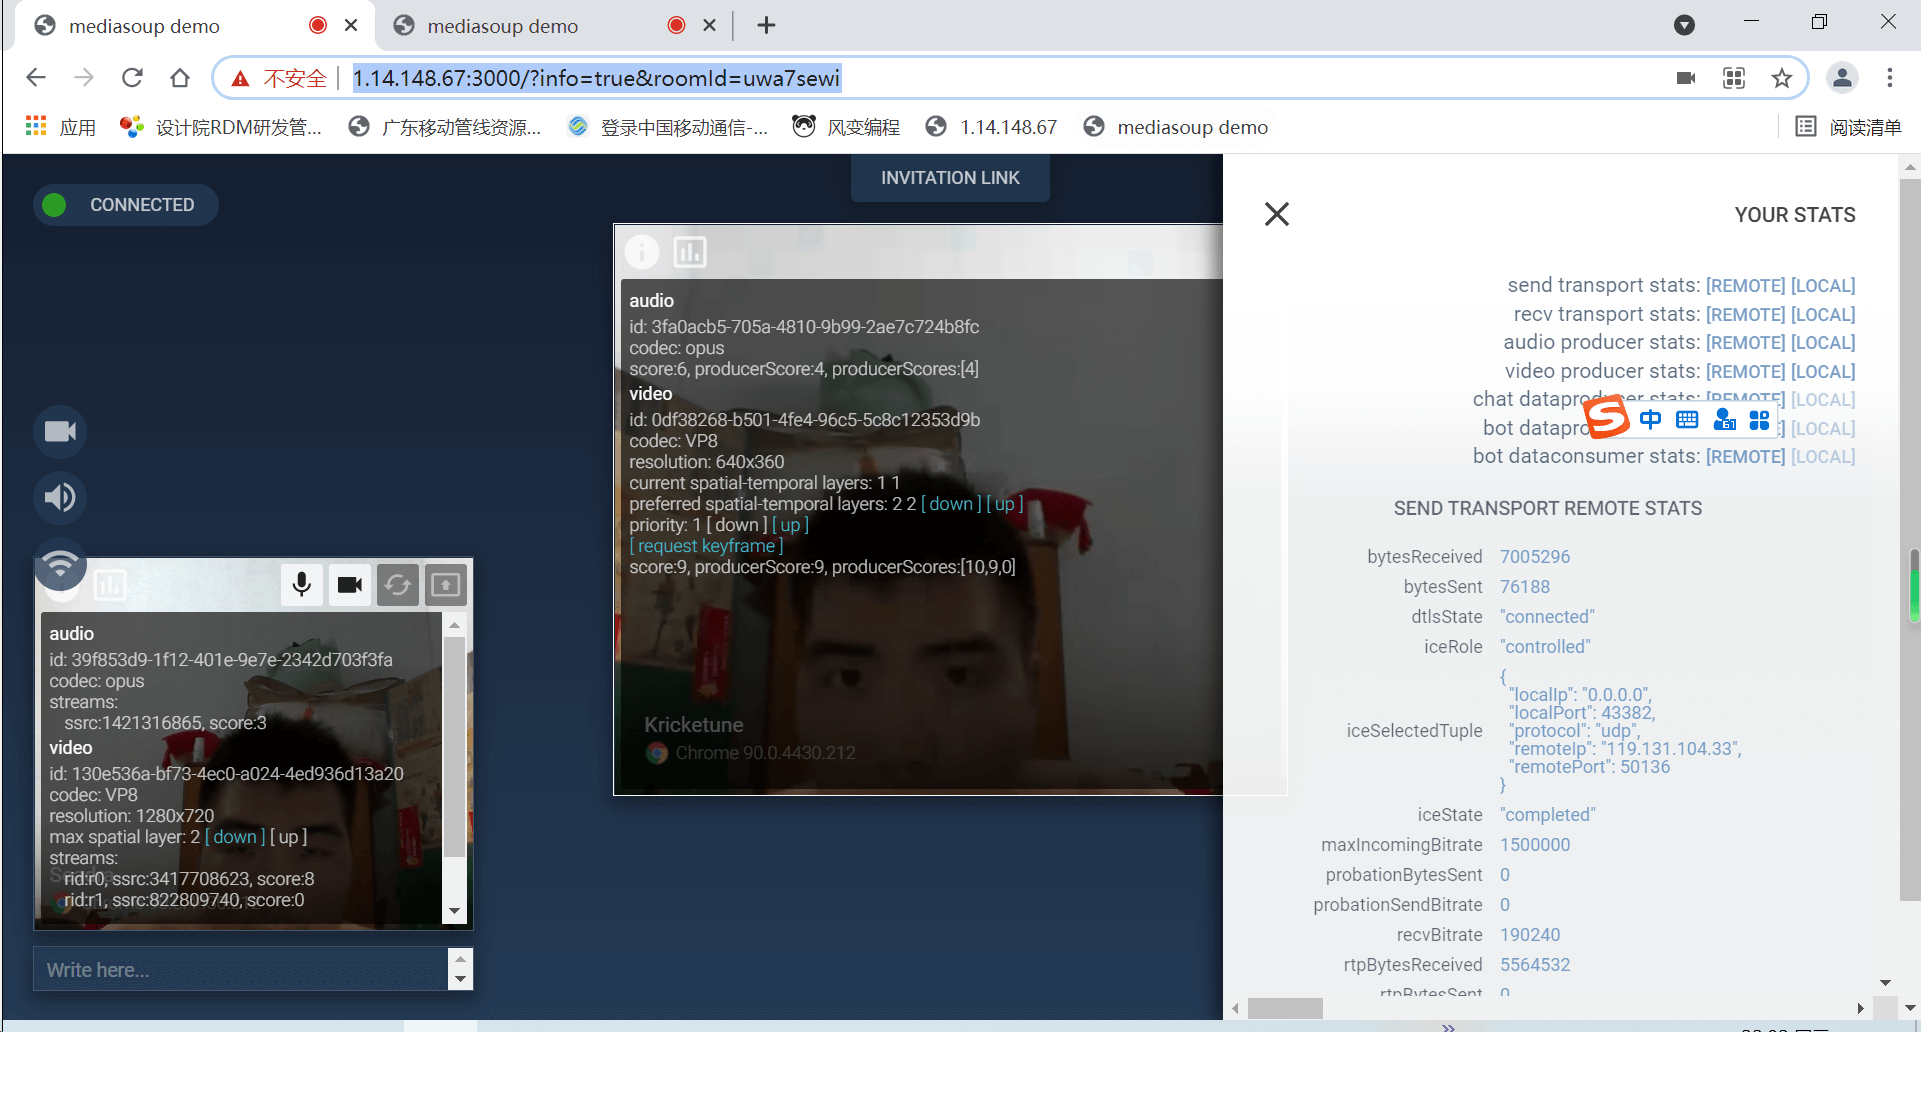
13-3 通过Nodejs实现HTTP服务
13-4 HTTPS基本知识
https://www.yuque.com/caokunchao/pelvyg/kv389s
13-5 通过WWW服务发布mediasoup客户端代码
npm install gulp-cli -gnpm install gulp -D
mediasoup-demo里面
cd appgulp dist
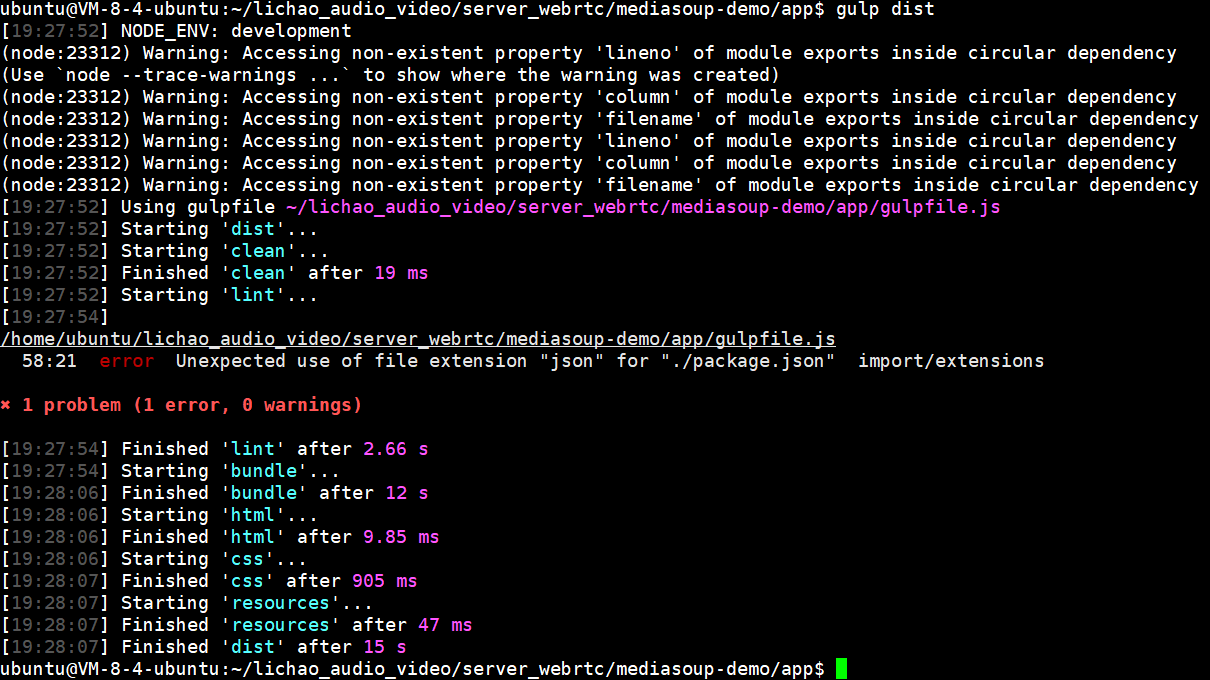
运行之后,就会在上一级的server目录中生成一个public目录。
里面的是mediasoup-demo的网页端代码。
可以使用nodejs写一个服务端程序server.js来调用
'use strict'var http = require('http');var https = require('https');var fs = require('fs');// 将文件夹中文件列表显示到浏览器中。var serveIndex = require('serve-index');var express = require('express');var app = express();// 下面2行代码,顺序不能换// 浏览静态目录(浏览目录中所有文件)app.use(serveIndex('./public'));// 发布静态目录app.use(express.static('./public'));var options = {key : fs.readFileSync('./cert/key.pem'),cert : fs.readFileSync('./cert/cert.pem')}var https_server = https.createServer(options, app);https_server.listen(443, '0.0.0.0');var http_server = http.createServer(app);http_server.listen(80, '0.0.0.0');
将客户端代码所在的整个public目录,放在server.js的当前目录下。
然后后面执行sudo node server.js。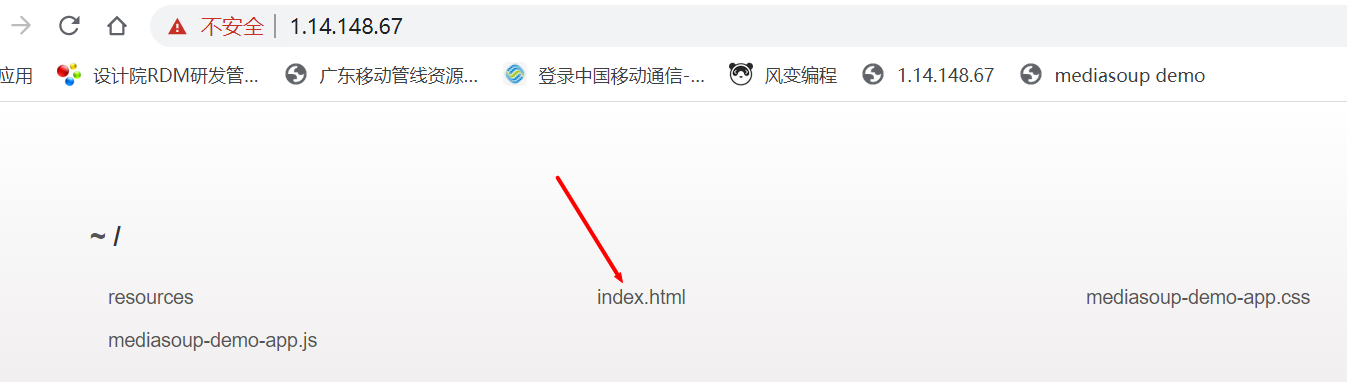
运行index.html,则会出现客户端界面。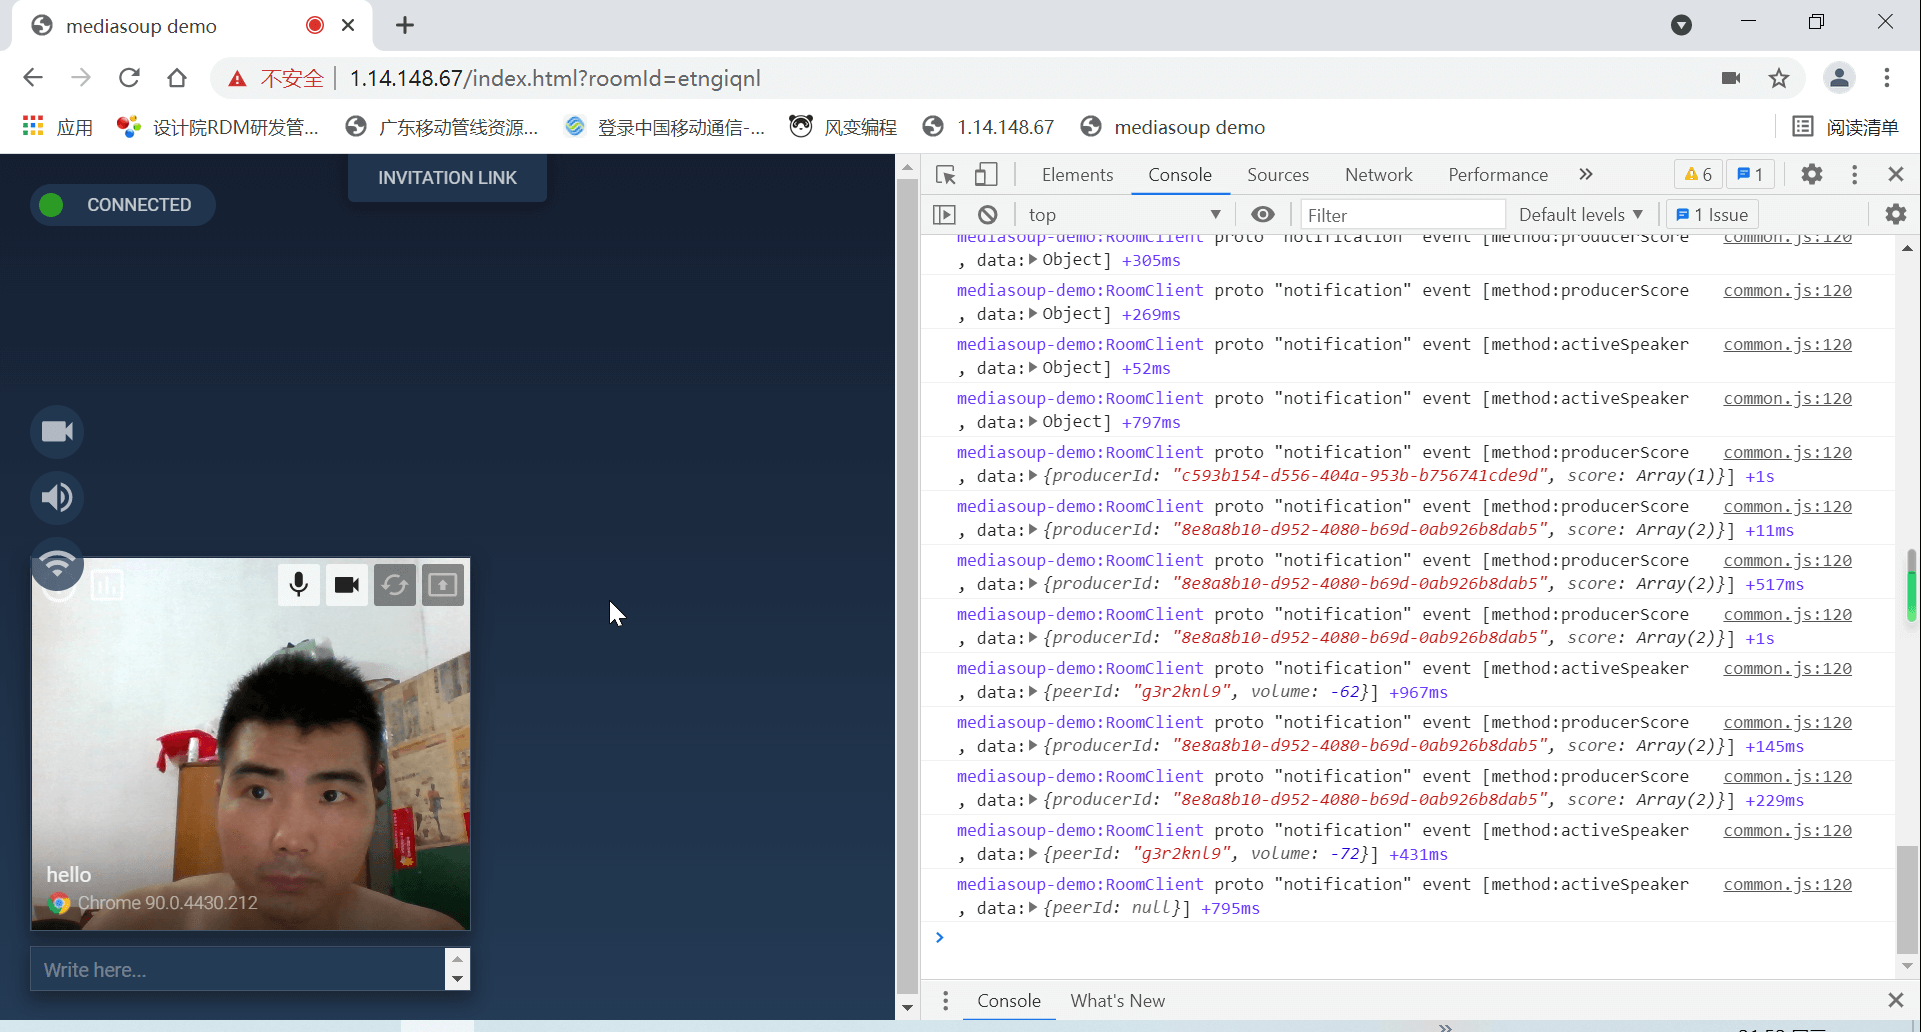 webserver.zip
13-6 作业-客户端是如何与信令服务建立连接的
通过wss协议,在mediasoup-demo-app.js里面有代码。
exports.getProtooUrl = getProtooUrl;var protooPort = 4443;if (window.location.hostname === 'test.mediasoup.org') protooPort = 4444;function getProtooUrl(_ref) {var roomId = _ref.roomId,peerId = _ref.peerId;var hostname = window.location.hostname;return "wss://".concat(hostname, ":").concat(protooPort, "/?roomId=").concat(roomId, "&peerId=").concat(peerId);}
13-7 参考资料
Mediasoup(webrtc) Demo搭建及测试
https://blog.csdn.net/m0_37263637/article/details/89921861
【流媒体服务器Mediasoup】环境部署与demo搭建
https://blog.csdn.net/gjy_it/article/details/104423353

若有收获,就点个赞吧
0 人点赞
