第一章:Gradle 创建可执行 jar 文件
1.1 概述
- 如果要想创建可执行的 jar 文件,一般需要考虑将第三方的组件保存在 jar 文件之中,所以除了基本的程序打包之外,还需要考虑到将第三方的 jar 文件一起打包的操作。
1.2 依赖的配置
- 在项目中引入 druid 的组件,修改
build.gradle文件:
plugins {id 'java' // 配置的是一个 Java 插件(Java 项目)}group 'com.github.fairy.era' // 组织名称version '1.0' // 项目版本sourceCompatibility = 1.8 // 源代码版本repositories { // 仓库配置mavenCentral()}dependencies { // 依赖管理/* junit 5 */testImplementation group: 'org.junit.jupiter', name: 'junit-jupiter', version: '5.8.2'/* druid */implementation group: 'com.alibaba', name: 'druid', version: '1.2.8'}tasks.withType(JavaCompile) { // 针对程序编译的任务进行配置options.encoding = "UTF-8"}test { // 进行测试任务的配置useJUnitPlatform() // 使用 Junit 平台}sourceSets { // 建立源代码的目录集合main {java {srcDirs = ['src/main/java']}resources {srcDirs = ['src/main/resources', 'src/main/config']}}}
1.3 启动类
- 为了方便 jar 文件的执行,一般都会定义有一个程序启动类:
package com.github.fairy.era;/*** @author 许大仙* @version 1.0* @since 2021-12-24 15:36*/public class GradleMain {public static void main(String[] args) {System.out.println("你好啊,Gradle");}}
1.3 Gradle 配置
- 如果现在要想项目打包成一个可执行的 jar 文件,就需要修改
build.gradle文件,加入各种配置项:
// 定义一个公共的变量描述当前使用的 JDK 版本def jdkVersion = 1.8sourceCompatibility = jdkVersion // 源代码版本targetCompatibility = jdkVersion // 目标版本
def mainClassName = 'com.github.fairy.era.GradleMain' // 程序的主类名称jar {archivesBaseName = 'gradle' // 生成的 jar 文件名称,如果不写此名称则使用项目名称manifestContentCharset = 'UTF-8' // 设置整个文件的编码metadataCharset = 'UTF-8' // 元数据设置编码manifest {attributes(['Manifest-Version' : getArchiveVersion().getOrNull(), // 程序版本号'Main-Class' : "$mainClassName", // 程序主类名称'Implementation-Title' : 'hello-gradle', // 实现标题'Implementation-Version': archiveVersion // 实现的内部版本号])}into('lib') { // 将程序锁需要的第三方组件包配置到 lib 目录之中from configurations.compileClasspath}}
1.4 打包
- 通过 Gradle 对当前的项目进行打包处理。
- 程序执行命令:
gradle clean build
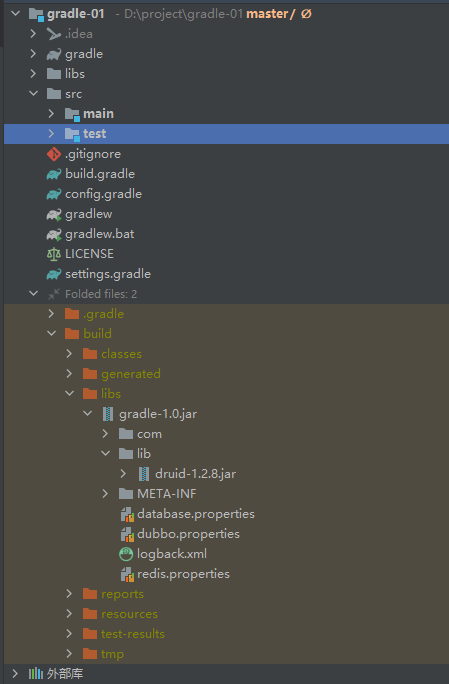
- 程序执行结果:
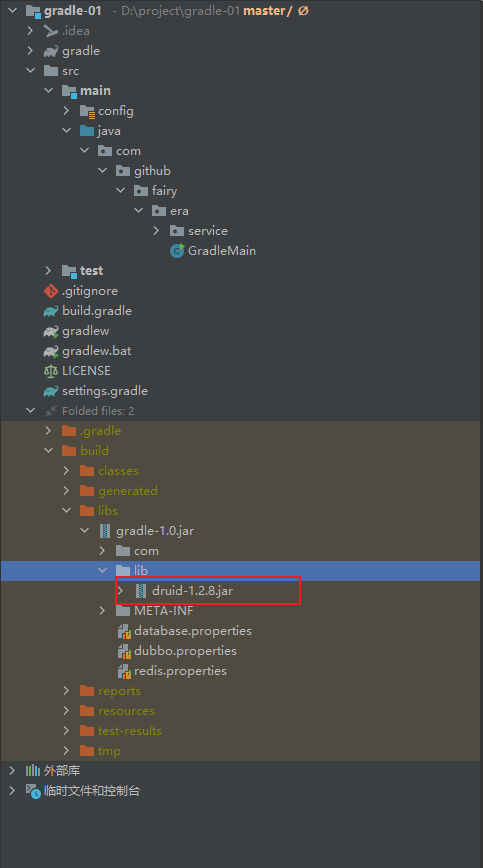
- 在使用 build 进行项目构建的时候会自动找到里面的 jar 任务进行项目的构建处理,当构建成功后会得到一个 gradle-1.0.jar 文件,这是一个可执行的 jar 文件。
1.5 执行 jar
- 既然生成的是一个可执行的 jar 文件,那么直接通过本地的 JDK 提供的命令执行当前的程序:
java -jar gradle-1.0.jar

第二章:Gradle 依赖库打包范围
2.1 概述
- 在 Maven 中所有的依赖库并不是最终都会直接进行打包,会根据不同的范围有着不同的作用,同理对于 Gradle 来说,也是一样。
- 对于当前使用的 build.gradle 配置文件来说,引入了如下的几个依赖:
dependencies { // 依赖管理/* junit 5 */testImplementation group: 'org.junit.jupiter', name: 'junit-jupiter', version: '5.8.2'/* druid */implementation group: 'com.alibaba', name: 'druid', version: '1.2.8'}
- 此时的程序一共提供了 2 个依赖库,但是最终在打包生成 jar 包的时候里面只有一个 druid.jar 文件,那么主要的原因在于 druid 使用了 implementation 打包范围,而对于 testImplementation 由于只是工作在测试环境,所以没有必要将其打包在最终的程序文件中。
2.2 Gradle 支持的打包范围
| 打包范围(老版本) | 打包范围(新版本 | ||
|---|---|---|---|
| compile | 依赖的库文件在编译及运行时都需要,前提:apply plugin: ‘war’ 或 apply plugin: ‘java’ | implementation | A 依赖 B ,B 依赖 C ,如果 B 依赖 C 使用的是 implementation ,那么在 A 中是访问不到 C 中的方法的,如果需要访问,请使用 api 依赖。 |
| compile | 依赖的库文件在编译时需要,但是在运行时不需要,前提:apply plugin: ‘war’ | api | 此配置的行为类似于 compile(现已弃用) |
| provided | 依赖的库文件在编译时需要,但是在运行时不需要,前提:apply plugin: ‘war’ | compileOnly | 此配置的行为类似于 provided(现已弃用) |
| runtime | 依赖的库文件在编译时需要,但是在编译时不需要,前提:apply plugin: ‘java’ | runtimeOnly | 此配置的行为类似于 runtime(现已弃用) |
| testCompile | 依赖库在测试的时候需要 | testImplementation | 此配置的行为类似于 testCompile(现已弃用) |
| debugCompile | 依赖文件在 debug 模式下生效 | debugImplementation | 此配置的行为类似于 debugCompile(现已弃用) |
| releaseCompile | 赖文件在最终 Release 模式下生效 | releaseImplementation | 此配置的行为类似于 releaseCompile(现已弃用) |
2.3 本地 jar
- 默认情况下所有项目中需要使用到的 Gradle 依赖全部都是通过网络下载的,但是如果说现在某些依赖已经在本地了,不希望再去网络进行引用,Gradle 也是支持这一功能的。
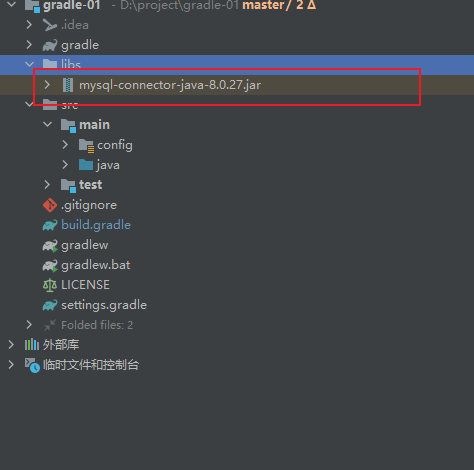
- ① 在项目中添加一个新的目录 libs 。
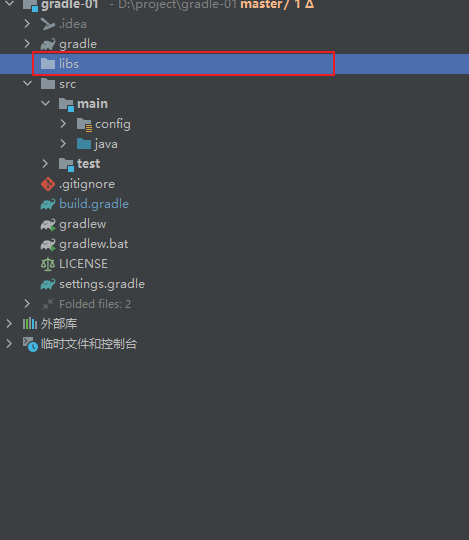
- ② 将本地需要导入的 jar 文件保存在此目录之中。
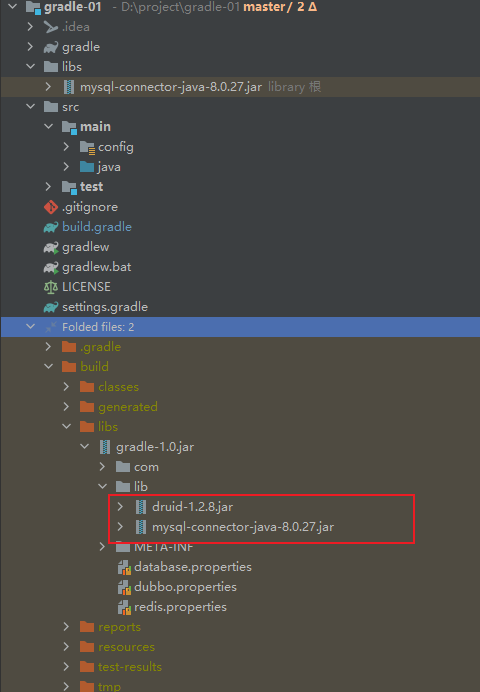
- ③ 修改 build.gradle 配置文件,在依赖配置上进行本地的引用:
dependencies { // 依赖管理/* junit 5 */testImplementation group: 'org.junit.jupiter', name: 'junit-jupiter', version: '5.8.2'/* druid */implementation group: 'com.alibaba', name: 'druid', version: '1.2.8'/* 进行本地的引用 */implementation fileTree(dir: 'libs', includes: ['*.jar'])}
- 程序执行命令:
gradle clean build
- 程序执行结果:

- 完整的
build.gradle文件:
plugins {id 'java' // 配置的是一个 Java 插件(Java 项目)}group 'com.github.fairy.era' // 组织名称version '1.0' // 项目版本// 定义一个公共的变量描述当前使用的 JDK 版本def jdkVersion = 1.8sourceCompatibility = jdkVersion // 源代码版本targetCompatibility = jdkVersion // 目标版本repositories { // 仓库配置mavenCentral()}dependencies { // 依赖管理/* junit 5 */testImplementation group: 'org.junit.jupiter', name: 'junit-jupiter', version: '5.8.2'/* druid */implementation group: 'com.alibaba', name: 'druid', version: '1.2.8'implementation fileTree(dir: 'libs', includes: ['*.jar'])}tasks.withType(JavaCompile) { // 针对程序编译的任务进行配置options.encoding = "UTF-8"}def mainClassName = 'com.github.fairy.era.GradleMain' // 程序的主类名称jar {archivesBaseName = 'gradle' // 生成的 jar 文件名称,如果不写此名称则使用项目名称manifestContentCharset = 'UTF-8' // 设置整个文件的编码metadataCharset = 'UTF-8' // 元数据设置编码manifest {attributes(['Manifest-Version' : getArchiveVersion().getOrNull(), // 程序版本号'Main-Class' : "$mainClassName", // 程序主类名称'Implementation-Title' : 'hello-gradle', // 实现标题'Implementation-Version': archiveVersion // 实现的内部版本号])}into('lib') { // 将程序锁需要的第三方组件包配置到 lib 目录之中from configurations.compileClasspath}}test { // 进行测试任务的配置useJUnitPlatform() // 使用 Junit 平台}sourceSets { // 建立源代码的目录集合main {java {srcDirs = ['src/main/java']}resources {srcDirs = ['src/main/resources', 'src/main/config']}}}
2.4 api
- 在早期的 Gradle 版本中推荐使用的是 compile ,但是时过境迁,目前的 Gradle 推荐使用的是 implementation,然而 implementation 不会将依赖进行传递,可是我们又需要将依赖进行传递,那么就需要使用 api 了(需要在项目中引入新的插件)。
- 引入新的插件,修改 build.gradle 文件:
plugins {id 'java' // 配置的是一个 Java 插件(Java 项目)id 'java-library' // 引入一个新的插件}
- 修改引入,修改 build.gradle 文件:
dependencies { // 依赖管理/* junit 5 */testImplementation group: 'org.junit.jupiter', name: 'junit-jupiter', version: '5.8.2'/* druid */api group: 'com.alibaba', name: 'druid', version: '1.2.8'implementation fileTree(dir: 'libs', includes: ['*.jar'])}
- 程序执行命令:
gradle clean build
- 程序执行结果:
2.5 依赖信息
- 在一个项目中肯定会引入大量的第三方的依赖,对于这些依赖信息可以直接通过 gradle 命令查看。
- 程序执行命令:
gradle -q dependencies
- 程序执行结果:
10:52:49: 正在执行 'dependencies -q'…------------------------------------------------------------Root project------------------------------------------------------------annotationProcessor - Annotation processors and their dependencies for source set 'main'.No dependenciesapi - API dependencies for source set 'main'. (n)\--- com.alibaba:druid:1.2.8 (n)apiElements - API elements for main. (n)No dependenciesarchives - Configuration for archive artifacts. (n)No dependenciescompileClasspath - Compile classpath for source set 'main'.\--- com.alibaba:druid:1.2.8compileOnly - Compile only dependencies for source set 'main'. (n)No dependenciesdefault - Configuration for default artifacts. (n)No dependenciesimplementation - Implementation only dependencies for source set 'main'. (n)\--- unspecified (n)runtimeClasspath - Runtime classpath of source set 'main'.\--- com.alibaba:druid:1.2.8runtimeElements - Elements of runtime for main. (n)No dependenciesruntimeOnly - Runtime only dependencies for source set 'main'. (n)No dependenciestestAnnotationProcessor - Annotation processors and their dependencies for source set 'test'.No dependenciestestCompileClasspath - Compile classpath for source set 'test'.+--- com.alibaba:druid:1.2.8\--- org.junit.jupiter:junit-jupiter:5.8.2+--- org.junit:junit-bom:5.8.2| +--- org.junit.jupiter:junit-jupiter:5.8.2 (c)| +--- org.junit.jupiter:junit-jupiter-api:5.8.2 (c)| +--- org.junit.jupiter:junit-jupiter-params:5.8.2 (c)| \--- org.junit.platform:junit-platform-commons:1.8.2 (c)+--- org.junit.jupiter:junit-jupiter-api:5.8.2| +--- org.junit:junit-bom:5.8.2 (*)| +--- org.opentest4j:opentest4j:1.2.0| +--- org.junit.platform:junit-platform-commons:1.8.2| | +--- org.junit:junit-bom:5.8.2 (*)| | \--- org.apiguardian:apiguardian-api:1.1.2| \--- org.apiguardian:apiguardian-api:1.1.2\--- org.junit.jupiter:junit-jupiter-params:5.8.2+--- org.junit:junit-bom:5.8.2 (*)+--- org.junit.jupiter:junit-jupiter-api:5.8.2 (*)\--- org.apiguardian:apiguardian-api:1.1.2testCompileOnly - Compile only dependencies for source set 'test'. (n)No dependenciestestImplementation - Implementation only dependencies for source set 'test'. (n)\--- org.junit.jupiter:junit-jupiter:5.8.2 (n)testRuntimeClasspath - Runtime classpath of source set 'test'.+--- com.alibaba:druid:1.2.8\--- org.junit.jupiter:junit-jupiter:5.8.2+--- org.junit:junit-bom:5.8.2| +--- org.junit.jupiter:junit-jupiter:5.8.2 (c)| +--- org.junit.jupiter:junit-jupiter-api:5.8.2 (c)| +--- org.junit.jupiter:junit-jupiter-engine:5.8.2 (c)| +--- org.junit.jupiter:junit-jupiter-params:5.8.2 (c)| +--- org.junit.platform:junit-platform-commons:1.8.2 (c)| \--- org.junit.platform:junit-platform-engine:1.8.2 (c)+--- org.junit.jupiter:junit-jupiter-api:5.8.2| +--- org.junit:junit-bom:5.8.2 (*)| +--- org.opentest4j:opentest4j:1.2.0| \--- org.junit.platform:junit-platform-commons:1.8.2| \--- org.junit:junit-bom:5.8.2 (*)+--- org.junit.jupiter:junit-jupiter-params:5.8.2| +--- org.junit:junit-bom:5.8.2 (*)| \--- org.junit.jupiter:junit-jupiter-api:5.8.2 (*)\--- org.junit.jupiter:junit-jupiter-engine:5.8.2+--- org.junit:junit-bom:5.8.2 (*)+--- org.junit.platform:junit-platform-engine:1.8.2| +--- org.junit:junit-bom:5.8.2 (*)| +--- org.opentest4j:opentest4j:1.2.0| \--- org.junit.platform:junit-platform-commons:1.8.2 (*)\--- org.junit.jupiter:junit-jupiter-api:5.8.2 (*)testRuntimeOnly - Runtime only dependencies for source set 'test'. (n)No dependencies(c) - dependency constraint(*) - dependencies omitted (listed previously)(n) - Not resolved (configuration is not meant to be resolved)A web-based, searchable dependency report is available by adding the --scan option.10:52:49: 执行完成 'dependencies -q'。
2.6 依赖过滤
- 有些时候可能并不需要将所有范围的依赖全部进行列出,只希望列出 implementation 的依赖范围,那么可以在依赖列表的时候进行一些参数的配置。
- 程序执行命令:
gradle -q dependencies --configuration implementation
- 程序执行结果:
8:50:36: 正在执行 'dependencies --configuration implementation -q'…------------------------------------------------------------Root project------------------------------------------------------------implementation - Implementation only dependencies for source set 'main'. (n)+--- com.alibaba:druid:1.2.8 (n)\--- unspecified (n)(n) - Not resolved (configuration is not meant to be resolved)A web-based, searchable dependency report is available by adding the --scan option.8:50:37: 执行完成 'dependencies --configuration implementation -q'。
2.7 依赖查找
- 一个项目中有可能存在有大量的依赖,那么也可以直接利用 gradle 项目进行指定依赖名称的查找。
- 程序执行命令:查找项目中是否存在 druid 的依赖
gradle -q dependencyInsight --dependency druid --configuration implementation
- 程序执行结果:
Execution failed for task ':dependencyInsight'.> Resolving dependency configuration 'implementation' is not allowed as it is defined as 'canBeResolved=false'.Instead, a resolvable ('canBeResolved=true') dependency configuration that extends 'implementation' should be resolved.* Try:Run with --stacktrace option to get the stack trace. Run with --info or --debug option to get more log output. Run with --scan to get full insights.
- 此时程序会报错,根据提示信息在 build.gradle 中增加如下的配置信息:
configurations {implementation {canBeConsumed = truecanBeResolved = true}}
- 再次执行程序命令,程序执行结果:
9:11:31: 正在执行 'dependencyInsight --dependency druid --configuration implementation -q'…com.alibaba:druid:1.2.8variant "runtime" [org.gradle.status = release (not requested)org.gradle.usage = java-runtime (not requested)org.gradle.libraryelements = jar (not requested)org.gradle.category = library (not requested)]com.alibaba:druid:1.2.8\--- implementationA web-based, searchable dependency report is available by adding the --scan option.9:11:31: 执行完成 'dependencyInsight --dependency druid --configuration implementation -q'。
- 所有的依赖的配置在 Gradle 里面都有其自己的范围,同时也可以通过 Gradle 提供的各种命令进行依赖的查找。
第三章:Gradle 依赖库排除
3.1 概述
- 在进行依赖库引入的时候,由于各个不同的依赖库有可能去引用同一个依赖文件(最为常见的就是日志组件了),这样就会造成各种的包引入不明确的问题,所有就需要进行一些依赖的排除操作。
3.2 日志依赖
- 修改 build.gradle 文件,进行一些日志依赖文件的定义:
dependencies { // 依赖管理testImplementation group: 'org.junit.jupiter', name: 'junit-jupiter', version: '5.8.2'/* druid */implementation group: 'com.alibaba', name: 'druid', version: '1.2.8'/* 日志依赖 */implementation group: 'org.slf4j', name: 'slf4j-api', version: '1.7.30'implementation group: 'org.slf4j', name: 'slf4j-log4j12', version: '1.7.30'implementation group: 'org.slf4j', name: 'log4j-over-slf4j', version: '1.7.30'implementation group: 'org.slf4j', name: 'slf4j-nop', version: '1.7.30'implementation group: 'org.apache.logging.log4j', name: 'log4j-api', version: '2.13.2'implementation group: 'org.apache.logging.log4j', name: 'log4j-to-slf4j', version: '2.13.2'}
3.3 日志文件
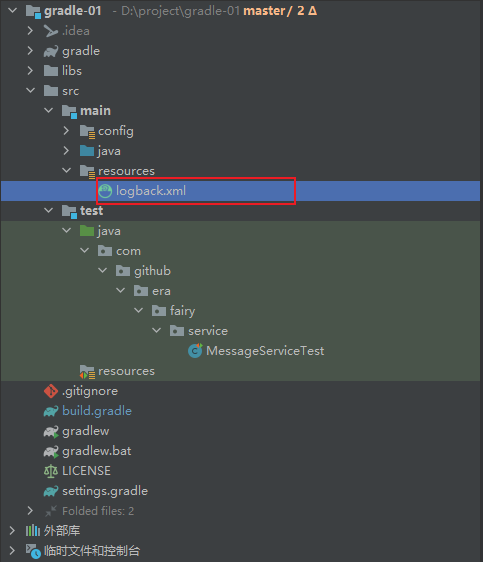
- 如果要想进行日志的显示,还需要配置有一个日志文件:logback.xml ,内容如下:
<?xml version="1.0" encoding="UTF-8"?><configuration debug="false"><!--定义日志文件的存储地址 勿在 LogBack 的配置中使用相对路径--><property name="LOG_HOME" value="d://home" /><appender name="STDOUT" class="ch.qos.logback.core.ConsoleAppender"> <!-- 控制台输出 --><encoder class="ch.qos.logback.classic.encoder.PatternLayoutEncoder"><!--格式化输出:%d表示日期,%thread表示线程名,%-5level:级别从左显示5个字符宽度%msg:日志消息,%n是换行符--><pattern>%d{yyyy-MM-dd HH:mm:ss.SSS} [%thread] %-5level %logger{50} - %msg%n</pattern></encoder></appender><appender name="FILE" class="ch.qos.logback.core.rolling.RollingFileAppender"> <!-- 按照每天生成日志文件 --><rollingPolicy class="ch.qos.logback.core.rolling.TimeBasedRollingPolicy"><!--日志文件输出的文件名--><FileNamePattern>${LOG_HOME}/Yootk.log.%d{yyyy-MM-dd}.log</FileNamePattern><!--日志文件保留天数--><MaxHistory>30</MaxHistory></rollingPolicy><encoder class="ch.qos.logback.classic.encoder.PatternLayoutEncoder"><!--格式化输出:%d表示日期,%thread表示线程名,%-5level:级别从左显示5个字符宽度%msg:日志消息,%n是换行符--><pattern>%d{yyyy-MM-dd HH:mm:ss.SSS} [%thread] %-5level %logger{50} - %msg%n</pattern></encoder><!--日志文件最大的大小--><triggeringPolicy class="ch.qos.logback.core.rolling.SizeBasedTriggeringPolicy"><MaxFileSize>10MB</MaxFileSize></triggeringPolicy></appender><root level="INFO"> <!-- 日志输出级别 --><appender-ref ref="STDOUT,FILE" /></root><root level="ERROR"> <!-- 日志输出级别 --><appender-ref ref="FILE" /></root><root level="DEBUG"> <!-- 日志输出级别 --><appender-ref ref="FILE" /></root></configuration>
3.4 编写程序
- 既然已经配置好了日志相关的依赖以及日志的配置文件,那么就可以直接进行日志的操作了。
package com.github.fairy.era;import org.slf4j.Logger;import org.slf4j.LoggerFactory;/*** @author 许大仙* @version 1.0* @since 2021-12-24 15:36*/public class GradleMain {private static Logger logger = LoggerFactory.getLogger(GradleMain.class);public static void main(String[] args) {logger.info("你好啊,Gradle");}}
- 程序执行结果:
Caused by: java.lang.IllegalStateException: Detected both log4j-over-slf4j.jar AND bound slf4j-log4j12.jar on the class path, preempting StackOverflowError. See also http://www.slf4j.org/codes.html#log4jDelegationLoop for more details.
- 此时的程序执行会出现依赖库重复的问题,因为发现了两个同样的依赖库:log4j-over-slf4j.jar 和 slf4j-log4j12.jar 。
3.5 依赖排除
- 如果要想解决上面的问题,那么就需要进行依赖的排除操作,修改 build.gradle 文件(以下方式任选一种即可,因为两种都是 Groovy 语法):
configurations { // 进行依赖的配置all*.exclude group: 'org.slf4j', module: 'slf4j-log4j12' // 全局的排除设置implementation {canBeConsumed = truecanBeResolved = true}}
configurations { // 进行依赖的配置all.collect {configuration -> // 全局的排除设置configuration.exclude group: 'org.slf4j', module: 'slf4j-log4j12'}implementation {canBeConsumed = truecanBeResolved = true}}
- 此时,引入了一个全局的排除设置,这样就表示在进行依赖引入的时候不在项目中去使用 slf4j-log4j12 的组件包。
3.6 模块排除
- 以上的操作是针对于一个组织中对应的模块编写的排除操作,那么如果有需求也可以针对于一个模块进行排除,修改 build.gradle 文件:
configurations { // 进行依赖的配置// 模块排除implementation.exclude module: 'slf4j-log4j12'implementation {canBeConsumed = truecanBeResolved = true}}
3.7 依赖排除
- 可以直接在进行某个依赖配置的时候进行排除,修改 build.gradle 文件:
dependencies { // 依赖管理testImplementation group: 'org.junit.jupiter', name: 'junit-jupiter', version: '5.8.2'/* druid */implementation group: 'com.alibaba', name: 'druid', version: '1.2.8'implementation fileTree(dir: 'libs', includes: ['*.jar'])implementation group: 'org.slf4j', name: 'slf4j-api', version: '1.7.30'// 类似于 Maven 的 exclusion 标签implementation(group: 'org.slf4j', name: 'slf4j-log4j12', version: '1.7.30') {exclude module: 'log4j-api'}implementation group: 'org.slf4j', name: 'log4j-over-slf4j', version: '1.7.30'implementation group: 'org.slf4j', name: 'slf4j-nop', version: '1.7.30'implementation group: 'org.apache.logging.log4j', name: 'log4j-api', version: '2.13.2'implementation group: 'org.apache.logging.log4j', name: 'log4j-to-slf4j', version: '2.13.2'}
注意:实际开发中一般还是会使用依赖排除。
第四章:Gradle 依赖库版本号统一管理
4.1 概述
- 在任何的构建工具中,由于版本编号经常性的需要进行更新,所以就需要对版本号进行统一的管理操作,在 Gradle 里面为了实现这样的版本号的统一管理,可以专门定义一个配置文件,这个配置文件在需要的地方进行进入即可。
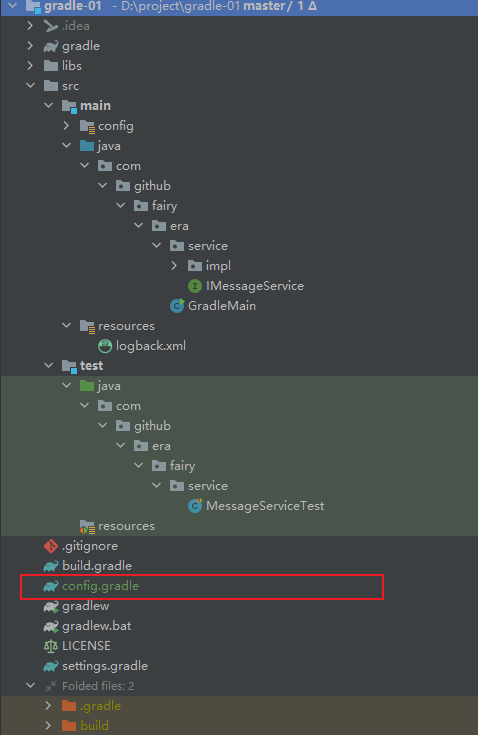
4.2 配置文件
- 在项目中编写一个 config.gradle 的配置文件,内容如下:
ext { // 编写所有的相关扩展操作jdkVersion = JavaVersion.VERSION_1_8 // 传统的 JDK 版本都是需要自己编写字符串的,而 Gradle 中提供了这样的操作druidVersion = '1.2.8'junitJupiterVersion = '5.8.2'}
4.3 引入配置
- 如果想让配置文件中的配置生效,则必须在 build.gradle 配置文件中进入 config.gradle 的引入,在 plugins 下编写,修改 build.gradle 文件:
plugins {id 'java' // 配置的是一个 Java 插件(Java 项目)id 'java-library'}apply from: 'config.gradle' // 引入一个配置文件
- 引入此配置文件就相当于将所有的变量全部引入项目之中,那么后面的项目直接使用变量填充即可。
4.4 Gradle 配置
- 将 config.gradle 中引入的变量直接在 build.gradle 中进行填充处理,修改 build.gradle 文件:
// 定义一个公共的变量描述当前使用的 JDK 版本sourceCompatibility = jdkVersiontargetCompatibility = jdkVersion
dependencies { // 依赖管理/* junit 5 */testImplementation group: 'org.junit.jupiter', name: 'junit-jupiter', version: junitJupiterVersion/* druid */implementation group: 'com.alibaba', name: 'druid', version: druidVersion}
4.5 程序编译
- 为了检查当前的配置是否生效,可以考虑将代码进行编译操作。
- 程序执行命令:
gradle clean build
- 程序执行结果:
4.6 版本确定
- 现在已经成功的实现了版本号的统一配置,但是如果要想确定当前的配置是否成功,那么就可以查看类的版本信息的方式来完成,而这种方式就需要进入到类所在的目录中进行控制。
- 程序执行命令:
javap -verbose GradleMain.class
- 程序执行结果:
D:\project\gradle-01\build\classes\java\main\com\github\fairy\era>javap -verbose GradleMain.classClassfile /D:/project/gradle-01/build/classes/java/main/com/github/fairy/era/GradleMain.classLast modified 2021-12-27; size 582 bytesMD5 checksum e61e67b8cc83ecad8ccb76f0733acb21Compiled from "GradleMain.java"public class com.github.fairy.era.GradleMainminor version: 0major version: 52flags: ACC_PUBLIC, ACC_SUPERConstant pool:#1 = Methodref #6.#20 // java/lang/Object."<init>":()V#2 = Fieldref #21.#22 // java/lang/System.out:Ljava/io/PrintStream;#3 = String #23 // 你好啊,Gradle#4 = Methodref #24.#25 // java/io/PrintStream.println:(Ljava/lang/String;)V#5 = Class #26 // com/github/fairy/era/GradleMain#6 = Class #27 // java/lang/Object#7 = Utf8 <init>#8 = Utf8 ()V#9 = Utf8 Code#10 = Utf8 LineNumberTable#11 = Utf8 LocalVariableTable#12 = Utf8 this#13 = Utf8 Lcom/github/fairy/era/GradleMain;#14 = Utf8 main#15 = Utf8 ([Ljava/lang/String;)V#16 = Utf8 args#17 = Utf8 [Ljava/lang/String;#18 = Utf8 SourceFile#19 = Utf8 GradleMain.java#20 = NameAndType #7:#8 // "<init>":()V#21 = Class #28 // java/lang/System#22 = NameAndType #29:#30 // out:Ljava/io/PrintStream;#23 = Utf8 你好啊,Gradle#24 = Class #31 // java/io/PrintStream#25 = NameAndType #32:#33 // println:(Ljava/lang/String;)V#26 = Utf8 com/github/fairy/era/GradleMain#27 = Utf8 java/lang/Object#28 = Utf8 java/lang/System#29 = Utf8 out#30 = Utf8 Ljava/io/PrintStream;#31 = Utf8 java/io/PrintStream#32 = Utf8 println#33 = Utf8 (Ljava/lang/String;)V{public com.github.fairy.era.GradleMain();descriptor: ()Vflags: ACC_PUBLICCode:stack=1, locals=1, args_size=10: aload_01: invokespecial #1 // Method java/lang/Object."<init>":()V4: returnLineNumberTable:line 9: 0LocalVariableTable:Start Length Slot Name Signature0 5 0 this Lcom/github/fairy/era/GradleMain;public static void main(java.lang.String[]);descriptor: ([Ljava/lang/String;)Vflags: ACC_PUBLIC, ACC_STATICCode:stack=2, locals=1, args_size=10: getstatic #2 // Field java/lang/System.out:Ljava/io/PrintStream;3: ldc #3 // String 你好啊,Gradle5: invokevirtual #4 // Method java/io/PrintStream.println:(Ljava/lang/String;)V8: returnLineNumberTable:line 11: 0line 12: 8LocalVariableTable:Start Length Slot Name Signature0 9 0 args [Ljava/lang/String;}SourceFile: "GradleMain.java"
- JDK 版本和 major.minor 版本: | JDK 版本 | major.minor version | | —- | —- | | 1.1 | 45 | | 1.2 | 46 | | 1.3 | 47 | | 1.4 | 48 | | 1.5 | 49 | | 1.6 | 50 | | 1.7 | 51 | | 1.8 | 52 |
第五章:Gradle 依赖库集中管理
5.1 概述
- 虽然可以通过单独的配置文件模式,将所有需要的版本号进行统一的配置,但是从某些严格意义上来讲,如果将所有的依赖都配置在 build.gradle 文件里面,那么随着时间的推移,build.gradle 文件将会变得又臭又长(可以和传统 Maven 项目中的 pom.xml 对比)!!!
- 在 Gradle 中考虑到了传统的 Maven 所带来的各种的维护问题,所以对于依赖库的管理的最佳实践模式 —— 建立一个单独的依赖配置文件,通过这个依赖配置文件定义所有需要用到的依赖,随后在 build.gradle 文件里面去通过这个依赖文件引入相应的依赖库,换言之,build.gradle 文件不直接参与任何版本的操作。
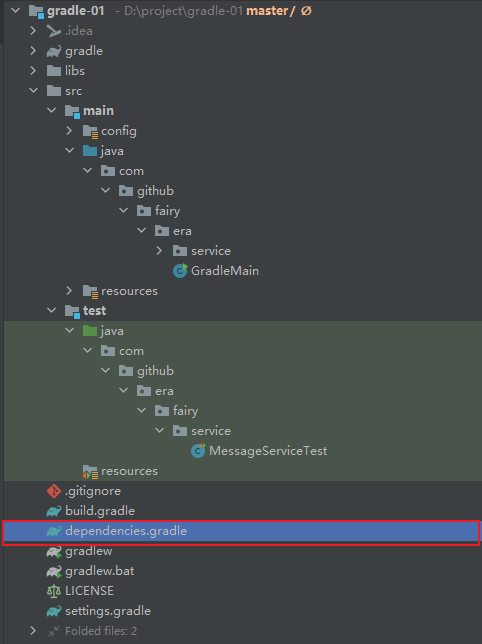
5.2 依赖文件
- 在项目中定义有一个 dependencies.gradle 配置文件,内容如下:
// 定义所有要使用的版本号ext.versions = [junitJupiterVersion: '5.8.2',druidVersion : '1.2.8']// 定义所有的依赖库ext.libraries = [/* junit 5 */'junit-jupiter': "org.junit.jupiter:junit-jupiter:${versions.junitJupiterVersion}",/* druid */druid : "com.alibaba:druid:${versions.druidVersion}"]
5.2 配置引入
- 修改 build.gradle 文件,引入以上的库文件:
apply from :'dependencies.gradle' // 引入所有的依赖文件
5.3 依赖配置
- 所有的依赖配置最终都是在 build.gradle 文件中完成的,修改在 build.gradle 文件中的 dependencies 中配置,内容如下:
dependencies { // 依赖管理/* junit 5 */testImplementation( // 如果有多个依赖,使用 , 隔开libraries.'junit-jupiter')/* druid */implementation( // 如果有多个依赖,使用 , 隔开libraries.'druid')}
- 完整的 build.gradle 内容如下:
plugins {id 'java' // 配置的是一个 Java 插件(Java 项目)id 'java-library'}ext {jdkVersion = JavaVersion.VERSION_1_8 // 传统的 JDK 版本都是需要自己编写字符串的,而 Gradle 中提供了这样的操作}apply from :'dependencies.gradle' // 引入所有的依赖文件configurations { // 进行依赖的配置implementation {canBeConsumed = truecanBeResolved = true}}group 'com.github.fairy.era' // 组织名称version '1.0' // 项目版本// 定义一个公共的变量描述当前使用的 JDK 版本sourceCompatibility = jdkVersiontargetCompatibility = jdkVersionrepositories { // 仓库配置mavenCentral()}dependencies { // 依赖管理/* junit 5 */testImplementation( // 如果有多个依赖,使用 , 隔开libraries.'junit-jupiter')/* druid */implementation( // 如果有多个依赖,使用 , 隔开libraries.'druid')}tasks.withType(JavaCompile) { // 针对程序编译的任务进行配置options.encoding = "UTF-8"}def mainClassName = 'com.github.fairy.era.GradleMain' // 程序的主类名称jar {archivesBaseName = 'gradle' // 生成的 jar 文件名称,如果不写此名称则使用项目名称manifestContentCharset = 'UTF-8' // 设置整个文件的编码metadataCharset = 'UTF-8' // 元数据设置编码manifest {attributes 'Manifest-Version': getArchiveVersion().getOrNull(), // 程序版本号'Main-Class': "${mainClassName}",// 程序主类名称'Implementation-Title': 'hello-gradle',// 程序主类名称'Implementation-Version': archiveVersion // 版本编号}into('lib') { // 将程序锁需要的第三方组件包配置到 lib 目录之中from configurations.compileClasspath}}test { // 进行测试任务的配置useJUnitPlatform() // 使用 Junit 平台}sourceSets { // 建立源代码的目录集合main {java {srcDirs = ['src/main/java']}resources {srcDirs = ['src/main/resources', 'src/main/config']}}}
- 那么,此时的 Gradle 项目就可以通过一个专属的依赖文件进行所有依赖库的管理了,以后如果要维护版本只需要修改专属的依赖配置文件集合,不需要改动 build.gradle 文件了。

若有收获,就点个赞吧
0 人点赞
