原文: https://howtodoinjava.com/spring-security/login-form-based-spring-3-security-example/
学习使用 Spring Security 教程中讨论的详细信息,将 Spring Security 登录表单添加到任何 Spring Web 应用程序。
1. 背景资料
我们学会了在链接的帖子中集成 Spring 3 和 Hibernate 之间。 该应用程序是简单的 Web 应用程序,它提供了一个视图,用户可以在其中添加/编辑员工。
使该应用程序安全。 本教程的范围是:
- 只有授权用户才能访问编辑员工屏幕。
- 未经授权的用户应显示登录屏幕。
- 成功的凭据应转发到编辑员工屏幕。
- 不成功的凭据应转发到拒绝访问屏幕。
- 应该有一个注销应用程序的链接。
2. Spring Security Maven 依赖项
让我们从第一步开始,即更新项目依赖项。 由于以下原因,它将在演示中添加以下four sub-modules:
spring-security-core:它包含核心身份验证以及访问控制类和接口。spring-security-web:包含过滤器和相关的 Web 安全基础结构代码。 它还启用了基于 URL 的安全性,我们将在此演示中使用它。spring-security-config:它包含安全名称空间解析代码。 如果您使用 Spring Security XML 文件进行配置,则需要它。spring-security-taglibs:它为访问安全信息和在 JSP 中应用安全约束提供基本支持。
pom.xml
<properties><org.springframework.version>3.0.5.RELEASE</org.springframework.version></properties><!-- Spring Security --><dependency><groupid>org.springframework.security</groupid><artifactid>spring-security-core</artifactid><version>${org.springframework.version}</version><type>jar</type><scope>compile</scope></dependency><dependency><groupid>org.springframework.security</groupid><artifactid>spring-security-web</artifactid><version>${org.springframework.version}</version><type>jar</type><scope>compile</scope></dependency><dependency><groupid>org.springframework.security</groupid><artifactid>spring-security-config</artifactid><version>${org.springframework.version}</version><type>jar</type><scope>compile</scope></dependency><dependency><groupid>org.springframework.security</groupid><artifactid>spring-security-taglibs</artifactid><version>${org.springframework.version}</version><type>jar</type><scope>compile</scope></dependency>
现在使用“ mvn compile”命令更新项目中的依赖项。
3. 在web.xml中配置DelegatingFilterProxy
Spring Security 的 Web 基础结构完全基于标准 Servlet 过滤器。 这些过滤器在web.xml文件中定义,否则 servlet 容器将忽略它们。
在 Spring Security 中,过滤器类也是在应用程序上下文中定义的 Spring Bean,因此能够利用 Spring 丰富的依赖注入机制和生命周期接口。 Spring 的 DelegatingFilterProxy 提供了web.xml和应用上下文之间的链接。
web.xml
<filter><filter-name>springSecurityFilterChain</filter-name><filter-class>org.springframework.web.filter.DelegatingFilterProxy</filter-class></filter><filter-mapping><filter-name>springSecurityFilterChain</filter-name><url-pattern>/*</url-pattern></filter-mapping>
如果您没有使用任何明确的过滤器定义,并且希望 spring 为您配置基本的基础架构,则如上例所示,将过滤器名称用作“ springSecurityFilterChain”。 请注意,您不应自己使用此 bean 名称。 将其添加到web.xml后,就可以开始编辑 Spring Security 配置文件了。 Web 安全服务是使用元素配置的。
同样不要忘记将安全配置文件放在上下文配置位置设置中。
web.xml
<context-param><param-name>contextConfigLocation</param-name><param-value>/WEB-INF/employee-servlet.xml/WEB-INF/application-security.xml</param-value></context-param>
完整的web.xml文件如下所示:
web.xml
<?xml version="1.0" encoding="UTF-8"?><web-app xmlns:xsi="http://www.w3.org/2001/XMLSchema-instance"xmlns="http://java.sun.com/xml/ns/javaee"xmlns:web="http://java.sun.com/xml/ns/javaee/web-app_2_5.xsd"xsi:schemaLocation="http://java.sun.com/xml/ns/javaee http://java.sun.com/xml/ns/javaee/web-app_2_5.xsd"id="WebApp_ID" version="2.5"><display-name>Archetype Created Web Application</display-name><welcome-file-list><welcome-file>/WEB-INF/index.jsp</welcome-file></welcome-file-list><filter><filter-name>springSecurityFilterChain</filter-name><filter-class>org.springframework.web.filter.DelegatingFilterProxy</filter-class></filter><filter-mapping><filter-name>springSecurityFilterChain</filter-name><url-pattern>/*</url-pattern></filter-mapping><servlet><servlet-name>employee</servlet-name><servlet-class>org.springframework.web.servlet.DispatcherServlet</servlet-class><load-on-startup>1</load-on-startup></servlet><servlet-mapping><servlet-name>employee</servlet-name><url-pattern>/</url-pattern></servlet-mapping><context-param><param-name>contextConfigLocation</param-name><param-value>/WEB-INF/employee-servlet.xml/WEB-INF/application-security.xml</param-value></context-param><listener><listener-class>org.springframework.web.context.ContextLoaderListener</listener-class></listener></web-app>
4. 配置登录注销安全性
正如我们在上一节中了解到的那样,将过滤器名称用作springSecurityFilterChain可以帮助您使用元素配置基本基础结构。 让我们先看看它是如何配置的? 我已经为这个演示编写了一个基本配置:
application-security.xml
<?xml version="1.0" encoding="UTF-8"?><beans:beans xmlns="http://www.springframework.org/schema/security"xmlns:beans="http://www.springframework.org/schema/beans"xmlns:xsi="http://www.w3.org/2001/XMLSchema-instance"xsi:schemaLocation="http://www.springframework.org/schema/beanshttp://www.springframework.org/schema/beans/spring-beans-3.0.xsdhttp://www.springframework.org/schema/securityhttp://www.springframework.org/schema/security/spring-security-3.0.3.xsd"><http auto-config="true" use-expressions="true"><intercept-url pattern="/login" access="permitAll" /><intercept-url pattern="/logout" access="permitAll" /><intercept-url pattern="/accessdenied" access="permitAll" /><intercept-url pattern="/**" access="hasRole('ROLE_USER')" /><form-login login-page="/login" default-target-url="/list" authentication-failure-url="/accessdenied" /><logout logout-success-url="/logout" /></http><authentication-manager alias="authenticationManager"><authentication-provider><user-service><user name="lokesh" password="password" authorities="ROLE_USER" /></user-service></authentication-provider></authentication-manager></beans:beans>
让我们看看这个配置的实际含义。
http:包括与配置相关的网址级别安全性。 此元素是所有与 Web 相关的名称空间功能的父级。auto-config:包括一些基本服务。 它是<http><form-login /><http-basic /><logout /></http>
的简写
use-expressions:这里使用表达式来保护单个 URL。 这些表达式可以是例如hasRole([role]),hasAnyRole([role1,role2]),permitAll,denyAll等。intercept-url:这将匹配请求中请求的网址格式,并根据访问值决定要采取的操作。form-login: 当用户尝试访问任何安全的 URL 时,这将成为图片。 映射到login-page属性的登录页面将用于身份验证检查。 它是 spring securitylogin-processing-url。
如果未提供,spring 将为用户提供内置的登录页面。 如果登录成功或由于无效的用户/密码匹配而导致登录失败,它也包含默认目标的属性。logout:如果在应用程序中调用注销,这将有助于查找下一个视图。
我正在使用基于 XML 的用户服务,即我不会去数据库进行密码验证,而是将用户名/密码组合存储在配置文件本身中。 要使用此设置王,请使用内置的内置用户详细信息服务来设置authentication-manager。 在更实时的应用程序中,这将是一些从远程数据库中获取数据的用户服务。
5. Spring 控制器
我将重用控制器,并将在控制器中添加其他映射和处理器方法。 这些其他 URL 是/login,/logout和/accessdenied。 具有所有方法处理器的更新后的控制器如下所示:
EditEmployeeController.java
package com.howtodoinjava.controller;import org.springframework.beans.factory.annotation.Autowired;import org.springframework.stereotype.Controller;import org.springframework.ui.ModelMap;import org.springframework.validation.BindingResult;import org.springframework.web.bind.annotation.ModelAttribute;import org.springframework.web.bind.annotation.PathVariable;import org.springframework.web.bind.annotation.RequestMapping;import org.springframework.web.bind.annotation.RequestMethod;import com.howtodoinjava.entity.EmployeeEntity;import com.howtodoinjava.service.EmployeeManager;@Controllerpublic class EditEmployeeController {@Autowiredprivate EmployeeManager employeeManager;public void setEmployeeManager(EmployeeManager employeeManager) {this.employeeManager = employeeManager;}@RequestMapping(value = "/login", method = RequestMethod.GET)public String login(ModelMap model) {return "login";}@RequestMapping(value = "/accessdenied", method = RequestMethod.GET)public String loginerror(ModelMap model) {model.addAttribute("error", "true");return "denied";}@RequestMapping(value = "/logout", method = RequestMethod.GET)public String logout(ModelMap model) {return "logout";}@RequestMapping(value = "/", method = RequestMethod.GET)public String defaultPage(ModelMap map) {return "redirect:/list";}@RequestMapping(value = "/list", method = RequestMethod.GET)public String listEmployees(ModelMap map) {map.addAttribute("employee", new EmployeeEntity());map.addAttribute("employeeList", employeeManager.getAllEmployees());return "editEmployeeList";}@RequestMapping(value = "/add", method = RequestMethod.POST)public String addEmployee(@ModelAttribute(value = "employee") EmployeeEntity employee,BindingResult result) {employeeManager.addEmployee(employee);return "redirect:/list";}@RequestMapping("/delete/{employeeId}")public String deleteEmplyee(@PathVariable("employeeId") Integer employeeId) {employeeManager.deleteEmployee(employeeId);return "redirect:/list";}}
6. Spring 的视图
现在,我们已经使用安全配置和控制器处理器配置了我们的应用程序。 是时候编写本质上是 JSP 文件的视图了。 jsp 文件中最重要的附加内容是login.jsp文件。
该文件的格式包含用户名和密码字段的文本框。 让我们看看它是怎么写的:
6.1. login.jsp
login.jsp
<%@ taglib uri="http://java.sun.com/jsp/jstl/core" prefix="c" %><%@ taglib uri="http://www.springframework.org/tags/form" prefix="form" %><%@ taglib uri="http://www.springframework.org/tags" prefix="spring" %><html><body><h1 id="banner">Login to Security Demo</h1><form name="f" action="<c:url value='j_spring_security_check'/>"method="POST"><table><tr><td>Username:</td><td><input type='text' name='j_username' /></td></tr><tr><td>Password:</td><td><input type='password' name='j_password'></td></tr><tr><td colspan="2"> </td></tr><tr><td colspan='2'><input name="submit" type="submit"> <input name="reset" type="reset"></td></tr></table></form></body></html>
默认情况下,spring 会自动生成并配置一个UsernamePasswordAuthenticationFilter bean。 默认情况下,此过滤器在处理 Web 表单中的登录 POST 时响应 URL /j_spring_security_check。 用户名字段使用“ j_username”,密码字段使用“ j_password”。
提交此表单时,UsernamePasswordAuthenticationFilter将匹配application-security.xml中身份验证提供程序设置中配置的用户名和密码。
6.2. logout.jsp
logout.jsp
< % session.invalidate(); %>You are now logged out!!<a href="//howtodoinjava.com/spring/spring-security/login-form-based-spring-3-security-example/">go back</a>
该视图仅使会话无效,并提供一个链接以返回登录页面。
6.3. denied.jsp
当用户尝试使用无效的用户名和密码组合进行身份验证时,此 jsp 文件将出现在用户屏幕中。 它将在类路径中显示message.properties中配置的相应消息。
denied.jsp
<%@ taglib uri="http://java.sun.com/jsp/jstl/core" prefix="c"%><html><body><h1 id="banner">Unauthorized Access !!</h1><hr /><c:if test="${not empty error}"><div style="color:red">Your fake login attempt was bursted, dare again !!<br />Caused : ${sessionScope["SPRING_SECURITY_LAST_EXCEPTION"].message}</div></c:if><p class="message">Access denied!</p><a href="//howtodoinjava.com/spring/spring-security/login-form-based-spring-3-security-example/">Go back to login page</a></body></html>
7. Spring Security 登录表单演示
是时候测试应用程序了。 只需将应用程序部署在任何服务器中,例如就我而言,我正在使用 Tomcat 7.0. 现在,执行以下步骤:
7.1. 在浏览器http://localhost:8080/Spring3HibernateIntegration中输入 URL
除了/login,/logout和/accessdeni之外,它将显示登录屏幕,所有其他 URL 都是受保护的 URL。
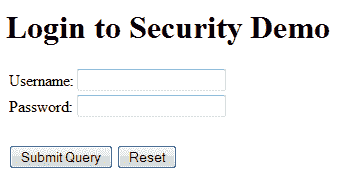
默认登录界面
7.2. 尝试使用用户名"demo"和密码"1234"进行身份验证
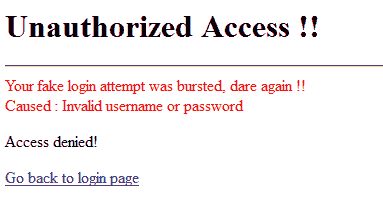
无效的用户名和密码的未经授权访问
由于用户名和密码无效,它将给出拒绝访问错误。
7.3. 尝试使用用户名"lokesh"和密码"password"进行身份验证
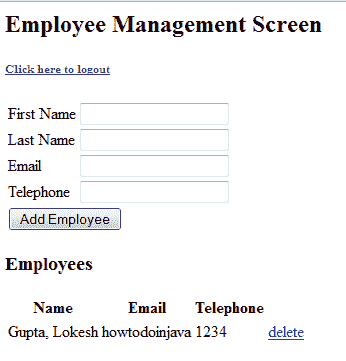
成功验证后的员工编辑界面
因为用户名和密码正确,它将显示员工管理屏幕。
7.4. 单击注销链接
注销消息
用户将被注销,并出现登录屏幕。
我希望这个 spring mvc 登录示例能够对使用 xml 配置的基本 Spring Security 机制有所启发。 如果您对此 Spring Security 登录表单示例有任何疑问,请给我评论。
学习愉快!

若有收获,就点个赞吧
0 人点赞
