原文: https://howtodoinjava.com/spring-mvc/spring-mvc-multi-file-upload-with-progress-bar/
此 Spring MVC 示例演示了如何在进度条中使用多文件上传功能,而服务器端代码是用 Spring MVC 编写的。 我已经修改了 spring MVC 多文件上传示例上一篇文章的代码,该示例没有进度栏功能,而是在新的显示页面上显示了上传的图像和数据。
本示例使用纯 JavaScript 代码和 HTML5 控件来构建客户端代码。 如果您想使用任何 JavaScript 库,例如 jQuery 然后请相应地修改代码。
1. 文件上传和进度栏的客户端视图
在下面的productForm.jsp中给出了 spring MVC 项目中的 JSP 文件-但它仅包含 HTML 代码,因此如果您愿意,可以轻松地放置相同的代码。
该文件具有onUploadProgress()函数,该函数显示上传文件的进度。 还有其他功能可以显示上载过程和支持活动的完成情况。
productForm.jsp
<!DOCTYPE html><html><head><script>var totalFileLength, totalUploaded, fileCount, filesUploaded;//To log everything on consolefunction debug(s) {var debug = document.getElementById('debug');if (debug) {debug.innerHTML = debug.innerHTML + '<br/>' + s;}}//Will be called when upload is completedfunction onUploadComplete(e) {totalUploaded += document.getElementById('files').files[filesUploaded].size;filesUploaded++;debug('complete ' + filesUploaded + " of " + fileCount);debug('totalUploaded: ' + totalUploaded);if (filesUploaded < fileCount) {uploadNext();} else {var bar = document.getElementById('bar');bar.style.width = '100%';bar.innerHTML = '100% complete';alert('Finished uploading file(s)');}}//Will be called when user select the files in file controlfunction onFileSelect(e) {var files = e.target.files; // FileList objectvar output = [];fileCount = files.length;totalFileLength = 0;for (var i = 0; i < fileCount; i++) {var file = files[i];output.push(file.name, ' (', file.size, ' bytes, ', file.lastModifiedDate.toLocaleDateString(), ')');output.push('<br/>');debug('add ' + file.size);totalFileLength += file.size;}document.getElementById('selectedFiles').innerHTML = output.join('');debug('totalFileLength:' + totalFileLength);}//This will continueously update the progress barfunction onUploadProgress(e) {if (e.lengthComputable) {var percentComplete = parseInt((e.loaded + totalUploaded) * 100 / totalFileLength);var bar = document.getElementById('bar');bar.style.width = percentComplete + '%';bar.innerHTML = percentComplete + ' % complete';} else {debug('unable to compute');}}//the Ouchhh !! moments will be captured herefunction onUploadFailed(e) {alert("Error uploading file");}//Pick the next file in queue and upload it to remote serverfunction uploadNext() {var xhr = new XMLHttpRequest();var fd = new FormData();var file = document.getElementById('files').files[filesUploaded];fd.append("multipartFile", file);xhr.upload.addEventListener("progress", onUploadProgress, false);xhr.addEventListener("load", onUploadComplete, false);xhr.addEventListener("error", onUploadFailed, false);xhr.open("POST", "save-product");debug('uploading ' + file.name);xhr.send(fd);}//Let's begin the upload processfunction startUpload() {totalUploaded = filesUploaded = 0;uploadNext();}//Event listeners for button clickswindow.onload = function() {document.getElementById('files').addEventListener('change', onFileSelect, false);document.getElementById('uploadButton').addEventListener('click', startUpload, false);}</script></head><body><div style="width:55%"><h1>HTML5 Ajax Multi-file Upload With Progress Bar</h1><div id='progressBar' style='height: 20px; border: 2px solid green; margin-bottom: 20px'><div id='bar' style='height: 100%; background: #33dd33; width: 0%'></div></div><form style="margin-bottom: 20px"><input type="file" id="files" multiple style="margin-bottom: 20px"/><br/><output id="selectedFiles"></output><input id="uploadButton" type="button" value="Upload" style="margin-top: 20px"/></form><div id='debug' style='height: 100px; border: 2px solid #ccc; overflow: auto'></div></div></body></html>
2. 讨论上传进度功能
上面的代码足以说明问题,您在理解上应该不会遇到任何问题。 但是,让我们总结一下要点:
- “上传” 按钮不是提交按钮。 因此,单击它不会提交包含表单。 实际上,该脚本使用
XMLHttpRequest对象进行上传。 totalFileLength变量保存要上传的文件的总长度。totalUploaded是到目前为止已上传的字节数。fileCount包含要上传的文件数,filesUploaded指示已上传的文件数。window.onload()使用onFileSelect功能映射文件输入元素的更改事件,并使用startUpload映射按钮的单击事件。- 当用户单击“上传”按钮时,将调用
startUpload函数,然后依次调用uploadNext函数。uploadNext上传所选文件集中的下一个文件。 首先创建一个XMLHttpRequest对象和一个FormData对象,接下来要上载的文件将附加到该对象。 - 然后,
uploadNext函数将XMLHttpRequest对象的进度事件附加到onUploadProgress和load事件,并将error事件附加到onUploadComplete和onUploadFailed。 - 在上载进度期间,会反复调用
onUploadProgress功能,从而有机会更新进度条。 - 上载完成后,将调用
onUploadComplete函数。
3. 多个文件上传控制器和模型类
Spring MVC 文件上传控制器和模型类如下所示:
3.1. Spring MVC 多文件上传控制器
DemoProductController.java
package com.howtodoinjava.demo.controller;import java.io.File;import java.io.IOException;import javax.servlet.http.HttpServletRequest;import org.springframework.stereotype.Controller;import org.springframework.ui.Model;import org.springframework.validation.BindingResult;import org.springframework.web.bind.annotation.ModelAttribute;import org.springframework.web.bind.annotation.RequestMapping;import org.springframework.web.multipart.MultipartFile;import com.howtodoinjava.demo.model.UploadedFile;@Controllerpublic class DemoProductController{@RequestMapping("/save-product")public void saveFile(HttpServletRequest servletRequest,@ModelAttribute UploadedFile uploadedFile,BindingResult bindingResult, Model model) {MultipartFile multipartFile = uploadedFile.getMultipartFile();String fileName = multipartFile.getOriginalFilename();try {File file = new File(servletRequest.getServletContext().getRealPath("/image"), fileName);multipartFile.transferTo(file);} catch (IOException e) {e.printStackTrace();}}@RequestMapping(value = "/product-input-form")public String inputProduct(Model model) {return "productForm";}}
3.2. Spring MVC 多文件模型类
UploadedFile.java
package com.howtodoinjava.demo.model;import org.springframework.web.multipart.MultipartFile;public class UploadedFile {private static final long serialVersionUID = 1L;private MultipartFile multipartFile;public MultipartFile getMultipartFile() {return multipartFile;}public void setMultipartFile(MultipartFile multipartFile) {this.multipartFile = multipartFile;}}
4. 用于构建示例的其他文件
4.1. web.xml
<?xml version="1.0" encoding="UTF-8"?><web-app version="3.1"xmlns="http://xmlns.jcp.org/xml/ns/javaee"xmlns:xsi="http://www.w3.org/2001/XMLSchema-instance"xsi:schemaLocation="http://xmlns.jcp.org/xml/ns/javaeehttp://xmlns.jcp.org/xml/ns/javaee/web-app_3_1.xsd"><display-name>Spring Web MVC Hello World Application</display-name><servlet><servlet-name>spring</servlet-name><servlet-class>org.springframework.web.servlet.DispatcherServlet</servlet-class><multipart-config><max-file-size>20848820</max-file-size><max-request-size>418018841</max-request-size><file-size-threshold>1048576</file-size-threshold></multipart-config></servlet><servlet-mapping><servlet-name>spring</servlet-name><url-pattern>/</url-pattern></servlet-mapping></web-app>
4.2. spring-servlet.xml
<beans xmlns="http://www.springframework.org/schema/beans"xmlns:xsi="http://www.w3.org/2001/XMLSchema-instance" xmlns:context="http://www.springframework.org/schema/context" xmlns:mvc="http://www.springframework.org/schema/mvc"xsi:schemaLocation="http://www.springframework.org/schema/beanshttp://www.springframework.org/schema/beans/spring-beans-3.0.xsdhttp://www.springframework.org/schema/context/http://www.springframework.org/schema/context/spring-context-3.0.xsdhttp://www.springframework.org/schema/mvchttp://www.springframework.org/schema/mvc/spring-mvc-3.0.xsd"><context:component-scan base-package="com.howtodoinjava.demo" /><mvc:resources mapping="/image/**" location="/image/" /><bean class="org.springframework.web.servlet.mvc.annotation.AnnotationMethodHandlerAdapter" /><bean class="org.springframework.web.servlet.mvc.annotation.DefaultAnnotationHandlerMapping" /><bean class="org.springframework.web.servlet.view.InternalResourceViewResolver"><property name="prefix" value="/WEB-INF/views/" /><property name="suffix" value=".jsp" /></bean><bean id="messageSource" class="org.springframework.context.support.ResourceBundleMessageSource"><property name="basename" value="messages" /></bean><bean id="multipartResolver" class="org.springframework.web.multipart.support.StandardServletMultipartResolver"></bean></beans>
5. Spring MVC 多个文件上传,带有进度条演示
点击 URL:
http://localhost:8080/springmvcexample/product-input-form
下面的屏幕将在浏览器上加载。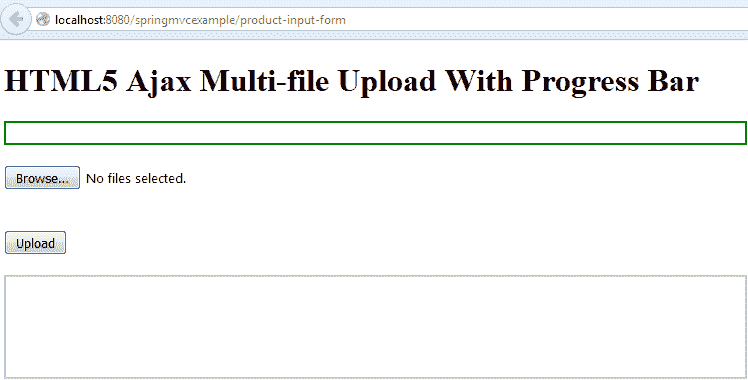
带有进度条的多文件上传 - 输入表单选择文件,然后单击上载按钮
如果一切正常,那么您将获得如下所示的上传进度栏和上传的文件信息。
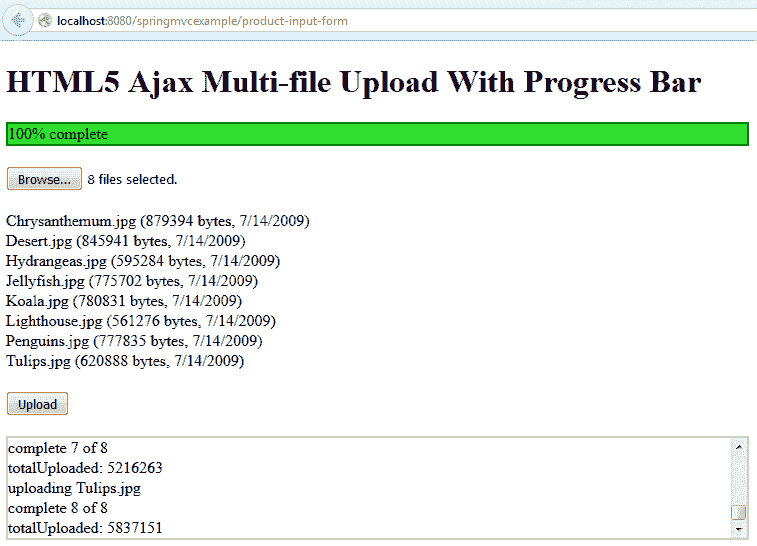
带有进度条的多文件上传 - 上传成功
请给我发送有关 Spring mvc 多文件上传的问题和问题,并提供进度条示例。
学习愉快!

若有收获,就点个赞吧
0 人点赞
