原文: https://howtodoinjava.com/resteasy/jax-rs-resteasy-basic-authentication-and-authorization-tutorial/
安全性是任何企业应用不可或缺的一部分。 安全涉及两个阶段,即认证和授权。 认证可验证您的身份。 授权会验证您有权执行的操作。 在本文中,我们将学习为 REST API 构建基于角色的基本认证/授权安全性。
Sections in this post:Background informationImportant classes/annotations usedBuilding the security interceptorTesting authorization and authentication on REST APIs
背景信息
在本文中,我将尝试解决以下安全问题:
- 从 http 请求获取用户名和密码
- 获取适用的方法安全性详细信息
- 验证用户是否有权访问 API
- 如果访问无效,则返回有效的错误代码
另外,请注意,我正在为您实现以下部分:
- 访问数据库以获取密码,以验证请求中提供的密码
- 从数据库中为有效用户获取允许的角色
我正在重用为 ETag 使用演示编写的代码。 该项目有 2 个主要类:
User.java:代表系统中用户资源的模型类
@XmlAccessorType(XmlAccessType.NONE)@XmlRootElement(name = "user")public class User implements Serializable{@XmlAttribute(name = "id")private int id;@XmlAttribute(name="uri")private String uri;@XmlElement(name = "firstName")private String firstName;@XmlElement(name = "lastName")private String lastName;@XmlElement(name="last-modified")private Date lastModified;//Getters and setters}
UserService.java:此类具有 GET 和 PUT API,用于获取/修改用户资源。
@Path("/user-service")public class UserService{@GET@Path("/users/{id}")public Response getUserById(@PathParam("id") int id, @Context Request req){Response.ResponseBuilder rb = Response.ok(UserDatabase.getUserById(id));return rb.build();}@PUT@Path("/users/{id}")public Response updateUserById(@PathParam("id") int id){//Update the User resourceUserDatabase.updateUser(id);return Response.status(200).build();}}
在本教程中,我将使用上述 2 个 API 并确保它们的安全。
使用的重要类/注解
JAX-RS 提供必要的注解,以在基于 RESTEasy 的应用中实现安全性。 重要的注解是:
javax.annotation.security.PermitAll:此注解应用于 API 时,用于声明任何用户都可以自由访问该 API。 此 API 没有访问限制。javax.annotation.security.DenyAll:此注解用于声明无论分配给任何用户的角色,都不允许任何人访问此 API。javax.annotation.security.RolesAllowed:此注解有助于标识访问该 API 的任何用户都需要哪些角色。 如果通过用户/名称和密码验证了用户,但没有此注解指定的角色,则将不允许该用户访问。javax.ws.rs.core.HttpHeaders:一个接口,提供对与 http 请求一起附加的 HTTP 标头信息的访问。org.jboss.resteasy.util.Base64:此类有助于在 Base64 表示法之间进行编码和解码。
除上述类外,org.jboss.resteasy.spi.interception.PreProcessInterceptor将用于创建安全拦截器。 javax.ws.rs.ext.Provider注解将用于在 resteasy 上下文中注册拦截器。
构建安全拦截器
在构建拦截器之前,请确保 API 的安全。 我在 GET/PUT API 中添加了@PermitAll和@RolesAllowed注解。 GET API 向所有人开放,即没有访问限制。 PUT API 需要具有ADMIN功能的有效用户。
@Path("/user-service")public class UserService{@PermitAll@GET@Path("/users/{id}")public Response getUserById(@PathParam("id") int id, @Context Request req){Response.ResponseBuilder rb = Response.ok(UserDatabase.getUserById(id));return rb.build();}@RolesAllowed("ADMIN")@PUT@Path("/users/{id}")public Response updateUserById(@PathParam("id") int id){//Update the User resourceUserDatabase.updateUser(id);return Response.status(200).build();}}
通过实现org.jboss.resteasy.spi.interception.PreProcessInterceptor接口来构建安全拦截器。 该接口有一个实现类的类需要实现的方法。
public ServerResponse preProcess(HttpRequest request, ResourceMethod methodInvoked)throws Failure, WebApplicationException;
methodInvoked参数提供对方法的访问,该方法将由于调用 REST API 而被调用。
请求参数提供对客户端传递的请求标头和参数的访问。
拦截器类的定义如下:
@Provider@ServerInterceptorpublic class SecurityInterceptor implements PreProcessInterceptor{//more code}
@Provider进行 resteasy 上下文扫描,以将该类添加为上下文类。
@ServerInterceptor注解将此类添加到可用的拦截器列表中。
现在,第一步是检查 API 是否对所有人都打开或对所有人都关闭。 这可以通过检查@PermitAll和@DenyAll注解来完成。
Method method = methodInvoked.getMethod();//Access allowed for allif(method.isAnnotationPresent(PermitAll.class)){return null; //Return null to continue request processing}//Access denied for allif(method.isAnnotationPresent(DenyAll.class)){return ACCESS_FORBIDDEN; //Return access denied to user}
下一步是从请求中获取授权标头。 从授权标头中,我们将检索用户发送的用户名和密码。
//Get request headersfinal HttpHeaders headers = request.getHttpHeaders();//Fetch authorization headerfinal List<String> authorization = headers.getRequestHeader(AUTHORIZATION_PROPERTY);//If no authorization information present; block accessif(authorization == null || authorization.isEmpty()){return ACCESS_DENIED;}//Get encoded username and passwordfinal String encodedUserPassword = authorization.get(0).replaceFirst(AUTHENTICATION_SCHEME + " ", "");//Decode username and passwordString usernameAndPassword;try {usernameAndPassword = new String(Base64.decode(encodedUserPassword));} catch (IOException e) {return SERVER_ERROR;}//Split username and password tokensfinal StringTokenizer tokenizer = new StringTokenizer(usernameAndPassword, ":");final String username = tokenizer.nextToken();final String password = tokenizer.nextToken();
现在,我们将从@RolesAllowed注解中获取访问 API 所需的角色。
RolesAllowed rolesAnnotation = method.getAnnotation(RolesAllowed.class);Set<String> rolesSet = new HashSet<String>(Arrays.asList(rolesAnnotation.value()));
RolesSet包含所有可以允许 API 访问的角色。
现在,在最后一步中,我们必须做两件事。 首先,从任何数据库服务验证用户名和密码,如果用户有效,则获取分配给他的角色。 该角色将用于检查用户的认证成功。
if(rolesSet.contains(userRole)){isAllowed = true;}
SecurityInterceptor.java的完整源代码如下所示:
/*** This interceptor verify the access permissions for a user* based on username and passowrd provided in request* */@Provider@ServerInterceptorpublic class SecurityInterceptor implements PreProcessInterceptor{private static final String AUTHORIZATION_PROPERTY = "Authorization";private static final String AUTHENTICATION_SCHEME = "Basic";private static final ServerResponse ACCESS_DENIED = new ServerResponse("Access denied for this resource", 401, new Headers<Object>());;private static final ServerResponse ACCESS_FORBIDDEN = new ServerResponse("Nobody can access this resource", 403, new Headers<Object>());;private static final ServerResponse SERVER_ERROR = new ServerResponse("INTERNAL SERVER ERROR", 500, new Headers<Object>());;@Overridepublic ServerResponse preProcess(HttpRequest request, ResourceMethod methodInvoked) throws Failure, WebApplicationException{Method method = methodInvoked.getMethod();//Access allowed for allif(method.isAnnotationPresent(PermitAll.class)){return null;}//Access denied for allif(method.isAnnotationPresent(DenyAll.class)){return ACCESS_FORBIDDEN;}//Get request headersfinal HttpHeaders headers = request.getHttpHeaders();//Fetch authorization headerfinal List<String> authorization = headers.getRequestHeader(AUTHORIZATION_PROPERTY);//If no authorization information present; block accessif(authorization == null || authorization.isEmpty()){return ACCESS_DENIED;}//Get encoded username and passwordfinal String encodedUserPassword = authorization.get(0).replaceFirst(AUTHENTICATION_SCHEME + " ", "");//Decode username and passwordString usernameAndPassword;try {usernameAndPassword = new String(Base64.decode(encodedUserPassword));} catch (IOException e) {return SERVER_ERROR;}//Split username and password tokensfinal StringTokenizer tokenizer = new StringTokenizer(usernameAndPassword, ":");final String username = tokenizer.nextToken();final String password = tokenizer.nextToken();//Verifying Username and passwordSystem.out.println(username);System.out.println(password);//Verify user accessif(method.isAnnotationPresent(RolesAllowed.class)){RolesAllowed rolesAnnotation = method.getAnnotation(RolesAllowed.class);Set<String> rolesSet = new HashSet<String>(Arrays.asList(rolesAnnotation.value()));//Is user valid?if( ! isUserAllowed(username, password, rolesSet)){return ACCESS_DENIED;}}//Return null to continue request processingreturn null;}private boolean isUserAllowed(final String username, final String password, final Set<String> rolesSet){boolean isAllowed = false;//Step 1\. Fetch password from database and match with password in argument//If both match then get the defined role for user from database and continue; else return isAllowed [false]//Access the database and do this part yourself//String userRole = userMgr.getUserRole(username);String userRole = "ADMIN";//Step 2\. Verify user roleif(rolesSet.contains(userRole)){isAllowed = true;}return isAllowed;}}
在 REST API 上测试授权和认证
要测试安全代码,请将 Web 应用部署在任何应用服务器(例如 Tomcat)中。 现在,发送以下请求:
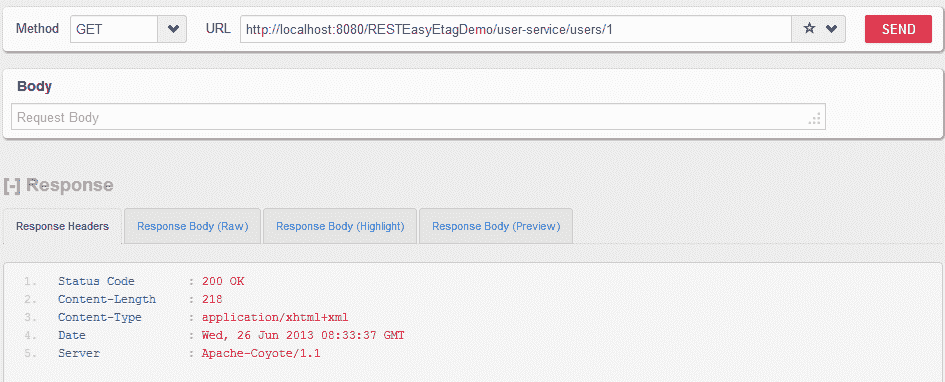
HTTP GET http://localhost:8080/RESTEasyEtagDemo/user-service/users/1,没有用户名和密码
用户能够成功访问 API。

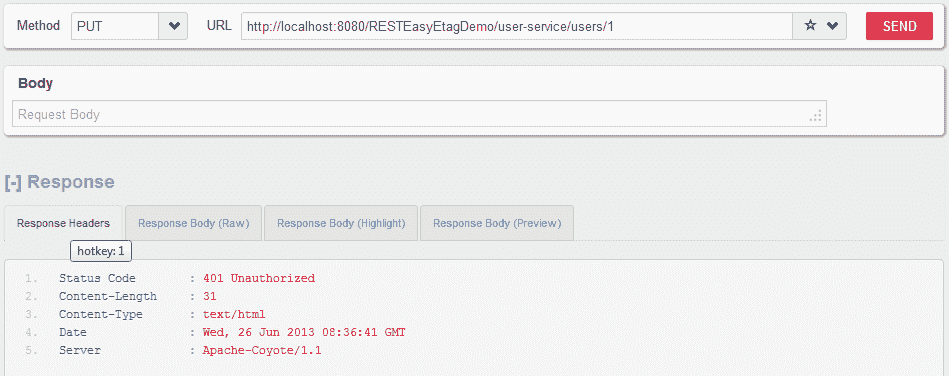
HTTP PUT http://localhost:8080/RESTEasyEtagDemo/user-service/users/1,没有用户名和密码
用户无法访问 API。

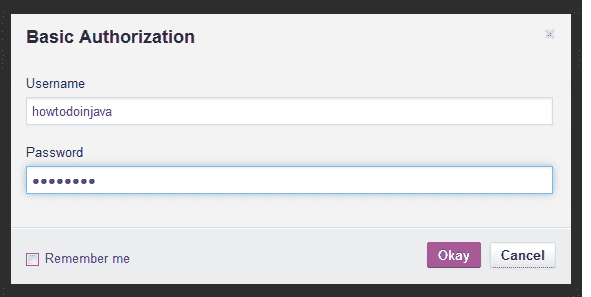
添加基本授权凭证

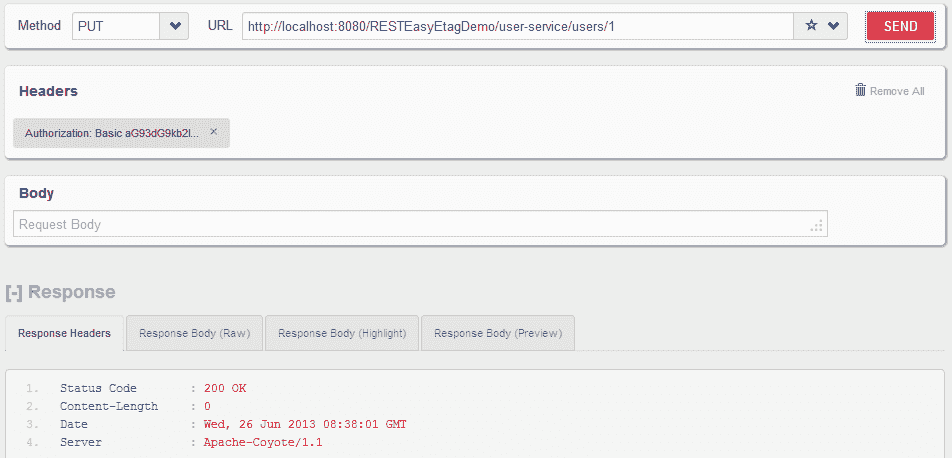
HTTP PUT http://localhost:8080/RESTEasyEtagDemo/user-service/users/1,其中添加了用户名和密码
用户能够访问受保护的 API

这就是本教程中的全部内容。 如果您有任何疑问或建议,请给我评论。
祝您学习愉快!

