原文: https://howtodoinjava.com/jersey/jersey-quickstart-archetype-hello-world-application-example/
在此示例中,我们将使用 Eclipse 中的jersey-quickstart-webapp maven 原型创建一个 jersey RESTful API Web 应用。
Table of ContentsInstall remote archetypes in eclipseCreate new maven project using jersey-quickstart-webappGenerated FilesRun The Application
在 Eclipse 中安装远程原型
在创建实际的 Maven 快速入门应用之前,第一步是在 Eclipse 中安装快速入门定义。 这是非常简单的过程,我已经在上一教程中介绍了此信息。
使用jersey-quickstart-webapp创建新的 Maven 项目
现在,我们创建一个新的 Maven 项目。
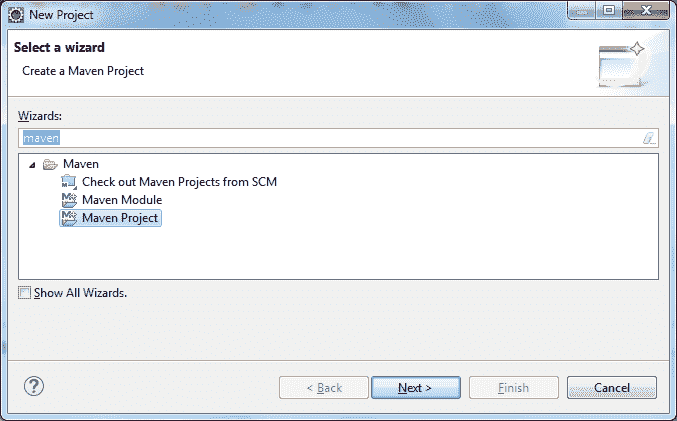
创建新的 maven 项目
选择默认/其他工作区。
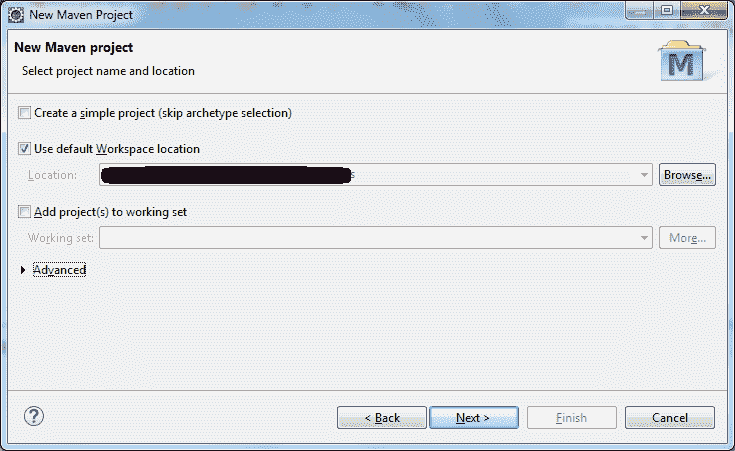
选择工作区位置
选择jersey-quickstart-webapp版本。
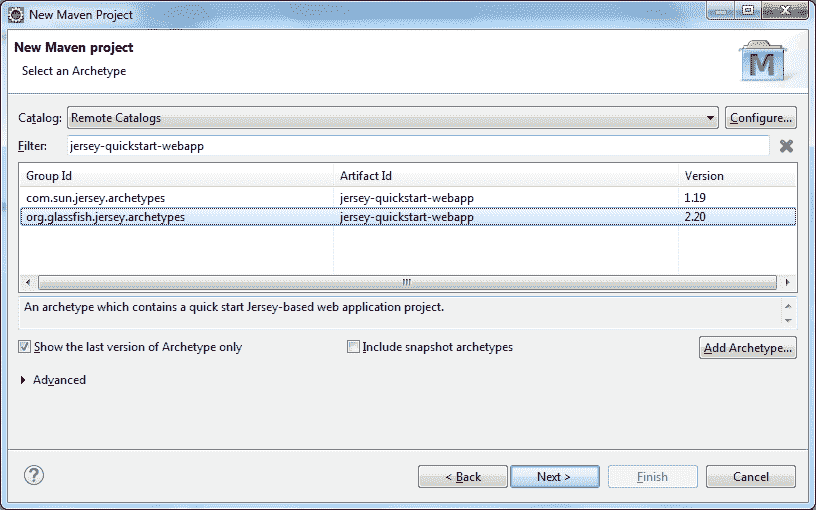
选择jersey-quickstart-webapp版本
填写工件 ID 和组 ID。
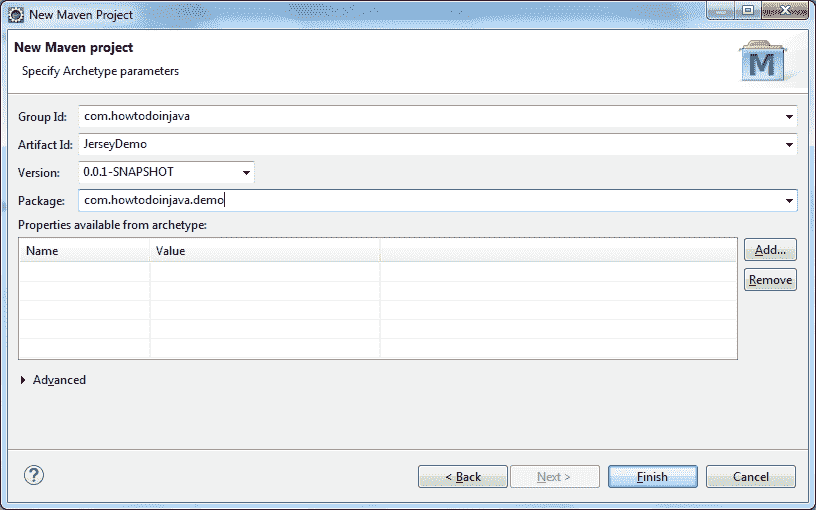
填写工件 ID 和组 ID
点击“确定”以创建该项目。 项目将在工作区中创建。
生成的文件
让我们看一下生成的文件。
文件夹结构
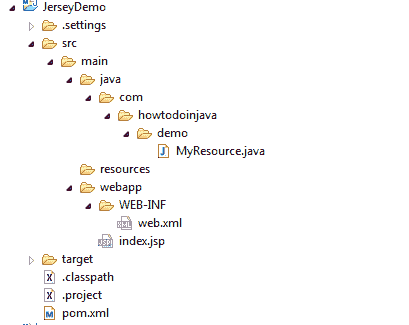
默认生成的文件
web.xml
<?xml version="1.0" encoding="UTF-8"?><!-- This web.xml file is not required when using Servlet 3.0 container,see implementation details https://jax-rs-spec.java.net/ --><web-app xmlns:xsi="http://www.w3.org/2001/XMLSchema-instance" xmlns="http://java.sun.com/xml/ns/javaee" xsi:schemaLocation="http://java.sun.com/xml/ns/javaee http://www.oracle.com/technetwork/java/index.html; version="2.5"><servlet><servlet-name>Jersey Web Application</servlet-name><servlet-class>org.glassfish.jersey.servlet.ServletContainer</servlet-class><init-param><param-name>jersey.config.server.provider.packages</param-name><param-value>com.howtodoinjava.demo</param-value></init-param><load-on-startup>1</load-on-startup></servlet><servlet-mapping><servlet-name>Jersey Web Application</servlet-name><url-pattern>/webapi/*</url-pattern></servlet-mapping></web-app>
pom.xml
<project xmlns="http://maven.apache.org/POM/4.0.0" xmlns:xsi="http://www.w3.org/2001/XMLSchema-instance"xsi:schemaLocation="http://maven.apache.org/POM/4.0.0 http://maven.apache.org/maven-v4_0_0.xsd"><modelVersion>4.0.0</modelVersion><groupId>com.howtodoinjava.demo</groupId><artifactId>JerseyDemo</artifactId><packaging>war</packaging><version>0.0.1-SNAPSHOT</version><name>JerseyDemo</name><build><finalName>JerseyDemo</finalName><plugins><plugin><groupId>org.apache.maven.plugins</groupId><artifactId>maven-compiler-plugin</artifactId><version>2.5.1</version><inherited>true</inherited><configuration><source>1.7</source><target>1.7</target></configuration></plugin></plugins></build><dependencyManagement><dependencies><dependency><groupId>org.glassfish.jersey</groupId><artifactId>jersey-bom</artifactId><version>${jersey.version}</version><type>pom</type><scope>import</scope></dependency></dependencies></dependencyManagement><dependencies><dependency><groupId>org.glassfish.jersey.containers</groupId><artifactId>jersey-container-servlet-core</artifactId><!-- use the following artifactId if you don't need servlet 2.x compatibility --><!-- artifactId>jersey-container-servlet</artifactId --></dependency><!-- uncomment this to get JSON support<dependency><groupId>org.glassfish.jersey.media</groupId><artifactId>jersey-media-moxy</artifactId></dependency>--></dependencies><properties><jersey.version>2.20</jersey.version><project.build.sourceEncoding>UTF-8</project.build.sourceEncoding></properties></project>
MyResource.java
package com.howtodoinjava.demo;import javax.ws.rs.GET;import javax.ws.rs.Path;import javax.ws.rs.Produces;import javax.ws.rs.core.MediaType;/*** Root resource (exposed at "myresource" path)*/@Path("myresource")public class MyResource {/*** Method handling HTTP GET requests. The returned object will be sent* to the client as "text/plain" media type.** @return String that will be returned as a text/plain response.*/@GET@Produces(MediaType.TEXT_PLAIN)public String getIt() {return "Got it!";}}
运行应用
为了打招呼,您无需在此项目中做任何事情。 一切都已配置。 只需部署应用。
匹配网址:http://localhost:8080/JerseyDemo/webapi/myresource
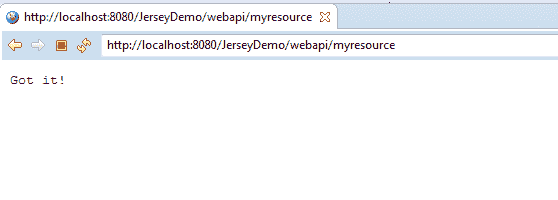
应用输出
将我的问题放在评论部分。
祝您学习愉快!

