原文: https://howtodoinjava.com/jersey/jax-rs-jersey-ajax-multi-file-upload-example/
了解如何结合使用 Ajax 和 JAX-RS 网络服务(示例中使用 Jersey)一次性上传多个文件。 还要看看基于表单的文件上传示例和文件下载示例。

Table of ContentsJersey maven multipart dependencyAdd MultiPartFeatureWrite Upload REST APIHTML/Ajax codeDemo of Multiple files upload
Jersey Maven 多部分依赖
要使用多部分功能,您需要将jersey-media-multipart模块以及其他必需的模块添加到pom.xml文件中。
<project xmlns="http://maven.apache.org/POM/4.0.0"xmlns:xsi="http://www.w3.org/2001/XMLSchema-instance"xsi:schemaLocation="http://maven.apache.org/POM/4.0.0http://maven.apache.org/xsd/maven-4.0.0.xsd;<modelVersion>4.0.0</modelVersion><groupId>com.howtodoinjava.jersey</groupId><artifactId>JerseyDemos</artifactId><version>0.0.1-SNAPSHOT</version><packaging>war</packaging><repositories><repository><id>maven2-repository.java.net</id><name>Java.net Repository for Maven</name><url>http://download.java.net/maven/2/</url><layout>default</layout></repository></repositories><properties><jersey2.version>2.19</jersey2.version><jaxrs.version>2.0.1</jaxrs.version></properties><dependencies><!-- JAX-RS --><dependency><groupId>javax.ws.rs</groupId><artifactId>javax.ws.rs-api</artifactId><version>${jaxrs.version}</version></dependency><!-- Jersey2.19 --><dependency><groupId>org.glassfish.jersey.containers</groupId><artifactId>jersey-container-servlet</artifactId><version>${jersey2.version}</version></dependency><dependency><groupId>org.glassfish.jersey.core</groupId><artifactId>jersey-server</artifactId><version>${jersey2.version}</version></dependency><dependency><groupId>org.glassfish.jersey.core</groupId><artifactId>jersey-client</artifactId><version>${jersey2.version}</version></dependency><dependency><groupId>org.glassfish.jersey.media</groupId><artifactId>jersey-media-multipart</artifactId><version>${jersey2.version}</version></dependency></dependencies><build><finalName>JerseyDemos</finalName><plugins><plugin><artifactId>maven-compiler-plugin</artifactId><configuration><source>1.7</source><target>1.7</target></configuration></plugin></plugins></build></project>
添加MultiPartFeature
此外,还需要在 Jersey 配置中添加MultiPartFeature,以使其知道您将使用多部分请求。 最简单的方法是通过web.xml文件添加支持。
<!DOCTYPE web-app PUBLIC"-//Sun Microsystems, Inc.//DTD Web Application 2.3//EN""http://java.sun.com/dtd/web-app_2_3.dtd" ><web-app><display-name>Archetype Created Web Application</display-name><servlet><servlet-name>jersey-serlvet</servlet-name><servlet-class>org.glassfish.jersey.servlet.ServletContainer</servlet-class><init-param><param-name>jersey.config.server.provider.packages</param-name><param-value>com.howtodoinjava.jersey</param-value></init-param><init-param><param-name>jersey.config.server.provider.classnames</param-name><param-value>org.glassfish.jersey.filter.LoggingFilter;org.glassfish.jersey.media.multipart.MultiPartFeature</param-value></init-param><load-on-startup>1</load-on-startup></servlet><servlet-mapping><servlet-name>jersey-serlvet</servlet-name><url-pattern>/rest/*</url-pattern></servlet-mapping></web-app>
编写上传 REST API
现在编写服务层 JAX-RS API,它实际上将具有将上传的文件存储在服务器上的逻辑。
package com.howtodoinjava.jersey;import java.io.File;import java.io.FileOutputStream;import java.io.IOException;import java.io.InputStream;import java.io.OutputStream;import javax.ws.rs.Consumes;import javax.ws.rs.POST;import javax.ws.rs.Path;import javax.ws.rs.WebApplicationException;import javax.ws.rs.core.MediaType;import javax.ws.rs.core.Response;import org.glassfish.jersey.media.multipart.FormDataContentDisposition;import org.glassfish.jersey.media.multipart.FormDataParam;@Path("/upload")public class JerseyService{@POST@Path("/pdf")@Consumes({MediaType.MULTIPART_FORM_DATA})public Response uploadPdfFile( @FormDataParam("file") InputStream fileInputStream,@FormDataParam("file") FormDataContentDisposition fileMetaData) throws Exception{String UPLOAD_PATH = "c:/temp/";try{int read = 0;byte[] bytes = new byte[1024];OutputStream out = new FileOutputStream(new File(UPLOAD_PATH + fileMetaData.getFileName()));while ((read = fileInputStream.read(bytes)) != -1){out.write(bytes, 0, read);}out.flush();out.close();} catch (IOException e){throw new WebApplicationException("Error while uploading file. Please try again !!");}return Response.ok(fileMetaData.getFileName() + " uploaded successfully !!").build();}}
HTML/Ajax 代码
是时候看看客户端代码了。 我编写了一个功能非常简单的非常简单的文件。 如果您要对其进行某些特定的更改,请告诉我。
<!DOCTYPE html PUBLIC "-//W3C//DTD XHTML 1.0 Strict//EN""http://www.w3.org/TR/xhtml1/DTD/xhtml1-strict.dtd"><html xmlns="http://www.w3.org/1999/xhtml" xml:lang="en" lang="en"><head><meta content="text/html;charset=utf-8" http-equiv="Content-Type" /><meta content="utf-8" http-equiv="encoding" /><script src="./js/jquery.min.js"></script><script type="text/javascript">$(document).ready(function(){$("#uploadBtn").click(function(){$('input[name="file"]').each(function(index, value){var file = value.files[0];if(file){var formData = new FormData();formData.append('file', file);$.ajax({url : '/JerseyDemos/rest/upload/pdf',type : 'POST',data : formData,cache : false,contentType : false,processData : false,success : function(data, textStatus, jqXHR) {var message = jqXHR.responseText;$("#messages").append("<li>" + message + "</li>");},error : function(jqXHR, textStatus, errorThrown) {$("#messages").append("<li style='color: red;'>" + textStatus + "</li>");}});}});});});</script></head><body><h1>JAX-RS Multi-file Upload Example</h1><form action="rest/upload/pdf" method="post" enctype="multipart/form-data"><p>Select file 1: <input type="file" name="file" size="45" accept=".pdf" /></p><p>Select file 2: <input type="file" name="file" size="45" accept=".pdf" /></p><p>Select file 3: <input type="file" name="file" size="45" accept=".pdf" /></p><p><input id="uploadBtn" type="button" value="Upload PFD Files" /></p></form><ul id="messages"></ul></body></html>
多个文件上传演示
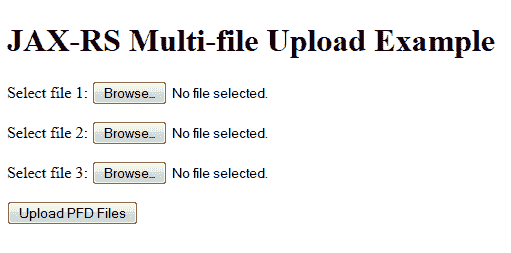
演示时间。 在服务器上部署应用,然后单击 URL:http://localhost:8080/JerseyDemos/fileUpload.html

Jersey 多文件上传示例 – 空白表格
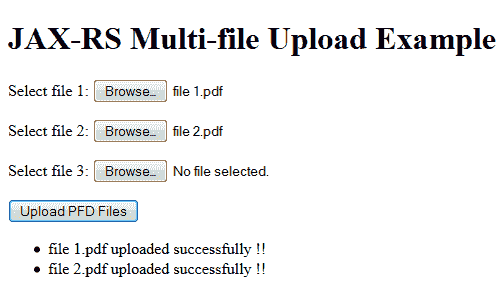
现在选择两个/三个文件,然后单击上载按钮。 您将在屏幕上看到以下消息。 文件也将存储在服务器上。

Jersey 多文件上传成功
在评论框中让我知道您的问题。
祝您学习愉快!

