原文: https://howtodoinjava.com/junit5/code-test-templates-eclipse/
Eclipse 对 JUnit 测试用例提供了强大的工具支持。 在 Eclipse 中配置用于 JUnit 测试用例的代码模板是加快测试开发速度的重要功能。 在 Eclipse 中学习创建和导入 JUnit5 测试模板。
JUnit5 测试模板
在以下模板文件中给出的配置三个 JUnit5 模板方法,即
@BeforeEach注解的setUp()@AfterEach注解的tearDown()@Test注解的testXXX()
当您使用test()模板时,它将自动添加以下导入语句:
import static org.junit.jupiter.api.Assertions.*;
它可以直接使用所有静态assertXXX()方法进行测试。
<?xml version="1.0" encoding="UTF-8" standalone="no"?><templates><template autoinsert="true" context="java" deleted="false" description="JUnit5 BeforeEach" enabled="true" name="setup (JUnit5)">${:import(org.junit.jupiter.api.BeforeEach)}@BeforeEachpublic void setUp() {${cursor}}</template><template autoinsert="true" context="java" deleted="false" description="JUnit5 AfterEach" enabled="true" name="teardown (JUnit5)">${:import(org.junit.jupiter.api.AfterEach)}@AfterEachpublic void tearDown() {${cursor}}</template><template autoinsert="false" context="java-members" deleted="false" description="JUnit5 test method" enabled="true" id="org.eclipse.jdt.ui.templates.test" name="test (JUnit5)">${:import(org.junit.jupiter.api.Test)}@Testpublic void test${name}() {${staticImport:importStatic('org.junit.jupiter.api.Assertions.*')}${cursor}}</template></templates>
将此 XML 保存到您首选位置的文件中。 我们将在下一步中导入该文件。
将代码模板导入 Eclipse
- Eclipse:Window -> 首选项
- Java -> 编辑器 -> 模板
- 导入…
- 选择文件
- 验证特定于 JUnit5 的模板名称“
setup(JUnit5)”,“teardown(JUnit5)”和“test(JUnit5)”
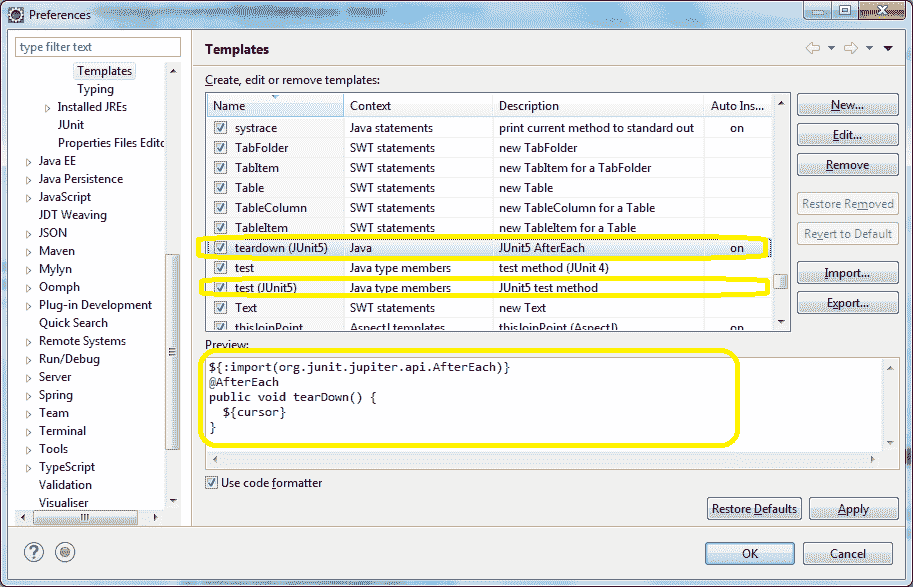
JUnit5 Eclipse 的测试模板
如何使用测试模板
要使用模板,请将光标放在新行中,然后输入 2-3 个模板方法的缩写。 现在点击CTRL+ENTER。 它将以下面的方式打开一个弹出窗口。
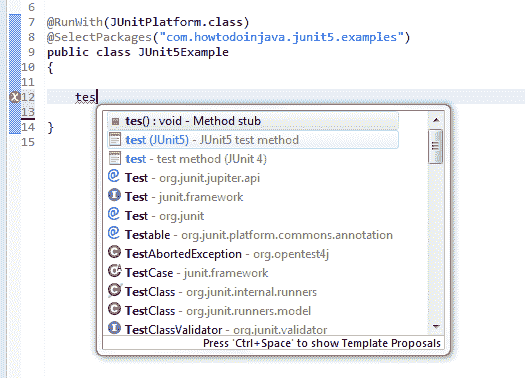
使用 JUnit5 Eclipse 的测试模板
使用向上或向下箭头键选择模板方法,然后按Enter。
它将生成放置光标的模板代码
将我的问题放在评论部分。
学习愉快!

若有收获,就点个赞吧
0 人点赞
