图像轮廓
基本理论
轮廓可以简单地解释为连接所有连续点(沿着边界)的曲线,具有相同的颜色或强度。轮廓是形状分析和物体检测和识别的有用工具。
- 处理轮廓时,使用的是二进制图像,首先应该使用阈值处理或者边缘检测( canny )
- cv2.findContours(), cv2.drawContours()
findContours(image, mode, method[, contours[, hierarchy[, offset]]]) -> contours, hierarchy
- image: 源图像
- mode: 轮廓检索模式
- cv2.RETR_EXTERNAL 只检测最外层轮廓
- cv2.RETR_LIST 提取所有轮廓,并放置在 list 中。建立的轮廓不建立等级关系
- cv2.RETR_CCOMP 提取所有轮廓,并将其组织为双层结构,顶层为连通域的外围边界,第二层为孔的内层边界,若孔内还有物体轮廓,则将其放在第一层
- cv2.RETR_TREE 提取所有轮廓,并重新建立网状的轮廓结构
- cv2.RETR_FLOODFILL
- method: 轮廓的近似方法
- cv2.CHAIN_APPROX_NONE 获取每个轮廓的像素,相邻的两个点的像素位置差不超过1
- cv2.CHAIN_APPROX_SIMPLE 压缩水平方向,垂直方向,对角线方向的元素,只保留该方向的终点坐标,如一个矩形需要四个坐标来保存轮廓信息
- cv2.CHAIN_APPROX_TC89_KCOS、cv2.CHAIN_APPROX_TC89_L1: 应用 Teh-Chin 链式近似算法的一个
- contours: 检测到的轮廓保存的地方,每个轮廓保存为一个点向量
- hierarchy: 包含图像的拓扑信息,图像的层次结构
- offset: ROI 图像时用到的参数
参数说明
drawContours(image, contours, contourIdx, color[, thickness[, lineType[, hierarchy[, maxLevel[, offset]]]]]) -> image
- image:
- contours: 轮廓保存信息的参数,数据结构为列表
- contourIdx: 轮廓绘制的标志量,若为负数,则代表绘制所有轮廓
- color: 颜色
- thickness: 轮廓线条粗细,默认值为 1,若为负值,则绘制在轮廓内部
- lineType: 线条类型默认为 cv2.LINE_8 (8 连通线型)、cv2.LINE_4(4 连通线型)、cv2.LINE_AA (抗锯齿线型)
- hierarchy: 层次结构信息
- maxLevel: 绘制轮廓的最大等级默认 cv2.INTER_MAX
- offset: 轮廓偏移参数
例程
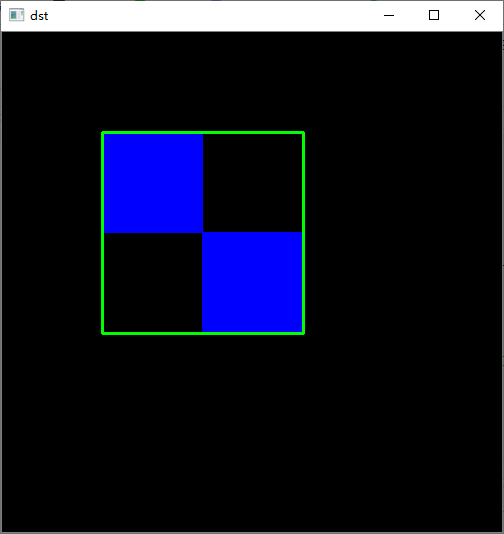
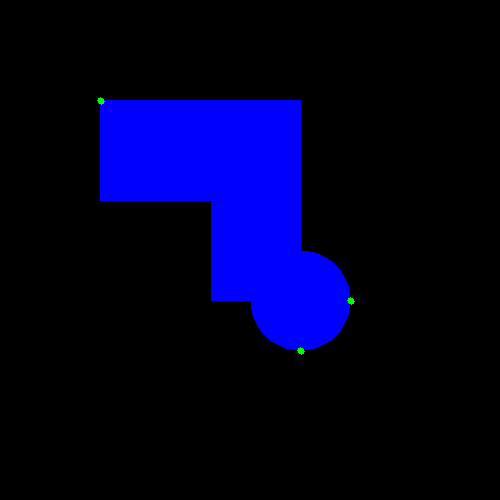
import cv2import numpy as npimg = np.zeros((300, 300, 3), dtype=np.uint8)cv2.rectangle(img, (100, 100), (200, 200), (255, 255, 255), -1)cv2.circle(img, (250, 250), 30, (255, 255, 255), -1)#img = cv2.imread("./sample_img/back.jpg")imgray = cv2.cvtColor(img, cv2.COLOR_BGR2GRAY)ret, thresh = cv2.threshold(imgray, 127, 255, 0)# findContours 只能处理二值图像contours, hierarchy = cv2.findContours(thresh, cv2.RETR_TREE, cv2.CHAIN_APPROX_SIMPLE)count = len(contours)for i in range(count):if i % 2 == 0:cv2.drawContours(img, contours, i, (0, 255, 0), 2, lineType=cv2.LINE_8, hierarchy=hierarchy)else:cv2.drawContours(img, contours, i, (0, 0, 255), 2, lineType=cv2.LINE_8, hierarchy=hierarchy)cv2.imshow("img", img)cv2.waitKey(0)cv2.destroyAllWindows()

import cv2import numpy as npimg = cv2.imread("./sample_img/contours.jpg")imgray = cv2.cvtColor(img, cv2.COLOR_BGR2GRAY)ret, thresh = cv2.threshold(imgray, 119, 255, 0)contours, hierarchy = cv2.findContours(thresh, cv2.RETR_CCOMP, cv2.CHAIN_APPROX_SIMPLE)img = cv2.drawContours(img, contours, -1, (0, 255, 0), 2,lineType=cv2.LINE_AA, hierarchy=hierarchy)cv2.imshow("img", img)cv2.imshow("thresh", thresh)cv2.waitKey(0)cv2.destroyAllWindows()

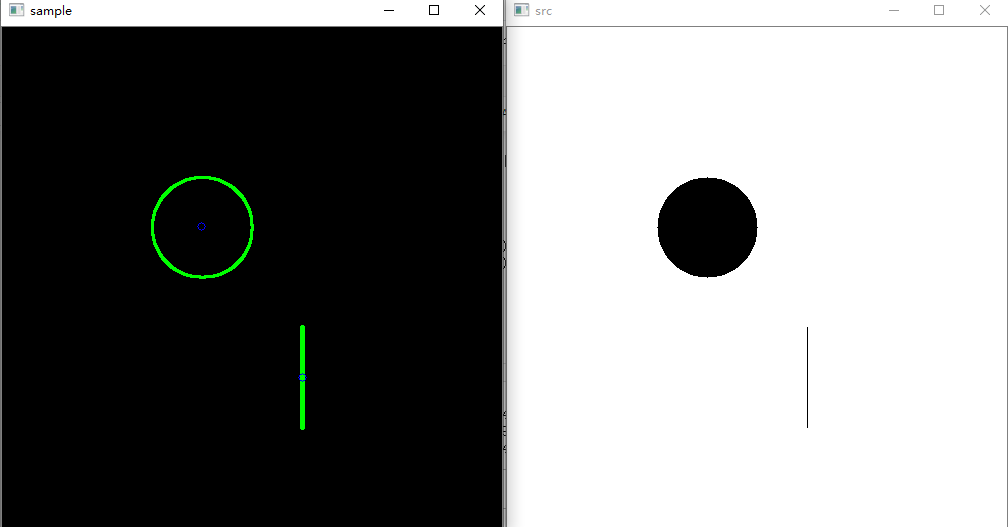
import cv2import numpy as npdef contours_demo(img):#dst = cv2.GaussianBlur(img, (3, 3), 0)gray = cv2.cvtColor(img, cv2.COLOR_BGR2GRAY)ret, binary = cv2.threshold(gray, 0, 255, cv2.THRESH_BINARY | cv2.THRESH_OTSU)cv2.imshow("binary image", binary)contours, hieriachy = cv2.findContours(binary, cv2.RETR_EXTERNAL, cv2.CHAIN_APPROX_SIMPLE)for i, contour in enumerate(contours):cv2.drawContours(img, contours, i, (0, 0, 255), 2)#print(i)cv2.imshow("detect contours", img)src = cv2.imread("./sample_img/circle.png")cv2.imshow("src", src)contours_demo(src)cv2.waitKey(0)cv2.destroyAllWindows()

凸包检测及其他轮廓特征

convexHull(points[, hull[, clockwise[, returnPoints]]]) -> hull
- points: 输入的二维点集
- hull: 返回的结果,即凸包
- clockwise: 操作方向标识符 True:凸包为顺时针,False:逆时针。且设定 x 轴指向右, y 轴指向上方
- returnPoints: 操作标识符,默认为 True:返回凸包的各个点,False:返回凸包各个点的指数
简易例程
import cv2import numpy as npimport randomdef contours_demo(img):#dst = cv2.GaussianBlur(img, (3, 3), 0)#gray = cv2.cvtColor(img, cv2.COLOR_BGR2GRAY)ret, binary = cv2.threshold(img, 0, 255, cv2.THRESH_BINARY | cv2.THRESH_OTSU)#cv2.imshow("binary image", binary)contours, hieriachy = cv2.findContours(binary, cv2.RETR_EXTERNAL, cv2.CHAIN_APPROX_SIMPLE)#for i, contour in enumerate(contours):# cv2.drawContours(img, contours, i, (0, 0, 255), 2)#print(i)cv2.imshow("detect contours", img)return contoursimg = np.zeros((600, 600), dtype=np.uint8)for i in range(30):x = random.randint(200, 250)y = random.randint(200, 250)#print(x, y)cv2.circle(img, (x, y), 10, 255, -1)contours = contours_demo(img)cnt = contours[0]hull = cv2.convexHull(cnt)hullcount = hull.shape[0]for i in range(hullcount-1):x0 = hull[i][0][0]y0 = hull[i][0][1]x1 = hull[i+1][0][0]y1 = hull[i+1][0][1]cv2.line(img, (x0, y0), (x1, y1), 255, 2)if i == hullcount-2:#print(x1, y1)x2 = hull[0][0][0]y2 = hull[0][0][1]cv2.line(img, (x1, y1), (x2, y2), 255, 2)cv2.imshow("dst", img)cv2.waitKey(0)cv2.destroyAllWindows()

综合例程
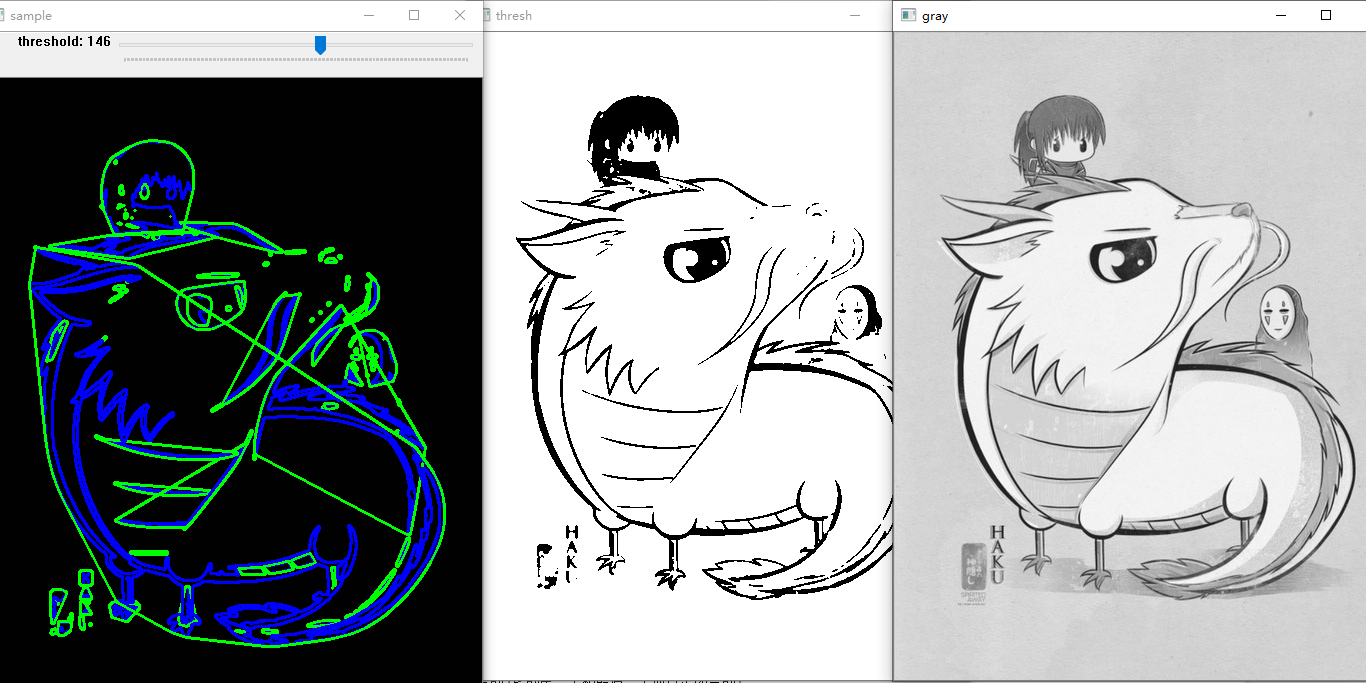
import cv2import numpy as npimport randomdef convexHull_demo(img, sample, threshold):gray = cv2.cvtColor(img, cv2.COLOR_BGR2GRAY)cv2.imshow("gray", gray)blur = cv2.GaussianBlur(gray, (3, 3), 0)ret, thresh = cv2.threshold(blur, threshold, 255, cv2.THRESH_BINARY)cv2.imshow("thresh", thresh)contours, hierachy = cv2.findContours(thresh, cv2.RETR_LIST, cv2.CHAIN_APPROX_SIMPLE)hull = []for i in range(len(contours)-1):hull.append(cv2.convexHull(contours[i], True))for i in range(len(contours)-1): # 减 1 的作用是去掉图像最外层的轮廓,但是有些图像没有cv2.drawContours(sample, contours, i, (255, 0, 0), 2, cv2.LINE_8, hierachy)cv2.drawContours(sample, hull, i, (0, 255, 0), 2, cv2.LINE_8)cv2.imshow("sample", sample)def nothing(x):passcv2.namedWindow("sample")cv2.createTrackbar("threshold", "sample", 0, 255, nothing)img = cv2.imread("./sample_img/contours_2.jpg", 1)while(1):sample = np.ones_like(img)threshold = cv2.getTrackbarPos("threshold", "sample")#print(threshold)convexHull_demo(img, sample, threshold)k = cv2.waitKey(1) & 0xffif k == 27:breakcv2.destroyAllWindows()
轮廓近似
approxPolyDP(curve, epsilon, closed[, approxCurve]) -> approxCurve 以指定的精度近似多边形曲线
- curve 二维矩阵
- epsilon 指定近似精度的参数 epsilon = rate*cv2.arcLength(contours[i], True) # rate 为趋近的比例 如取 0.1, 0.01
- closed 如果为真,则近似值曲线是闭合的(它的第一个和最后一个顶点是闭合的)
import cv2import numpy as npimport randomimg = np.zeros((500, 500, 3), dtype=np.uint8)cv2.rectangle(img, (200, 200), (400, 400), 255, -1)cv2.rectangle(img, (250, 200), (260, 220), 0, -1)cv2.rectangle(img, (200, 300), (220, 320), 0, -1)gray = cv2.cvtColor(img, cv2.COLOR_BGR2GRAY)_, binary = cv2.threshold(gray, 0, 255, cv2.THRESH_BINARY | cv2.THRESH_OTSU)contours, hieriachy = cv2.findContours(binary, cv2.RETR_EXTERNAL, cv2.CHAIN_APPROX_SIMPLE)count = len(contours)rate = 0.01 # 不同的取值会有不同的结果for i in range(count):epsilon = rate*cv2.arcLength(contours[i], True)approx = cv2.approxPolyDP(contours[i], epsilon, True)cv2.drawContours(img, approx, -1, (0, 0, 255), 10)for i in range(len(approx)-1):pt1 = (approx[i][0][0], approx[i][0][1])pt2 = (approx[i+1][0][0], approx[i+1][0][1])cv2.line(img, pt1, pt2, (0, 255, 0), 1)t = 1if t == 1:cv2.line(img, (approx[0][0][0], approx[0][0][1]), (approx[len(approx)-1][0][0], approx[len(approx)-1][0][1]), (0, 255, 0), 1)t = t + 1cv2.imshow("dst "+str(rate), img)cv2.waitKey(0)cv2.destroyAllWindows()

矩形边框
import cv2import numpy as npimport randomimg = np.zeros((500, 500, 3), dtype=np.uint8)cv2.rectangle(img, (100, 100), (200, 200), 255, -1)cv2.rectangle(img, (200, 200), (300, 300), 255, -1)gray = cv2.cvtColor(img, cv2.COLOR_BGR2GRAY)_, binary = cv2.threshold(gray, 0, 255, cv2.THRESH_BINARY+cv2.THRESH_OTSU)contours, hieriachy = cv2.findContours(binary, cv2.RETR_EXTERNAL, cv2.CHAIN_APPROX_SIMPLE)count = len(contours)for i in range(count):x, y, w, h = cv2.boundingRect(contours[i])img = cv2.rectangle(img, (x, y), (x+w, y+h), (0, 255, 0), 2)cv2.imshow("dst", img)cv2.waitKey(0)cv2.destroyAllWindows()
旋转矩形
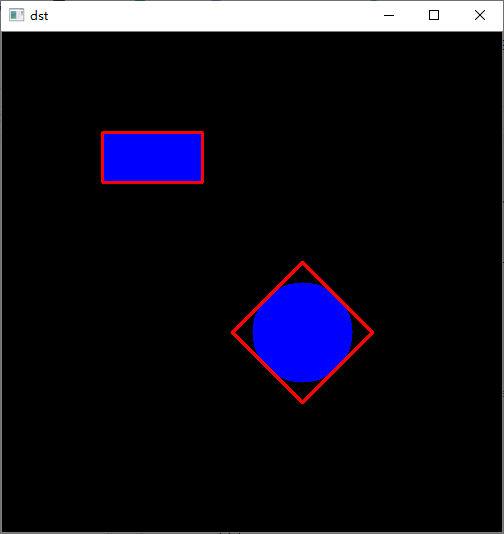
import cv2import numpy as npimport randomimg = np.zeros((500, 500, 3), dtype=np.uint8)cv2.rectangle(img, (100, 100), (200, 150), 255, -1)#cv2.rectangle(img, (200, 200), (300, 300), 255, -1)cv2.circle(img, (300, 300), 50, 255, -1)gray = cv2.cvtColor(img, cv2.COLOR_BGR2GRAY)_, binary = cv2.threshold(gray, 0, 255, cv2.THRESH_BINARY+cv2.THRESH_OTSU)contours, hieriachy = cv2.findContours(binary, cv2.RETR_EXTERNAL, cv2.CHAIN_APPROX_SIMPLE)count = len(contours)for i in range(count):rect = cv2.minAreaRect(contours[i]) # 返回 ((center_x, center_y), h, w, degree)print(rect)box = cv2.boxPoints(rect)box = np.int0(box)img = cv2.drawContours(img,[box],0,(0,0,255),2)cv2.imshow("dst", img)cv2.waitKey(0)cv2.destroyAllWindows()
((300.0, 300.0), (98.99495697021484, 98.99495697021484), -45.0)((150.0, 125.0), (50.0, 100.0), -90.0)
最小封闭圆
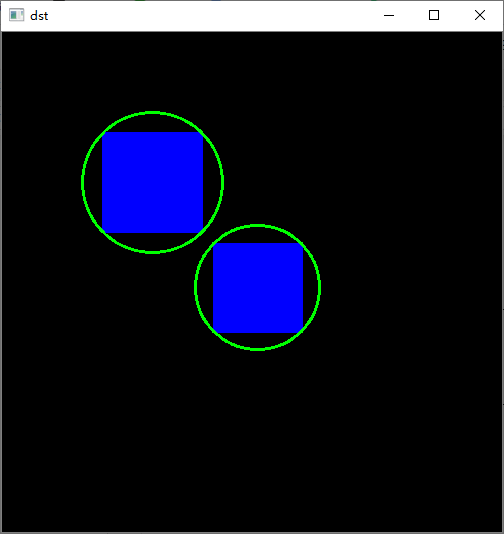
import cv2import numpy as npimport randomimg = np.zeros((500, 500, 3), dtype=np.uint8)cv2.rectangle(img, (100, 100), (200, 200), 255, -1)cv2.rectangle(img, (211, 211), (300, 300), 255, -1)#cv2.circle(img, (300, 300), 50, 255, -1)gray = cv2.cvtColor(img, cv2.COLOR_BGR2GRAY)_, binary = cv2.threshold(gray, 0, 255, cv2.THRESH_BINARY+cv2.THRESH_OTSU)contours, hieriachy = cv2.findContours(binary, cv2.RETR_EXTERNAL, cv2.CHAIN_APPROX_SIMPLE)count = len(contours)for i in range(count):(x, y), radius = cv2.minEnclosingCircle(contours[i])center = (int(x), int(y))radius = int(radius)img = cv2.circle(img, center, radius, (0, 255, 0), 2)cv2.imshow("dst", img)cv2.waitKey(0)cv2.destroyAllWindows()
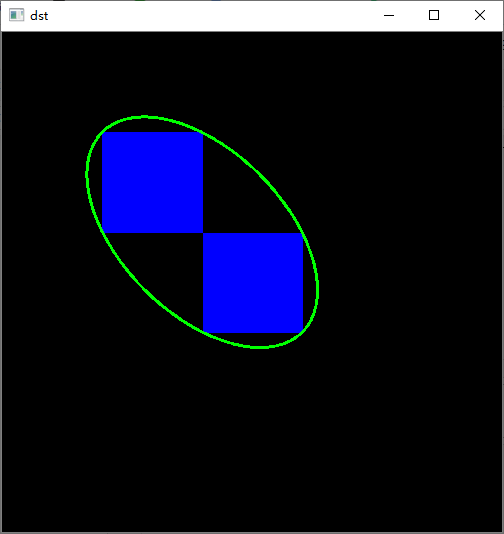
拟合椭圆 (至少需要 5 个点)
import cv2import numpy as npimport randomimg = np.zeros((500, 500, 3), dtype=np.uint8)cv2.rectangle(img, (100, 100), (200, 200), 255, -1)cv2.rectangle(img, (201, 201), (300, 300), 255, -1)#cv2.circle(img, (300, 300), 50, 255, -1)gray = cv2.cvtColor(img, cv2.COLOR_BGR2GRAY)_, binary = cv2.threshold(gray, 0, 255, cv2.THRESH_BINARY+cv2.THRESH_OTSU)contours, hieriachy = cv2.findContours(binary, cv2.RETR_EXTERNAL, cv2.CHAIN_APPROX_SIMPLE)count = len(contours)for i in range(count):ellipse = cv2.fitEllipse(contours[i])img = cv2.ellipse(img,ellipse,(0,255,0),2)cv2.imshow("dst", img)cv2.waitKey(0)cv2.destroyAllWindows()
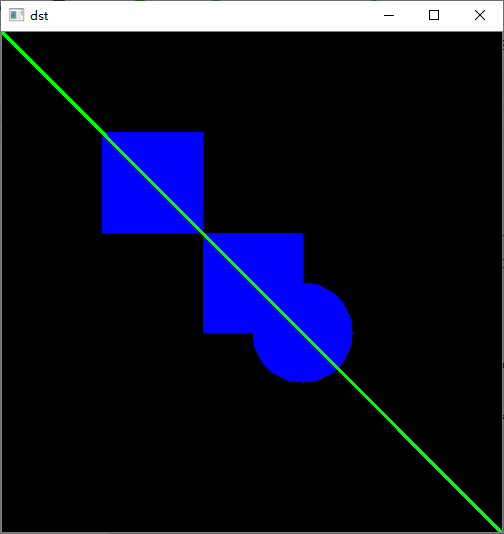
拟合直线
import cv2import numpy as npimport randomimg = np.zeros((500, 500, 3), dtype=np.uint8)cv2.rectangle(img, (100, 100), (200, 200), 255, -1)cv2.rectangle(img, (201, 201), (300, 300), 255, -1)cv2.circle(img, (300, 300), 50, 255, -1)gray = cv2.cvtColor(img, cv2.COLOR_BGR2GRAY)_, binary = cv2.threshold(gray, 0, 255, cv2.THRESH_BINARY+cv2.THRESH_OTSU)contours, hieriachy = cv2.findContours(binary, cv2.RETR_EXTERNAL, cv2.CHAIN_APPROX_SIMPLE)count = len(contours)for i in range(count):rows, cols = img.shape[:2][vx, vy, x, y] = cv2.fitLine(contours[i], cv2.DIST_L2, 0, 0.01, 0.01)lefty = int((-x*vy/vx) + y)righty = int(((cols-x)*vy/vx)+y)img = cv2.line(img, (cols-1, righty), (0, lefty), (0, 255, 0), 2)cv2.imshow("dst", img)cv2.waitKey(0)cv2.destroyAllWindows()
轮廓属性
纵横比(Aspect Ratio) 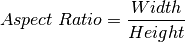
extent :是物体面积与边界矩形面积的比值 
Solidity :坚实度是等高线面积与其凸包面积之比。
Equivalent Diameter :等效直径是面积与等值线面积相等的圆的直径。

Orientation 方向是物体所指向的角度
最大最小值及其位置
import cv2import numpy as npimport randomimg = np.zeros((500, 500, 3), dtype=np.uint8)cv2.rectangle(img, (100, 100), (300, 200), (255, 2, 0), -1)cv2.rectangle(img, (211, 201), (300, 300), 255, -1)#cv2.circle(img, (300, 300), 50, 255, -1)gray = cv2.cvtColor(img, cv2.COLOR_BGR2GRAY)_, binary = cv2.threshold(gray, 0, 255, cv2.THRESH_BINARY+cv2.THRESH_OTSU)contours, hieriachy = cv2.findContours(binary, cv2.RETR_EXTERNAL, cv2.CHAIN_APPROX_SIMPLE)count = len(contours)cnt = contours[0]x, y, w, h = cv2.boundingRect(cnt)aspect_ratio = float(w)/hprint("横纵比:", aspect_ratio)area = cv2.contourArea(cnt)x, y, w, h = cv2.boundingRect(cnt)rect_area = w*hextent = float(area)/rect_areaprint("extent", extent)area = cv2.contourArea(cnt)hull = cv2.convexHull(cnt)hull_area = cv2.contourArea(hull)solidity = float(area)/hull_areaprint("solidity", solidity)area = cv2.contourArea(cnt)equi_diameter = np.sqrt(4*area/np.pi)print("equi_diameter", equi_diameter)(x, y), (MA, ma), angle = cv2.fitEllipse(cnt) # 返回的是椭圆的外切矩形print((x, y), (MA, ma))mask = np.zeros(gray.shape, np.uint8)cv2.drawContours(mask, [cnt], 0, 255, -1)pixelpoints = np.transpose(np.nonzero(mask))print(pixelpoints)#pixelpoints = cv2.findNonZero(mask) # Numpy 里面的方法min_val, max_val, min_loc, max_loc = cv2.minMaxLoc(gray,mask = mask)print(min_val, max_val, min_loc, max_loc)mean_val = cv2.mean(img,mask = mask)print(mean_val)cv2.imshow("dst", img)cv2.waitKey(0)cv2.destroyAllWindows()
横纵比: 1.0extent 0.715341204425633solidity 0.838911465892598equi_diameter 191.826117780188(217.58111572265625, 178.86651611328125) (220.607177734375, 291.5225524902344)[[100 100][100 101][100 102]...[300 298][300 299][300 300]]29.0 30.0 (211, 201) (100, 100)(255.0, 1.3856864953414558, 0.0, 0.0)
极端点
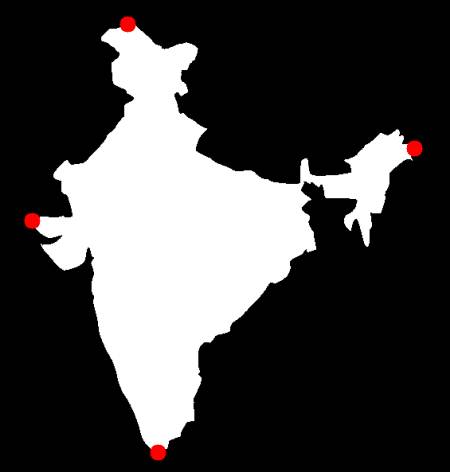
import cv2import numpy as npimport randomimg = np.zeros((500, 500, 3), dtype=np.uint8)cv2.rectangle(img, (100, 100), (300, 200), 255, -1)cv2.rectangle(img, (211, 201), (300, 300), 255, -1)cv2.circle(img, (300, 300), 50, 255, -1)gray = cv2.cvtColor(img, cv2.COLOR_BGR2GRAY)_, binary = cv2.threshold(gray, 0, 255, cv2.THRESH_BINARY+cv2.THRESH_OTSU)contours, hieriachy = cv2.findContours(binary, cv2.RETR_EXTERNAL, cv2.CHAIN_APPROX_SIMPLE)count = len(contours)cnt = contours[0]leftmost = tuple(cnt[cnt[:, :, 0].argmin()][0])rightmost = tuple(cnt[cnt[:, :, 0].argmax()][0])topmost = tuple(cnt[cnt[:, :, 1].argmin()][0])bottommost = tuple(cnt[cnt[:, :, 1].argmax()][0])cv2.line(img, leftmost, (leftmost[0]+1, leftmost[1]+1), (0, 255, 0), 5)cv2.line(img, rightmost, (rightmost[0]+1, rightmost[1]+1), (0, 255, 0), 5)cv2.line(img, topmost, (topmost[0]+1, topmost[1]+1), (0, 255, 0), 5)cv2.line(img, bottommost, (bottommost[0]+1, bottommost[1]+1), (0, 255, 0), 5)cv2.imshow("dst", img)cv2.waitKey(0)cv2.destroyAllWindows()
图像的矩
图像矩的应用广泛,包括模式识别、目标分类、目标识别、方位估计、图像编码与重构。
图像矩描述的是图像形状的全局特征,包括图像中不同类型的几何特性。如大小、位置、方向、形状等。
一阶矩与形状有关、二阶矩显示曲线围绕直线平均值的扩展程度,三阶矩是关于平均值的对称性的测量。二阶矩和三阶矩可以导出共 7 个不变矩,而不变矩是图像的同居特性,满足平移、伸缩、旋转均不变的不变性,应用广泛。
moments(array[, binaryImage]) -> retval 计算图像所有的矩(最高为三阶矩)
- array: 二维数组
- binaryImage: bool 类型,默认 False,若为 True 则所有非 0 像素为 1
contourArea(contour[, oriented]) -> retval 计算轮廓面积
- contour: 轮廓点(二维)
- oriented: bool 类型,面向区域标识符。为 True 返回一个带符号的面积值,正负取决于轮廓的方向,可以根据该标识符确定轮廓的位置。默认参数为 False 返回绝对值
arcLength(curve, closed) -> retval 计算轮廓长度(轮廓周长,曲线长度)
- curve: 二维点集
- closed: bool 类型,指示曲线是否封闭的标识符。默认封闭
简易例程
import cv2import numpy as np# 创建一个特殊的案例来说明img = np.ones((500, 500, 3), dtype=np.uint8)*255cv2.circle(img, (200, 200), 50, (0, 0, 0), -1)cv2.line(img, (300, 300), (300, 400), (0, 0, 0), 1)# 正常图片测试#img = cv2.imread("./sample_img/Moments.jpg")gray = cv2.cvtColor(img, cv2.COLOR_BGR2GRAY)blur = cv2.GaussianBlur(gray, (3, 3), 0)canny = cv2.Canny(blur, 0, 100, 3)contours, hierarchy = cv2.findContours(canny, cv2.RETR_TREE, cv2.CHAIN_APPROX_SIMPLE)count = len(contours)moment = [] # 计算矩for i in range(count):moment.append(cv2.moments(contours[i], False))mc = [] # 质心area = [] # 面积length = [] # 长度for i in range(count): # 计算中心矩(质心)if moment[i]['m00'] != 0:cx = int(moment[i]['m10']/moment[i]['m00'])cy = int(moment[i]['m01']/moment[i]['m00'])else:cx = cy = 9999mc.append([cx, cy])area.append(cv2.contourArea(contours[i]))length.append(cv2.arcLength(contours[i], True))print(str(i), "m00:", moment[i]["m00"],"opencv area:", area[i], "length:", length[i])sample = np.zeros_like(img)for i in range(count):cv2.drawContours(sample, contours, i, (0, 255, 0), 2, 8, hierarchy)cv2.circle(sample, (int(mc[i][0]), int(mc[i][1])), 4, (255, 0, 0))cv2.imshow("src", img)cv2.imshow("sample", sample)cv2.waitKey(0)cv2.destroyAllWindows()
0 m00: 204.0 opencv area: 204.0 length: 208.01 m00: 202.0 opencv area: 202.0 length: 205.656854152679442 m00: 7866.0 opencv area: 7866.0 length: 332.048772811889653 m00: 7820.0 opencv area: 7820.0 length: 329.70562267303467
带阈值调节例程
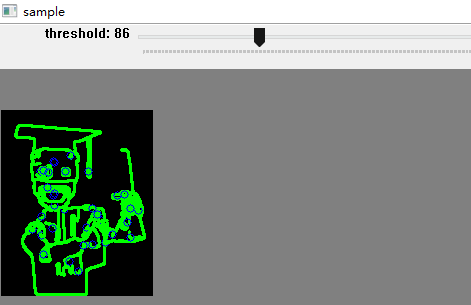
以下程序适合小图片处理,大图片会耗费大量内存,特别是在绘制轮廓的时候
import cv2import numpy as npimport timedef moment_demo(img, sample, threshold):canny = cv2.Canny(img, threshold, threshold*2, 3)contours, hierarchy = cv2.findContours(canny, cv2.RETR_TREE, cv2.CHAIN_APPROX_SIMPLE)count = len(contours)#moment = [] # 计算矩area = []length = []moment = [cv2.moments(contours[i], False) for i in range(count)]# cx, cy 为质心计算公式cx = [int(moment[i]['m10']/moment[i]['m00']) if (moment[i]['m00'] != 0) else 9999 for i in range(count)]cy = [int(moment[i]['m01']/moment[i]['m00']) if (moment[i]['m00'] != 0) else 9999 for i in range(count)]area = [cv2.contourArea(contours[i]) for i in range(count)]length = [cv2.arcLength(contours[i], True) for i in range(count)]for i in range(count): # 这里会耗费很大的内存cv2.drawContours(sample, contours, i, (0, 255, 0), 2, 8, hierarchy) # 绘制轮廓cv2.circle(sample, (int(cx[i]), int(cy[i])), 4, (255, 0, 0)) # 绘制质心#print(str(i), "m00:", moment[i]["m00"],"opencv area:", area[i], "length:", length[i])def nothing(x):passcv2.namedWindow("sample")cv2.createTrackbar("threshold", "sample", 1, 255, nothing)img = cv2.imread("./sample_img/ml.png")gray = cv2.cvtColor(img, cv2.COLOR_BGR2GRAY)blur = cv2.GaussianBlur(gray, (3, 3), 0)while(1):t0 = time.time()sample = np.zeros_like(img)threshold = cv2.getTrackbarPos("threshold", "sample")moment_demo(blur, sample,threshold)#print(time.time()-t0)cv2.imshow("sample", sample)if (cv2.waitKey(1) & 0xff) == 27:breakcv2.destroyAllWindows()
分水岭算法
灰度图像的像素值当作海拔的高度,在极小值处打一个小孔,将水注入,得到一个分水岭
watershed(image, markers) -> markers
- image:
- makers:
例程
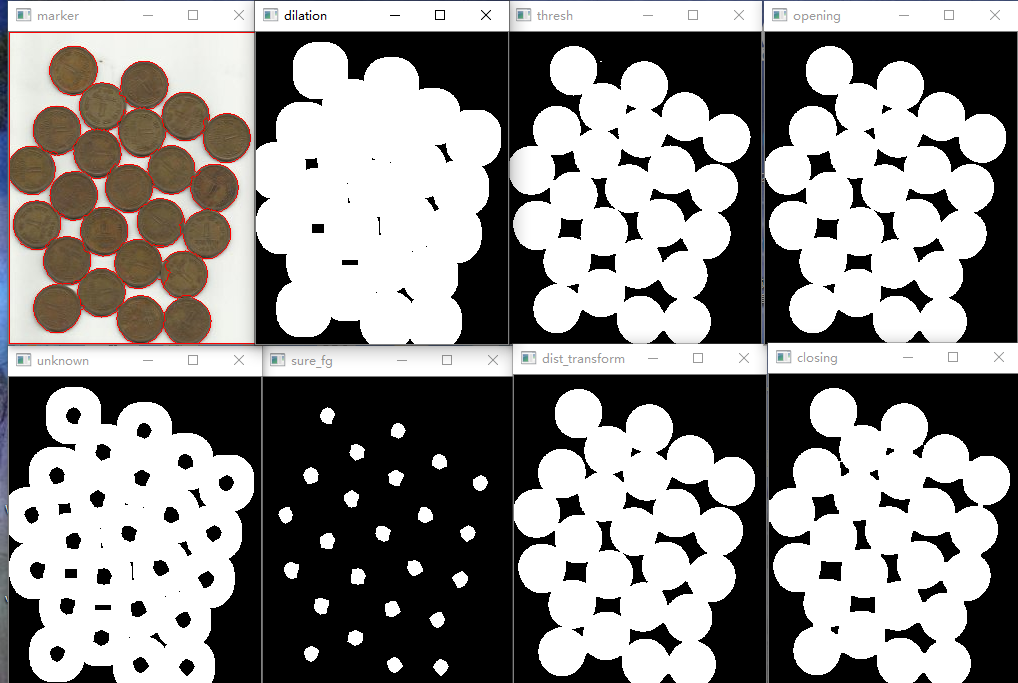
使用分水岭算法和距离变换分割相互接触的物体
# %matplotlib notebookimport cv2import numpy as npimport matplotlib.pyplot as pltdef opening_demo(img):kernel = cv2.getStructuringElement(cv2.MORPH_RECT, (5, 5))opening = cv2.morphologyEx(img, cv2.MORPH_OPEN, kernel)# opening = cv2.morphologyEx(img, 2, kernel) # 同上cv2.imshow("opening", opening)return openingdef closing_demo(img):kernel = cv2.getStructuringElement(cv2.MORPH_RECT, (3, 3))closing = cv2.morphologyEx(img, 3, kernel)cv2.imshow("closing", closing)return closingdef dilation_demo(img):kernel = cv2.getStructuringElement(cv2.MORPH_RECT, (5, 5))dilation = cv2.dilate(img, kernel, iterations=2)cv2.imshow("dilation", dilation)return dilationdef distanceTransform_demo(gray):"""src: 8 位单通道"""dis_transform = cv2.distanceTransform(src=gray,distanceType=cv2.DIST_L2,maskSize=5)scale = cv2.convertScaleAbs(dis_transform)normalize = cv2.normalize(dis_transform, None, 255,0, cv2.NORM_MINMAX, cv2.CV_8UC1)cv2.imshow("dis_transform", dis_transform)#cv2.imshow("scale", scale)cv2.imshow("normalize", normalize)return normalizedef watershed_demo(img):gray = cv2.cvtColor(img, cv2.COLOR_BGR2GRAY)ret, thresh = cv2.threshold(gray, 0, 255, cv2.THRESH_BINARY_INV+cv2.THRESH_OTSU) # 看看二值化后的效果cv2.imshow("thresh", thresh)# 用开运算去除白点噪声opening = opening_demo(thresh)# 用闭运算去除物体上的孔洞closing = closing_demo(opening)# 膨胀物体的边界,可以确保物体的区域被保留,包含了前景物和一部分背景sure_bg = dilation_demo(closing)# 距离变换dist_transform = distanceTransform_demo(opening)# 确定前景物,大概率能确定为前景物的形状ret, sure_fg = cv2.threshold(dist_transform, 0.7*dist_transform.max(), 255, 0)cv2.imshow("sure_fg", sure_fg)sure_fg = np.uint8(sure_fg)# 获得一块区域,该区域是前景物与背景交界的一部分unknown = cv2.subtract(sure_bg, sure_fg)cv2.imshow("unknown", unknown)# Marker labelling 创建一个模板用来标记不同的区域,把连通的区域绘制不同的标签# 未知区域标记为 0,其他区域标记为不同的整数_, markers = cv2.connectedComponents(sure_fg)# 使模板加 1 ,确保背景不是 0markers = markers + 1# 使背景标记为 0markers[unknown==255] = 0plt.imshow(markers, cmap='jet') # 画出 jet 形式的图,可以清晰的看出每个硬币的位置plt.title("markers jet")plt.xticks([]), plt.yticks([])# 用 OpenCV 的方式显示 colormap,但是色彩没有 plt 画出来的色彩丰富colormap = cv2.applyColorMap(src=np.uint8(markers), colormap=cv2.COLORMAP_JET)cv2.imshow("colormap", colormap)# 分水岭算法,得到的边界标记为 -1markers = cv2.watershed(img, markers)cv2.imshow("marker", markers)img[markers == -1] = [0,0,255] # 若为 -1 代表是边界cv2.imshow("dst", img)def main():img = cv2.imread('./sample_img/water_coins.jpg')#img = cv2.resize(img, (1366, 768))watershed_demo(img)main()cv2.waitKey(0) # 等有键输入或者1000ms后自动将窗口消除,0表示只用键输入结束窗口cv2.destroyAllWindows() # 关闭所有窗口
# %matplotlib notebookimport cv2import numpy as npimport matplotlib.pyplot as pltdef opening_demo(img):kernel = cv2.getStructuringElement(cv2.MORPH_RECT, (5, 5))opening = cv2.morphologyEx(img, cv2.MORPH_OPEN, kernel)# opening = cv2.morphologyEx(img, 2, kernel) # 同上cv2.imshow("opening", opening)return openingdef closing_demo(img):kernel = cv2.getStructuringElement(cv2.MORPH_RECT, (3, 3))closing = cv2.morphologyEx(img, 3, kernel)cv2.imshow("closing", closing)return closingdef dilation_demo(img):kernel = cv2.getStructuringElement(cv2.MORPH_RECT, (5, 5))dilation = cv2.dilate(img, kernel, iterations=2)cv2.imshow("dilation", dilation)return dilationdef watershed_demo(img):gray = cv2.cvtColor(img, cv2.COLOR_BGR2GRAY)ret, thresh = cv2.threshold(gray, 0, 255, cv2.THRESH_BINARY_INV+cv2.THRESH_OTSU) # 看看二值化后的效果cv2.imshow("thresh", thresh)# 用开运算去除白点噪声opening = opening_demo(thresh)# 用闭运算去除物体上的孔洞closing = closing_demo(opening)# 膨胀物体的边界,可以确保物体的区域不饿保留sure_bg = dilation_demo(closing)dist_transform = cv2.distanceTransform(opening, cv2.DIST_L2, 5)cv2.imshow("dist_transform", dist_transform)ret, sure_fg = cv2.threshold(dist_transform, 0.7*dist_transform.max(), 255, 0)cv2.imshow("sure_fg", sure_fg)sure_fg = np.uint8(sure_fg)unknown = cv2.subtract(sure_bg, sure_fg)cv2.imshow("unknown", unknown)# Marker labelling 创建一个模板用来标记不同的区域# 未知区域标记为 0,其他区域标记为不同的整数ret, markers = cv2.connectedComponents(sure_fg)# 使模板加 1 ,确保背景不是 0markers = markers + 1# 使背景标记为 0markers[unknown==255] = 0plt.imshow(markers, cmap='jet') # 画出 jet 形式的图,可以清晰的看出每个硬币的位置plt.xticks([]), plt.yticks([])markers = cv2.watershed(img, markers)img[markers == -1] = [0,0,255]cv2.imshow("marker", img)def main():img = cv2.imread('./sample_img/water_coins.jpg')#img = cv2.resize(img, (1366, 768))watershed_demo(img)main()cv2.waitKey(0) # 等有键输入或者1000ms后自动将窗口消除,0表示只用键输入结束窗口cv2.destroyAllWindows() # 关闭所有窗口
更多资料
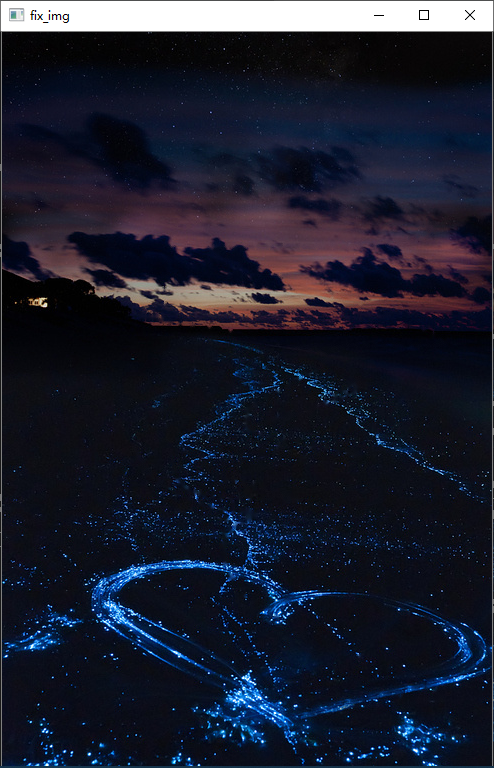
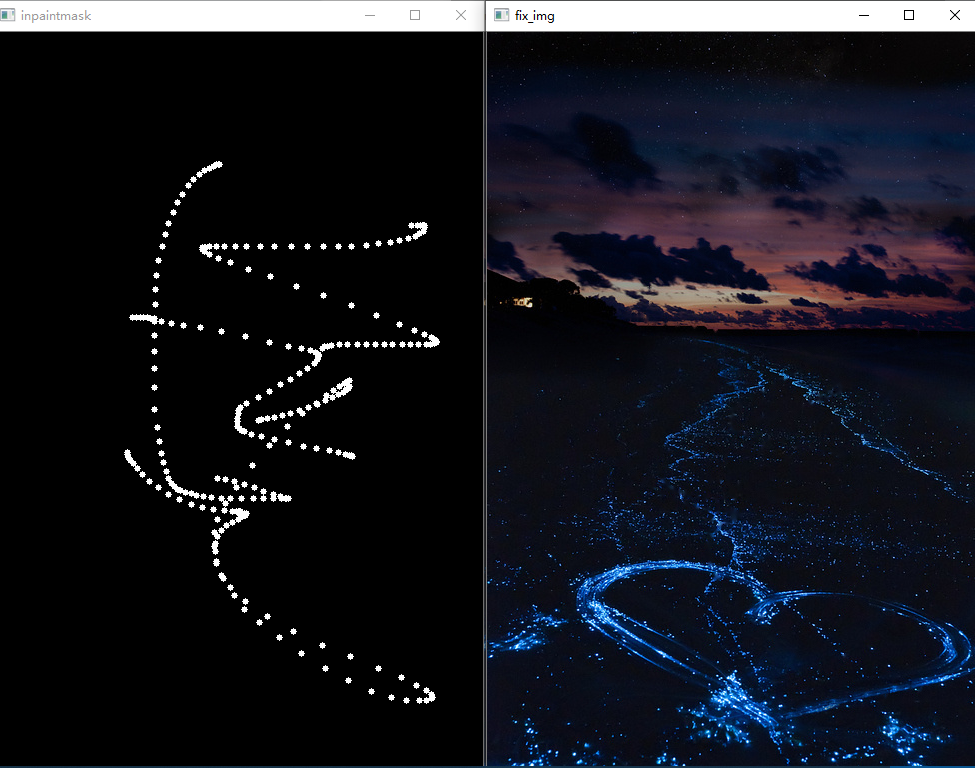
图像修复
inpaint(src, inpaintMask, inpaintRadius, flags[, dst]) -> dst
- src: 源图像 8 位单通道或三通道图像
- inpaintMask:修复掩模,为 8 位单通道图像。非 0 像素表示要修复的图像
- inpaintRadius:double 需要修补的每个点的圆形邻域,为修复算法的参考半径
- flags:修复方法标识符
- cv2.INPAINT_NS 基于 Navier-Stokes 方程
- cv2.INPAINT_TELEA Alexandru Telea
import cv2import numpy as npdrawing = False # 鼠标按下为 Trueix, iy = -1, -1def on_mouse(event, x, y, flags, param):global ix, iy, drawingif event == cv2.EVENT_LBUTTONDOWN: # 鼠标放下drawing = Trueix, iy = x, y # 鼠标放下时的坐标elif event == cv2.EVENT_MOUSEMOVE: # 鼠标移动if drawing == True:cv2.line(img, (x, y), (x, y), (255, 255, 255), 5)cv2.line(inpaintmask, (x, y), (x, y), 255, 5)elif event == cv2.EVENT_LBUTTONUP: # 鼠标提起,结束绘制drawing = Falseimg = cv2.imread("./sample_img/inpaint.jpg")cv2.namedWindow("image")cv2.setMouseCallback("image", on_mouse) # 功能绑定inpaintmask = np.zeros((img.shape[0], img.shape[1]), dtype=np.uint8)while(1):cv2.imshow("image", img)cv2.imshow("inpaintmask", inpaintmask)k = cv2.waitKey(1) & 0xFFif k == ord('c'):cv2.imwrite("./sample_img/inpaint_2.jpg", img)if k == ord('f'):fix_img = cv2.inpaint(img, inpaintmask, 2, cv2.INPAINT_TELEA)cv2.imshow("fix_img", fix_img)if k == 27:breakcv2.destroyAllWindows()

若有收获,就点个赞吧
0 人点赞
