- 下载安装Vue-CLI
- 创建项目
- vue.config.js
- [单元测试]Jest
- [单元测试]e2e-cypress
- Vue3+TypeScript项目搭建过程中报错
- VSCode插件ESLint+Prettier+vetur代码格式化冲突
- Error: Cannot find module ‘vue-loader-v16/package.json’
- [vue/no-multiple-template-root]The template root requires exactly one element.eslint-plugin-vue
- 找不到模块“”@aomao/engine””或其相应的类型声明。ts(2307)
- ‘vue/comment-directive’ — error in the end of public/index.html just after vue-cli installation
- Delete
␍eslintprettier/prettier
前言:前端工程化开发总结,使用Vue-CLI脚手架搭建Vue3.x + Typescript项目,整体项目的环境配置。
下载安装Vue-CLI
- 官方文档:Vue CLI 🛠️ Vue.js 开发的标准工具
查看版本:npm install -g @vue/cli# oryarn global add @vue/cli# orcnpm install -g @vue/cli
vue --version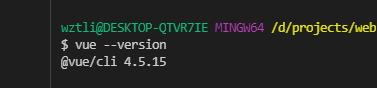
创建项目
新建并初始化项目文件夹
选择最后一项自定义相关配置vue create vue3-cli-demo
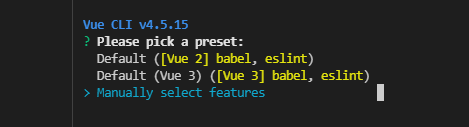
全配置搭建测试
vue.config.js
Vue项目的配置文件(详查:https://cli.vuejs.org/zh/config/#vue-config-js)module.exports = {// 打包的目录outputDir: 'dist',// 在保存时校验格式lintOnSave: true,// 生产环境是否生成 SourceMapproductionSourceMap: false,devServer: {// 启动服务后是否打开浏览器open: true,// 错误信息展示到页面overlay: {warnings: true,errors: true},host: '0.0.0.0',port: 8066, // 服务端口https: false,hotOnly: false,// proxy: { // 设置代理// '/api': {// target: host,// changeOrigin: true,// pathRewrite: {// '/api': '/',// }// },// },},}
[单元测试]Jest
Vue3.x+TypeScript项目下的jest单元测试
官网API:https://next.vue-test-utils.vuejs.org/api/jest.config.js
项目搭建成功之后的默认配置如下:
更改如下配置module.exports = {preset: '@vue/cli-plugin-unit-jest/presets/typescript-and-babel',transform: {'^.+\\.vue$': 'vue-jest',},}
/** @Author: wztlink1013* @Date: 2021-12-25 14:49:37* @LastEditTime: 2021-12-26 14:56:39* @Description:*/module.exports = {preset: '@vue/cli-plugin-unit-jest/presets/typescript-and-babel',// 测试的文件类型moduleFileExtensions: ['js', 'jsx', 'json', 'vue', 'ts', 'tsx'],// 转化方式transform: {'^.+\\.vue$': '<rootDir>/node_modules/vue-jest','.+\\.(css|styl|less|sass|scss|svg|png|jpg|ttf|woff|woff2)$':'<rootDir>/node_modules/jest-transform-stub','^.+\\.jsx?$': '<rootDir>/node_modules/babel-jest','^.+\\.tsx?$': '<rootDir>/node_modules/ts-jest',},// 不进行匹配的目录transformIgnorePatterns: ['<rootDir>/node_modules/'],// 匹配哪些文件进行测试testMatch: ['**/tests/unit/**/*.spec.[jt]s?(x)', '**/__tests__/*.[jt]s?(x)'],// @符号 表示当前项目下的srcmoduleNameMapper: {'^@/(.*)$': '<rootDir>/src/$1',},// 将保存的快照测试结果进行序列化,使得其更美观snapshotSerializers: ['jest-serializer-vue'],}
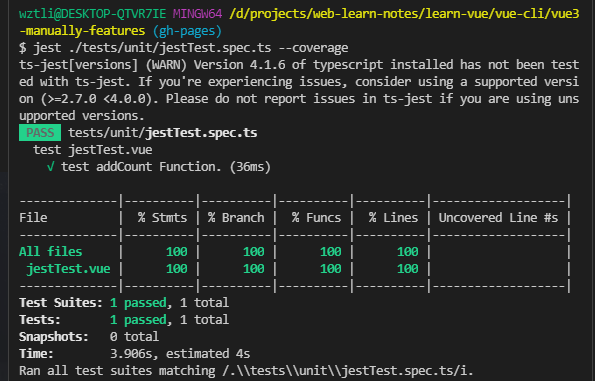
单个文件的单元测试
项目下运行单元测试命令test:unit默认测试所有测试文件,不能指定文件进行单元测试。
在本地下载全局jest然后指定命令去执行项目的单个文件单个测试
cnpm install jest --global
然后执行
jest ./tests/unit/jestTest.spec.ts
或
npx jest ./tests/unit/jestTest.spec.ts
空白项目下的jest单元测试
初始化npm插件项目
npm init -y
下载Jest和babel依赖
cnpm i @babel/core @babel/preset-env jest@24.8.0 -D
创建测试文件
创建测试框架用的文件index.js和index.test.js两个文件index.js
/** @Descripttion:* @Date: 2021-12-07 20:08:15* @LastEditTime: 2021-12-07 20:08:16*/export const add = (a, b) => {return a + b;};export const reduce = (a, b) => {return a - b;};
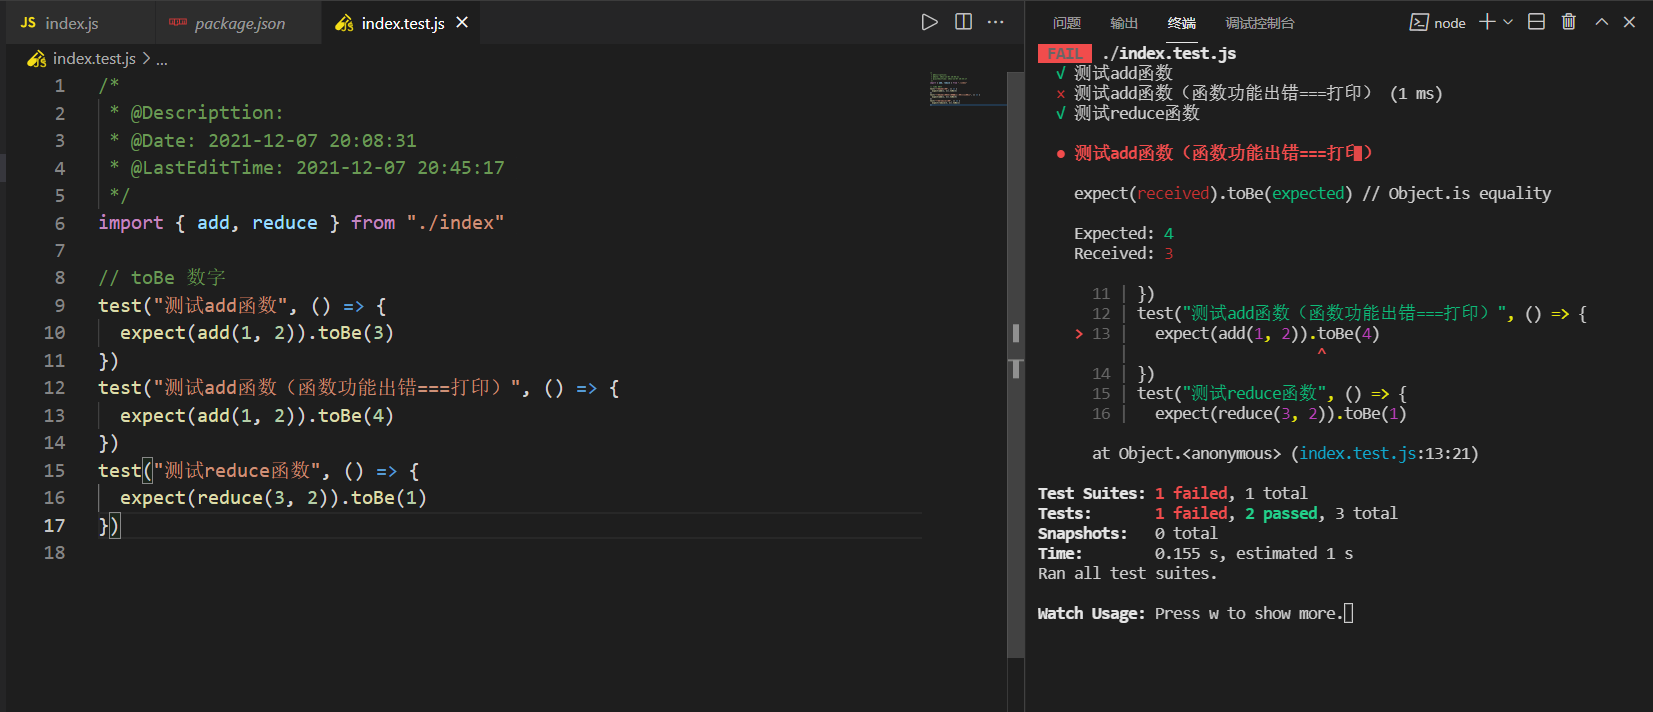
index.test.js
/** @Descripttion:* @Date: 2021-12-07 20:08:31* @LastEditTime: 2021-12-07 20:45:17*/import { add, reduce } from "./index"// toBe 数字test("测试add函数", () => {expect(add(1, 2)).toBe(3)})test("测试add函数(函数功能出错===打印)", () => {expect(add(1, 2)).toBe(4)})test("测试reduce函数", () => {expect(reduce(3, 2)).toBe(1)})
不能运行是node环境不能直接使用es6语法,需要只用babel来转换
新建.babelrc文件
// .babelrc{"presets": [["@babel/preset-env", {"targets": "> 5%"}]]}
运行
Jest API及相关命令
相关教程:
- Jest前端自动化测试入门
- 搭建基本 Jest 测试框架,解读覆盖率实现原理
- vue项目搭建jest单元测试及采坑
- Vue-Test-Utils + Jest 单元测试入门与实践
eslint就可以使用:eslint-plugin-jest
Jest API
test()类似请求后端接口一样,请求成功或失败的判断expect()则是判断和预期的值是否一样,然后执行相应的操作toBe()就是写入预期值来判断是否和自己写的代码值是否一样describe描述, decribe会形成一个作用域-
jest —coverage
查看覆盖率命令
该命令可以可视化展示,也可以在浏览器打开可视化结果网页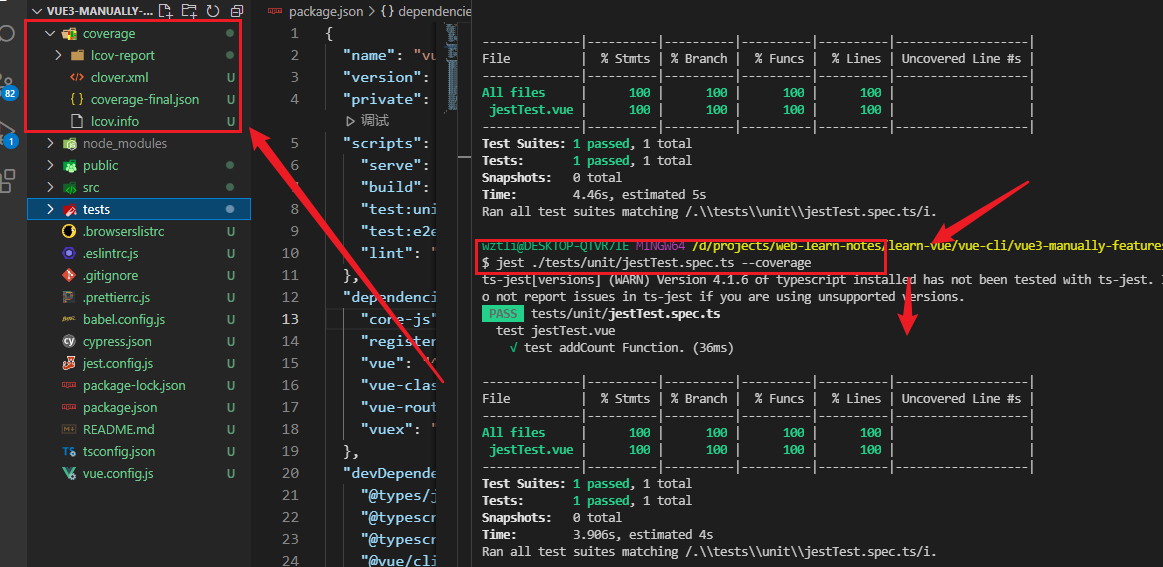
[单元测试]e2e-cypress
插眼:日后再深入了解

Vue官方插件地址:
参考教程:
- Vue项目采用Cypress做e2e自动化测试,手把手一撸到底
Vue3+TypeScript项目搭建过程中报错
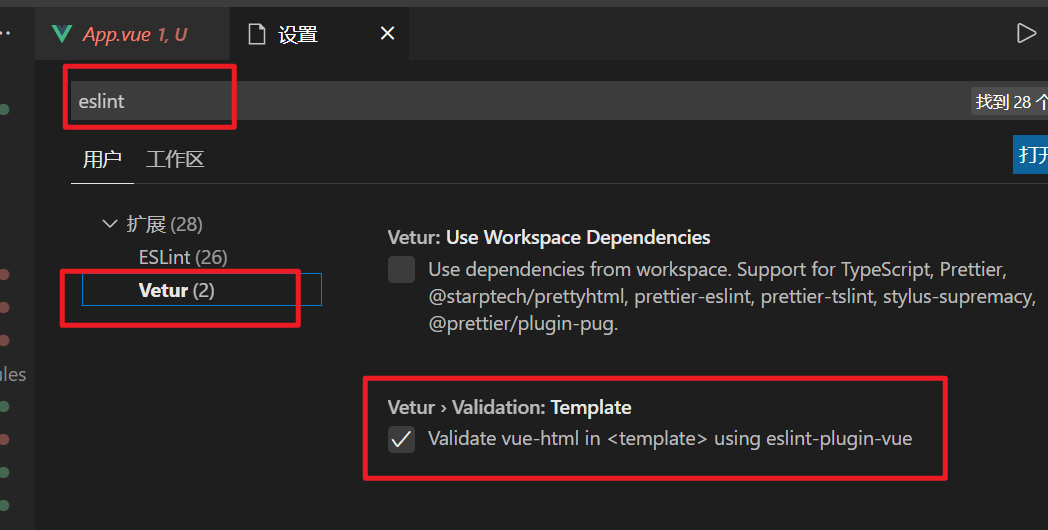
VSCode插件ESLint+Prettier+vetur代码格式化冲突
这三者是代码校验和格式化的插件,当vue3.x项目搭建成功之后
该行配置需要注释,不然代码保存之后,会经过Prettier和vetur两者之间的来回格式化顺序,导致不能正常格式化。
具体矛盾原因:
- 解决vscode eslint与prettier冲突
- VSCode中ESLint、Prettier 配置冲突问题原因及解决方案
- VSCode-Prettier和ESLint如何和睦共处?
Prettier插件:一定要留,能保存所有文件,按照自己规则进行格式化
- ESLint插件
- vetur插件
- Vue项目中的prettier插件
- Vue项目中的eslint插件
- Vue项目中的eslint的各个子插件
- 升级npm
使用cnpm的也要升级一下cnpm
cnpm i -g cnpm
重新安装node_modules依赖包
cnpm i // 重新安装
重新下载
cnpm i -D vue-loader-v16
[vue/no-multiple-template-root]The template root requires exactly one element.eslint-plugin-vue
找不到模块“”@aomao/engine””或其相应的类型声明。ts(2307)
:::danger 报错信息 :::
找不到模块“"@aomao/engine"”或其相应的类型声明。ts(2307)
模块“"@aomao/engine"”没有导出的成员“PluginEntry”。ts(2305)
:::success 按照网上找的一些方法,都无法解决这个问题
重启可以解决,插件用的太多===太卡顿 :::‘vue/comment-directive’ — error in the end of public/index.html just after vue-cli installation
public文件夹次啊的index.html文件末尾会有该报错,解决办法就是配置相关rule
https://github.com/vuejs/eslint-plugin-vue/issues/1355Delete
␍eslintprettier/prettier将代码push到GitHub仓库,新拉取下来,文件的每行代码会有此报错

报错原因:文本文件的换行符不一致
具体参考:https://juejin.cn/post/6844904069304156168#heading-6
解决办法:
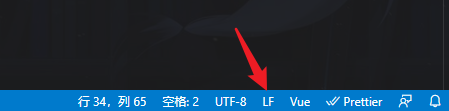
- 【治标】如果只有少个文件,将vscode右下角处改为LF即可
【治本】在windows环境下,全局关掉转换行
git config --global core.autocrlf false
然后再将刚刚拉取到本地的项目删掉,重新从GitHub拉取到本地,就不会出现该报错了
另外,在vscode设置中设置如下,可以达到新建文件就是LF转换行的效果了


若有收获,就点个赞吧
0 人点赞
