Deploy VOF Template
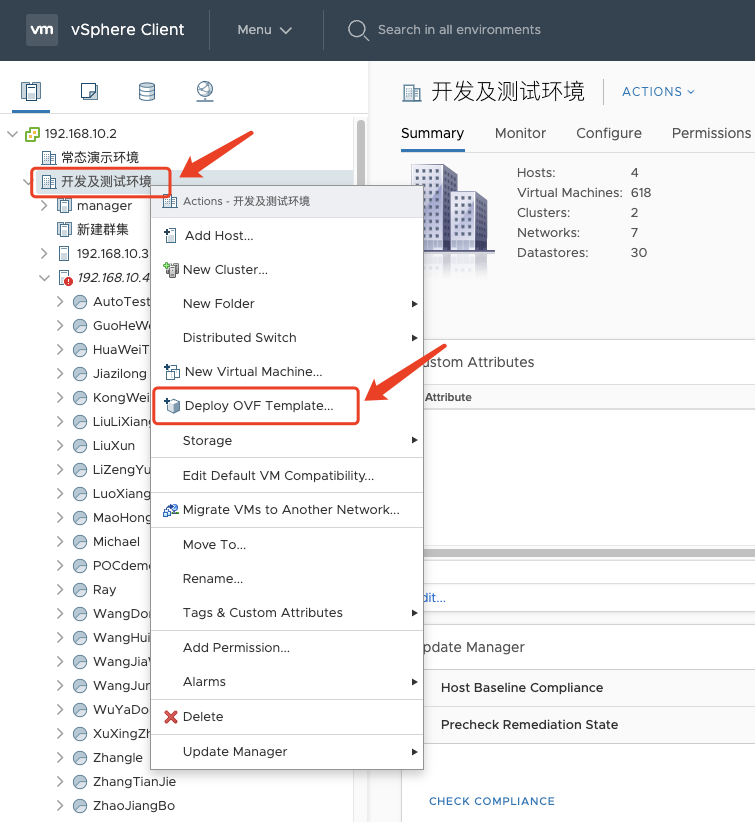
select the your Esxis or Datacenter Name, Right click, select the “Deploy OVF Template..”
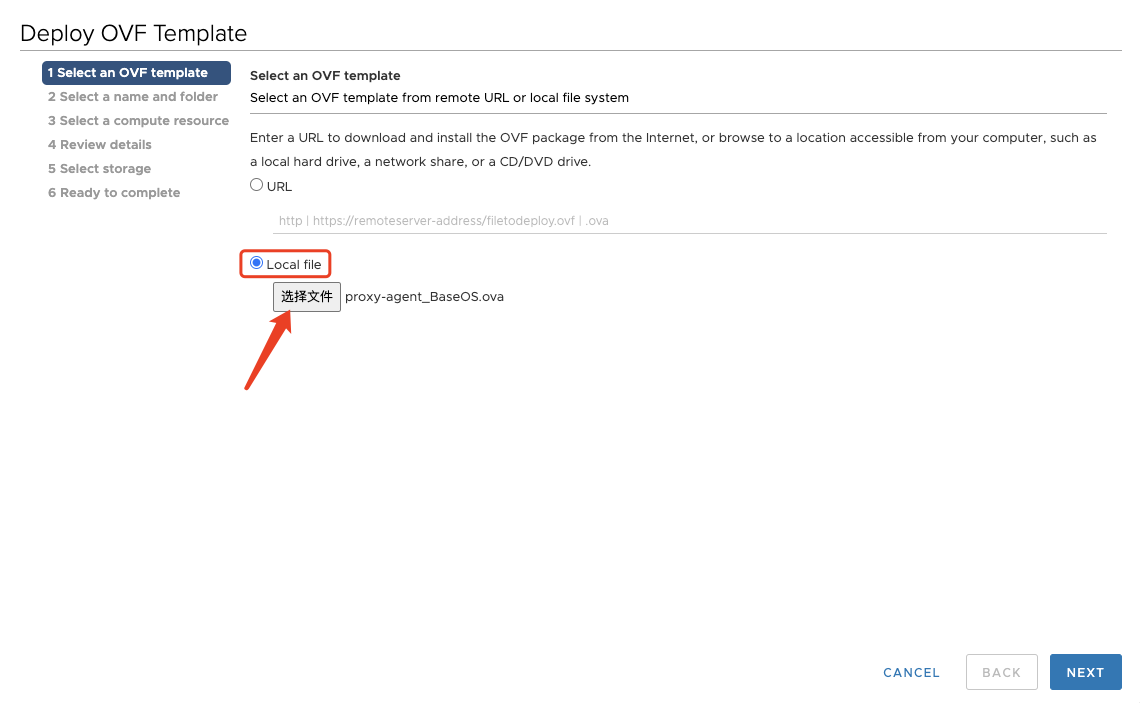
Step01: Select an OVF template
Click the “Local file” system, and click the “select file” button, select the ova template downloaded locally in advance, download OVA template name is “proxy-agent_BaseOS.ova”.
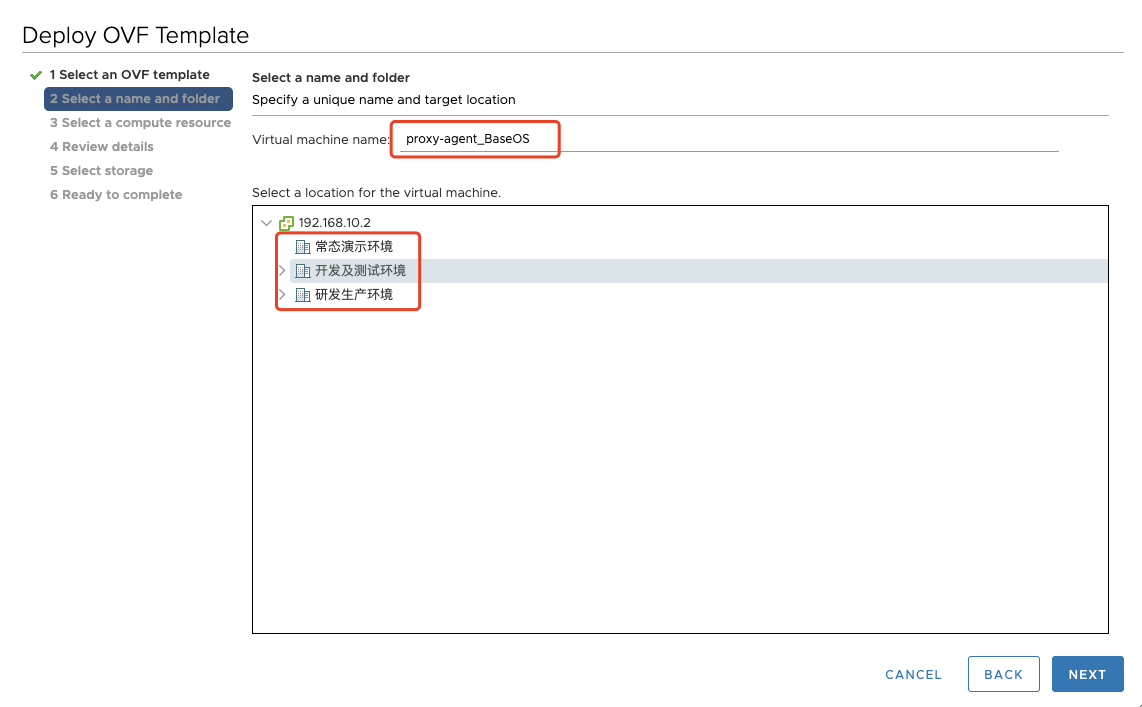
Step02: Select a name and folder
You can give this vm a name, setting name is “HyperBDR-proxy01”, then select a location for the virtual machine.
Step03: Select a compute resource
Select the destination compute resource for your created vm.

Step04: Review details
Verify the template details.

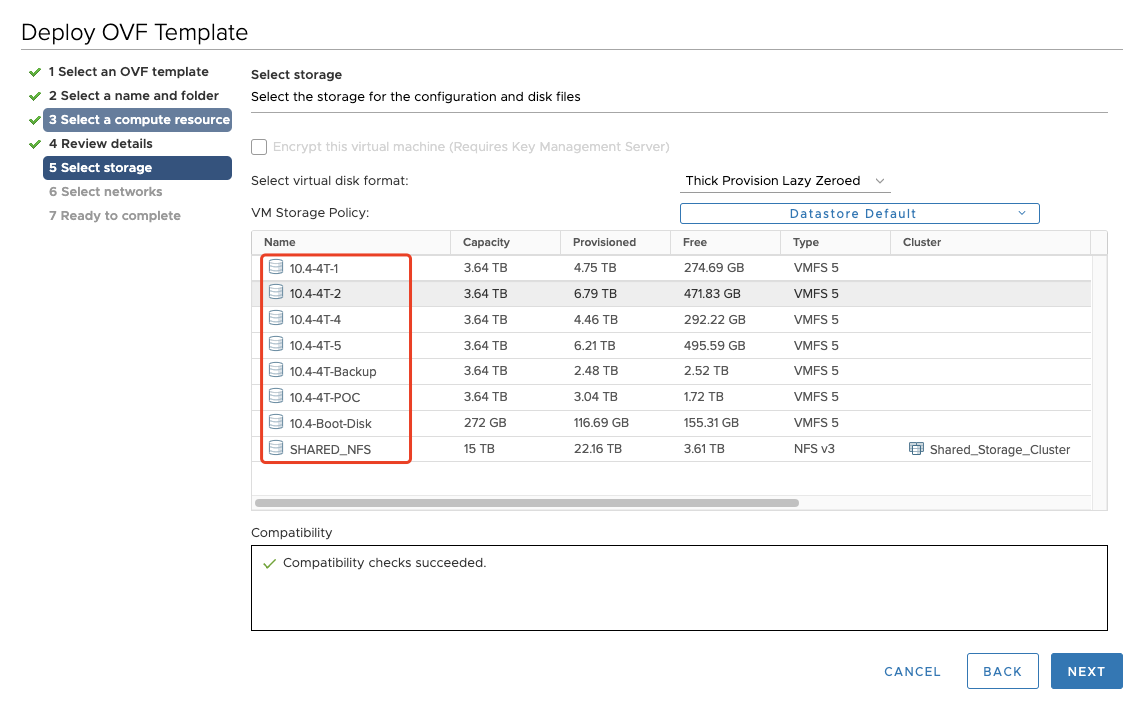
Step05: Select storage
Select the storage for the configuration and disk files.
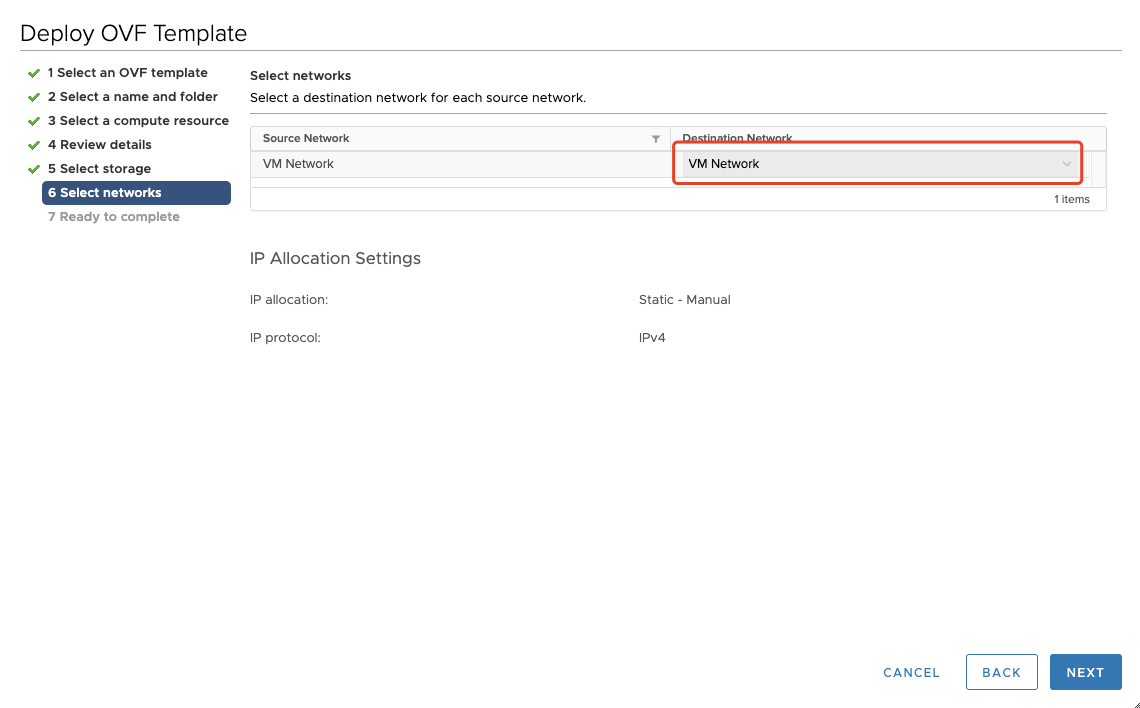
Step06: Select networks
Select a destination network for each source network.
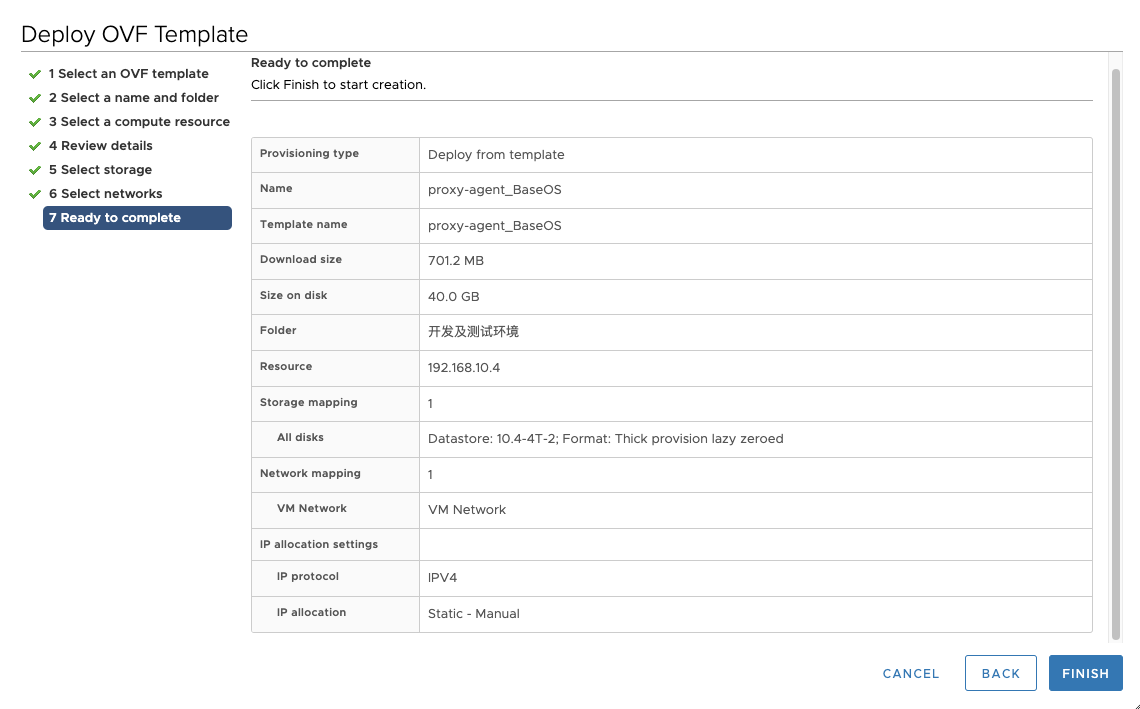
Step07: Ready to complete
Confirm the created information then click Finish to start creation.
Review import OVF template tasks
The “Import OVF package” and “Deploy OVF template” task is progress.

- “Import OVF package” and “Deploy OVF template” task status completed.

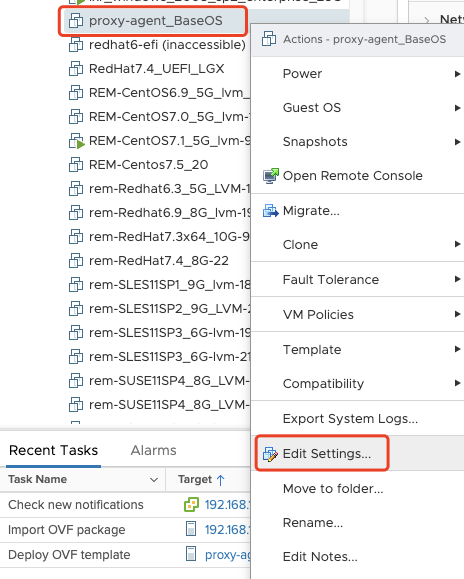
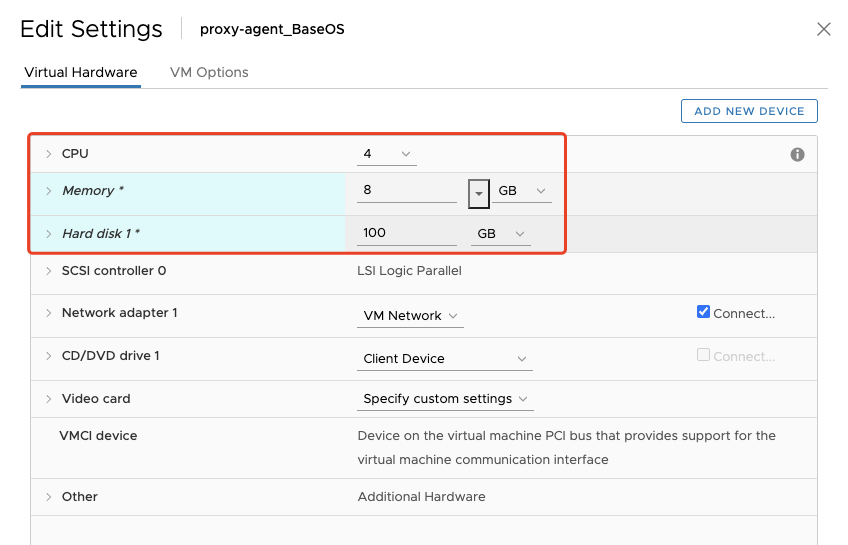
Modify the Proxy vm flavors
- Click the “HyperBDR-proxy01” VM name, then right click, select the “Edit Settings…”.
- Modify the CPU to 4 core, Memory to 8GB, Hard disk 1 size to 100GB.
Power on the proxy vm.

Next, you can configration the VM IPaddress.

若有收获,就点个赞吧
0 人点赞
