In the context of VMware vSphere virtualization platform for disaster recovery at the source end, the client needs to provide access credentials for vCenter to facilitate disaster recovery interface and data retrieval. When establishing the vCenter access account, it should have the following categories of permissions. The specific permissions are as follows:
vCenter Account Permissions
Host Profile
- View host configuration files
Global
- Enable method
- Disable method
- License management
Content Library
- Download files
- Update configuration settings
- View configuration settings
- Read storage
Scheduled Tasks
- Create tasks
Data Storage
- Low-level file operations
- Update virtual machine metadata
- Update virtual machine files
- Browse data storage
Virtual Machine
- Interaction - Backup operation on virtual machine - Defragment all disks - Restore Fault Tolerance - Enable Fault Tolerance - Pause or Unpause - Perform Guest Operations via VIX API - Reset
- Guest Operations - Modify guest operations - Query guest operations - Execute guest operation programs
- Snapshot Management - Create snapshot - Remove snapshot
- Configuration Changes - Modify device settings - Toggle fork parent - Toggle disk change tracking - Reload based on path - Display connection settings - Modify Settings - Modify resources - Query Fault Tolerance compatibility - Query unowned files - Retrieve disk lease - Configure managedBy - Reset guest information - Advanced configuration
- Service Configuration - Modify service configuration - Query service configuration - Manage service configuration - Read service configuration
- Provisioning - Allow virtual machine download - Allow read-only access to disks - Allow file access - Allow disk access - Customize guest - Read customization specification
vCenter Permission Open Settings Steps
Log in to the vCenter Administrator Console.
Add Access Users
Click on “Menu” -> “Administration”

Click on the left-hand menu “Users and Groups”, select “Users” tab, choose the “Domain” associated with the correct login for vCenter, and click the “Add” button.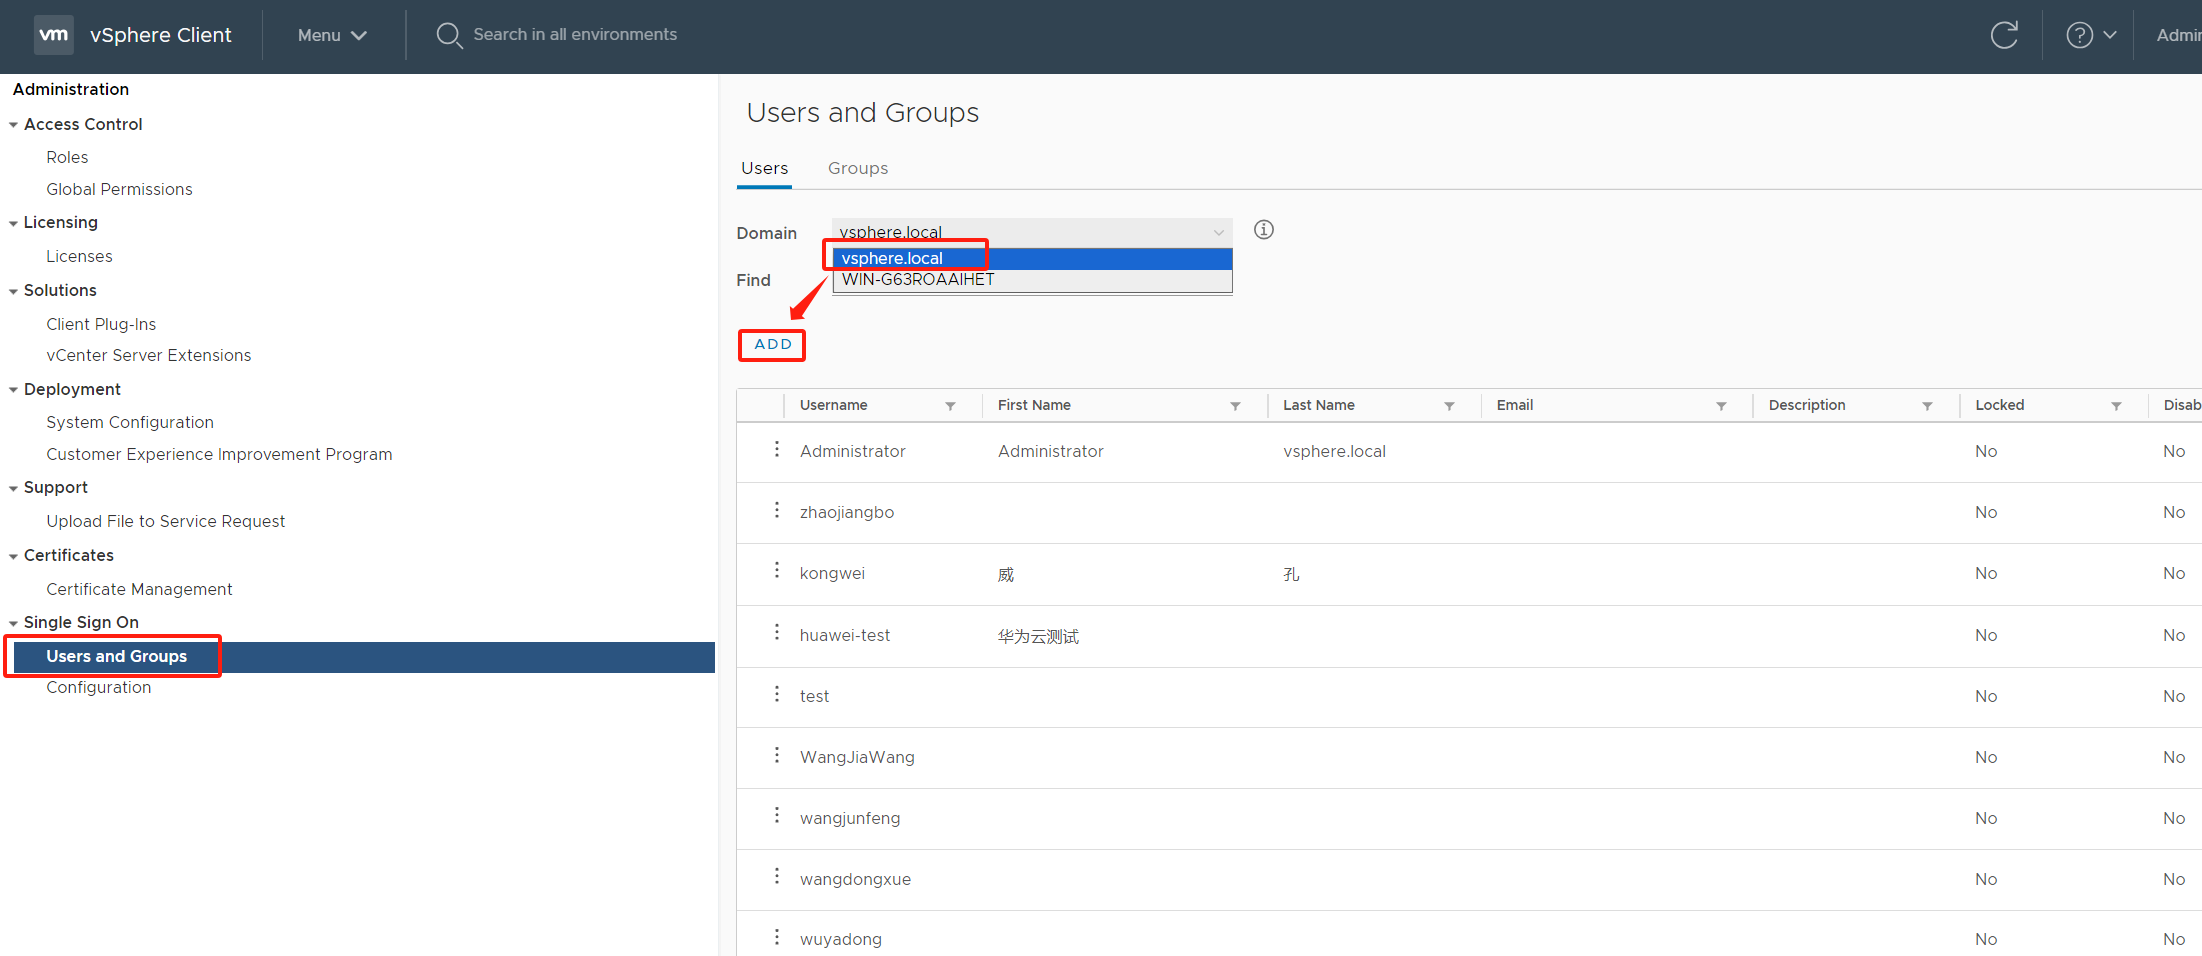
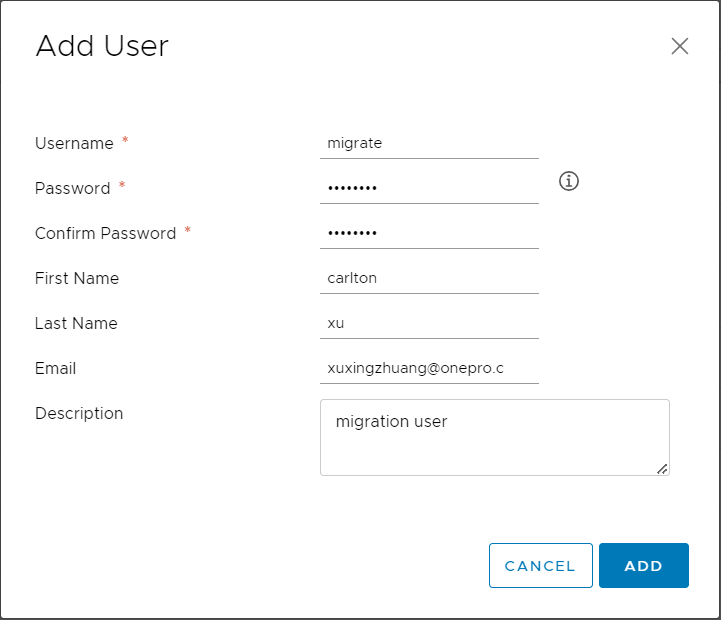
Follow the prompts to enter the Username, Password, Confirm Password, and any other optional information. Then, click the “Add” button.
Add Access Control Roles
On the left-hand menu, go to “Access Control” -> “Roles”. Under “Role Provider”, select the vCenter address, and click the “+” button.
Refer to vCenter Account Permissions list and select the appropriate settings. Then, click the “NEXT” button.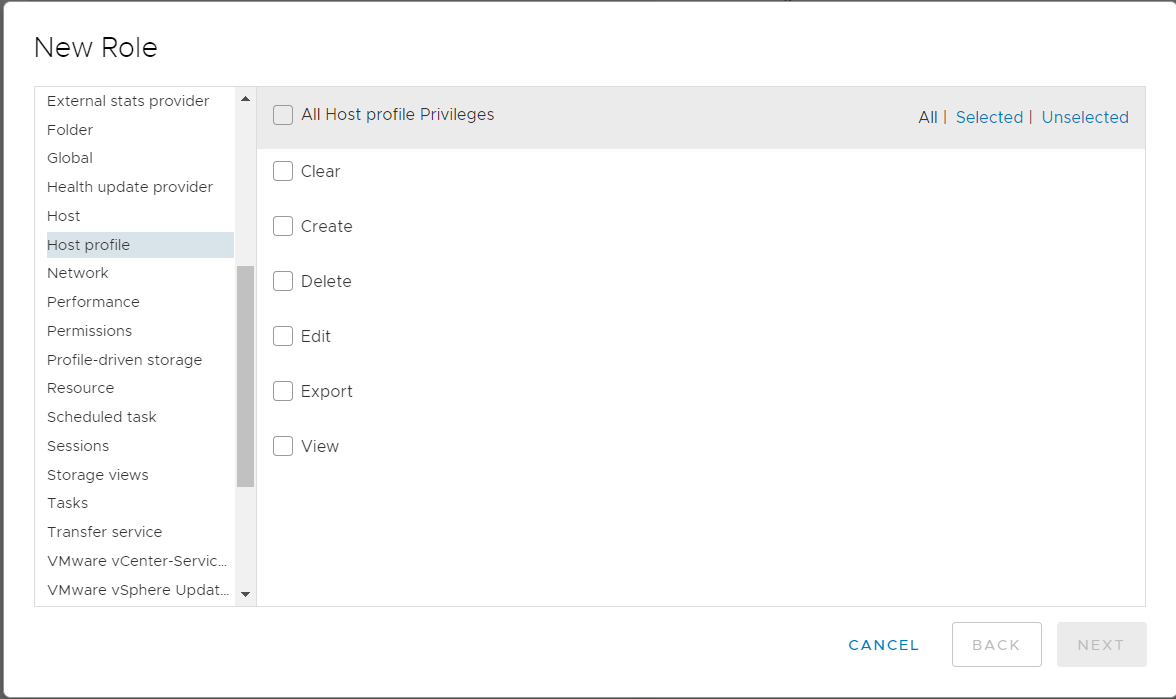
Set a new Role name and Description, then click the “FINISH” button.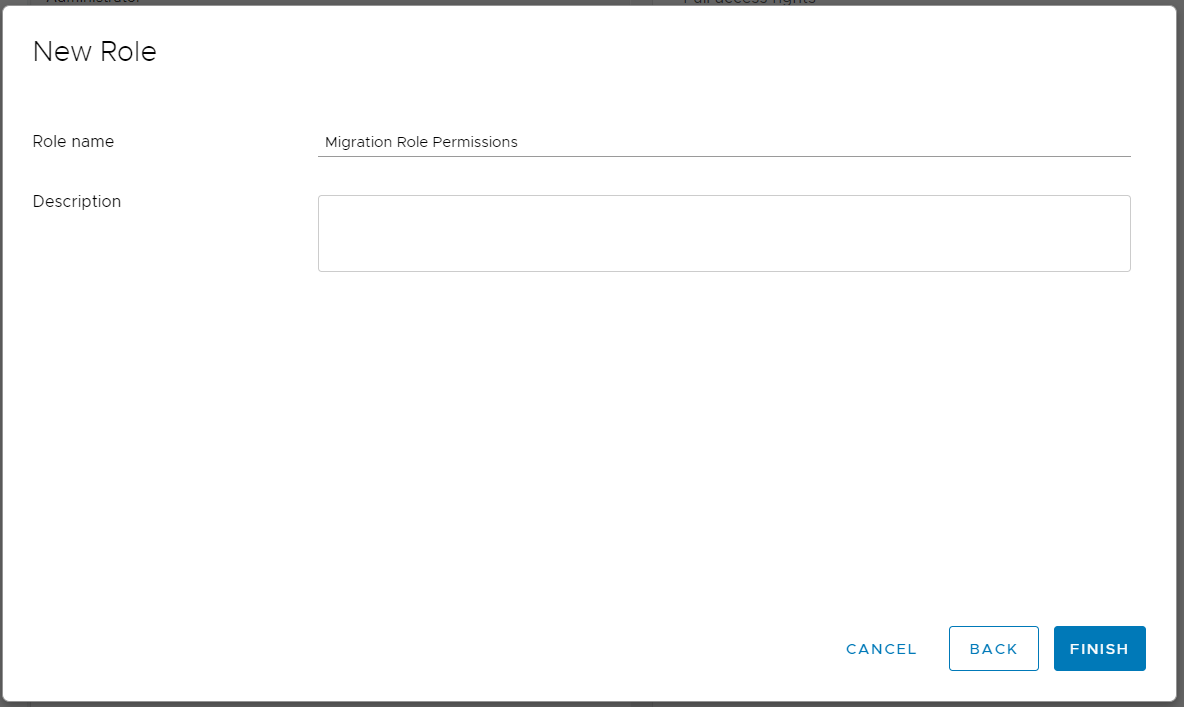
Add Permissions to vCenter
In “Hosts and Clusters”,find the top-level “vCenter IP” on the left-hand menu, select it, and click on the “Permissions” menu on the right. Then, click the “+” button.
Follow the prompts to choose the domain for user authorization, keeping it consistent with the previous steps. Search for the “migrate” user to be added. Select the “Migration Role Permissions” for the role and check the box for “Propagate to Child”. Then, click the “OK” button.

After the addition is complete, provide the vCenter access address, “migrate” user, and login password to HyperBDR platform.
vCenter Address:https://192.168.10.2:443
vCenter Username:migrate
vCenter Password:**
Configuring Production Platform (VMware)
【illustrate】
- When the source end (disaster recovery end) is virtualized using VMware, specific configurations are required.
- This scenario can achieve disaster recovery through an agentless approach, eliminating the need for proxies.
No need to install an agent on each VMware virtual machine, enabling non-intrusive operations.【Basic conditions】
- The presence of a vCenter/ESXi cluster.
- VMware vSphere Client installed and logged into the vCenter/ESXi cluster.
- Completion of the installation and login for the disaster recovery tool HyperBDR.
- Established network policies allowing connectivity from the production platform VMware virtualization to HyperBDR and the cloud synchronization gateway.
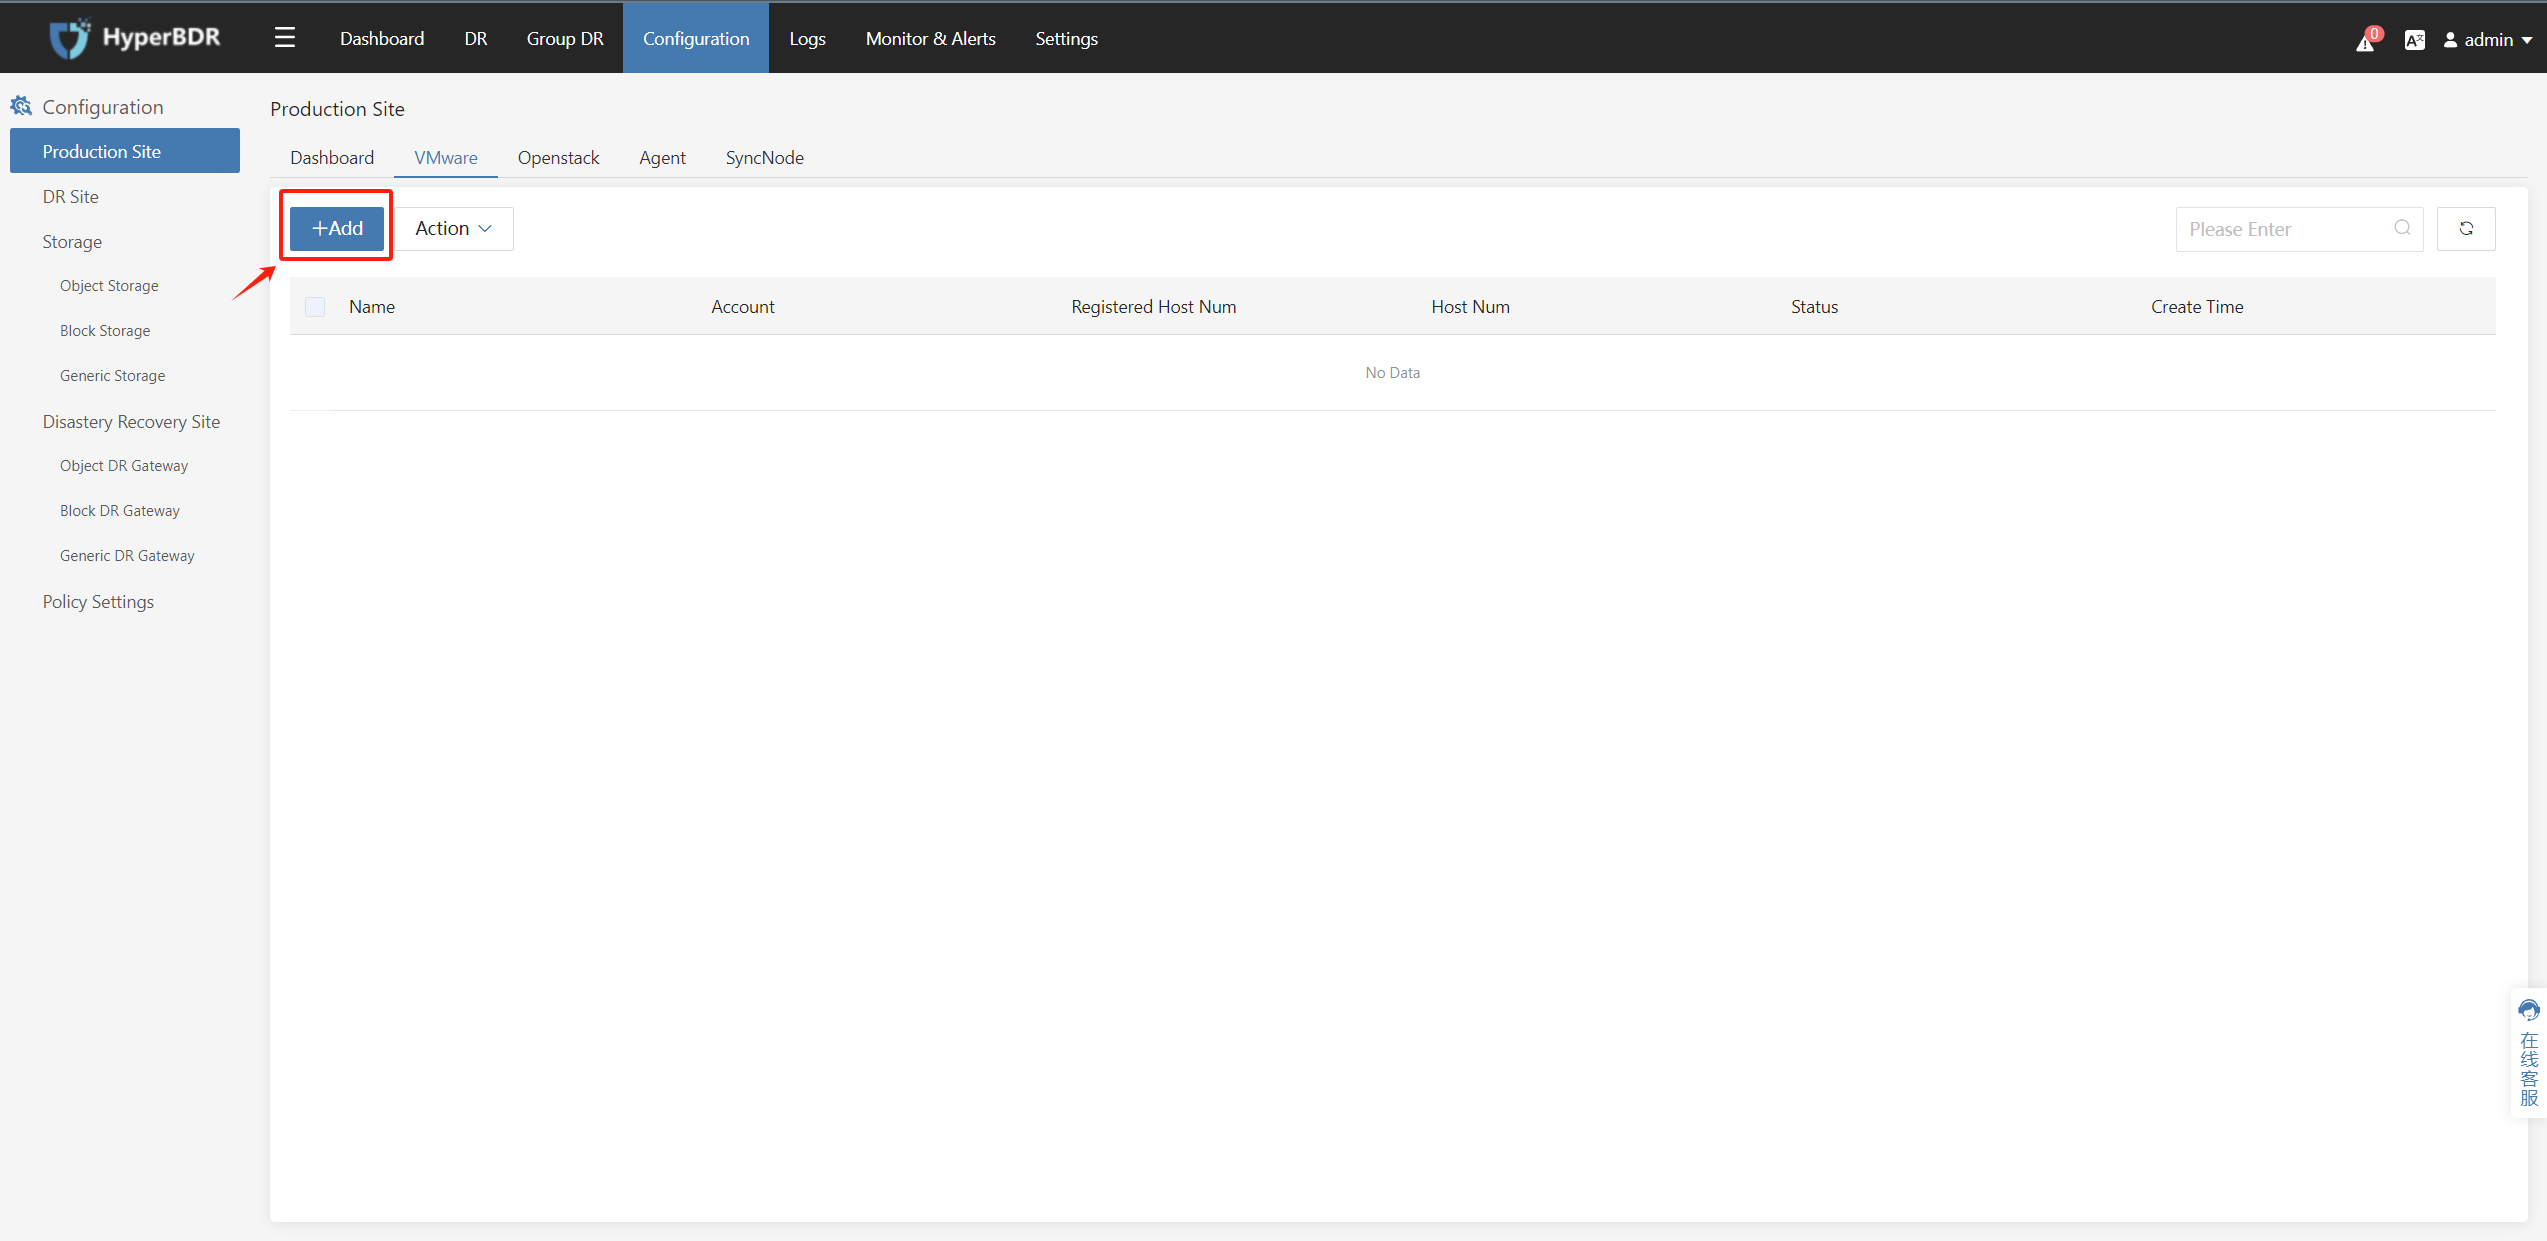
Step 1: Click on the menu bar, go to “Production Platform Settings,” and select the VMware checkbox.

Step 2: Click on the “+ Add” button to install and deploy the source-end Hamal agentless component.
For the initial VMware setup, it is necessary to install the Hamal component (refer to Step 3).
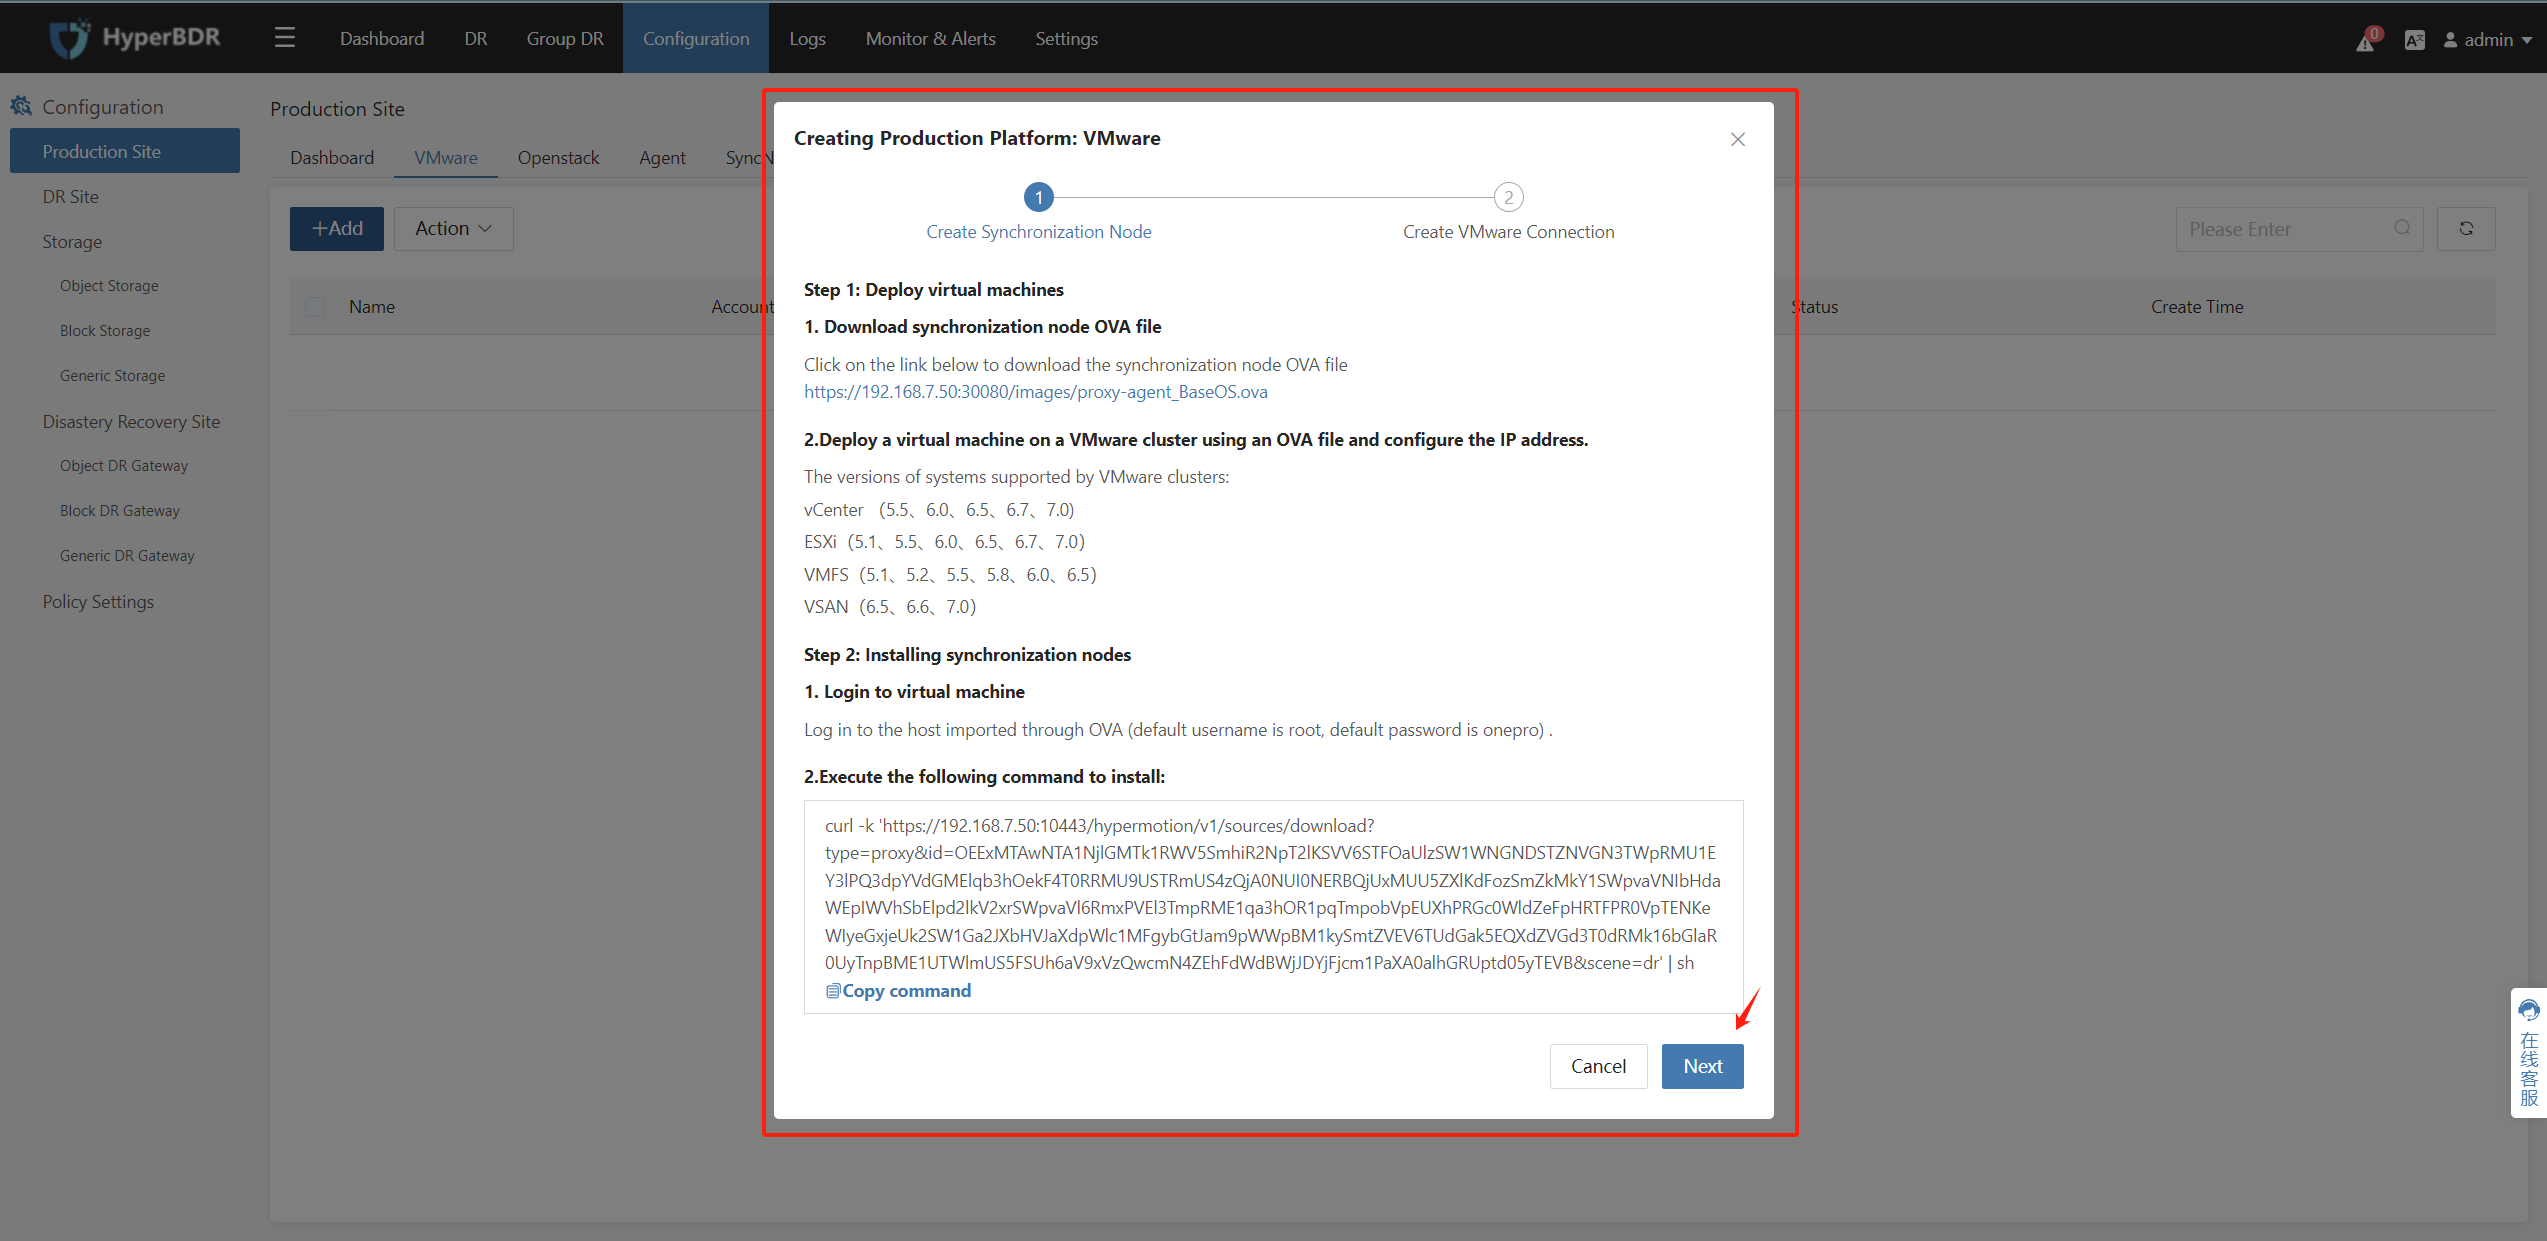
Step 3: Follow the on-screen instructions to install Hamal.
(1) Download the OVA to the VMware end, or prepare a virtual machine with CentOS 7.x at the source end. (2) Execute the installation command in the background on the host imported via OVA or on the prepared CentOS 7.x virtual machine.Note: Please follow the on-screen instructions displayed in the current disaster recovery tool interface. This action should be performed by the user within the VMware vSphere Client environment.(3) After completion, return to the disaster recovery tool and click the “Next” button.
Step 4: Fill in the relevant information in the pop-up dialog box.
| Auth Url | vCenter/ESXi Access Management Address |
|---|---|
| Username | vCenter/ESXi Account (Administrator Privileges) |
| Password | vCenter/ESXi Account Password |
| SyncNode | IP information obtained after the installation of the host imported via OVA in the previous step. |
 、
、
Configuration completed
vCenter/ESXi has been successfully added to the disaster recovery production platform. Repeat the above steps to add multiple vCenters as needed.
若有收获,就点个赞吧
0 人点赞
