一、通用Mapper
作用:替我们生成常用增删改查操作的SQL语句,减轻负担 通用mapper官方文档:https://github.com/abel533/Mapper/wiki/1.integration
1、准备环境
1.1 首先的有一张表
1.2 然后要有一个对应表的实体类
- 实体类的要求:必须都是包装类,double—->Double int—-> Integer
- 当然了,在开发中 实体类中尽量不要使用 基本数据类型,都是用对应的包装类型
在实体类的类名上添加
@Table注解,此注解表示这个实体类对应的数据库中的表名@Table(name = "table_emp")public class Employee {@Id@GeneratedValue(strategy = GenerationType.IDENTITY)private Integer empId;private String empName;private Double empSalary;private Integer empAge;@Transientprivate String name;
1.3 搭建mybatis+spring的开发环境
jdbc.properites
jdbc.url=jdbc:mysql://localhost:3306/mybatisjdbc.username=rootjdbc.password=0000jdbc.max=20
applicationContext.xml
<?xml version="1.0" encoding="UTF-8"?><beans xmlns="http://www.springframework.org/schema/beans"xmlns:xsi="http://www.w3.org/2001/XMLSchema-instance"xmlns:context="http://www.springframework.org/schema/context"xsi:schemaLocation="http://www.springframework.org/schema/beans http://www.springframework.org/schema/beans/spring-beans.xsd http://www.springframework.org/schema/context https://www.springframework.org/schema/context/spring-context.xsd"><!--把数据库的配置文件(jdbc.properties引入进来)--><context:property-placeholder location="classpath:jdbc.properties"/><!--声明数据源,DataSource,作用是连接数据库的,不用MyBatis原来的POOLED了--><bean id="dataSource" class="com.alibaba.druid.pool.DruidDataSource" init-method="init" destroy-method="close"><!--使用外部的properties文件语法 ${}--><property name="url" value="${jdbc.url}"/><property name="username" value="${jdbc.username}"/><property name="password" value="${jdbc.password}"/><property name="maxActive" value="${jdbc.max}"/></bean><!--声明mybatis中所提供的SqlSessionFactoryBean类,这个类的内部是创建SqlSessionFactory的--><bean id="sqlSessionFactory" class="org.mybatis.spring.SqlSessionFactoryBean"><property name="dataSource" ref="dataSource"/><property name="configLocation" value="classpath:mybatis-config.xml"/></bean><!--创建dao对象,使用SqlSession的getMapper(User.class)--><bean class="tk.mybatis.spring.mapper.MapperScannerConfigurer"><property name="sqlSessionFactoryBeanName" value="sqlSessionFactory"/><property name="basePackage" value="com.yixuexi.dao"/></bean><!--通过注解的方式创建对象--><context:component-scan base-package="com.yixuexi"/></beans>
mybatis-config.xml
<?xml version="1.0" encoding="UTF-8" ?><!DOCTYPE configurationPUBLIC "-//mybatis.org//DTD Config 3.0//EN""http://mybatis.org/dtd/mybatis-3-config.dtd"><configuration><!--设置别名--><typeAliases><package name="com.yixuexi.entity"/></typeAliases><mappers></mappers></configuration>
1.4 添加通用Mapper的依赖
<dependency><groupId>tk.mybatis</groupId><artifactId>mapper</artifactId><version>最新版本</version></dependency>
1.5 修改spring配置文件,整合通用mapper
把applicationContext.xml文件中的
<bean class="``org``.xxx.xxx.MapperScannerConfigurer">org改成``tk
1.6 在dao中创建EmployeeDao接口继承Mapper
【接口和接口之间的继承 extends】
继承Mapper接口,后面的泛型传入对应的实体类 【Mapper接口:通用Mapper提供的核心接口】
//在继承那里传入一个 泛型,此泛型就是这个接口对应的实体类的表public interface EmployeeDao extends Mapper<Employee> {}
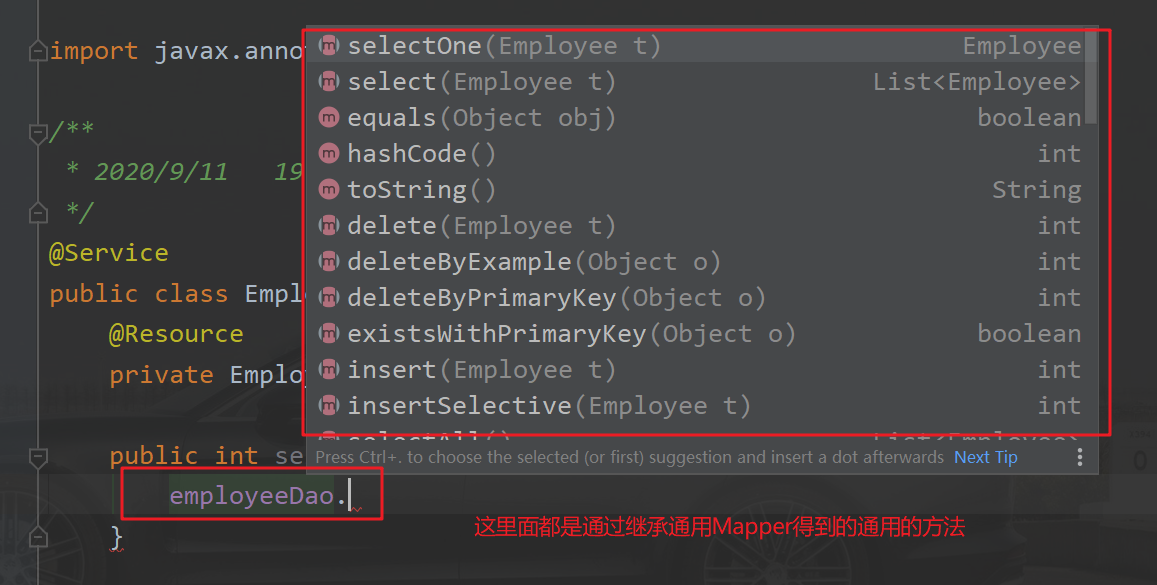
1.7 然后就可以使用了,此时的EmployeeDao接口里面,表面是没有抽象方法的,但是他继承了Mapper接口,他暗地里有方法
2、注意事项
数据库的表名叫table_emp,而实体类得名字叫Employee
- 所以不要忘记在实体类上添加@Table(name =”表名”)注解
- 他的默认规则是 类名Employee ——> 表名employee
不需要在mybatis-config中配置mapper信息,通用Mapper自己配置了
- 在
标签里面配置你的自己写的mapper就行了
- 在
实体类中属性和表中的字段不一致也没关系,通用Mapper会将 empName —转化—> emp_name
- 默认规则: 属性empName ——>字段 emp_name
- 如果没有按照默认规则的话,可以在属性上使用@Column注解 @Column(name=”字段名”)
但凡是遇到了
**xxxxPrimaryKey()**的方法 都需要使用@Id注解 在实体类中的属性上面添加 来明确哪个是主键
3、会使用到的注解
**@Table(name="表名")**: 在实体类上定义,表示类和数据库中表的映射关系- 默认规则:类名Employee ——> 表名employee
**@Column(name="字段名") **:定义在属性上,表示属性和字段的映射关系- 默认规则:属性empName ——>字段 emp_name
**@Id**:定义在实体类的属性上,告诉通用mapper这是 主键字段- 在调用selectByPrimaryKey()方法的时候,是通过主键来查询,但是他不知道哪个字段是主键,所以要用@Id注解来告诉程序,这个是属性是主键
**@GeneratedValue(strategy = GenerationType.IDENTITY)**:- 定义在主键上,调用完insert方法后,将新自增的id属性封装进 实体类那个对象的empId属性
**@Transient**一般实体类的字段都是和数据库字段一一对应的,如果有额外的属性可以使用@T``ransient来表示- 查询的 时候会忽略被这个注解修饰的属性
4、通用Mapper里面常用的方法
**selectOne(Emp e)**//根据条件查询一个- 实体类封装查询条件生成WHERE子句的规则:
- 传过来的对象中,非null的属性 会被拼装成where子句
- 在条件表达式中 比较的都是相等的关系,where id = 1
- 只能返回一个,如果根据的条件能返回多个的话 会报错
- 实体类封装查询条件生成WHERE子句的规则:
**selectByPrimaryKey( Integer id )**//根据主键查询,返回一个实体类对象- 需要在实体类的主键属性上添加@Id注解,告诉这个是主键,通过这个查询
- 如果没有@Id注解的话,会造成查询结果为null
- 之所以会是null,是因为通用Mapper将类中所有的字段都当成主键,结果成了联合主键
- 但凡是遇到了
**xxxxPrimaryKey()**的方法 都需要使用@Id注解 来明确哪个是主键
**existsWithPrimaryKey**``**(Integer id)**//根据主键查询,看看有没有,返回一个Boolean- 注意需要在实体类上 表明谁是主键 @Id
**Insert(Emp e)**//把提供的一个对象保存到数据库中去- 还有一个功能,将刚刚插入的主键封装进 实体类对象,只需在实体类的主键属性上加入注解
**@GeneratedValue(strategy = GenerationType.IDENTITY)**- 这样插入完成之后 在调用实体类对象的
**getEmpId()**方法,可以获取到刚插入自增的id 【e.getEmpId()】
**insertSelective()**//有选择的保存一个对象,对象中属性有值的保存,没值的不保存- 为null的属性不会写入到sql语句中,但是主键为null依然会写到主键中
- 字段多的时候,使用这个能减少数据库压力
**updateByPrimaryKey()**//根据主键更新,字段为null的属性也会拼装到SQL语句中- 如果为null的属性 被拼装到SQL中 会导致数据库中的原有数据被覆盖
**updateByPrimaryKeySelective()**//根据主键有选择的更新,为null的字段不会拼装到SQL中- 常用于更新,为null的属性不拼装到SQL中,为null的属性不会影响数据库原有的数据
**delete(Emp e)**//删除记录,根据传过来的对象的属性来删除,where 字段 = 属性不为null的- 一次可以删除多条记录【如果有多个叫张三的可以删除多个张三】
- 如果传入一个null,那么就是没有指定删除条件,所有的记录都会被删除【没有 where子句的部分】
- 实际使用中对 实体类对象进行 非空判断
**deleteByPrimaryKey(Integer id)**// 通过主键来进行删除- 一次只能删除一条记录【where emp_id = empId】
5、QBC查询
概念:Query By Criteria 根据标准查询 使用QBC查询,可以通过像搭积木的方法来进行复杂 SQL的拼装
示例
想要拼装的SQL语句的where部分为Where (emp_salary > ? And emp_age < ?) or ( emp_salary < ? And emp_age > ?);
使用Dao中的方法为:**selectByExample(example)** ; //通过条件查询
在测试方法中需要这样写
- 先创建出来Example对象,传入一个实体类的class字节码
Example example = new Example(Employee.class);
- 通过example对象创建 Criteria对象【直接 example. 就有了】
Example.Criteria criteria 01 = example.createCriteria();
因为条件有两个所以创建两个Criteria对象,拼装起来Example.Criteria criteria 02 = example.createCriteria();
- 在两个Criteria对象中分别设置查询条件
andGreaterThan()方法 :properties > value【支持链式变成,可以直接在后面写 年龄 < ?】
andLessThan() 方法 :properties < value?
第一个参数 properties :实体类的属性名
第二个参数 value:实体类的属性值criteria01.andGreaterThan("empSalary",2000).andLessThan("empAge",50);
第二个条件criteria02.andLessThan("empSalary",5000).andGreaterThan("empAge",30);
- 使用example对象的or关键词组装两个Criteria对象
- `example.or(criteria02); //此时的example就是 criteria01的那个条件
`
- 执行查询
- 调用service写好的
List<Employee> employees = employeeService.selectByExample(example); - 此时 在service类里有一个 employeeDao.selectByExample(obj); 这样的方法在执行
- 调用service写好的
5.1 QBC查询其他的属性 这些都是通用mapper的 selectByExample()方法
- 设置排序信息
根据主要条件工资的升序和次要条件年龄的降序进行排序Example example = new Example(Employee.class);`` //``创建ex``ample``对象
//支持链式编程,直接在asc后面添加次要条件就行 【orderBy()方法 跟一个要排序实体类的属性名】**example.orderBy("empSalary").asc().orderBy("empAge").desc();**employeeService.selectByExampleOrder(example); //调用service方法 把 example传进去就行
- 设置去重
Example example = new Example(Employee.class);example.setDistinct(true);//设置为true就行
- 设置select字段
- 查询不是都查询出来,而是查询设置的这些内容
Example e = new Example(Employee.class);**e.selectProperties("empName","empSalary");** [查询两个字段,别的都是null]
Example example = **new Example**(Employee.class);//创建example对象,传入一个实体类的classExample.Criteria criteria02 = **example**.**createCriteria**();//创建条件 | 标准,如果有多个 可创建多个criteria01.**andGreaterThan**("实体类的属性名",value);// 实体类 大于 valuecriteria02.**andLessThan**("实体类的属性名",value)实体类 小于 valueexample.or(criteria02);// 通过使用 or 把两个条件拼装起来,此时的example就是 01, 只需要把 02传进去
二、逆向工程 MyBatis Generator MBG
简称MBG,是一个专门为MyBatis框架使用者定制的代码生成器,可以快速的根据表生成对应的映射文件,接口,实体类。支持基本的增删改查,以及QBC风格的条件查询,但是表连接,存储过程这些复杂的SQL的定义需要我们手工编写
1、起步
官方文档 起步教程:http://mybatis.org/generator/configreference/xmlconfig.html
1.1 导入maven依赖【MySQL,MyBatis,MyBatis Generator】
<!--逆向工程--><dependency><groupId>org.mybatis.generator</groupId><artifactId>mybatis-generator-core</artifactId><version>1.4.0</version></dependency>
1.2 在resouces目录下创建 mbg.xml配置文件
- 内容可以在起步教程那里复制过来
**jdbcConnection**配置数据库连接信息**javaModelGenerator**配置java实体类的生成策略**sqlMapGenerator **配置sql映射文件的生成策略**javaClientGenerator **配置Mapper接口的生成策略**Table **配置逆向解析的数据表tbaleName:表名domainObjectName:对应的javaBean名 ```xml <?xml version=”1.0” encoding=”UTF-8”?> <!DOCTYPE generatorConfiguration PUBLIC “-//mybatis.org//DTD MyBatis Generator Configuration 1.0//EN” “http://mybatis.org/dtd/mybatis-generator-config_1_0.dtd">
<a name="EZ7m0"></a>### 1.3 执行```javaList<String> warnings = new ArrayList<String>();boolean overwrite = true;File configFile = new File("E:\\javaWeb\\framework\\MyBatis\\MyBatisPlugins\\MyBatis_generator\\src\\main\\resources\\mgb.xml");ConfigurationParser cp = new ConfigurationParser(warnings);Configuration config = cp.parseConfiguration(configFile);DefaultShellCallback callback = new DefaultShellCallback(overwrite);MyBatisGenerator myBatisGenerator = new MyBatisGenerator(config, callback, warnings);myBatisGenerator.generate(null);
1.4 注意
- 逆向工程不会生成MyBatis的主配置文件,主配置文件需要自己写
三、分页mapper
1、起步
1.1 导入maven依赖
<dependency><groupId>com.github.pagehelper</groupId><artifactId>pagehelper</artifactId><version>5.2.0</version></dependency>
1.2 在mybatis-config.xml文件中配置分页插件
<plugins><plugin interceptor="com.github.pagehelper.PageInterceptor"><!--分页参数合理化,不可能达到一个不正确的页码,如-1,超过总页数,查询最后一页--><property name="reasonable" value="true"/></plugin></plugins>
1.3 在查询之前调用一下pageHelper.startPage()方法
//第一个参数传入:第几页,第二个参数传入:每页多少条数据PageHelper.startPage(1,5);//调用查询方法List<Employee> employees = mapper.selectByExample(null);//创建PageInfo对象,传进去结果,和每页多少条数据PageInfo info = new PageInfo(employees,5);//通过调用info对象里面的方法 就能得到所有的分页信息,分页总页数,总记录数// info.getList();方法就是得到查询到的分页数据,返回一个list集合

若有收获,就点个赞吧
0 人点赞
