分类
按执行的时机,定义的位置
组件内的守卫
注意: 这里描述的不是任意组件,而是路由级别的组件
代码:
// 定义在组件内部的beforeRouteEnter(to, from, next) {// 在渲染该组件的对应路由被 confirm 前调用// 不!能!获取组件实例 `this`// 因为当守卫执行前,组件实例还没被创建},beforeRouteUpdate(to, from, next) {},beforeRouteLeave(to, from, next) {}
路由独享守卫
注意:在路由配置上直接定义 beforeEnter 守卫
代码:
const router = new VueRouter({routes: [{path: '/foo',component: Foo,beforeEnter: (to, from, next) => {// ...}}]})
全局守卫
说明: 是router对象一个属性,本质上是一个函数。在路由切换时,它会被调用,用它就可
以用来去检查凭证(是否登录)。
代码:
const router = new VueRouter({ ... })router.beforeEach(function (to, from, next) {console.log('路由变化了', to, from, next)next()})router.afterEach(function (to, from) {console.log('路由变化了', to, from)})
路由守卫的参数说明:
<br />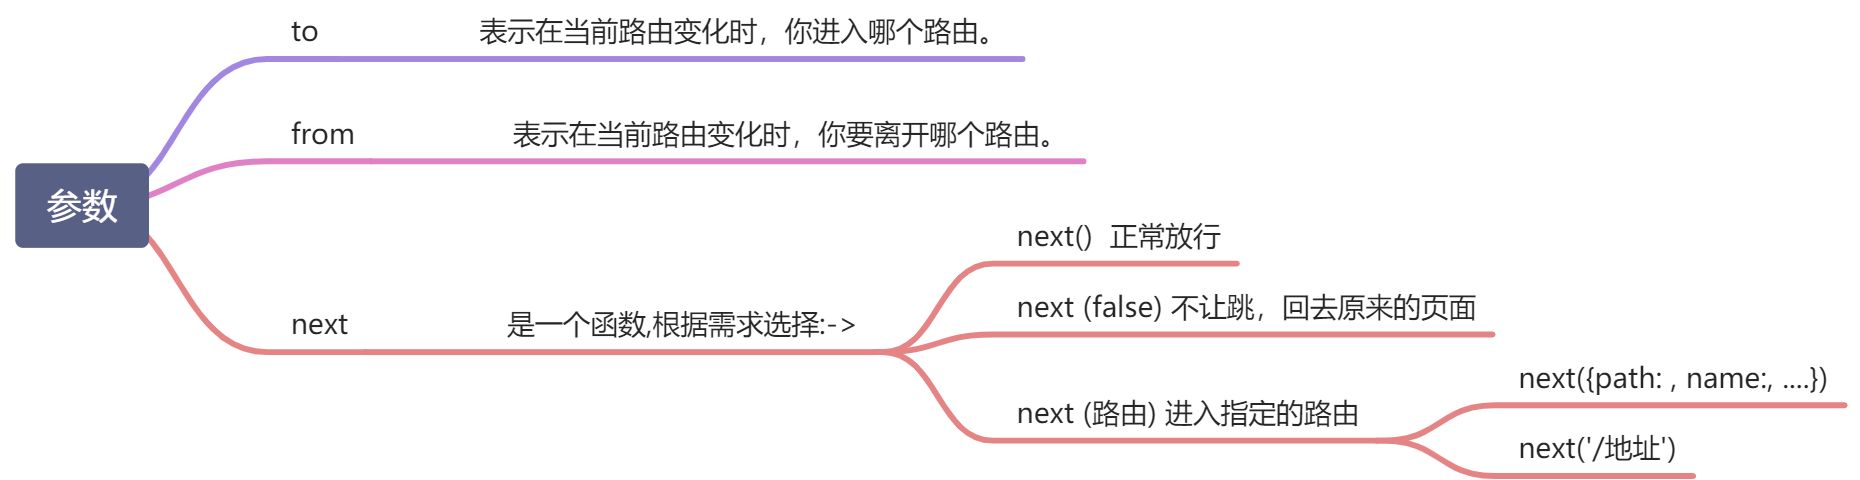<br />
应用场景
场景1: 离开页面时,阻止跳转
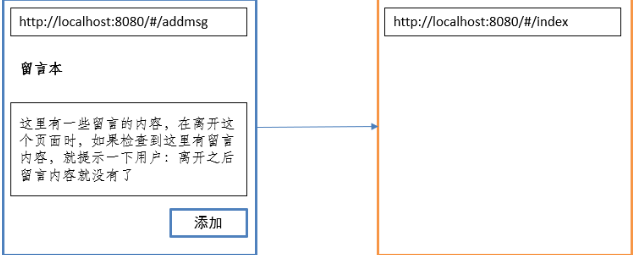
代码演示:
beforeRouteLeave (to, from, next) {if (this.msg && window.confirm('确定要跳转')) {next() // 如果用户确定要跳转,就放行} else {next(false) // 如果用户不确定跳转,就不跳转}}
场景2: 动态路由跳转
** 比如: 文章详情页(跳转的时候需要携带参数的 /foo/:id,在 /foo/1 和 /foo/2 之间跳转的时**<br />** 候)**
代码演示:
beforeRouteUpdate(to, from, next) {next()this.加载详情()}
另外说明:
如果外面已经定义了一个created钩子函数,里面也是放的是this.加载详情(), 然后又用到了这个路由守卫 <br /> 的话,如果不在里面再调用一次this.加载详情(), 跳转的时候只是地址栏里面的变化了,页面是还没有跳转的, <br /> 因为在created里面详情页组件已经被创建了
场景3: 权限校验
定义在全局守卫
情况1:如果一个用户没有登陆(没有token值),他还想去访问个人中心页,让他回去登录页
图示说明:

代码演示:
在router/index.js中补充一个前置路由守卫。
需求:
1. 如果没有登陆就不能访问某些敏感页面<br /> 2. 如果登陆了,就不能再访问login页面
import store from '@/store/index.js'const vipList = ['/setting']router.beforeEach((to, from, next) => {const token = store.state.tokenInfo.tokenconsole.log(token)if (!token && vipList.includes(to.path)) {console.log('没有权限,不能访问vip页面')next('/login)} else if (token && to.path === '/login') {console.log('已经登录了,就不能访问login了')next('/')} else {next()}})export default router
注意:
获取token动作应该在每次路由跳转都去做(代码要写在beforeEach内)<br /> 把需要权限的页面写在一个数组中,方便我们使用includes方法进行判断
情况2: 从a页面出发,访问b页面,发现没有权限,路由守卫转跳到login页中,在login中登录成功之后,应该要跳转到哪里呢?
代码演示:
router.beforeEach((to, from, next) => {const token = store.state.tokenInfo.tokenconsole.log(token)if (!token && vipList.includes(to.path)) {console.log(to.fullPath)// 用户想访问b页面,但是没登录就转到登录,登录了以后不是跳到主页,还是跳到想去的b页面next('/login?backto=' + encodeURIComponent(to.fullPath))} else if (token && to.path === '/login') {next('/')} else {next()}})
关键代码:
1.在跳到登录页时,传入要返回的页面地址 : <br />  to.fullPath会包含路径中的查询参数(/setting?a=1)<br /> 2. 登陆成功后,回到初始页面:<br /> 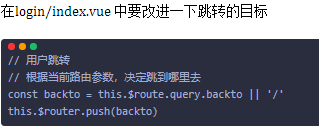
<br /> <br /> <br />** **<br />

若有收获,就点个赞吧
0 人点赞
