1.SpringBoot-Security技术
1.1 技术介绍
安全框架,权限控制的框架,包括认证功能、授权功能、加密功能、会话管理、缓存支持、记住登录信息等功能。
1.2 技术注意点
- 使用了spring security 后,@controller注解不能写地址
- @PreAuthorize注解一定要使用权限时才使用,如需要开放某接口时,则禁止使用,否则无法访问,并且排查异常麻烦,没有错误日志。
1.5 demo的技术代码实现
1.5.1 无数据库入门案例
1.准备pom
父工程准备<parent><groupId>org.springframework.boot</groupId><artifactId>spring-boot-starter-parent</artifactId><version>2.2.2.RELEASE</version><relativePath/> <!-- lookup parent from repository --></parent>
引入其pom的子工程
<dependency><groupId>org.springframework.boot</groupId><artifactId>spring-boot-starter-security</artifactId></dependency><dependency><groupId>org.springframework.boot</groupId><artifactId>spring-boot-starter-web</artifactId></dependency><dependency><groupId>org.springframework.boot</groupId><artifactId>spring-boot-devtools</artifactId><scope>runtime</scope><optional>true</optional></dependency><dependency><groupId>org.projectlombok</groupId><artifactId>lombok</artifactId><version>1.18.10</version></dependency><dependency><groupId>org.springframework.boot</groupId><artifactId>spring-boot-starter-test</artifactId><scope>test</scope><exclusions><exclusion><groupId>org.junit.vintage</groupId><artifactId>junit-vintage-engine</artifactId></exclusion></exclusions></dependency>
2.准备application.yml
server:port: 8080
3.准备启动项
@SpringBootApplicationpublic class SpringSecurityApplication {public static void main(String[] args){SpringApplication.run(SpringSecurityApplication.class,args);}}
启动main服务,测试其构建的springboot没有问题后,在进行下一步操作。
4.创建一个测试控制器
@RestControllerpublic class HelloController {@GetMapping("/hello")public String hello(){return "hello spring security!";}}
5. 简单测试
访问 http://localhost:8080/hello 地址,默认spring security会访问自带的login登录页面,效果如下: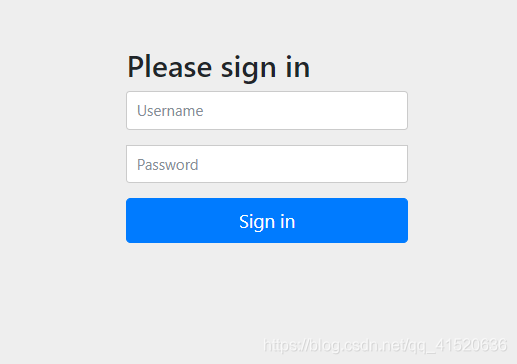
默认用户名:user,密码:在控制台打印了。
参考博文链接:https://www.cnblogs.com/xuweiweiwoaini/p/13890551.html
6. 添加自定义配置
作用:这个页面不符合自身需求,美观和功能需求都没有满足,我想要个注册按钮,记住密码,第三方登录,短信登录,邮件登录,验证码等等功能,这个默认的页面都无法满足我们的需求。这时spring security给了我们自定义页面的方案,并为我们提供了鉴权和授权的相应配置。
这时,需要引入两个东西,一个是相当于xml配置,设置一些我们想要的属性,该对象注入spring配置中心,进行授权验证服务。而我们还需要一个和本省程序联系的类,该对象进行和业务层调用联系,并在这里进行鉴权服务。
7 application.yml
设置一个默认的用户名和密码
spring:security:user:name: adminpassword: 123456
配置类
@Configuration@EnableWebSecuritypublic class SpringSecurityConfig extends WebSecurityConfigurerAdapter {private static final String USERNAME = "user";private static final String PASSWORD = "123456";/*** 密码加密算法** @return*/@Beanpublic BCryptPasswordEncoder bCryptPasswordEncoder() {return new BCryptPasswordEncoder();}/*** 授权验证服务(模拟没有用户详细信息实现类验证)** @param auth* @throws Exception*/@Overrideprotected void configure(AuthenticationManagerBuilder auth) throws Exception {BCryptPasswordEncoder encoder = new BCryptPasswordEncoder();// 加密(SHA-256+随机盐+密钥)String password = encoder.encode(PASSWORD);// 验证管理员身份auth.inMemoryAuthentication().withUser(USERNAME).password(password).roles("ADMIN");}}
业务类
@Service("userDetailsService")public class UserDetailsServiceImpl implements UserDetailsService {/*** 用户密码加密器(这里应该是注入dao或mapper来实现业务逻辑操作)*/@Autowiredprivate PasswordEncoder passwordEncoder;/*** 鉴权服务(模拟没有业务层鉴权)** @param username 用户名* @return* @throws UsernameNotFoundException*/@Overridepublic UserDetails loadUserByUsername(String username) throws UsernameNotFoundException {if (!ADMIN.equals(username)) {throw new UsernameNotFoundException("用户不存在或密码错误!");}// 这里的密码应该从数据库中取出String password = passwordEncoder.encode(PASSWORD);// 授予admin用户权限Collection<? extends GrantedAuthority> authorities =Stream.of(new SimpleGrantedAuthority("ADMIN")).collect(Collectors.toList());// 返回一个用户对象User user = new User(username, password, authorities);return user;}}
这时,你就可以进行测试,依然访问 http://localhost:8080 ,用户名:admin,密码:123456
不在是控制台生成的加密密码了。
并且 http://localhost:8080/hello 照样可以访问。
接着,将配置类和业务类建立连接,改造SpringSecurityConfig类
@Configuration@EnableWebSecuritypublic class SpringSecurityConfig extends WebSecurityConfigurerAdapter {@Autowired@Qualifier(value = "userDetailsService")private UserDetailsServiceImpl userDetailsService;/*** 密码加密算法** @return*/@Beanpublic BCryptPasswordEncoder bCryptPasswordEncoder() {return new BCryptPasswordEncoder();}/*** 授权验证服务(通过业务层验证后返回用户详细信息)** @param auth* @throws Exception*/@Overrideprotected void configure(AuthenticationManagerBuilder auth) throws Exception {auth.userDetailsService(userDetailsService).passwordEncoder(bCryptPasswordEncoder());}}
这时,又一次进行测试,再次访问 http://localhost:8080/hello , 输入用户名和密码后,成功访问!到这里入门案例结束。

若有收获,就点个赞吧
0 人点赞
