DataSet API主要可以分为3块来分析:DataSource、Transformation、DataSink。
DataSource:是程序的数据源输入。
Transformation:是具体的操作,它对一个或多个输入数据源进行计算处理,例如map、flatMap、filter等操作。
DataSink:是程序的输出,它可以把Transformation处理之后的数据输出到指定的存储介质中。
DataSource
针对DataSet批处理而言,其实最多的就是读取HDFS中的文件数据
集合(fromCollection)
基于集合 env.fromCollection(Collection),主要是为了方便测试使用。它的用法和DataStreamAPI中的用法一样,我们已经用过很多次了。
本地和HDFS文件(readTextFile)
基于文件 env.readTextFile(path),读取hdfs中的数据文件。这个前面我们也使用过了。
Transformation
| map | 输入一个元素进行处理,返回一个元素 |
|---|---|
| mapPartition | 类似map,一次处理一个分区的数据 |
| flatMap | 输入一个元素进行处理,可以返回多个元素 |
| filter | 对数据进行过滤,符合条件的数据会被留下 |
| reduce | 对当前元素和上一次的结果进行聚合操作 |
| aggregate | sum(),min(),max()等 |
这里面的算子我们都是比较熟悉的,在前面DatatreamAPI中都用过,用法都是一样的,所以在这就不再分享了
mapPartition
mapPartition这个算子我们在Flink中还没用过,不过在Spark 中是用过的,用法也是一样的mapPartition就是一次处理一批数据,如果在处理数据的时候想要获取第三方资源连接,建议使用mapPartition,这样可以一批数据获取一次连接,提高性能。
下面来演示一下Flink中mapPartition的使用
案例1:打印每个单词
/*** MapPartition的使用:一次处理一个分区的数据* 需求:打印每个单词*/object BatchMapPartitionScala {def main(args: Array[String]): Unit = {val env = ExecutionEnvironment.getExecutionEnvironment//生成数据源val text = env.fromCollection(Array("hello you", "hello me"))//每次处理一个分区的数据text.mapPartition(it => {//可以在此处创建数据库连接,建议把这块代码放到try-catch代码块中//注意:此时是每个分区获取一次数据库连接,不需要每处理一条数据就获取一次连接,性能较高val res = ListBuffer[String]()it.foreach(line => {val words = line.split(" ")for (word <- words) {res.append(word)}})res//在这关闭数据库连接}).print()//注意:针对DataSetAPI,如果在后面调用的是count、collect、print,则最后不需要指定execute//env.execute()}}
运行结果:
案例2:将集合中的元素*2后累加求和
spark代码
object MapPartitionsOpScala {def main(args: Array[String]): Unit = {val conf = new SparkConf()conf.setAppName("MapPartitionsOpScala")conf.setMaster("local")val sc = new SparkContext(conf)//设置分区数量为2val rdd = sc.parallelize(Array(1, 2, 3, 4, 5), 2)//1、使用map算子,一次处理一条数据// val sum = rdd.map(item => {// println("========")// item * 2// }).reduce(_ + _)//------driver端代码------//val .....//------driver端代码------//2、使用mapPartitions算子,一次处理一个分区的数据/*** 建议针对初始化链接之类的操作,使用mapPartitions,放在mapPartitions内部* 例如:创建数据库链接,使用mapPartitions可以减少链接创建的次数,提高性能* 注意:创建数据库链接的代码建议放在此处,不要放在Driver端或者it.foreach内部* 数据库链接放在Driver端会导致因为链接无法序列化,无法传递到对应的task中执行,所以算子在执行的时候会报错* 数据库链接放在it.foreach()内部还是会创建多个链接,和使用map算子的效果是一样的*/val sum = rdd.mapPartitions(it => {println("========")//创建数据库链接的代码建议放在此处val result = new ArrayBuffer[Int]()//这个foreach是scala里的函数,等价于for (elem <- it)it.foreach(item => {result += (item * 2)})//mapPartitions需要返回值,Iterator类型result.toIterator}).reduce(_ + _)println("sum=" + sum)sc.stop()}}

flink代码
object BatchMapPartitionScala2 {def main(args: Array[String]): Unit = {val env = ExecutionEnvironment.getExecutionEnvironment//默认情况下Flink任务中算子的并行度会读取当前机器的CPU个数,但是fromCollection的并行度为1,可以重新设置val text = env.fromCollection(Array(1, 2, 3, 4, 5)).setParallelism(2)text.mapPartition(it => {println("=====")val result = new ArrayBuffer[Int]()it.foreach(item => {result += item * 2})result}).reduce(_ + _).print()}}
")
下面还有一些transformation算子
| 算子 | 解释 |
|---|---|
| distinct | 返回数据集中去重之后的元素 |
| join | 内连接 |
| outerJoin | 外连接 |
| cross | 获取两个数据集的笛卡尔积 |
| union | 返回多个数据集的总和,数据类型需要一致 |
| first-n | 获取集合中的前N个元素 |
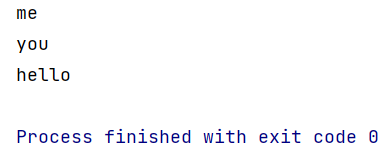
distinct
对数据进行全局去重。
object DistinctTest {

  def main(args: Array[String]): Unit = {
    val env = ExecutionEnvironment.getExecutionEnvironment

    //默认情况下Flink任务中算子的并行度会读取当前机器的CPU个数,但是fromCollection的并行度为1,可以重新设置
    val text = env.fromCollection(Array("hello", "you", "hello", "me"))
    text.distinct().print()

    //注意:针对DataSetAPI,如果在后面调用的是count、collect、print,则最后不需要指定execute
    //env.execute()
  }

}
join(内连接)
内连接,可以连接两份数据集
object BatchJoinScala {

  def main(args: Array[String]): Unit = {
    val env = ExecutionEnvironment.getExecutionEnvironment

    //初始化第一份数据 Tuple2<用户id,用户姓名>
    val text1 = env.fromCollection(Array((1, "jack"), (2, "tom"), (3, "mick")))
    //初始化第二份数据 Tuple2<用户id,用户所在城市>
    val text2 = env.fromCollection(Array((1, "bj"), (2, "sh"), (4, "gz")))

    //对两份数据集执行join操作,join后的格式:(1,(jack,bj))
    text1.join(text2)
      //注意:这里的where和equalsTo实现类似于on fieldA=fieldB的效果
      //where:指定左边数据集中参与比较的元素角标
      .where(0)
      //equalTo:指定右边数据集中参与比较的元素角标
      .equalTo(0) { (first, second) => {
        (first._1, first._2, second._2)
      }
      }.print()

  }
}

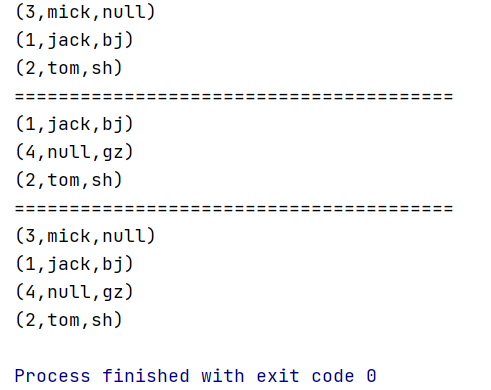
outerJoin(外连接)
外连接
/**
 * outerJoin:外连接
 * 一共有三种情况
 * 1:leftOuterJoin
 * 2:rightOuterJoin
 * 3:fullOuterJoin
 */
object BatchOuterJoinScala {
  def main(args: Array[String]): Unit = {
    val env = ExecutionEnvironment.getExecutionEnvironment

    //初始化第一份数据 Tuple2<用户id,用户姓名>
    val text1 = env.fromCollection(Array((1, "jack"), (2, "tom"), (3, "mick")))
    //初始化第二份数据 Tuple2<用户id,用户所在城市>
    val text2 = env.fromCollection(Array((1, "bj"), (2, "sh"), (4, "gz")))

    //对两份数据集执行leftOuterJoin操作
    text1.leftOuterJoin(text2)
      .where(0)
      .equalTo(0) { (first, second) => {
        //注意:second中的元素可能为null
        if (second == null) {
          (first._1, first._2, "null")
        } else {
          (first._1, first._2, second._2)
        }
      }
      }.print()

    println("========================================")

    //对两份数据集执行rightOuterJoin操作
    text1.rightOuterJoin(text2)
      .where(0)
      .equalTo(0) { (first, second) => {
        //注意:first中的元素可能为null
        if (first == null) {
          (second._1, "null", second._2)
        } else {
          (first._1, first._2, second._2)
        }
      }
      }.print()

    println("========================================")

    //对两份数据集执行fullOuterJoin操作
    text1.fullOuterJoin(text2)
      .where(0)
      .equalTo(0) { (first, second) => {
        //注意:first和second中的元素都有可能为null
        if (first == null) {
          (second._1, "null", second._2)
        } else if (second == null) {
          (first._1, first._2, "null")
        } else {
          (first._1, first._2, second._2)
        }
      }
      }.print()

  }

}
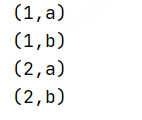
cross(笛卡尔积)
获取两个数据集的笛卡尔积
/**
 * cross:获取两个数据集的笛卡尔积
 */
object BatchCrossScala {
  def main(args: Array[String]): Unit = {
    val env = ExecutionEnvironment.getExecutionEnvironment

    import org.apache.flink.api.scala._
    //初始化第一份数据
    val text1 = env.fromCollection(Array(1, 2))
    //初始化第二份数据
    val text2 = env.fromCollection(Array("a", "b"))

    //执行cross操作
    text1.cross(text2).print()
  }

}
union
返回多个数据集的总和,数据类型需要一致
object BatchUnionScala {

  def main(args: Array[String]): Unit = {
    val env = ExecutionEnvironment.getExecutionEnvironment

    //第1份数据流
    val text1 = env.fromCollection(Array(1, 2, 3, 4, 5))
    //第2份数据流
    val text2 = env.fromCollection(Array(6, 7, 8, 9, 10))

    //合并流
    val unionText = text1.union(text2)

    //打印流中的数据
    unionText.print()

  }
}

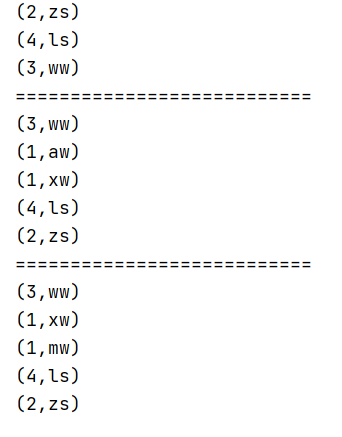
first-n(前N个)
获取集合中的前N个元素
/**
 * first-n:获取集合中的前N个元素
 */
object BatchFirstNScala {
  def main(args: Array[String]): Unit = {
    val env = ExecutionEnvironment.getExecutionEnvironment
    val data = ListBuffer[Tuple2[Int, String]]()
    data.append((2, "zs"))
    data.append((4, "ls"))
    data.append((3, "ww"))
    data.append((1, "aw"))
    data.append((1, "xw"))
    data.append((1, "mw"))

    import org.apache.flink.api.scala._
    //初始化数据
    val text = env.fromCollection(data)

    //获取前3条数据,按照数据插入的顺序
    text.first(3).print()
    println("===========================")

    //根据数据中的第一列进行分组,获取每组的前2个元素
    text.groupBy(0).first(2).print()
    println("===========================")


    //根据数据中的第一列分组,再根据第二列进行组内排序[倒序],获取每组的前2个元素
    //分组排序取TopN
    text.groupBy(0).sortGroup(1, Order.DESCENDING).first(2).print()
  }

}
DataSink
Flink针对DataSet提供了一些已经实现好的数据目的地
HDFS
其中最常见的是向HDFS中写入数据writeAsText():将元素以字符串形式逐行写入,这些字符串通过调用每个元素的toString()方法来获取writeAsCsv():将元组以逗号分隔写入文件中,行及字段之间的分隔是可配置的,每个字段的值来自对象的toString()方法
还有一个是print:打印每个元素的toString()方法的值 这个print是测试的时候使用的。

若有收获,就点个赞吧
0 人点赞
