源码地址:https://github.com/microsoft/Deep3DFaceReconstruction
在服务器上的位置:/dd/xiongz/Deep3DFaceReconstruction
运行
- 首先激活环境:
source activate deep3d - 在程序目录下,把所有需要进行重建的人脸图片(
png和jpg格式)放到./input文件夹,运行python get5landmarks.py,生成与图片同名且同路径的txt文件,内容是人脸的5个关键点。 - 然后运行
python demo.py,生成重建的3D人脸obj文件及参数mat文件,位于./output文件夹内。
注:input和output内现有的文件为测试文件,可全部删除。
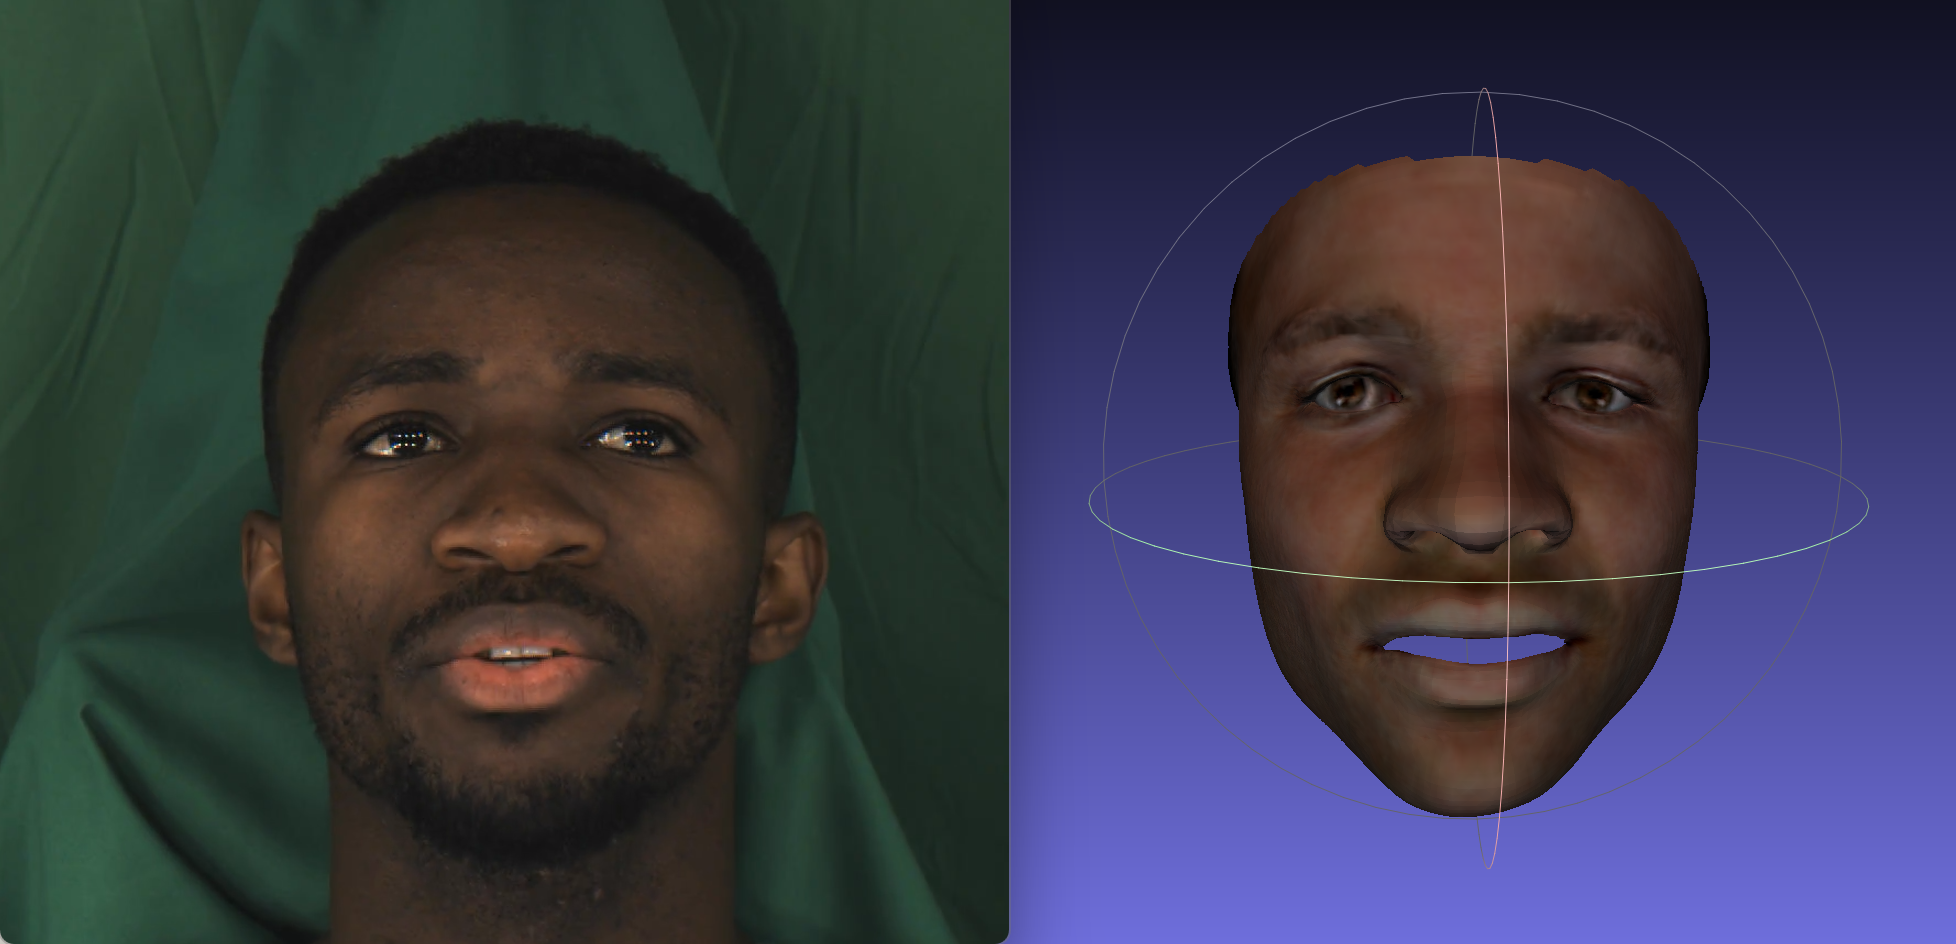
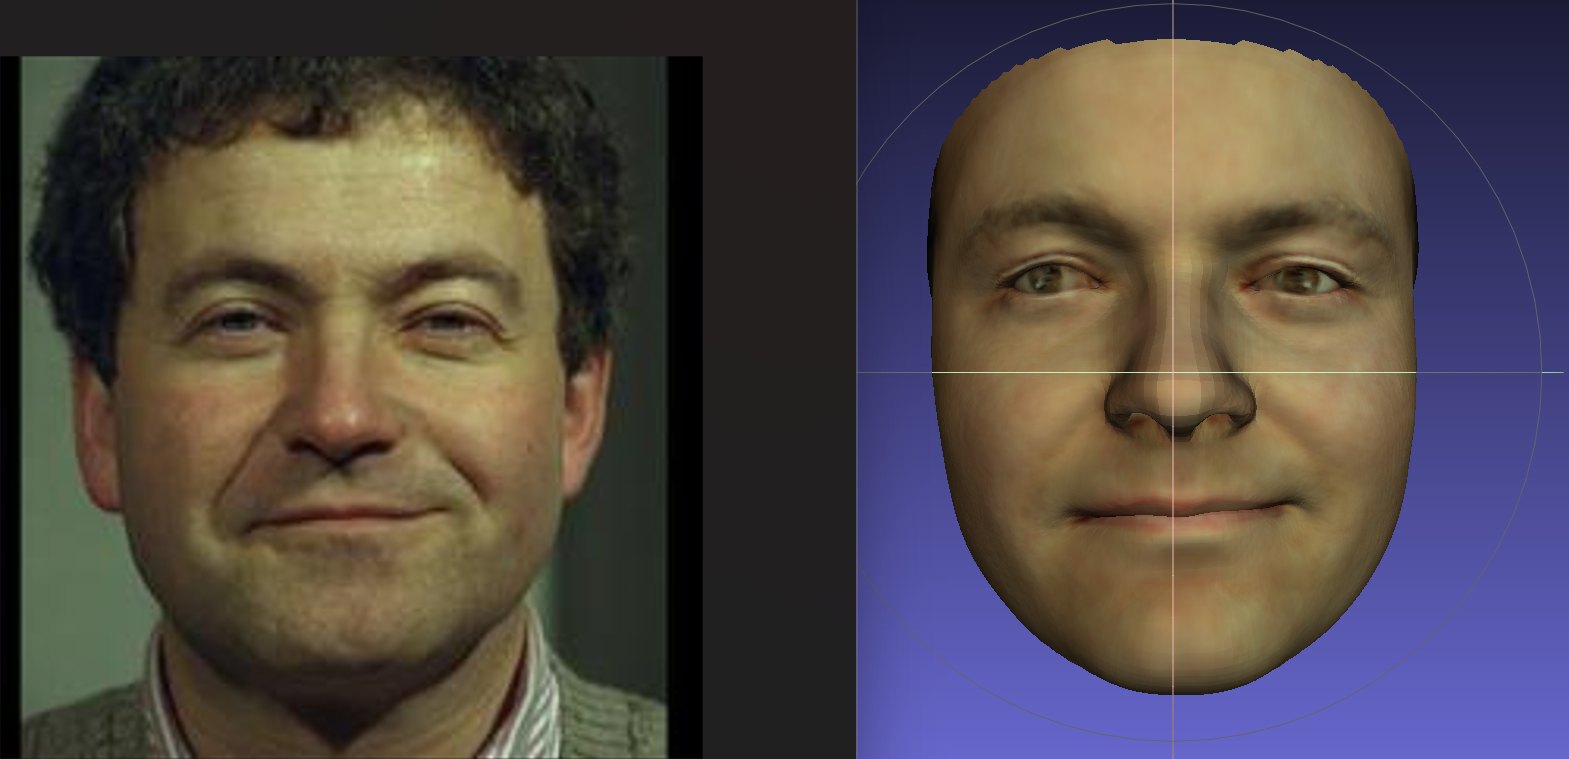
输出示例
运行python demo.py,./input文件夹下的每个 jpg 和 png 文件都会对应输出obj文件,保存于./output。
输出的内容
For each input test image, two output files can be obtained after running the demo code:
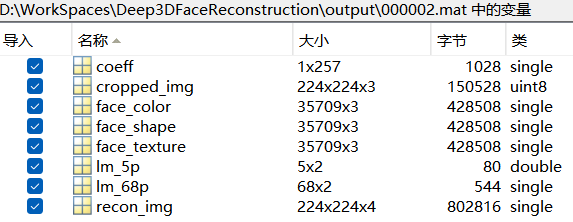
- “xxx.mat” :
- cropped_img: an RGB image after alignment, which is the input to the R-Net
- recon_img: an RGBA reconstruction image aligned with the input image (only on Linux).
- coeff: output coefficients of R-Net.
- face_shape: vertex positions of 3D face in the world coordinate.
- face_texture: vertex texture of 3D face, which excludes lighting effect.
- face_color: vertex color of 3D face, which takes lighting into consideration.
- lm_68p: 68 2D facial landmarks derived from the reconstructed 3D face. The landmarks are aligned with cropped_img.
- lm_5p: 5 detected landmarks aligned with cropped_img.
- “xxx_mesh.obj” : 3D face mesh in the world coordinate (best viewed in MeshLab).
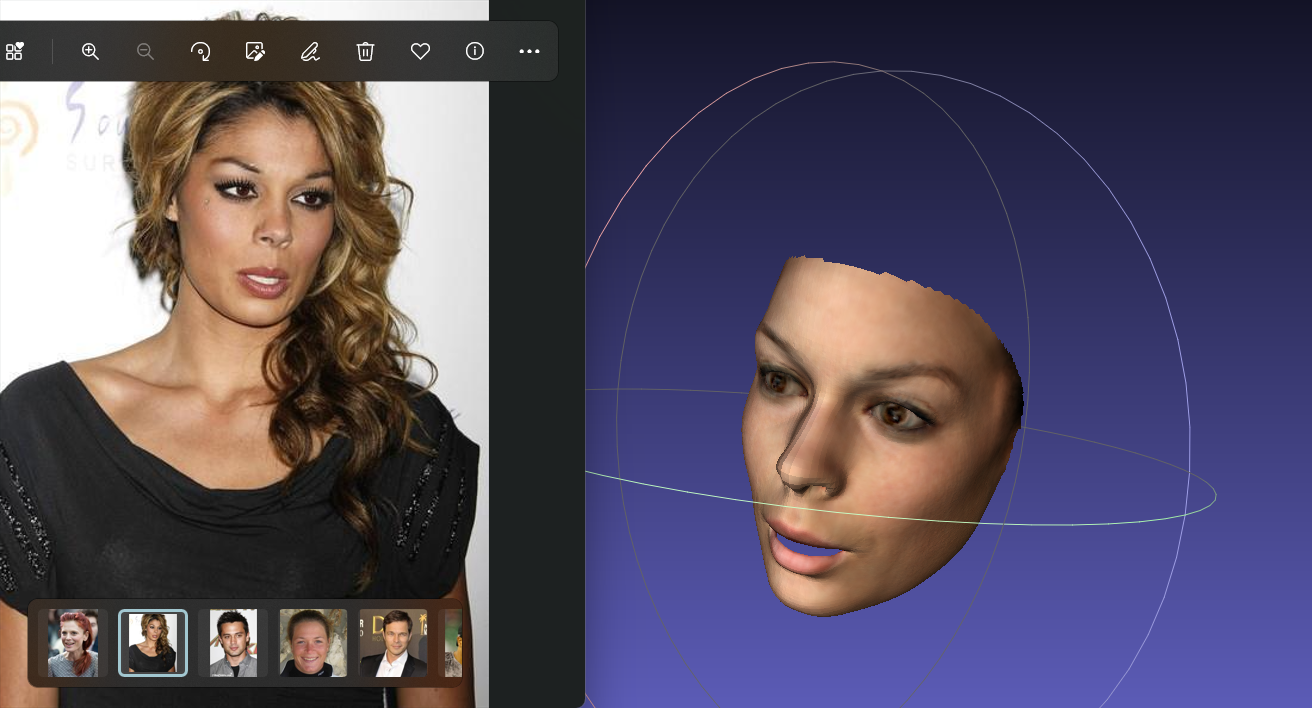
左图是输入的图片,右图是3D mesh。
安装时遇到的bug与解决
GnuTLS recv error (-110)
GnuTLS recv error (-110): The TLS connection was non-properly terminated.
apt-get install gnutls-bingit config --global http.sslVerify falsegit config --global http.postBuffer 1048576000
bazel 安装
curl 超时,下载到本地上传服务器,curl -fsSL https://bazel.build/bazel-release.pub.gpg | gpg --dearmor > bazel.gpg拆开运行。但是后面sudo apt update的时候报错,搜到解决方法是curl [https://bazel.build/bazel-release.pub.gpg](https://bazel.build/bazel-release.pub.gpg) | sudo apt-key add -,同样分开运行,但apt-key list里没有新增。
解决:文件上传到云存储,替换链接(也可能是我之前上传错了文件,文件是空的)。
bazel test …
- ERROR: Skipping ‘../..’: Bad target pattern ‘../..’: package name component contains only ‘.’ characters

因为是用的zsh,一些shells扩展了...,这里改成 bazel build "..."
- ERROR: An error occurred during the fetch of repository ‘com_google_googletest’:
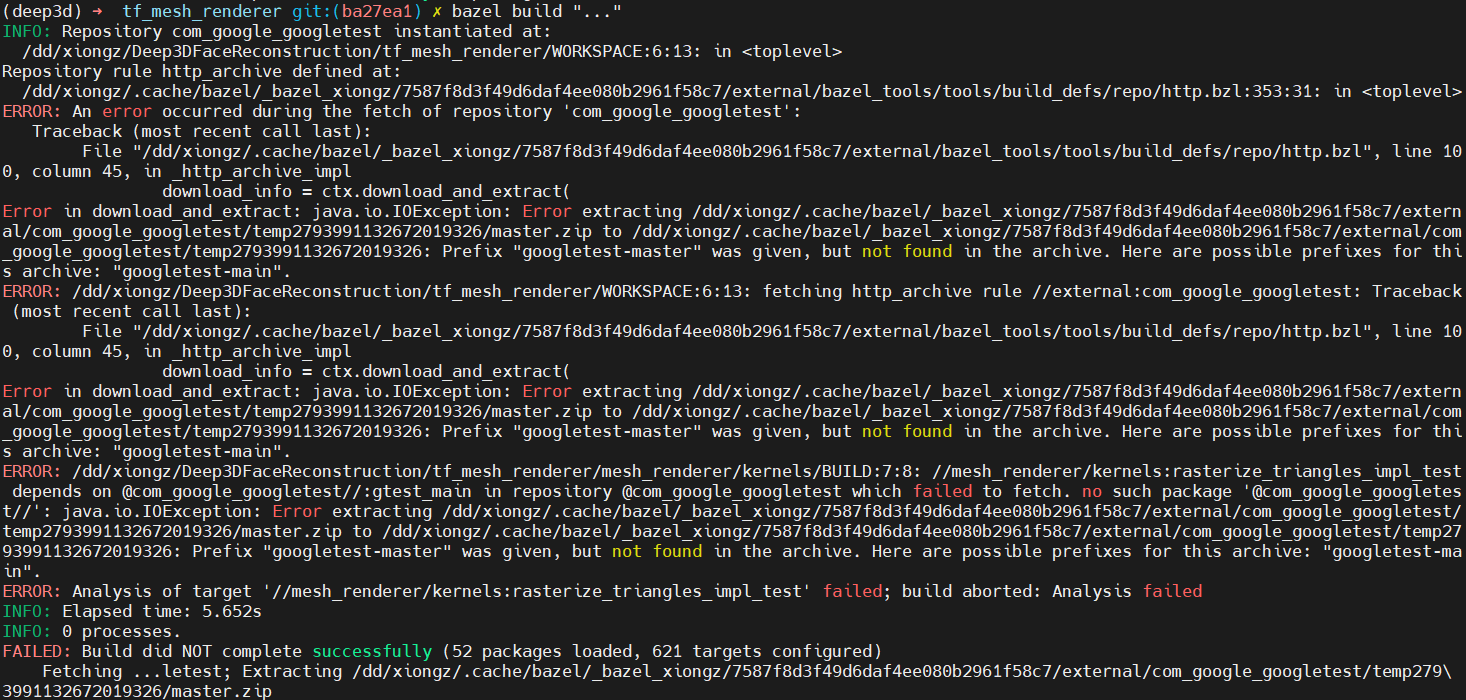
最后成功的操作:
bazel clean --expunge报错 https://github.com/google/googletest/archive/master.zip 下载超时,修改
/tf_mesh_renderer/WORKSPACE如下http_archive(name = "com_google_googletest",urls = ["https://github.com/google/googletest/archive/master.zip"],strip_prefix = "googletest-main",)
bazel build "..."之前这一步有2个fail:mesh_renderer_test 和 rasterize_triangles_test,按这里的答案 https://github.com/yiranran/Audio-driven-TalkingFace-HeadPose/issues/3 没有解决。按上面2步走没有报 failed 了。
不过,有一堆unsupported,比如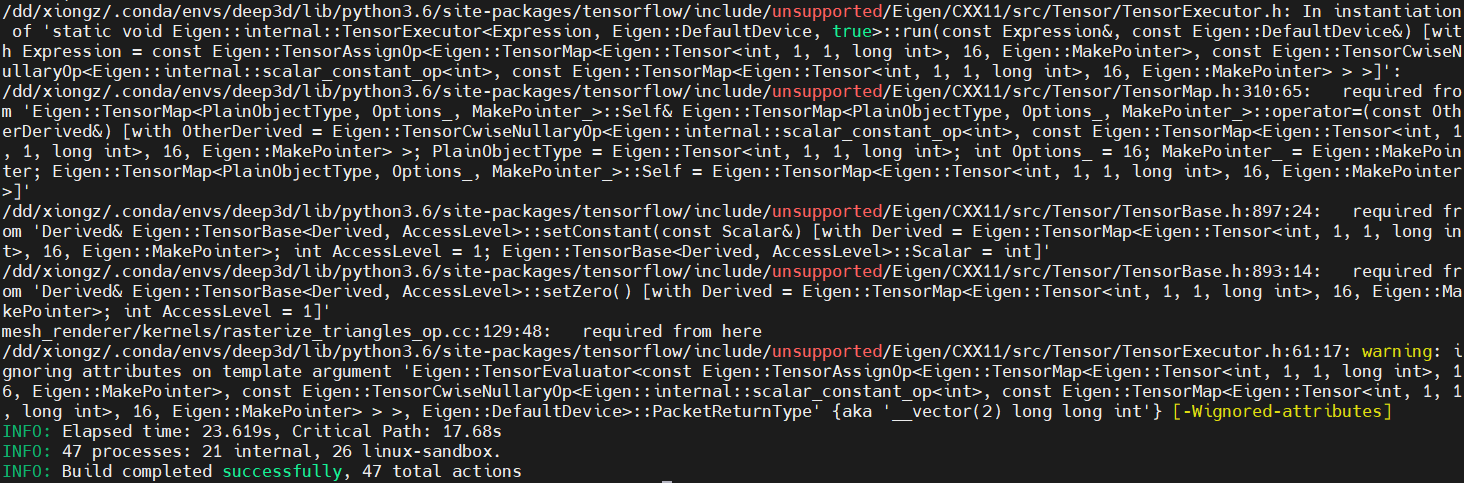
获取人脸5个关键点的代码
将图片放在 /input 文件夹下,需要自己实现获取人脸5个关键点,可用dlib或MTCNN来做。关键点位置保存为与图片同名的 txt 文件,与图片同路径。
from mtcnn import MTCNNimport osimport cv2import argparseimport tensorflow as tfos.environ['CUDA_VISIBLE_DEVICES']='0'# tf 1.13config = tf.ConfigProto()config.gpu_options.allow_growth=Truesess = tf.Session(config=config)sess.run(tf.global_variables_initializer())parser = argparse.ArgumentParser(description='Get landmarks from images.')parser.add_argument('--input_dir', type=str, default="./input",help='directory with the input images')args = parser.parse_args()input_dir = args.input_dirdetector = MTCNN()for filename in os.listdir(input_dir):print('filename: ', filename)basename = os.path.splitext(filename)[0]image_path = f"{input_dir}/{filename}"text_path = f"{input_dir}/{basename}.txt"img = cv2.cvtColor(cv2.imread(image_path), cv2.COLOR_BGR2RGB)result = detector.detect_faces(img)keypoints = result[0]['keypoints']text_file = open(text_path, "a")for value in keypoints.values():text_file.write(f"{value[0]}\t{value[1]}\n")print(f"File successfully written: {text_path}")text_file.close()
自测结果
输入一个人:
模型加载的时间:1.88
图像处理的时间:0.02
模型预测时间: 7.19 sec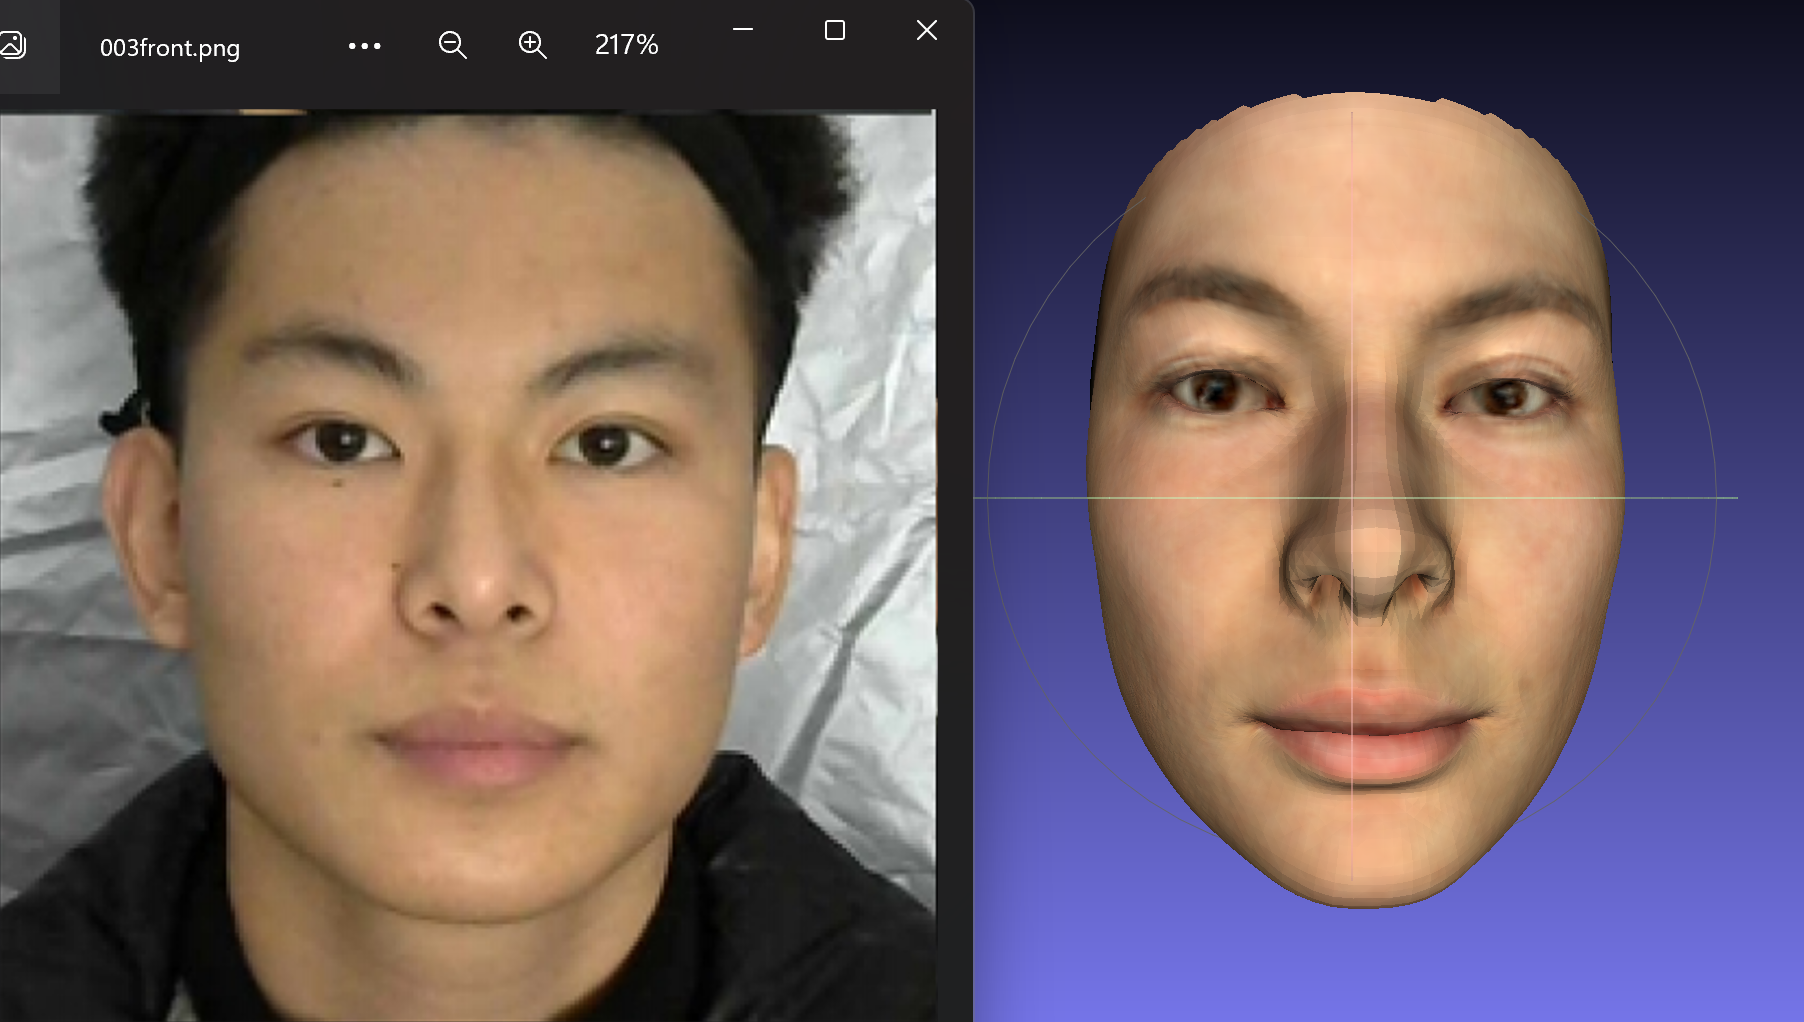
一次运行处理多个人脸重建:
模型加载的时间:1.85
1 input/001front.png
图像处理的时间:0.09
模型预测时间: 7.19 sec
2 input/002front.png
图像处理的时间:0.07
模型预测时间: 0.02 sec
3 input/front.jpg
图像处理的时间:0.00
模型预测时间: 0.02 sec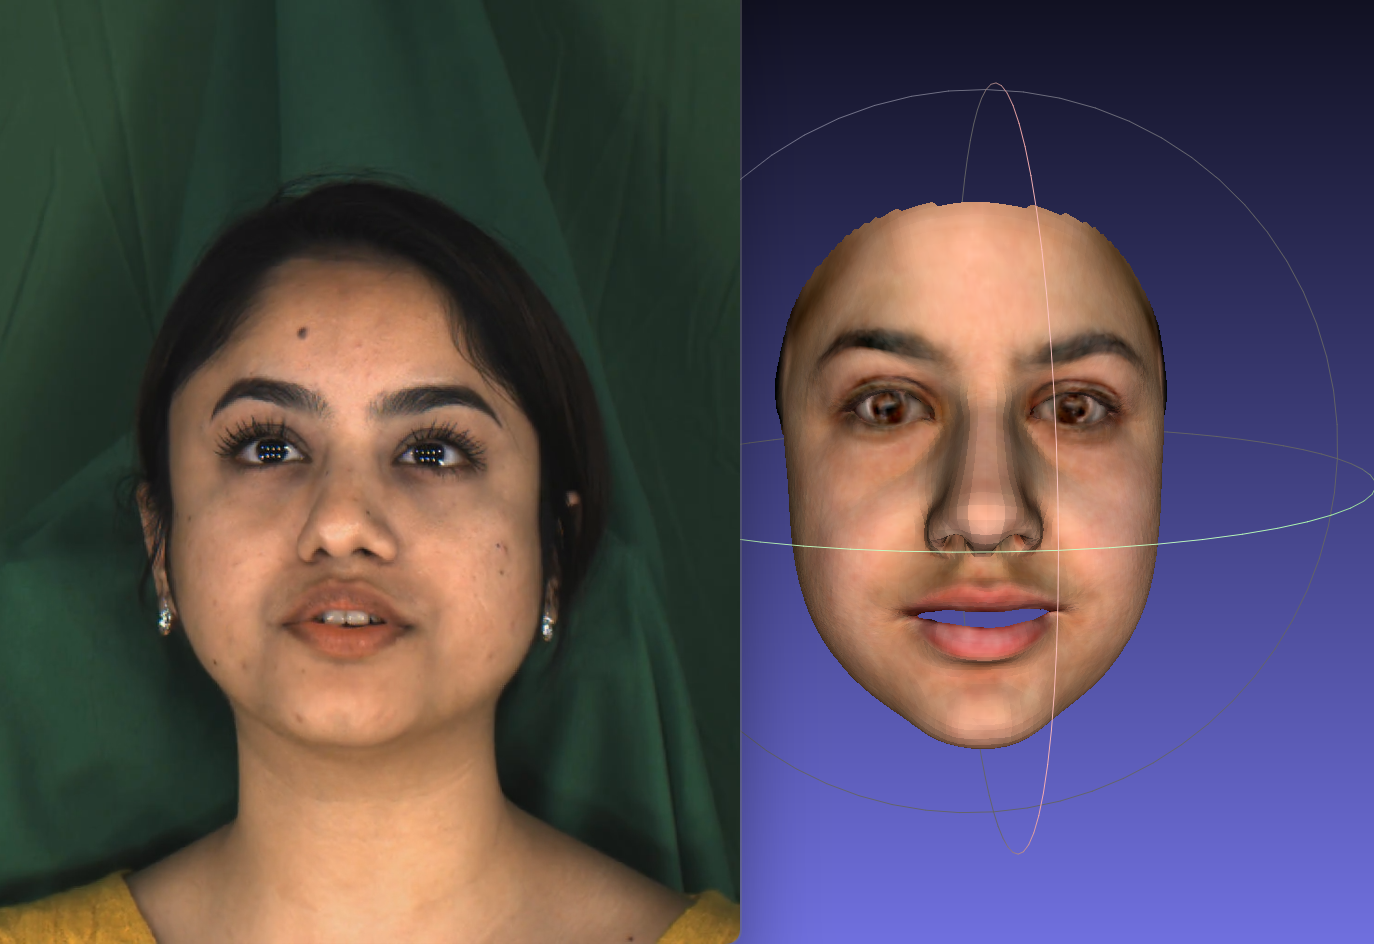

若有收获,就点个赞吧
0 人点赞
